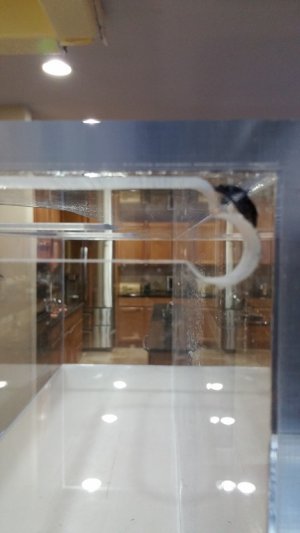
Acrylic fabrication questions? I can help!

Nice Floyd, what are the dimensions on the BA overflow boxes? Also, What kind of a bulkhead fitting do you use to mount these up? Do you just add an extra rubber washer in between?

That one is 48" long and 2" front to back (inner dim) and about 7.8" tall.

The ext box is about 18" long, 4.5" front-back and 8.5" tall

It's held on with 2" slip x slip bulkheads and the gaskets go on either side of the glass with the flange side in the external box, nut inside the inner box.

I have another on deck next that is 60" long, and another duplicate of the one above for a tank in my basement that I've been meaning to drill & set up for a friend.

Floyd what is your tricks for making the teeth so nice.

CNC :)

I also have a template I made by hand, the template took time to make but very little time to utilize.
 
I just finished this 90 gallon everything turned out good except for I dripped Weld-on 4 from the bottle. You can see the weld-on in the 2nd photo. What is the best way to remove? I'm figuring that it needs to be sanded buffed and polished? But wanted to find out here first.

20150225_200736_zpszmqhut5o.jpg
[/URL][/IMG]

20150225_201119_zpsbf3uw5is.jpg
[/URL][/IMG]
 
So did you try to wipe it off after you saw the pool? That's what it looks like. Should be able to sand it out, start with a very high grit like 2000 wet/dry on a small area and see how it goes, then buff it out and see if you get it to look clear again. Might be tough, depending on how much the solvent ate into the material.
 
So did you try to wipe it off after you saw the pool? That's what it looks like. Should be able to sand it out, start with a very high grit like 2000 wet/dry on a small area and see how it goes, then buff it out and see if you get it to look clear again. Might be tough, depending on how much the solvent ate into the material.

No I definitely did not try to wipe it. Got up under the paper where it was peeled up and I didn't notice it till after I pulled the paper.
 
How did that happen? Did you bond the top on with it on top of the tank, rather than the tank upside down sitting the top panel?
 
No, the top was on the bottom but when I squeeze the bottle to let the air out I squeeze too much and weld-on shot out and up under the peel. (I know stupid right)
 
No, the top was on the bottom but when I squeeze the bottle to let the air out I squeeze too much and weld-on shot out and up under the peel. (I know stupid right)

I have done it too - I found it easier and safer to just peel off all paper and deal with any scuffs later. Chances are that you will need to polish a bit from the router anyways.
 
That one is 48" long and 2" front to back (inner dim) and about 7.8" tall.

The ext box is about 18" long, 4.5" front-back and 8.5" tall

It's held on with 2" slip x slip bulkheads and the gaskets go on either side of the glass with the flange side in the external box, nut inside the inner box.

I have another on deck next that is 60" long, and another duplicate of the one above for a tank in my basement that I've been meaning to drill & set up for a friend.


CNC :)

I also have a template I made by hand, the template took time to make but very little time to utilize.

Thanks Floyd! One last question, did you weld an extra piece of acrylic on the bulkhead holes?
 
Do you have a CNC at the house? If so, details - DIY?

No, I found a local sign shop and the owner is an aquarist, they have a 5'x10' table, I usually save up projects and have a few sheets CNCd at the same time

I have done it too - I found it easier and safer to just peel off all paper and deal with any scuffs later. Chances are that you will need to polish a bit from the router anyways.

There's no reason to take the paper off IMO until you are done. The paper allows the project to easily slide across the table when edge prepping and flush trimming - otherwise you will end up having to sand and buff and polish the entire tank, something I never have had to do. Spray a little pledge on the table and it will slide right off the table if you let it go (like an air hockey table almost)

The trick is that you have to peel the paper back about 1" from the edge that you are bonding and the take a fresh razor on a box cutter (I use the kind that ratchet out and you can snap off the old parts) and slice the paper in one smooth motion all the way across, then push the paper back down. Doing this will keep the sticky stuff under the paper and the project can still slide smoothly across the table. I try to never slide exposed acrylic across the table because it will always get scratched.
 
Thanks Floyd! One last question, did you weld an extra piece of acrylic on the bulkhead holes?

I can answer that. Yes he did. The purpose is to create a spacer so that the outer box will clear the frame around the top of the tank. That way the outer box will be level with the top of the tank. Adding an little extra layer of safety from an spill.
 
So - I messed up and failed to measure twice before I cut the starter holes for my weir. One of the holes is 1/4" lower than the other. I can continue to route out the weir at the correct height, but when I am done there will be a 3/4" x 1/4" piece that needs to be filled in. Can I use weld-on to build up the area?
 
Probably not your headache :) - here is a picture. I want to fill in the bottom section to be level with the rest of the weir.

As a note for anyone else - I bought an inexpensive top-bearing flush trim bit to cut the weir. The bearing slipped during the cut and really messed up the cut. I bought it from Lowes and it was their brand (no other options). Just be careful....
 

Attachments

  • WeirProblem.jpg
    WeirProblem.jpg
    80.4 KB · Views: 4
Gotcha. You can only use something like weldon #40 to fill in that area. You would have to dam it off on both sides and then pour it in, and sand/buff it to make it smooth

I'm assuming that you still want to bond the overflow box on? You only have a narrow area on the right side (near the error) on which to bond it, how thick is the material on your overflow box? Unless the front/side joint is perfectly flush you can't bond across the entire side of the tank. Well you can, it would just be tricky and you probably would need to add a gusset and fill it in with #40 (probably not a bad idea regardless)
 
Floyd, or others, I am looking to make my 40g acrylic breeder tank in to a sump and I was trying to plan out the baffles and I realized that the way that the euro brace is set up, it makes it next to impossible to drop in the drain lines to where I want them to flow in to. Can I drill the euro brace even though it is somewhat close to either edge? I can take a photo to better illustrate.
 
The overflow box is 1/2" and there is 3/4"+ on both sides to bond to. The side are "almost" perfect, lol. I am going to fine finish it with a razor blade. I will probably use some of the weld-on 40 as well, then. But, really , this section is not really handing a lot of water pressure, so I was not too concerned. I will show a pic or two when done...

Thanks!
 
yes but you are essentially transferring the outward bowing stress to the overflow box that is bonded to the tank. So the bottom piece of the overflow box becomes the structural member preventing the side panel from bowing, so the bond between that and the side panel needs to be a good one. If the front/back panel edges, even if flush trimmed, stick out 1/1000th of an inch, and you bond the box on with #3 or #4, when the solvent dries it will let air into the joint.

Also your overflow box will have vertical panels for the ends, so the whole box might end up standing off the side panel enough to let air into the whole joint. So you want to avoid having to bond the box on such that it overlaps the side/front or side/back joint, if that makes sense

Aslo you don't "have" to fill in that hole. You can just bond a small piece over it to level out the weir...I think, at least...
 
For a 16x16x18 tall almost cube tank, should the eurobrace up top be 2" wide and 2" diameter corners? 3/8 plexiglas g. I tried searching, but is there a formula or rule of thumb for determining bracing needs and corner radius?
 
Back
Top