Acrylic fabrication questions? I can help!

Hi gents,

In the last week or so I've been busy using different adhesives, different methods and such in preparation to test them to see how they break.

Acrylic Specs:
Plexiglas GS (cell cast acrylic)
Each piece measured 150mm x 100mm x 12mm.

Adhesives Specs:
1. AcriBond 105 (comparable to WeldOn 4) - Water thin, solvent adhesive.
2. AcriFix 192 - Thick, UV cured adhesive.
3. AcriBond 372 - Semi thick, 2 part structural adhesive.

Methods Used:
1. AB 105 - Capillary method, Pins method.
2. AF 192 - 4° Chamfer method (video in my above post).
3. AL 372 - 4° Chamfer method.

Trial Used:
All pieces were joined together at 90° angles using their respective methods.
All pieces given (a lot more in most cases) triple their required curing time.
Pieces had holes drilled in each panel. This allowed the acrylic angles to be attached to a hang weight scale, and then to a metal bar that was attached to our forklift.
The forklift then pushed down on the bar, applying force in an effort to record how much weight would be needed to break the join. Here are the results.

1. AB 105 - Capillary method - taken to 95kgs, join broke.
2. AB 105 - Pins method - taken to 150kgs, join did NOT break.
3. AF 192 - 4° - taken to 150kgs, join did NOT break.
4. AL 372 - 4° - taken to 150kgs, join did NOT break.

I think it's clear to say the the capillary was the least strongest of the joins. I wouldn't build a tank using this, but possibly could be used for sump baffles and such. The AcriFix 192, whilst given great join strength, was was to thick and took to long to join. Could be suitable elsewhere, as long as UV cured (either using lights or the sun). The AB 105/Pins gave great results, but personally I'm not sold on (myself) being able to build a tank using this. It's messy and honestly (to me) a pain in the butt to use. I know there's a trick to it, and I can get it pretty close to perfect, but for the outer of a tank I don't think it's for me.

The clear winner, in my experience, would be the AcriBond 372. It's a 2 part mix that also comes with a gun (much like a silicone gun but smaller) and a self mixing applicator nozzle. As I have a lot of experience with using a silicone gun, it almost seemed like second nature. The adhesive is not super thick so it flows well and is easy to manage. Much like silicone, when used proper it leaves a nice looking join. I only saw cut the 4° and did not sand it and it still gave perfect results. My next purchase will be a router bit for our CNC so I can cut it out on that for a small tank trial.

So there we are. A pretty simple trial that gave clear, unbiased results on a few different adhesives and methods. As mentioned, I plan on designing a small tank and using the AcriFix 372 / 4° method and taking everything from there.

When I can, I'm going to try and put them in our hydraulic press and see what happens. I'll report back when I've dont this.

What do you all think of the results/tests?
I still have all the pieces, if you can think of something to test differently - let me know and I'll give it a go.
 
That's great info, thanks for posting. Not to knock on your results, but the fact is that the vast majority of tank builders use methylene chloride based binding techniques and the pins method. This includes James Steele ("Acrylics" on this thread) one of the best tank builders out there, and he uses solvent welding for material up to 2" thick. So while your tests may show joint strength in certain situations, what it doesn't necessarily equate to is the actual pressures seen in aquariums. James has stated in this thread that the levels of stress from water pressure are much lower than the joint strength achieved with solvent welding and that 2-part adhesive is overkill and must be done properly in order to get the "rated" strength. It's not just about physics. Aquarium building is darn near at art form. Putting a 4 degree angle on all ends of all bonding surfaces while at the same time making sure all those edges remain perfectly square (or parallel) is a whole different level of expertise. One can much more easily build a stronger tank using solvent welding than they can builds tank with the 4 degree / 2-part bond because of this.

I'll bump James and see if he can give you his professional opinion.
 
How would you glue the top or bottom of the tank if you use two parts? Would that require a 4 degree chamfer also?
 
My thoughts are to chamfer the bottom/top edges so the gap is on the water side of the tank. When sealed, you wouldn't even see them at all.

There's got to be more than one way to build a strong, attractive tank that will last years and years. With all the panels be machined on a CNC router will ensure complete accuracy, and with the use of jigs/clamps (same as the pins method) to ensure everything goes together as it should I see no reason to not have a great looking tank that'll last years and years.
 
I'm not disagreeing with you that there is more than one way, but I think you are just way over complicating things. There's no reason why a solvent welded tank shouldn't last 20+ years if built correctly.
 
I totally agree Floyd, if correct methods are followed it'll be successful. Maybe I need to go back and refine my methods with the pins. To be honest, I was surprised that the solvent weld/pins method achieved the results that it did in my tests.

Out of interest sake, would you mind posting some photos of your work? The joins/over all tank would be fantastic to see. I haven't been able to find many detailed photos of aquariums but this way.

PS - being from Des Moines, IA you'd be a fan of Slipknot (the band)?
 
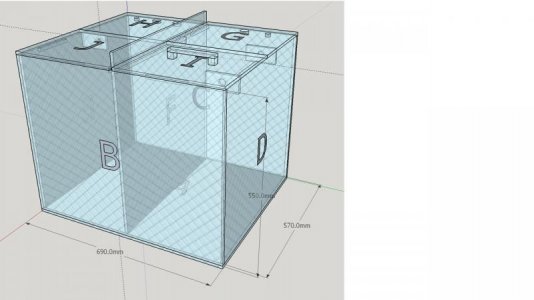
I'm ordering acrylic for a sump and ATO/AWC reservoir that I have designed. My original design called for 10mm acrylic. I just kinda made this number up. Seems like people on forums were using 10mm to make sumps. Then I started looking for material. I live in South Korea and everything is usually 2x the cost here. First estimate came in at almost $2,000. Changed the design to 8mm. Found the material for about $800. I feel comfortable with 8mm, because there are lots of internal bracing within the sump (baffles and chamber dividers). The reservoirs will have a solid top and I can add internal bracing as well.

The question is this. Can I get away with 5mm acrylic? 5mm would cost less than $500.
 

Attachments

  • Water Factory .jpg
    Water Factory .jpg
    34.4 KB · Views: 4
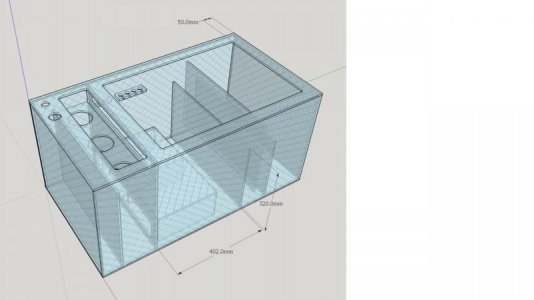
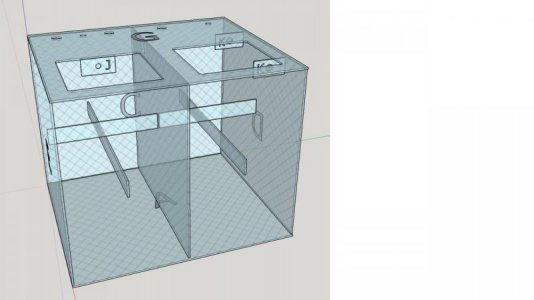
I have used your input and added euro bracing to the sump and essentially to the reservoir. I also added internal bracing to the reservoir. Do you think I can get away with 5mm acrylic with these design modifications? I can't find 1/4"(6mm) acrylic here. So its 5mm or 8mm with the 8mm costing an extra $300.

I noticed today, that some of the holding tanks in LFS today made of 5mm. They were about 15" square. Didn't see any bowing.

The largest unsupported span in my sump is about 15". I'm pretty confident with the 5mm sump design. Lots of internal bracing and a solid Euro brace.

I'm more worried about the NSW-RO/DO reservoir. Any thoughts on the internal braces I added? Will this be sufficient? I could add more!
 

Attachments

  • Slide1.jpg
    Slide1.jpg
    28.7 KB · Views: 4
  • Slide2.jpg
    Slide2.jpg
    30.7 KB · Views: 4
So I finally took a stab at making my Bean Animal inside and outside overflow boxes as well as the baffles for my sump. The good news is a somewhat got the boxes to where I want them. The bad news is that the sump baffles were a total bust for me. I think I'd rather go with a glass sump and deal with glass baffles cut by someone locally.

With regards to the overflow boxes, I already welded the outer overflow box. Everything seemed to be cut right, but when I simply held the overflow box to the face of my fish tank, it seems like there is a very slight gap between the two. I'd have to say it is probably 1/16" or even a 1/32" gap, but the gap is there. I welded all the seams with weld on 4 yesterday, but also have weld on #16 on hand which I plan on also applying today. My question is, will the weld on #16 help connect this gap like silicone would on glass? I don't see how the weld on #4 would since it is so runny.

Any help is greatly appreciated. I didn't find the welding so difficult, but I did find the cutting more difficult because I wanted everything to be perfectly square, and it was very difficult for me to do so with the tools I had on hand. I ended up going with a skil saw and not the table saw.
 
So I dug out some old physics equations (not everyday you perform integral calculus to solve a reefing issue) and they tell me that the pressure from my design should not exceed the strength of the acrylic, or come anywhere close for that matter. The strength of the welds is another story. I don't have an equation for that. Acrylic thickness calculators tell me that I need 6mm acrylic. Logic would dictate (at least to me) that the additional bracing would overcome the 5mm vs. 6mm issue. Murphy's law would dictate that my welding skills will suck enough to "undercome" the additional bracing strength.

And so the dilemma continues...
too much thinking. just do it. :uzi::lolspin:
 
My question is, will the weld on #16 help connect this gap like silicone would on glass?

#16 is not really supposed to be a gap filler, but some use it as such. It dries to a thin profile, not much more than #4. But if you apply multiple layers, sometimes this will work.

the better thing to do is to use a scrap strip and set that in place with #16. You don't need much, even cutting a square rod out of 1/4" (1/4" x 1/4") and bonding that in will solve your issue if all you need to do is seal the gap so that water won't get by.

Also worth mentioning is that if you bond it all the way around and you are confident that it will stay in place, you can use silicone to seal the joint (from the pressure/water side)

Note that this only works effectively for a purpose such as you are using it for: a joint that is not structural, but needs to be leak-proof.

Cool, I actually have a whole bunch of acrlic scrap lying around from the build and will probably end up using strip like you suggest. I also thought of the silicone idea, but thought I'd ask here first. Thanks Floyd.
 
Acrylic bonding would be better, technically you're supposed to let silicone cure for up to 2 weeks before using it, if it's going into a tank that has corals in it. If it's a brand new setup and will go through cycling, probably OK...
 
Sorry to keep posting here. I soooo want to stop thinking and start building! I'm trusting the initial advice everyone seems to give. Going with 8mm.

I'm going to use the pin method. Read alot on here. Makes a ton of sense.

The question now is, what's up with the build order? Had I not read otherwise on this thread, I would have started with the base and then built around that. Why should I start with the front face and build the 4 walls first? Under this scenario, top before bottom makes sense, but why not start from the base? Ya'll seem to be spot on with everything else, so I thought I'd ask, and the follow the advice!

And thanks for all the advice. It's been quite helpful.
 
Back
Top