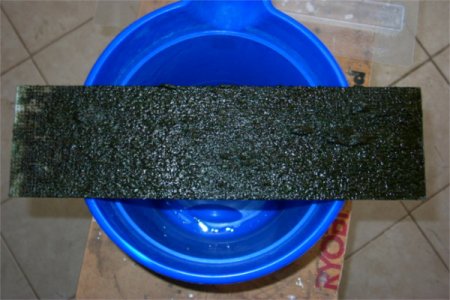
Algae Scrubber Basics

Looks like I have an updraft ATS too

My 12ft skimmer has dual penductors injection and pumps gallons of air in. (The inlet sounds like a vaccum)

About 2ft is exposed to my MH.

Here it is a year ago

<a href="http://s1062.photobucket.com/user/karimwassef/media/0ED2E633-8211-4A5A-A083-F65E694AA6B8_zpsmz6faxa4.jpg.html" target="_blank"><img src="http://i1062.photobucket.com/albums/t496/karimwassef/0ED2E633-8211-4A5A-A083-F65E694AA6B8_zpsmz6faxa4.jpg" border="0" alt=" photo 0ED2E633-8211-4A5A-A083-F65E694AA6B8_zpsmz6faxa4.jpg"/></a>

And now

<a href="http://s1062.photobucket.com/user/karimwassef/media/A4B2C097-A54D-463E-BA1C-394904A667F7_zpsunxljvsp.jpg.html" target="_blank"><img src="http://i1062.photobucket.com/albums/t496/karimwassef/A4B2C097-A54D-463E-BA1C-394904A667F7_zpsunxljvsp.jpg" border="0" alt=" photo A4B2C097-A54D-463E-BA1C-394904A667F7_zpsunxljvsp.jpg"/></a>

<a href="http://s1062.photobucket.com/user/karimwassef/media/76BFBF93-8CE2-4477-9AD3-89559640685F_zpsuzfanhb0.jpg.html" target="_blank"><img src="http://i1062.photobucket.com/albums/t496/karimwassef/76BFBF93-8CE2-4477-9AD3-89559640685F_zpsuzfanhb0.jpg" border="0" alt=" photo 76BFBF93-8CE2-4477-9AD3-89559640685F_zpsuzfanhb0.jpg"/></a>
 
It was so pretty when new

<a href="http://s1062.photobucket.com/user/karimwassef/media/BBC3548B-3CF2-44DF-9B5C-65B388EAFB33_zpshpfnzb51.jpg.html" target="_blank"><img src="http://i1062.photobucket.com/albums/t496/karimwassef/BBC3548B-3CF2-44DF-9B5C-65B388EAFB33_zpshpfnzb51.jpg" border="0" alt=" photo BBC3548B-3CF2-44DF-9B5C-65B388EAFB33_zpshpfnzb51.jpg"/></a>

Unfortunately, it's uncleanable :(
 
No room. The top is only an inch away from the ceiling. I can remove the whole top. That gives me a foot of clearance above but then I need to go down 6ft to the ATS layer.

Doesn't look like it hurts my skimmer's efficiency.
 
I am assembling all the various bits and pieces to build an ATS based on all this good information.

One thing that does not seem to have been covered is the ideal mesh count of the screen.

I can get various count sizes...7, 9, 10, or 20. but nobody seems actually specify what is the "norm"

Any information about mesh count/ efficiency/criticality ???

Thanks


#7 is traditionally used here
 
Old School

Old School

Hi there,

I thought I'd throw my latest scrubber on here for everyone's amusement. It's definitely old school. It's a simple trough style at about a 30 degree angle. It just sits on top of my sump and runs on the return flow from my tank.

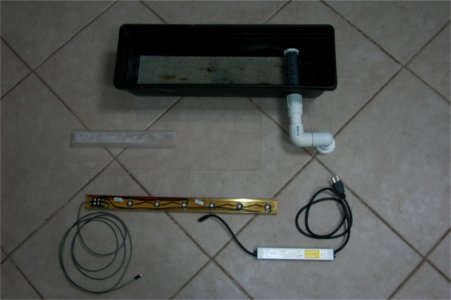
Specs: The box is a flower box liner from Lowe's with a slit cut in one end to let the water out and a hole at the other for the spray bar. The spray bar is a 6"x1" nipple with holes drilled in it that can be rotated to adjust the angle of the spray. The screen is roughened plastic canvas that was super glued to a 1/4" sheet of acrylic. The slot in the box is a little narrower than the screen to keep it from slipping out the end. The screen is 18"x6.5" for 117 sq/in. The lid is clear acrylic with a pocket glued to the top that the light bar slips into. The light bar is a anodized piece of aluminum from a old shower enclosure. It has 6 leds at 3 watts each. They are 660nm deep reds. The lights currently run 9hrs on and 15 off but I'll be upping that to 10/14 tonight.

Below is a picture of the scrubber disassembled. You'll notice that there is already some algae on the screen. I cheated and stuck the screen in an established 55gal for a month while I was designing and building the rock work.
AlgaeScrubberParts.jpg

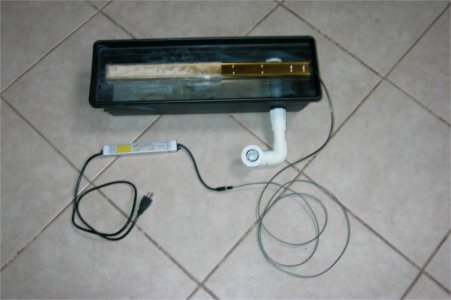
Here's what it looks like with the lid and lights on it.
AlgaeScrubberAssembled.jpg

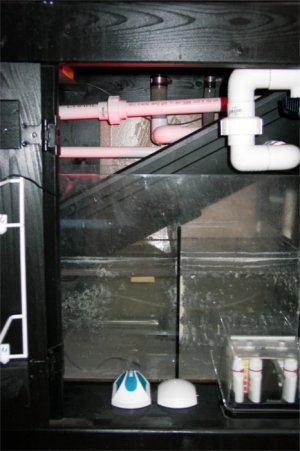
Here it is on top of the sump.
ScrubberInSumpSideView.jpg

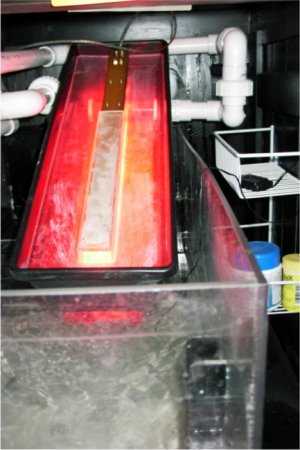
This is an end view of it in operation.
ScrubberInSumpEndView.jpg

And here is the first harvest after three weeks. I was cycling the tank with a few pinches of flake food per day.
AlgaeScrubberFirstHarvest.jpg

So far, I'm really pleased with the performance. It's really easy to service also. Hope you enjoyed seeing it even if it isn't the latest and greatest style. :)
 
Is there a way to chop it in half and put it back together? Or lay it on its side?

Yes... When I move next.

It is not completely impossible but just very hard. It's like working on an old car- you can do it with a buddy over a weekend... But you need a really good reason to.

So as long as it doesn't interfere with my skimming, I'll leave it alone. I have noticed that some parts are beginning to waft in the wind like a green flag. I guess there's a risk of it breaking off and clogging my injectors or the skimmer outlet. The inside surface should be very smooth acrylic so adhesion is probably poor. Just ideal condition of intense MH with gallons of water and air mixing...

Should I block the light to kill it slowly? Just let it be?
 
I've always like the flower boxes for the perfect size.

You could easily triple the amount of LEDs there.

I've been thinking about that as an option for the future. I easily have room for two more light bars on top; however I'm getting good growth with just 9 hours of photo period for now so I think I'll experiment with upping that. Another nice thing about leds is that (being point sources) I can add 60 degree optics and triple the intensity without having to increase the wattage. I currently have some for my DIY main tank lighting. I might give those a try if it looks like the scrubber isn't keeping up.
 
I've had a Santa Monica Surf II in a QT for 11 days and it still looks brand new inside. The tank also has a seeded sponge filter. So far I've done three water changes to keep the ammonia indicator below .05.
Do I just keep waiting for hair algae to appear or should I hit up my local reefers for a clump to get me started?

it will start on its own. the algae is present, it just takes time to attach. took mine almost a month to start up. now it grows like crazy, quick and thick.
 
Upflow style scrubbers similar to the UAS benefit most with big bubbles. Venturi's work fine, as long as you still get the bubbles.

It's not the water movement you want; it's the turbulent air/water interface (which might sound confusingly similar, but it's not the same).

My idea is to take a regular TLF150 reactor, make a round screen insert that can be easily removed attached to the plate on the bottom of the tube. I'm thinking I need 1/2->3/4 inch between the screen and the outside of the reactor. Attach a venturi to the inlet line (http://www.aliexpress.com/item/Irri.../1027301963.html?spm=2114.40010508.4.6.nRrAcC), run a pretty slow water rate, and wrap the tube in flexible grow LEDS (http://www.amazon.com/Lvjing®-Flexi...sr=8-3&keywords=full+spectrum+led+grow+lights) use the foam disc on top to prevent algae from being pumped out and have a contained algae reactor setup. My big concern is getting enough air in there.

It would be considered single sided but you could get a decent screen size since you're making a tube of screen basically.
 
Last edited:
ordered the 30w I65 red/blue floodlight to swap out my 6500k I'm running now.

Should give me a true 20W
 
getting ready to build a waterfall ats going to use these lights. will have one on each side of screen. lights are 9x9 inches . how wide would my screen need to be or how wide could it be. I know I need 150 sq inches for my tank 120 gallon plus sump 150 total gallons would like to do a screen 14 wide and 10.5 tall would these lights work for a screen that big . it will be boxed in style . thx
 
Back
Top