Atomic's 800g Inwall Plywood Build

I used the black pond foam to secure the rock to the back wall of my 400g tank back in 2004. No issues. Not even the start of an issue. The rock work is exactly as it was when I built the tank. Not one piece has ever come loose.

Dave B
 
For the Rock Wall, im going with the E-Marco Bonding. Im going to epoxy some zip ties into the back wall. Then I can push them into the E-Marco bonding agent to make sure the wall is attached to the tank. I decided against the Foam route because of the unknown longevity. It would be easier, but the tank is being built to last 20+ years and i cannot say that about the foam in saltwater.

If the zip ties break then you won't have anything to hold the rocks in place... and it would be hard to re-do that or another attachment option. You could use some sort of construction adhesive as long as it's reef safe (maybe none are). Sounds like the foam may be a good option though...
 
If the zip ties break then you won't have anything to hold the rocks in place... and it would be hard to re-do that or another attachment option. You could use some sort of construction adhesive as long as it's reef safe (maybe none are). Sounds like the foam may be a good option though...

I'm going to use the zip ties (or something similar) like a brick Mason uses wall straps. The straps don't hold the rock together, but hold the wall onto the inside of the tank. I plan on doing a dozen or more of these. The wall itself should be self supporting and technically should bond to the exterior of the tank. The straps just give it a extra way to bond. If I ever decide to get rid of the rock wall I can always cut the straps. The rock wall will all be bonded together using the E-marco mortar. I'm currently searching for dry rock locally for this.
 
I zip tied the rocks to egg crate then foamed around the egg crate. Then secured the walls to the tank with GE1 silicone and let dry. It can be a lil bit of a PITA but it’s holds fine for years. Doing the leak test today so if all goes well for a week or so then I’ll move the tank onto stand and slide in place then use hydraulic cement to connect my rock structures to the walls.
The zip ties will hold fine. Don’t worry
 
I should have most of this weekend to work on the tank. Epoxy floors being installed Wednesday. Then I finally have the ability to work on the Frag tank and Refugium stands.

I have 400lbs of Dry rock coming in this weekend for the rock wall also.


Im also going to setup the Fish breeding system so i can start transferring lifestock from my current system over to the new house. Im not sure how im going to move my corals. I bought the Breeding system used and im concerned about someone adding copper to the tanks at one point and it would kill my corals. Ideas??? Maybe just setup the frag tank and throw a skimmer in with it.
 
Last edited:
Got to spend 6 hours today working on the tank.

The finished Epoxy Floors. Just a clear epoxy over the concrete. We did the same in the family room/theater/bar area and i think it turned out great. I had 3 gallons left over, so i used it in the fish room.
<a href="https://ibb.co/gzoBVf"><img src="https://preview.ibb.co/iJgWVf/20181017-135912.jpg" alt="20181017-135912" border="0"></a>


Lumber for finished the 800g stand/wall, Frag tank stand, and refugium stand.
<a href="https://ibb.co/hyD0O0"><img src="https://preview.ibb.co/chrWVf/20181020-091852.jpg" alt="20181020-091852" border="0"></a>


Final coat of epoxy on the back side of the tank. Might do another coat on the sides. Decided against any zip ties.
<a href="https://ibb.co/mGh5qf"><img src="https://preview.ibb.co/du9UGL/20181021-154336.jpg" alt="20181021-154336" border="0"></a>


100G Rubermaid sump set into place
<a href="https://ibb.co/gFOZi0"><img src="https://preview.ibb.co/ifG9GL/20181021-154346.jpg" alt="20181021-154346" border="0"></a>


Breeding System setup for my current fish to go in.
<a href="https://ibb.co/d7tObL"><img src="https://preview.ibb.co/mh8BVf/20181021-154403.jpg" alt="20181021-154403" border="0"></a>


Started working on the frag tank stand.
<a href="https://ibb.co/c14qO0"><img src="https://preview.ibb.co/jaax30/20181021-154414.jpg" alt="20181021-154414" border="0"></a>


Picked up 560lbs of Dry rock Saturday also.
<a href="https://ibb.co/fmGtbL"><img src="https://preview.ibb.co/gRZPi0/20181021-162424.jpg" alt="20181021-162424" border="0"></a>


I hope to get away one evening this week and finish the stands for the frag tank and the refugium. Glass comes in late this week or early next week.:beer:
 
I got the stands painted today. Also put a coat of placket pond shield on the back sides of the big tank. I didnt like the white.

Glass install on Tuesday!

<a href="https://ibb.co/jPvuWV"><img src="https://preview.ibb.co/kYMZWV/20181022-164756.jpg" alt="20181022-164756" border="0"></a>

<a href="https://ibb.co/erCxkq"><img src="https://preview.ibb.co/hKXxkq/20181022-164807.jpg" alt="20181022-164807" border="0"></a>

<a href="https://ibb.co/nOmOQq"><img src="https://preview.ibb.co/jJaHkq/20181028-103949.jpg" alt="20181028-103949" border="0"></a>
 
Tank is looking awesome! Can't wait to see more! I'm interested in building a plywood tank this size as well, so will be learning a lot from this.

One thing, that I don't think anyone mentioned/probably too late to, is that there is not front access to the tank. I have an in wall tank that's 36" front to back and it's the biggest pain to clean because I didn't add front access. Definitely not as desirable looking but I will be adding front access to my next in wall, especially 4' front to back.


Sent from my iPhone using Tapatalk Pro


I did not opt to have front access of the tank. It wasnt really a option because the wall the tank is being built into is a 2x6 load baring wall in the house. The header that was used above the tank is 3ply 16" LVL spanning the 10' for the tank. There just wasnt enough room after putting in the header to put good access to the tank. Im going to actually have a rail system on wheels so i can lay over the top of the tank and reach the front glass. I imagine this the opposite of a mechanic working under a car. Ill just be working over a fish tank.....I dont have this built yet so things can change, but for now something like that is the plan.
 
GLASS DAY!!!!!

I went this morning and got the glass. Big shout out to Chuck at Henry County Glass. He gave me a good deal and let me borrow his van to transport the glass. Saved me quite a bit of money.


I used RVT108 silicone as a adhesive between the glass and the tank lip. Its supposed to be better than standard silicone. It was dry to the touch after about a hour. I also put small tile spacers in the silicone. The spacers are 1/8 inch tall. This made sure that the weight of the glass didnt squeeze all the silicone out, leaving me with a minimum of 1/8 inch behind the glass.

<a href="https://imgbb.com/"><img src="https://image.ibb.co/mGAWHf/41d-Qihw-Md5-L.jpg" alt="41d-Qihw-Md5-L" border="0"></a>


The glass is 3/4 inch tempered. It weighed about 250 lbs. It wasnt too difficult for 4 guys to lift into place. Using suction cups we layed it into place. I was extremely nervous about this part. Im very happy with the outcome today. Now i only need to get past a leak test and ill be able to sleep at night again!!!!

<a href="https://ibb.co/co5Fcf"><img src="https://preview.ibb.co/jOL3V0/20181030-102744.jpg" alt="20181030-102744" border="0"></a>

<a href="https://ibb.co/b8yqA0"><img src="https://preview.ibb.co/fbJqA0/20181030-102758.jpg" alt="20181030-102758" border="0"></a>

<a href="https://ibb.co/kjA3V0"><img src="https://preview.ibb.co/muciV0/20181030-152008.jpg" alt="20181030-152008" border="0"></a>


Tomorrow we will flip the tank over and put the it in its final resting place. Then i can start building the walls around it and plumbing it. Hopefully soon after that i can get the walls foamed in......
 
This is at the point where I can't wait for what comes next. PLEASE PLEASE don't leave us hanging!!!

Looking great!! I also opted out of a front access for my tank but it's only 30" from front to back, It didn't take long for me to get used to it. The only thing is that the fish know when it's feeding time because I open the door to the equipment room.

And if you followed my build, you would know that I created a rail system for the lights, but to this day, I haven't needed to move the lights out of the way for access. Hence, I'll probably opt out of automating it.

Thanks! Ill check out the rail system you built, Im not sure about the automated rail system just yet. Ill probably add one if needed, but hopefully it wont be needed. I just dont wana touch the MH lights when im cleaning the tank.


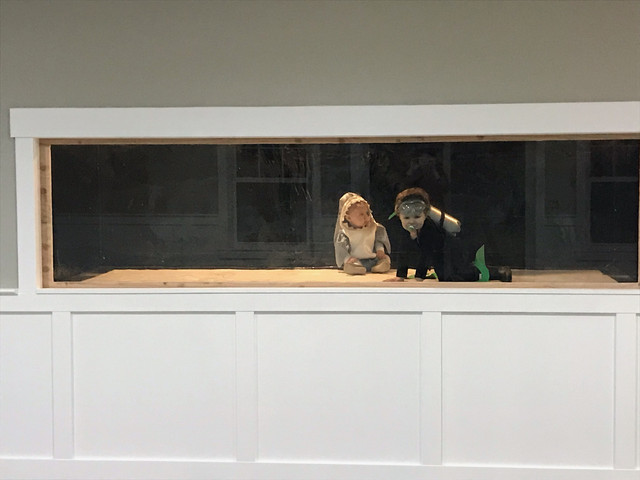
SO...... This happened on Halloween with my kids!!!!


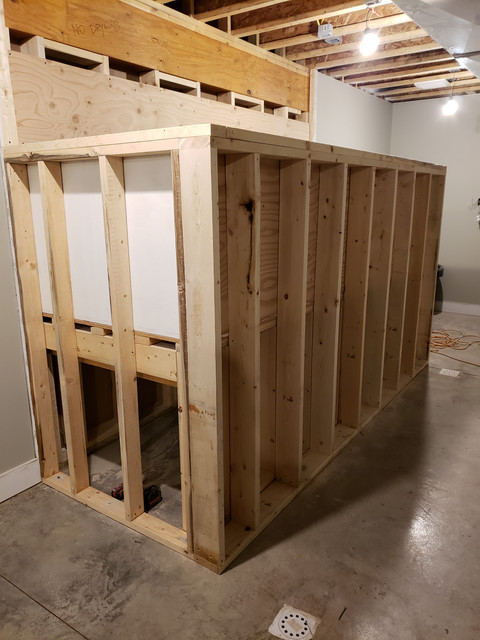
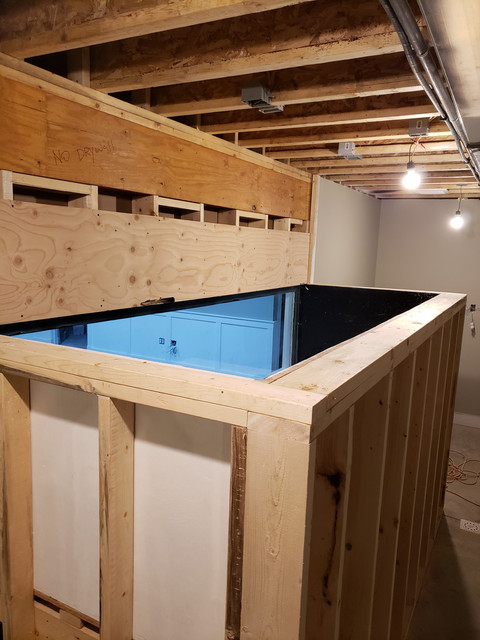
I was also able to build the back walls around the tank. I was really worried about this but after seeing it built, I think its WAY overbuilt.


Foam guys come in today or tomorrow. then im gonna do a leak test later this week!!!!!!
 
What makes you say it's overbuilt? :0)

Hey, I'd rather feel that way than wonder if it's good enough. Looks really good to me!!

Great pic of the kids.
 
I haven't done any major maintenance on the tank yet, and it is nice that I have the option, but I'm certain that I wont automate it.
 
The insulation guy didnt come today, I starting really looking into it and if they foam around all the return/overflow drains, It could really be a bear if I have problems down the road. So he is holding off for a few weeks until i get the tank up and running and if i then decided i want it foamed, then he will come back. I did glue between all the wall studs and the tank so that any gaps are now filled with glue.

I started to frame in the viewing holes on the back side of the tank today and drilled for my return lines. Im getting more silicone in tomorrow and will mount the glass and overflows in the next few days and do the leak test this weekend while im around the whole day....not that im worried...:eek1::uhoh2:
 
Hi,

I think you build is nice. The sides and back are nice and strong. No overbuild in my opinion.
You can enjoy having a support for your body when you work in the tank in the future.

The only thing that concerns me a little bit is a possible bowing of your glass window.
Maybe it's just not clear in the pictures, but I don't see any support on the long side of the glass??

My tank is all glass, but it's holded together in a metal frame on the top with welded small bars to keep the glass from bowing. It put in a picture to make it more clear.

Maybe you can weld one or two bars from the glass to the back side to cover this?

Kind regards,
Yoeri
 
sorry, forgot the picture:

IMG_1098.JPG
 
Back
Top