Awais' 120g Build

Hi Everyone,
I had the pleasure to meet some of the SLASH members at the Feb 24th PN. And I was encouraged to come up with my build thread.
I'm out of town and atleast I have some time to start this one.

It all started with a desire to go back to aquariums. I used to have FW growing up and then again until 9 months ago before I moved to STL.
Got a new house, new job and thought why not to get my hands wet with a saltwater. Always wanted to do this. Fishes are much more colorful and the corals are fascinating!
I knew it is going to me more expensive then FW but didnt know how much more. LOL, now I know better:bounce2:

Negotiated at the most crucial HOME DEPARTMENT ( wife) as to the size and got approved for and had to settle for a 120g, ( if I had my way, it would be 8 feet long)....

My research began...and I scourged through the internet and this forum and settled for bean animal fail safe overflow.
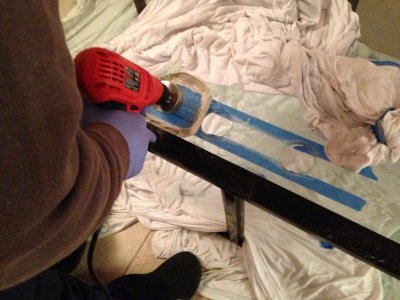
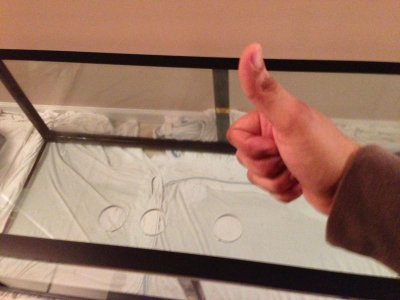
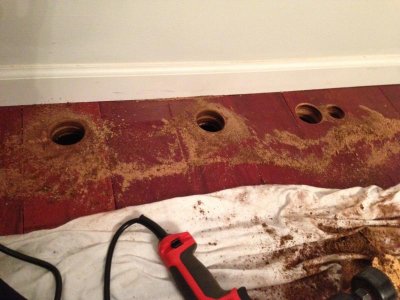
And as I like hard work, I decided to start from almost scratch with drilling my own holes...
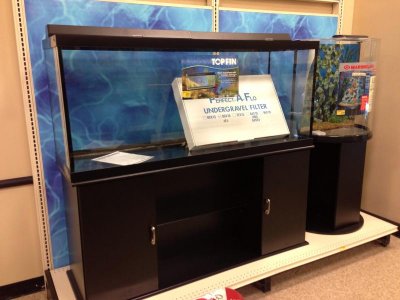
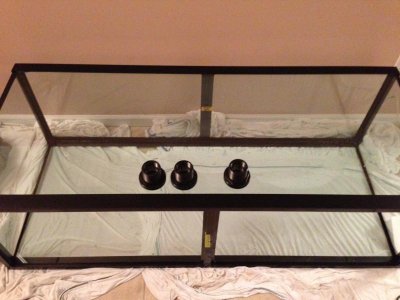
Got this TOPFIN FW 120g tank at petsmart at a good price during the holidays ( see pic)
and more research...:crazy1:
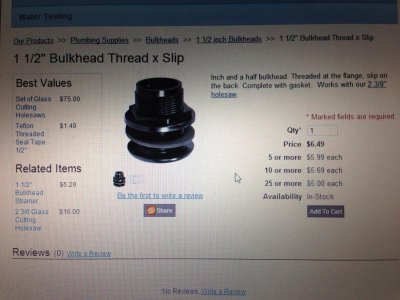
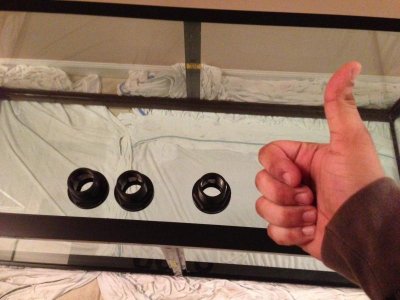
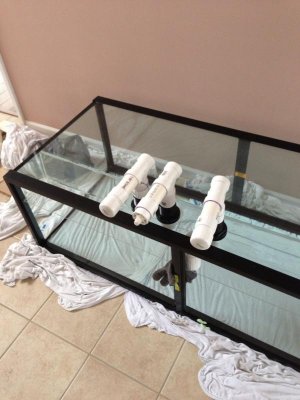
and found glass-holes.com for the drill bit and bulkheads.. ( pic)... also decided against their overflow box as I wanted failsafe AND most noiceless.....so decided to go for end to end overflow weir..... thats another story which Ill write up later...

Thats all the time I have for now...

Ill add the plans, equipment, next thread....later, I must sleep its 1 am and have conference starting at 8!!
 

Attachments

  • IMG_0161.jpg
    IMG_0161.jpg
    55.7 KB · Views: 25
  • IMG_0162.jpg
    IMG_0162.jpg
    56.4 KB · Views: 19
Wow! what a teaser. I've seen more pics at the last Pizza Night on his phone... He has a great build. A lot of DIY work.
 
I drilled these 3 holes on the tank for the 1 1.2" bulkheads and overflows bean animal style.

Question: I see that my pics come up as thumb nail attachments. How do I get the picture in the body of the thread?
 

Attachments

  • IMG_0049.jpg
    IMG_0049.jpg
    62.1 KB · Views: 20
  • IMG_0047.jpg
    IMG_0047.jpg
    46.8 KB · Views: 21
  • IMG_0046.jpg
    IMG_0046.jpg
    56.9 KB · Views: 19
  • IMG_0045.jpg
    IMG_0045.jpg
    54.5 KB · Views: 21
  • IMG_0030.jpg
    IMG_0030.jpg
    55.3 KB · Views: 17
Then I drilled on my new hardwood floor for the 3 overflows and the return lines and plumbed it to the basement where the sump would be.

I initially thought this rubber maid would work for a sump but I found it flimsy and I wanted my sump to have an emergency drain, so that wouldnt work. Not to mention the baffles were impossible to install.. so dumped that rubbermaid idea.
 

Attachments

  • IMG_0043.jpg
    IMG_0043.jpg
    63.2 KB · Views: 31
  • IMG_0034.jpg
    IMG_0034.jpg
    24.7 KB · Views: 17
  • IMG_0035.jpg
    IMG_0035.jpg
    52 KB · Views: 27
  • IMG_0037.jpg
    IMG_0037.jpg
    55.2 KB · Views: 21
  • IMG_0027.jpg
    IMG_0027.jpg
    38 KB · Views: 17
I see that my pics come up as thumbnail attachments. How do I get the picture in the body of the thread? Can any one help?
 
I wanted a noise free ( or less noise) overflow, so I siliconed an end to end 60", 6" x 6" weir on the back top.
IMG_0022.jpg


IMG_0023.jpg

I bent an acrylic panel and siliconed it.

IMG_0024.jpg


IMG_0065.jpg


Then the tank was ready to be lifted and placed on the stand. My wife and I did it together, I wouldnt have been able to do it without her smart tricks.

IMG_0026.jpg


IMG_0079.jpg

IMG_0010.jpg

IMG_0013.jpg

IMG_0016.jpg
 
Then I put egg crate on the bottom, , sand and rocks.

IMG_0088.jpg


Rocks were not how we wanted, so it came out. And with many combinations we were able to give it a form we liked.

IMG_0091.jpg

IMG_0090.jpg

IMG_0089.jpg


IMG_0122.jpg


IMG_0101.jpg


After that me and my wife, painstakingly siliconed small marble stones on the weir.

IMG_0122.jpg


I did that because next was the back wall.....intially I made it with pond foam. But my wife did not like it, it was pond foam or her, LOL. So I had to dump that idea.
IMG_0092.jpg
 
I zip tied drilled small rocks and few 1.5" PVCS for some caves for the fishes on the egg crate, and then with silicone and marble stones on it for 3 layers, managed to get the back wall finished.

IMG_0095.jpg

IMG_0094.jpg

IMG_0093.jpg

IMG_0097.jpg

IMG_0099.jpg

IMG_0120.jpg

IMG_0121.jpg

IMG_0116.jpg
 
Time to get to the basement sump!

IMG_0127.jpg


For the RO/DI supply, I had to figure this one first:

IMG_0081.jpg


Once I was done with that I just lay 1/2 PVC on the ceiling of the basement and to the RODI with a ball valve. The following picture is just to show the RO/DI

IMG_0063.jpg


The RO/DI out splits into 2, each with its own on/off valve into 2 garbage containers , each about 55 gallons and each has its own float valve, so I dont have to be worried about it overflowing ever. I dont have pic of it at this moment, but this is what I got from BRS: http://www.bulkreefsupply.com/catalog/product/view/id/2044/
 
Very nice - I've never seen that approach to the back wall. Looks like you put in a lot of work silconing all those rocks.

What type of sand is that?

Keep posting your progress.

-Mike
 
I then drilled a 1.5 inch drain the 70 g sump on the left upper side ( near the RO/DI) for a flood protection drain
IMG_0112.jpg

IMG_0111.jpg


I didnt want my basement to be flooded either, EVER. I hope this drain prevents that from happening.
That drain I tapped into the kitchen drain on the other side of the basement.

IMG_0084.jpg

I also added an extra pipe to the drainage pipe on the extremen left side of the sump, just a pipe at the sump height and then placed a funnel on top of it... my home made sink.... if I ever need it to drain or discard liquids there, I wont have to run any where.
You' see that funnel in this picture:
IMG_0082.jpg

Just see the funnel on the extreme left side, ignore other things that Ill explain later.


I then divided the 70 g sump into 3 compartments:
Left side for 3 1.5 inches overflows and the skimmer.
Next 2 baffles,
Middle compartment for whatever Ill ever need... extra refugium etc
Next 3 baffles
Rt compartment for the return line with mesh and heaters.


Then it was time to plumb the pump .... Panworld 200PS

I imagined that a good pump would be able to prime itself
http://aquarium.bulkreefsupply.com/search?w=panworld 200ps
 
Thanks. It WAS a lot of work. But it better be how the home minister wanted it. LOL or the tank would be stalled. hahaha, or thats how it is believed...


Sand: its the HD playsand. I did a lot of research about it here at reefcentral and came to the conclusion that cheap sand or sand worth of gold, all eventually will be live. So I saved some cash there too.
Take it from me, I did enough research, and firmly believe aragonite or silicone based, both are fine. After all majority of the ocean in the world has silicone sand...... and all creatures live there happily.

Thats just me. If I fail, atleast I TRIED it and I KNOW first hand it fails and I wont make that mistake again.


Very nice - I've never seen that approach to the back wall. Looks like you put in a lot of work silconing all those rocks.

What type of sand is that?

Keep posting your progress.

-Mike
 
By the way, I did buy some 40 lb 'live' aragonite sand as starters, youll see it on the pictures.

Also after ALL the plumbing was done, I was enlightened with a very important fact: when plumbing in clean environment, we do not need that dark ugly looking purple PVC primer!!!!!!!!!!!!!
arghhhhhhhhhhhhhhhhhh after I made all that ugly purple spill lines on the living room plumbing......
 
Last edited:
Back
Top