Bonsai - BA's 34G Rimless Solana

BattleAthletics

New member
Through whether it be my luck or obsession, I have been privileged to come in contact with some extremely helpful forum members to local members. I have an incredible cast of friends that have helped me out tremendously in this hobby of mine. I can only hope that I can return the favor in the future to everyone that has helped me in this amazing and expensive hobby.​

One night I get a text from Mark(Spirofucci)(Here and on Nano-Reef) saying that he plans to sell the system he has but doesn't want to part it out. He wants someone just to take it away completely. In shock I said sure and let me see what I can do. Fast forward to January 12th and I am at mark's house ready with a U-Haul cargo van. The tanks were not in TOTM(Nano-Reef) material and I knew that going in. It took us about 4-6 hours to load everything. We annihilated a 24 pack of beer and some of what mark had already had. About 90% of the corals didn't make it due to the stress of the shipping so I had to throw away huge chunks of colonies. Reason being that within that time that mark got sick he hadn't touched the tank and the livestock was still hanging on, 6 months no water change will do that.

I was planning on setting up both tanks but the space wasn't there and plus the stand that mark made could hold an army tank. So I ended up getting rid of the RSM. The stand I know is overkill for the tank but it has two separate sides, the right side is the sump area and the left side is the electronics area.

Equipment:
- Display Tank: Current Solana 20x20x20 Rimless Cube Tank 3 Sided Low-Iron
- Lighting: Ecotech Radion Pro
- Stand: 64x22x32 (From Spirofucci)
- Skimmer: LifeReef SVS2-24 Skimmer w/Mag 9.5 pump
- Return Pump: Mag 7 pump
- Sump: CLF2 Custom Sump 30x13x14
- Circulation Pumps: 2 Ecotech VorTech MP10WES with Battery Backup
- Heater: Finnex 300W Titanium Heater With HC810 Digital Controller
- Media Reactor: Two Little Fishes PhosBan Reactor w/upgraded pump
- Auto Top Off: JBJ ATO(Upgradable?)
- RODI: 5 Stage BRS Chloramines System w/Booster Pump

Substrate & Rockwork:
- Sand: Mix of Fiji Pink, Crushed coral and Bahama
- Custom DIY rock sculpture: Inspired by Chingchai, Nineball, Crazy4Acros and Spirofucci
- Salt: Red Sea Coral Pro

Livestock:
Later!​

Table of Contents:​


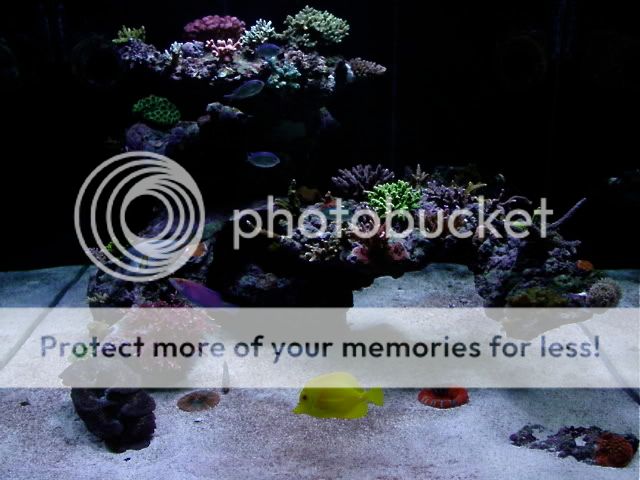
Oh and if you are here for awesome pictures with incredible resolution, yeah im not there yet.​
 
Drilling is scary, but fun.
12134369553_f605c24868_c.jpg

Bulkhead installation
12134101855_079182f0e1_c.jpg

Silicone the overflow box, yeah its huge.
12135101793_4b2b5d5dc4_c.jpg

12135495096_2fff48812c_c.jpg


Now to wait for it to cure.
 
Thanks Gig'em!

Acid Washing Dry/Live/Dead Rock

Im going to try and keep this short, not too many people in this industry are willing to use Hydrochloric Acid in their tank builds. Now I should first mention that HCL is not something you should take lightly, you should only handle chemicals that you are familiar with. I work in the chemical industry where I handle Hydrochloric Acid aka HCL(100% Strength), Hydrofluoric Acid aka HF(100% Strength) and many acidic materials. I am fortunate to have extensive training in handling materials of this strength and the knowledge to treat in case of an exposure. The muriatic acid I used was a 34% strength and the brand of the bottle was SMART brand. I had approximately 80#'s of rock initially. The rule of thumb that ive noticed many people that have done was use a 10:1 ratio of water to HCL(Muriatic Acid). Many people use 14% HCL, so be careful what you purchase, in the end the HCL might not be strong enough. I'll remind you that the proper PPE(Personal Protective Equipment) is essential in working with chemicals such as HCL. Here is a list of what I used in the acid washing process.


PPE of Choice:

  1. Face Shield w/ respirator
  2. Ansell ANSI Cerified Chemical Gloves
  3. Chemical Apron or Splash Suit
  4. A base of choice, baking soda or the equivalent in order to neutralize the acid
  5. Now you dont have to get all fancy like I did, but I was able to man handle the rock inside the tub. Before you start the process always make sure you have no leaks in your gloves and apron/suit.


List of materials:

  1. Muriatic Acid
  2. PPE
  3. A big enough tote to hold your rock
  4. Water
  5. Enough baking soda (Depending on the amount you are to be washing)
  6. Stopwatch
  7. pH paper and a pH meter

Now I had this dead rock for a couple of months now, it was live when I got it from a local reefer(originally the rock was in the bay), in order to prevent any hitch hikers and unwanted pest algea I decided to try out what vinegar would do to this dead rock. It essentially cleaned it to a certain degree, but nothing compared to what HCL did to it.

I donned the proper PPE needed for this job, I had a tote full of rock, filled it up with water and prepared everything I needed in order to ensure a smooth wash. I should mention that the pH of HCL is less that -1.0, so it will cause blisters, severe burns, tissue loss is evident and the biggest one of all is that it is EXTREMELY CORROSIVE. It also has a certain pungent smell to it. I guess im a little used to the smell of HCL.


Acid washing:

  1. Fill up tote with rocks to wash
  2. Add water to the tote just about 1in. above the rock line in the tote(Depending how much water you have)
  3. Add Muriatic acid SLOWLY(Depending how much water to acid ratio 10:1)
  4. Wait 20-35 minutes, or until bubbling has died down
  5. Add baking soda
  6. Test pH of the water solution
  7. Ensure that it is around a 7
  8. Proceed to dump neutralized water to the drain or ditch or gutter etc etc.
  9. Take rock out of tote and rinse with garden hose, a strong pressurized nozzle is needed for this step as it ensures no rubble or granuals are left behind.
  10. Wash down the tote very well
  11. Let the rocks dry for 1-2 days(Sooner or later if you wish)
  12. Mission completed
  13. During acid wash, notice the brown organics dissolving

Before​
12168412043_9ce1150cea_c.jpg

After
12168403073_d1bdfff0f1_c.jpg

After it is all said and done you can dunk the rocks in rodi and take them out after a while, or let it air dry, its a personal preference really.

Hope this helps anyone wanting to learn more on how to do an acid wash.
 
I have been working on my equipment panel and the makeshift light hanger, as opposed to hanging it from the celing. Here are some pictures of the aformentioned panel and hanger

Equipment Panel(Unfinished):
12516098843_1bfce86be3_c.jpg


12528335255_3906428214_c.jpg

Light Tree(Unfinished):
12516087623_dac08a847e_c.jpg

GFY, dosing pump holder
12515976305_0a45678ef0_c.jpg
 
azy7y7e4.jpg

bu9ebaha.jpg

heqanugu.jpg

y8unyze5.jpg


Now just have to wait for the WMX module and the Lab Grade pH Probe to get here to finish the equipment panel, I hope. I still havent updated the firmware on the APEX.

As you can see I made a sliding shelf for the containers also, behind the dosing containers is a open space that could accomodate a 18X10X14 ATO Black Acrylic container, still in the talks with Mike @ Micro-Reefs in making this happen.
 
e7y4e2y4.jpg


Still not done with the rockscape. Scapin' is allot harder than I thought.

Wmx module, lab grade pH probe and plumbing came in, screen top done and the setup is inside. This setup is ridiculously heavy, between two of us and a movers dolly we were able to man handle it in.

I did add a spacer between the equipment panel on back. Now there's plenty of room for the wires instead of it getting bound up.


Looking good
 
So in an effort to show off the sick stand that mark made, and also help other reefers visualize what the stand looks like I took some pictures to help them out since ive been asked about it on here and other forums too.

12821448283_1b9b8d75cf_c.jpg

12821434073_415001d64e_c.jpg

12821429523_c9cf50f94c_c.jpg


Hope that shows how the spacing behind the equipment panel allows for a snake pit to be hidden. Not everything is actually plugged in ATM, since ive yet to update the APEX.
 
azy7y7e4.jpg

bu9ebaha.jpg

heqanugu.jpg

y8unyze5.jpg


Now just have to wait for the WMX module and the Lab Grade pH Probe to get here to finish the equipment panel, I hope. I still havent updated the firmware on the APEX.

As you can see I made a sliding shelf for the containers also, behind the dosing containers is a open space that could accomodate a 18X10X14 ATO Black Acrylic container, still in the talks with Mike @ Micro-Reefs in making this happen.
 
So tank is wet, only leak check tonight. This bean animal overflow is so silent it's amazing. The mag 5 return pump is the only thing that's loud, vibration loud that is. Even with noise dampening pads underneath the pump it still is loud. I'll update more on Friday as its my day off.


ahy2avu4.jpg

hutu8age.jpg


Pictures!
 
Back
Top