Broadfield
New member
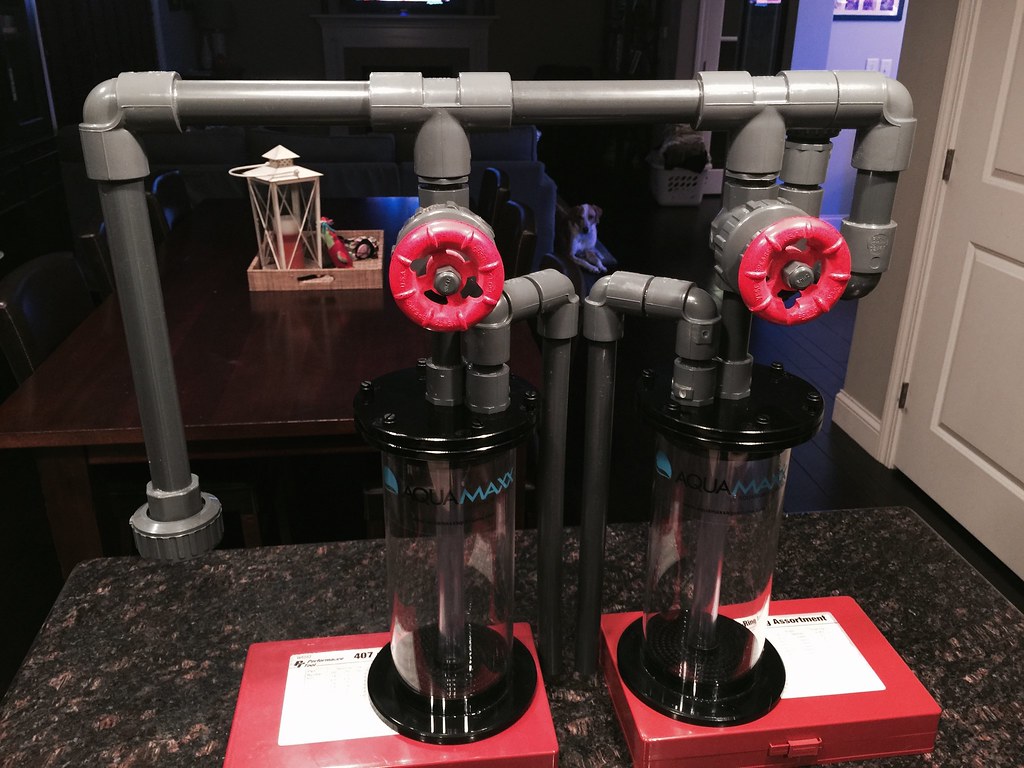
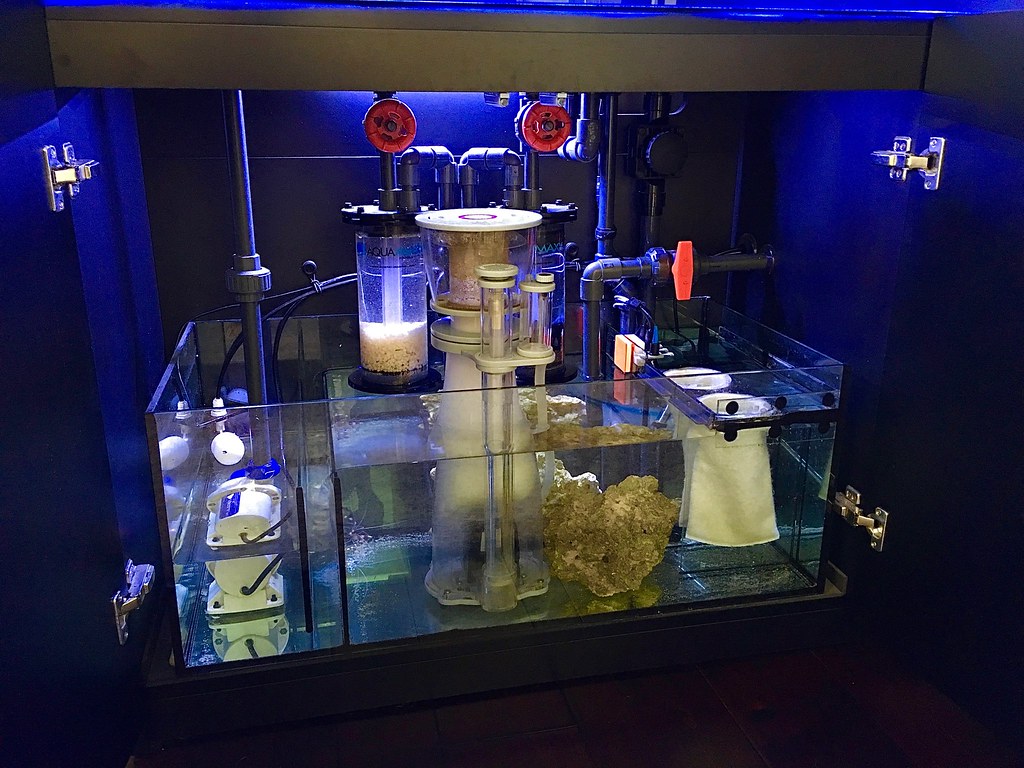
So my redesign of the controller area and sump area have officially started. As I have said in the past, both of those areas were done as a quick, temporary solutions... knowing that I would redo them once I had time. I'll be doing the sump and plumbing next week most likely, but started on the controller side. I actually like my initial simple design, with the hinged panel that allows me access to everything behind it. However, I just want to class it up and tie in the cosmetics from the sump area. So I decided to keep with the current design, but do cosmetic panels to trim it out and allow for things like edge lit acrylic etc.
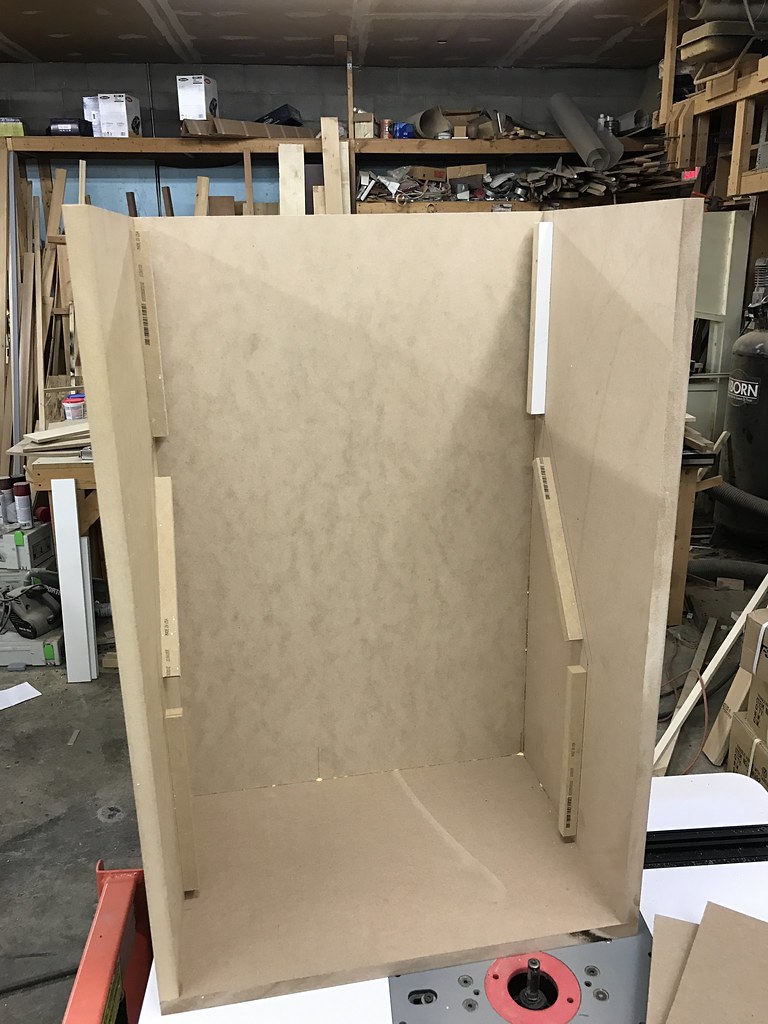
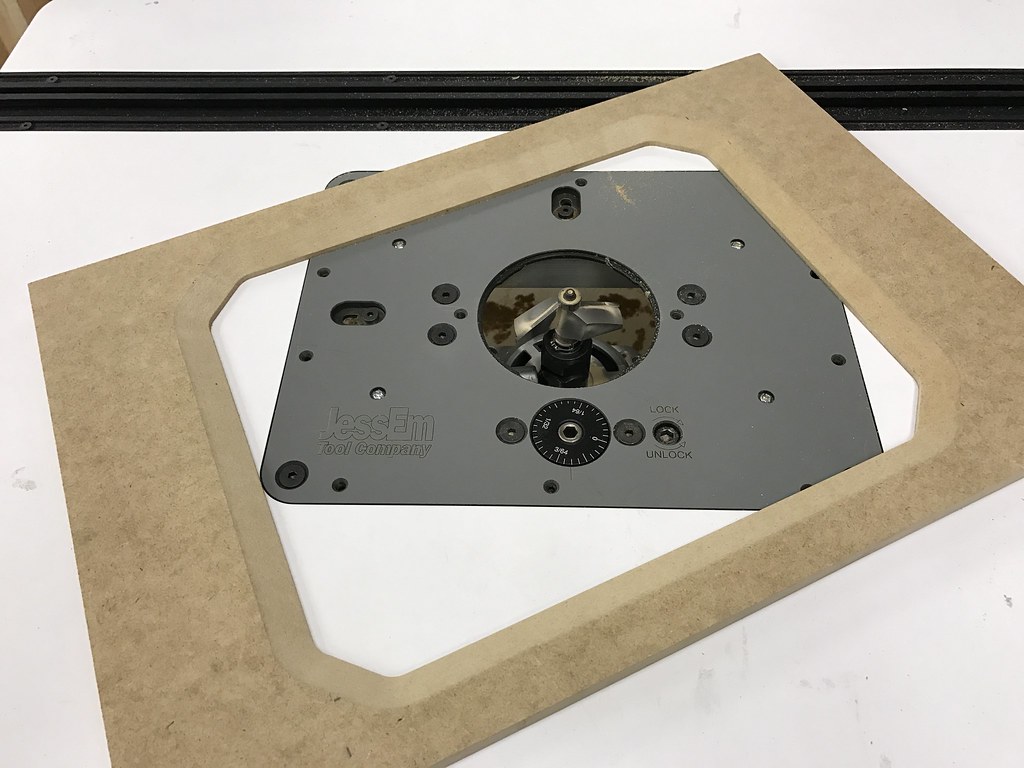
To start off with, I did a mockup of that section of the stand, at work. This would allow me to do all of the fabrication/routering of the new panels at work. With all of the angles and fitment needed, it was going to be very time consuming. This would allow me to finish everything 100% at the shop. Then I could simply bring them home, remove the equipment and old panels, then install the new panels along with the equipment... insuring a perfect fit, even though I built it all off site. Here's a simple mockup of the right side of the stand. NOTE: I didn't feel it necessary to make the mockup the full depth of the Red Sea stand, as I was only concerned with top vertical panel and everything forward of it. And the nailer strips in the following image are only for the purpose of the mockup, to hold the base panels in place while I work on them. Those panels are held in place with hidden brackets in my stand currently.
 IMG_7508 by Toby Broadfield, on Flickr
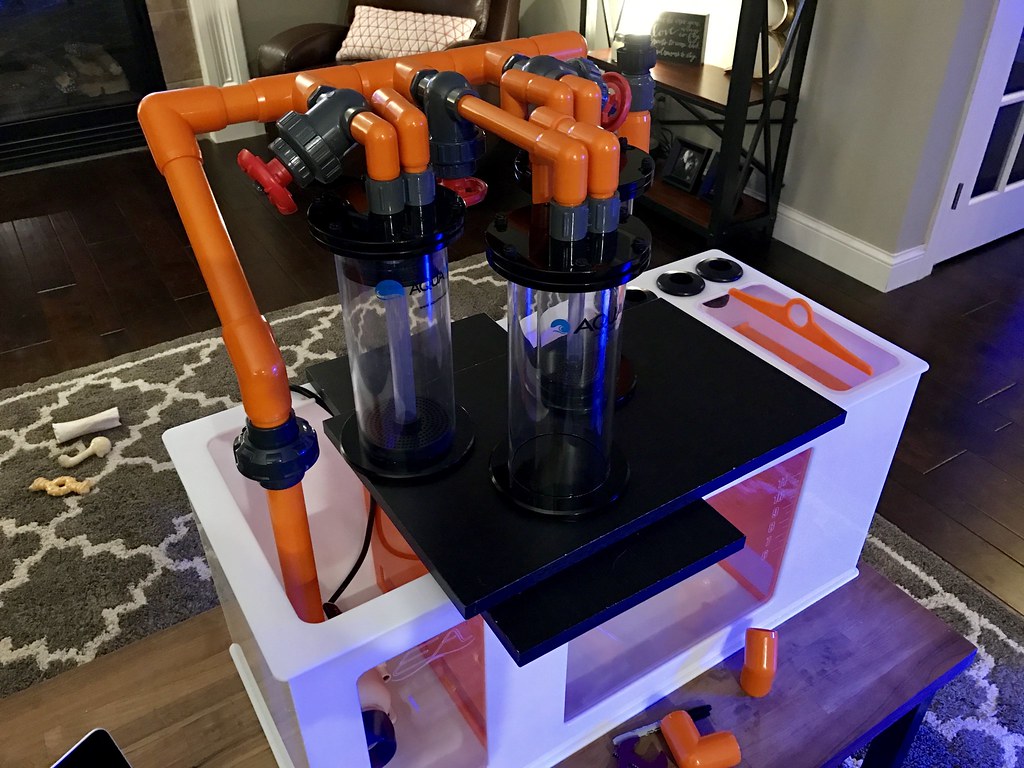
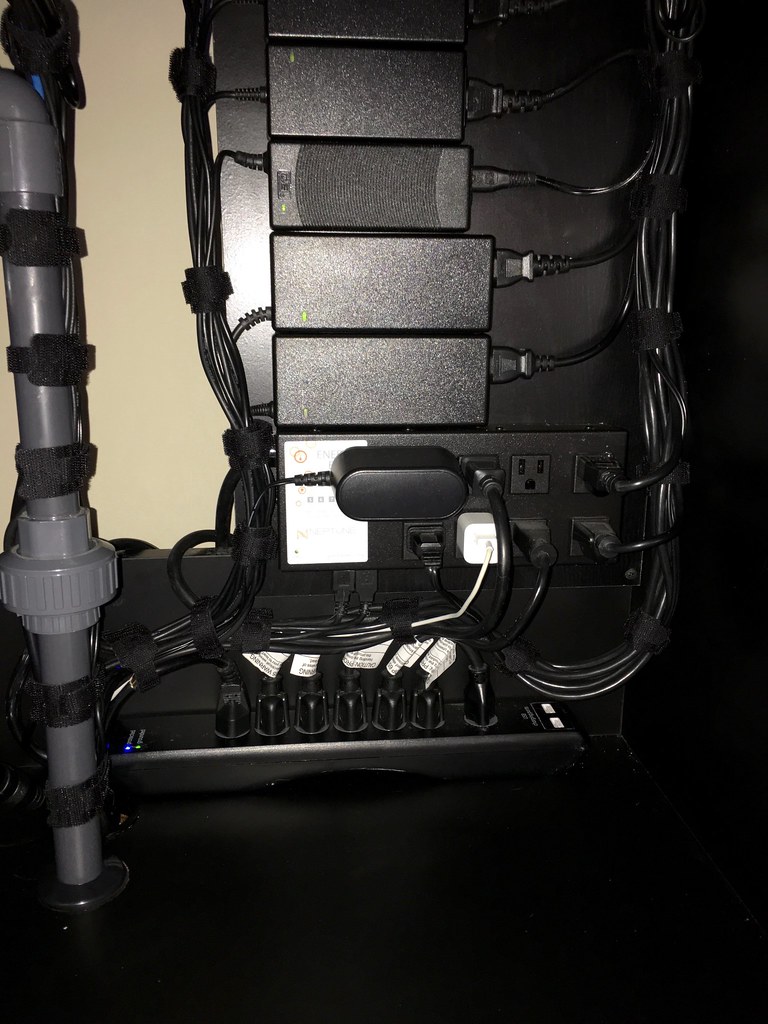
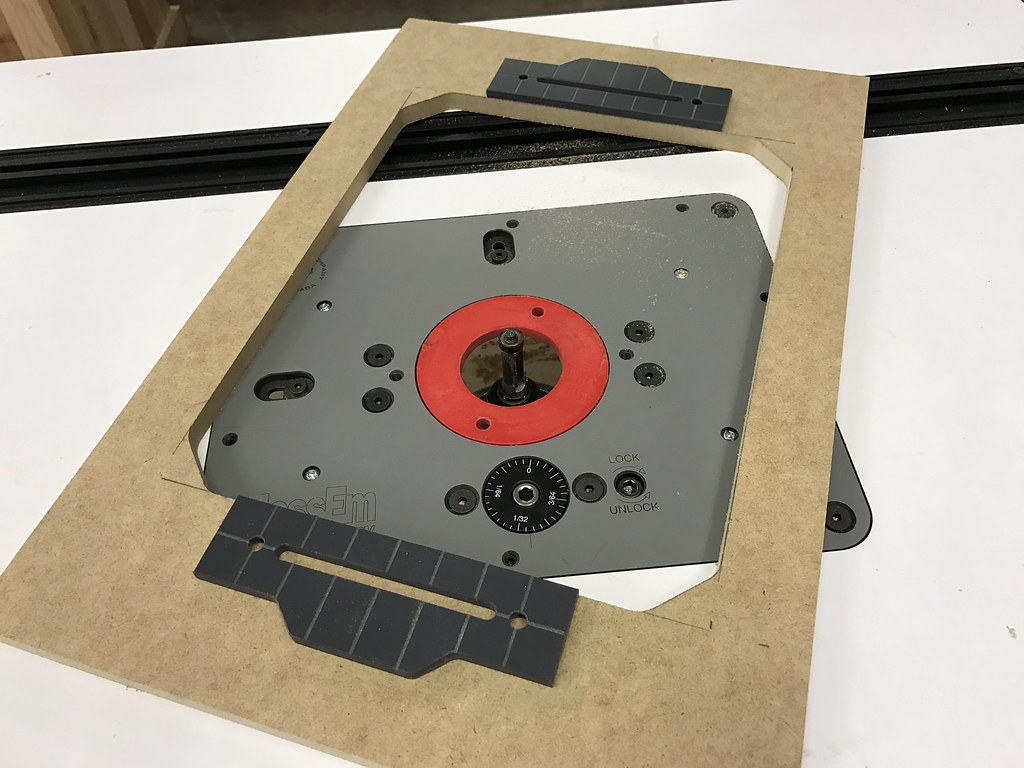
The following image is with the new base plates mocked up. These are in the same exact location as my current ones... why change something that works so well! These will hold all of the equipment as they do now. However, I will be painting these orange to tie in the plumbing color and sump from the sump side. I will also float the modules about a half inch off the base panel. This will allow me to have the grommets hidden under each module and wrap the cables back under each module and out the base panel... cleaner look. I may also mount small LED strips on the underside of each module, facing down, to accent it and create even more of a floating look. This rebuild of the sump side and controller side is going to get some mad LED usage... so hold on! All hidden of course... I hate being able to see the actual LEDs in use, no matter what angle you are looking from.
 IMG_7515 by Toby Broadfield, on Flickr
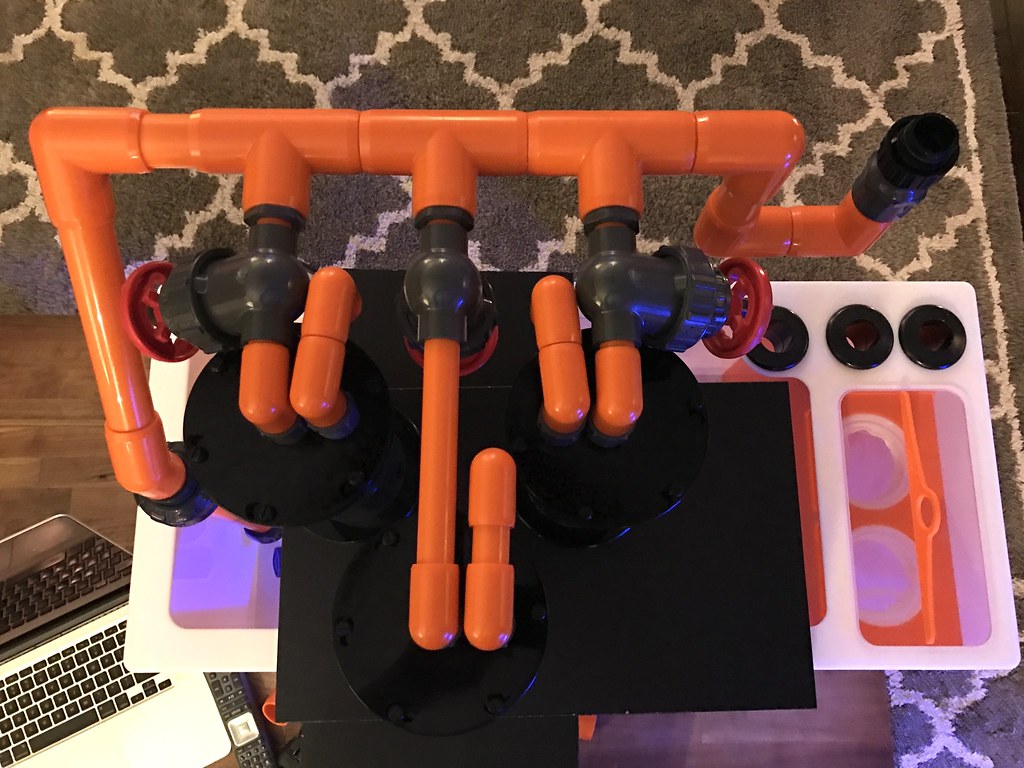
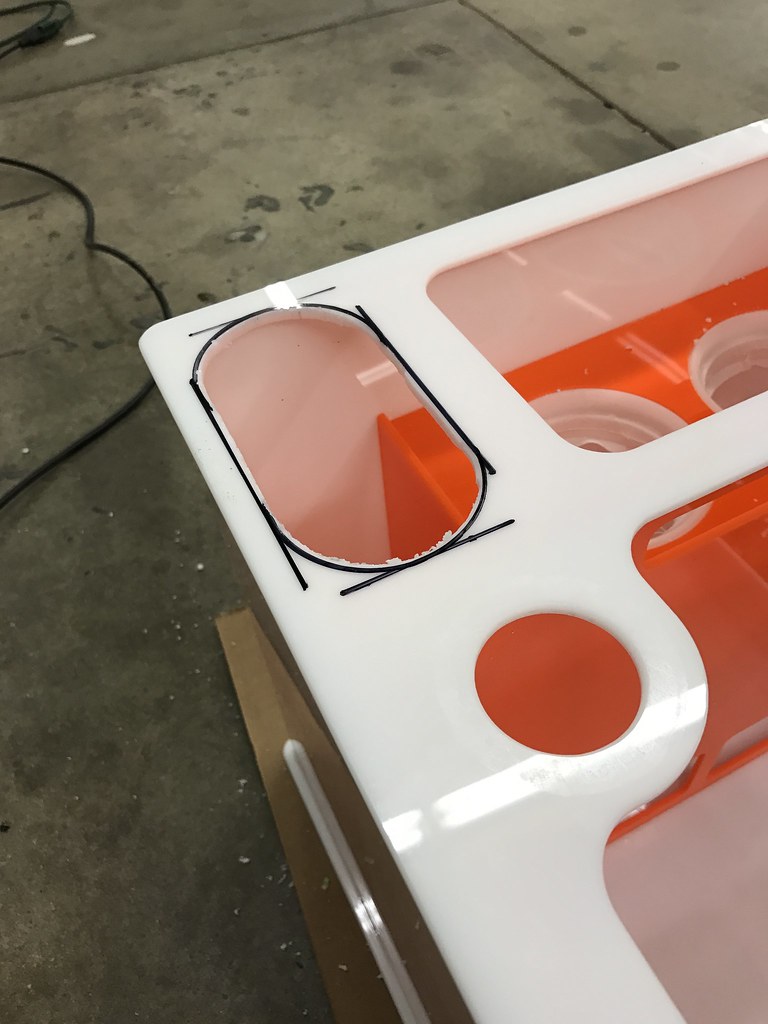
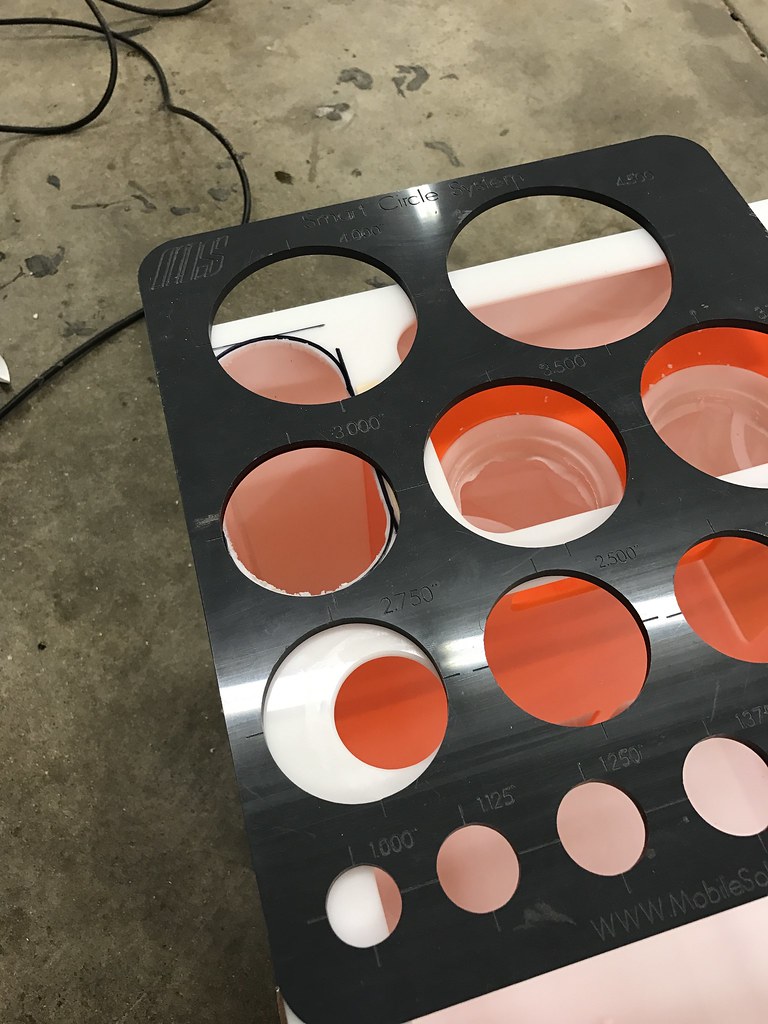
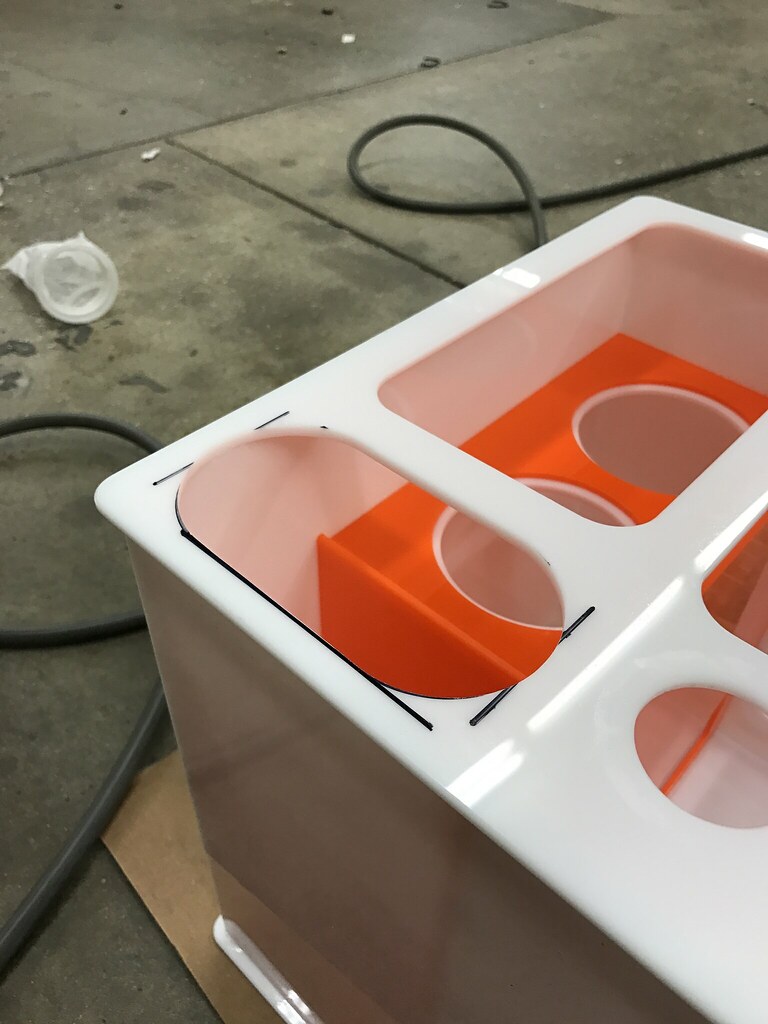
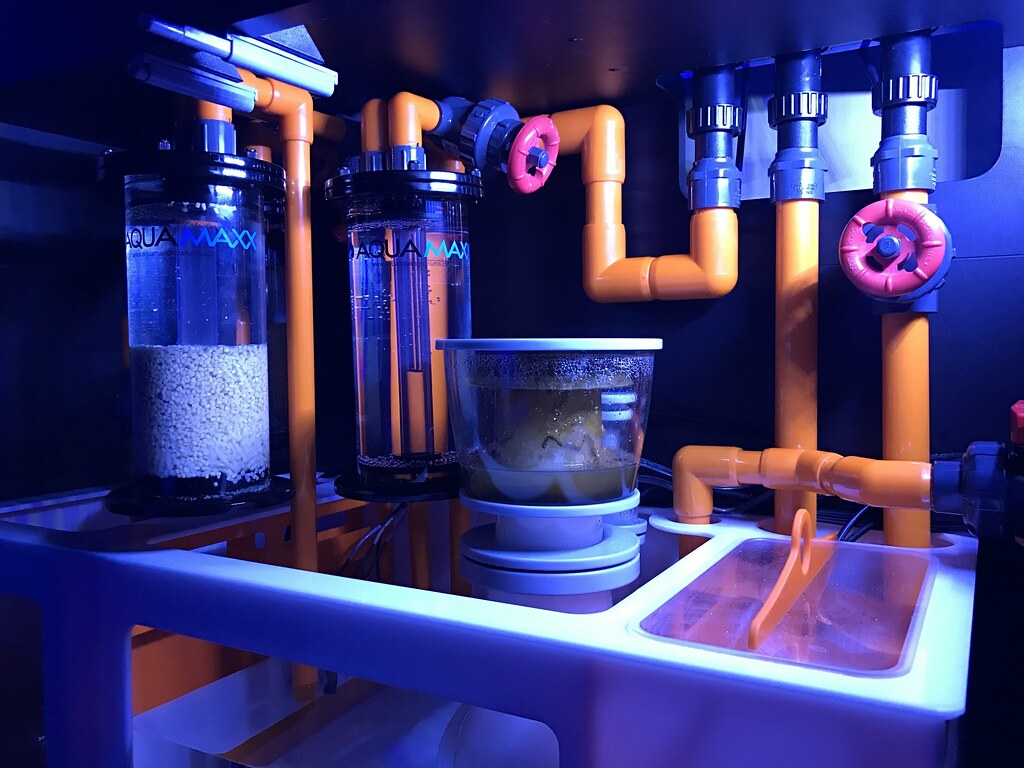
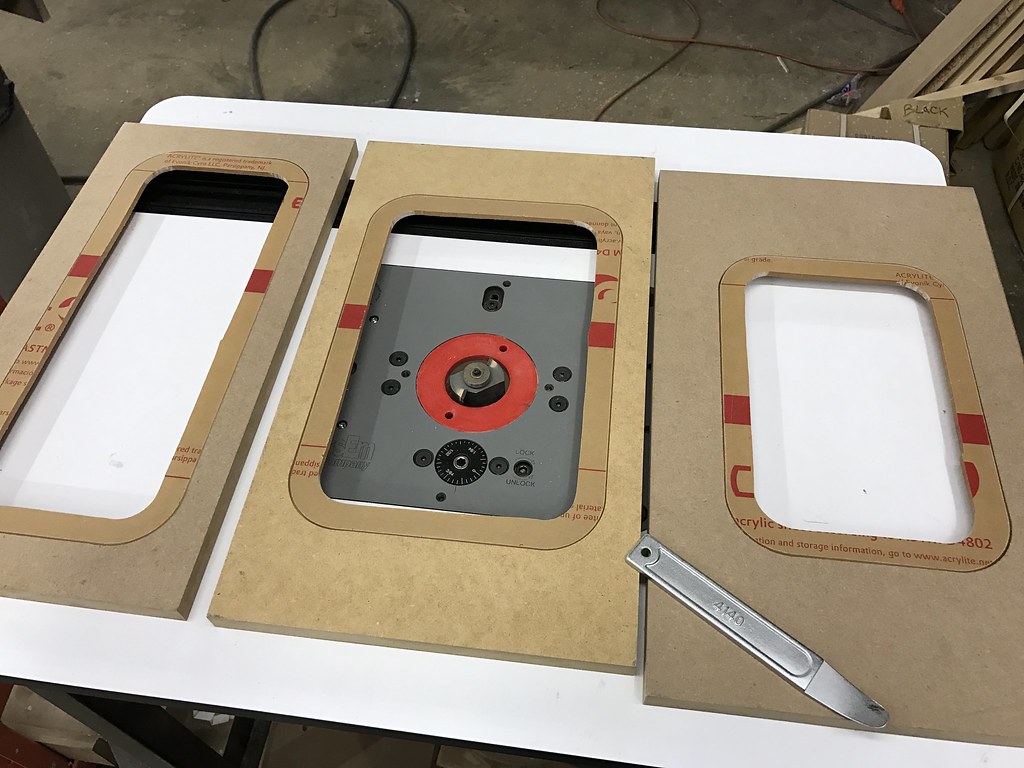
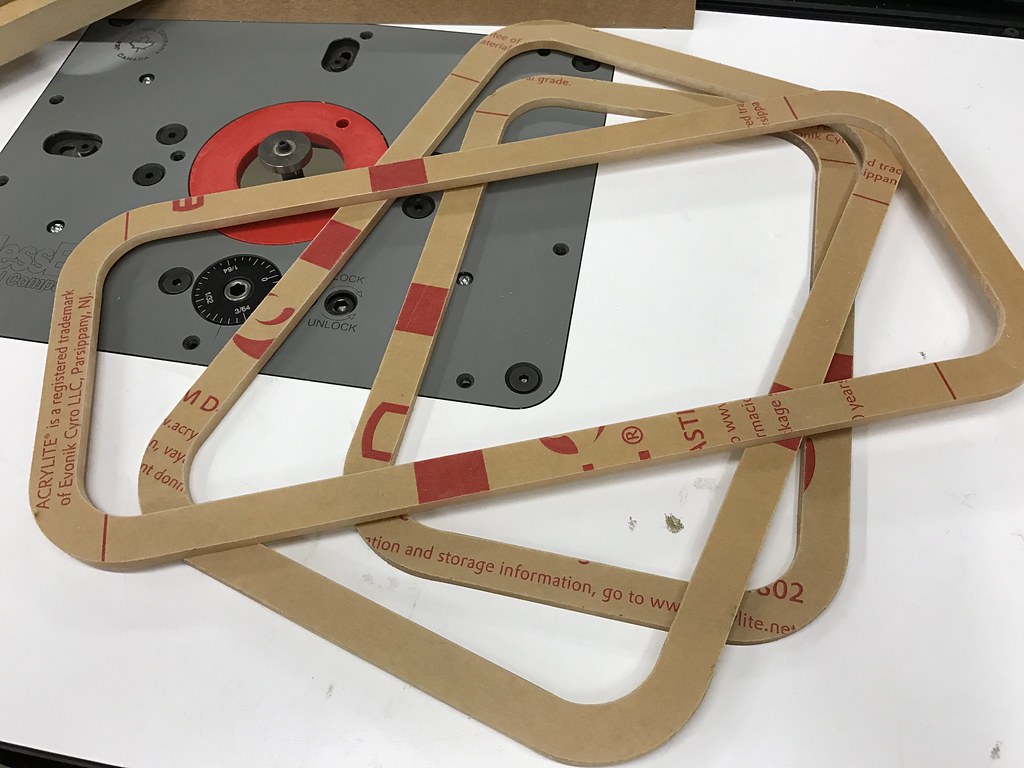
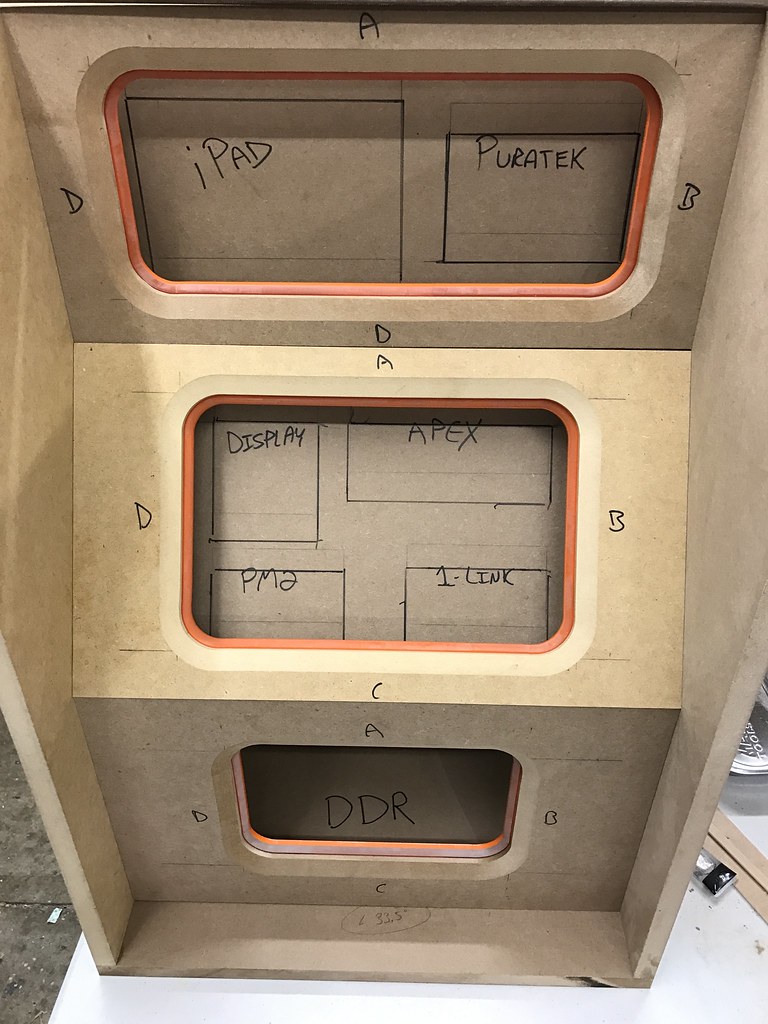
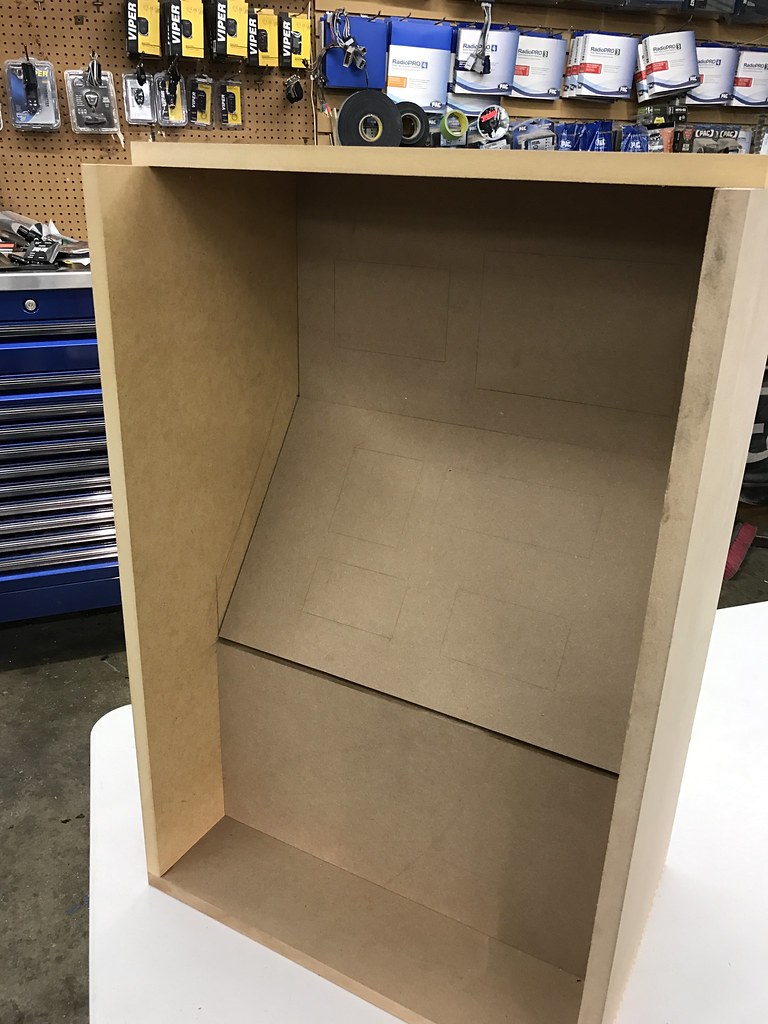
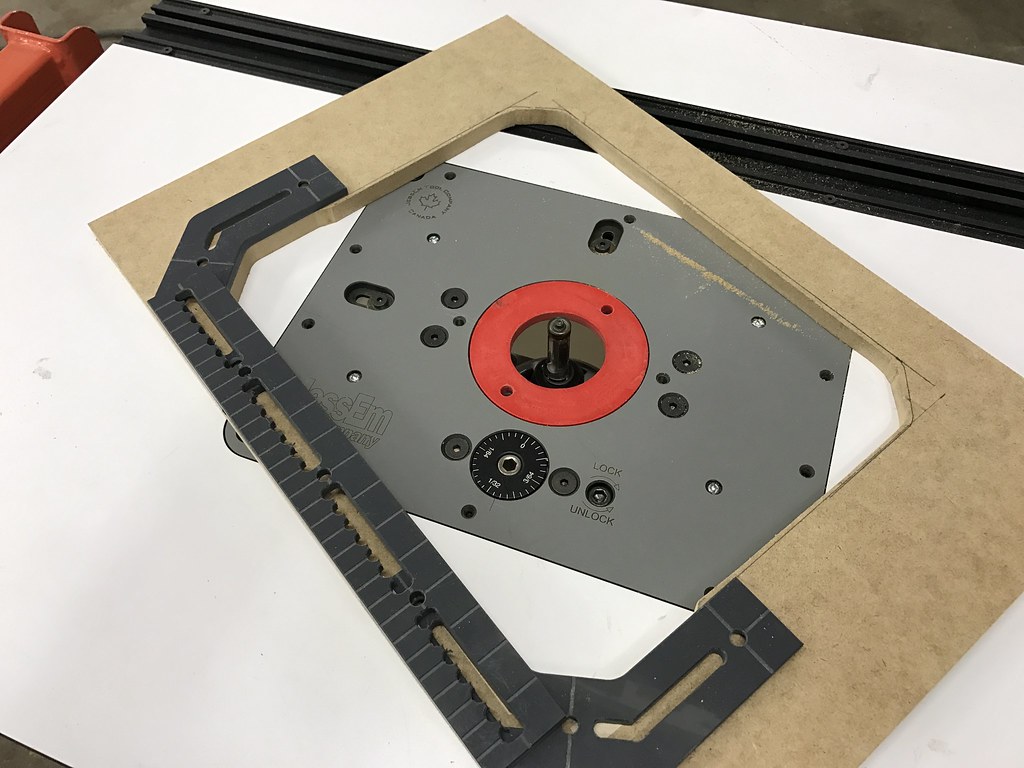
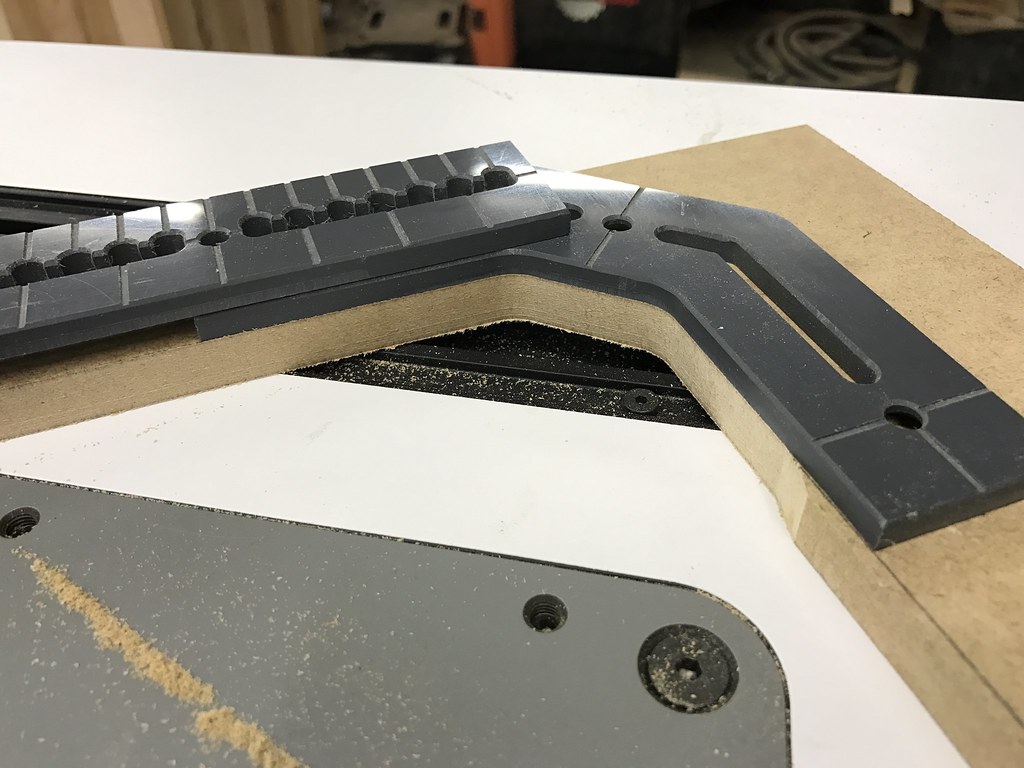
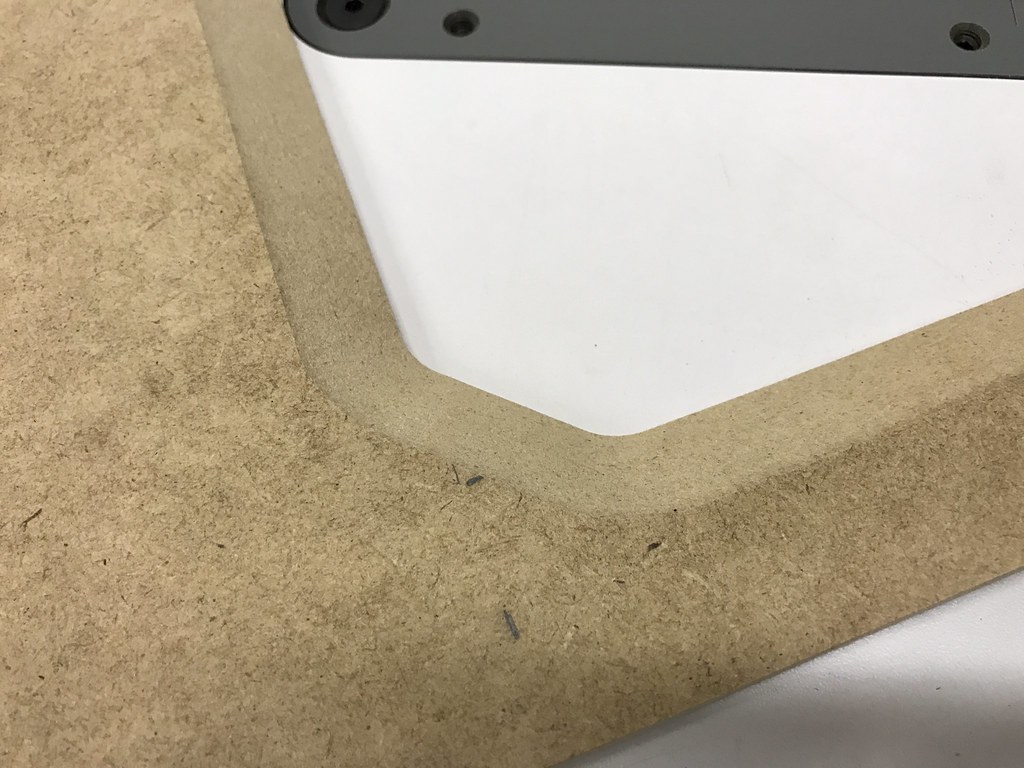
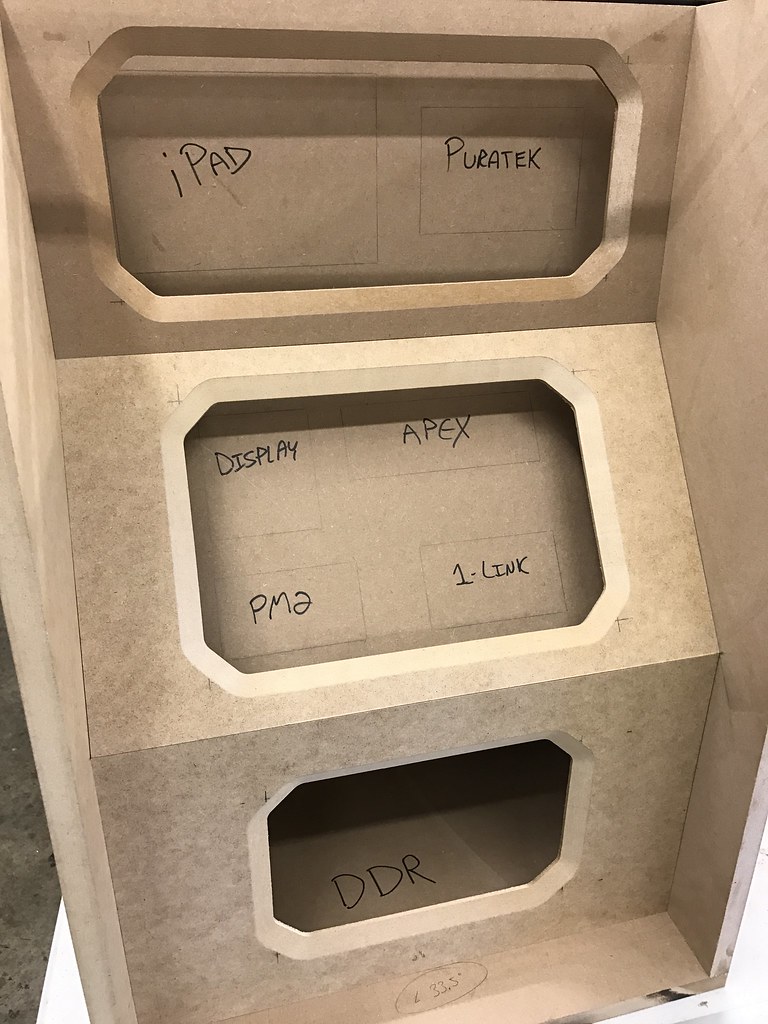
Next up is creating the trim panels that sit above the base panels. These will sit 2" above the base panels and will have a viewing window.... most likely a clear acrylic window mounted to the backside. But we'll see how that pans out... there's a lot that are going into these cosmetically and I may just leave the acrylic window off and leave them open. I decided to do a fairly shallow chamfer on them. Which on the inside edge will be edge lit acrylic... most likely do orange LED for the edge lighting. Then white LED under each module. More on this later. For now, here's how I did the panels... template routing!
 IMG_7516 by Toby Broadfield, on Flickr
 IMG_7517 by Toby Broadfield, on Flickr
 IMG_7518 by Toby Broadfield, on Flickr
 IMG_7519 by Toby Broadfield, on Flickr
 IMG_7521 by Toby Broadfield, on Flickr
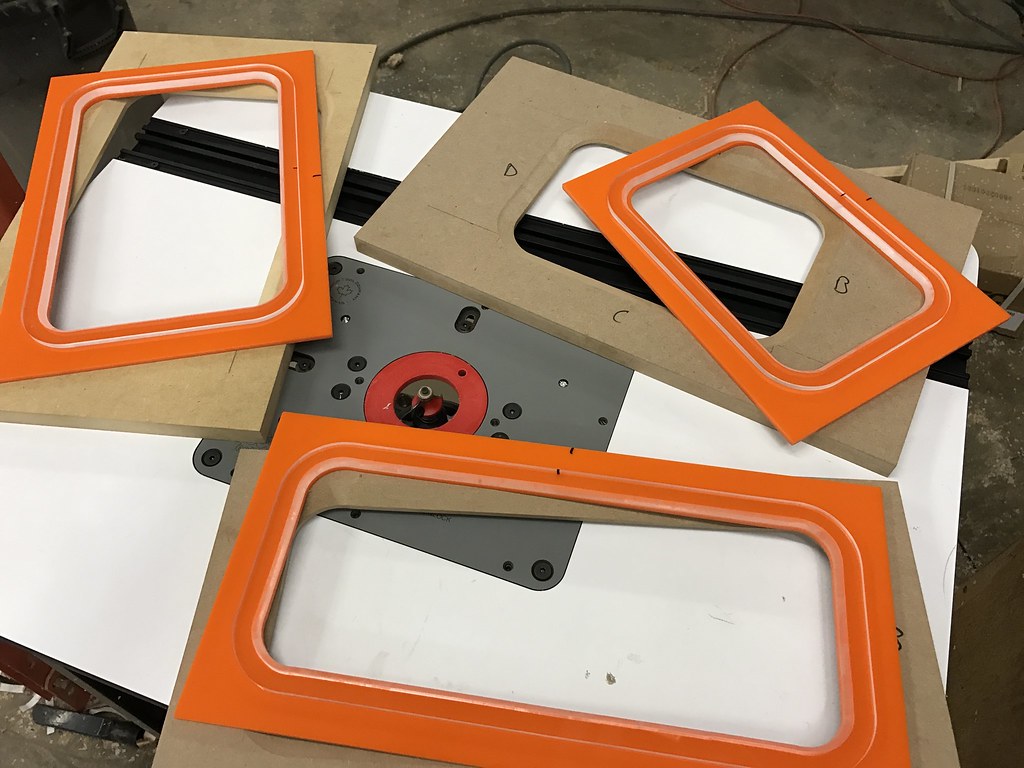
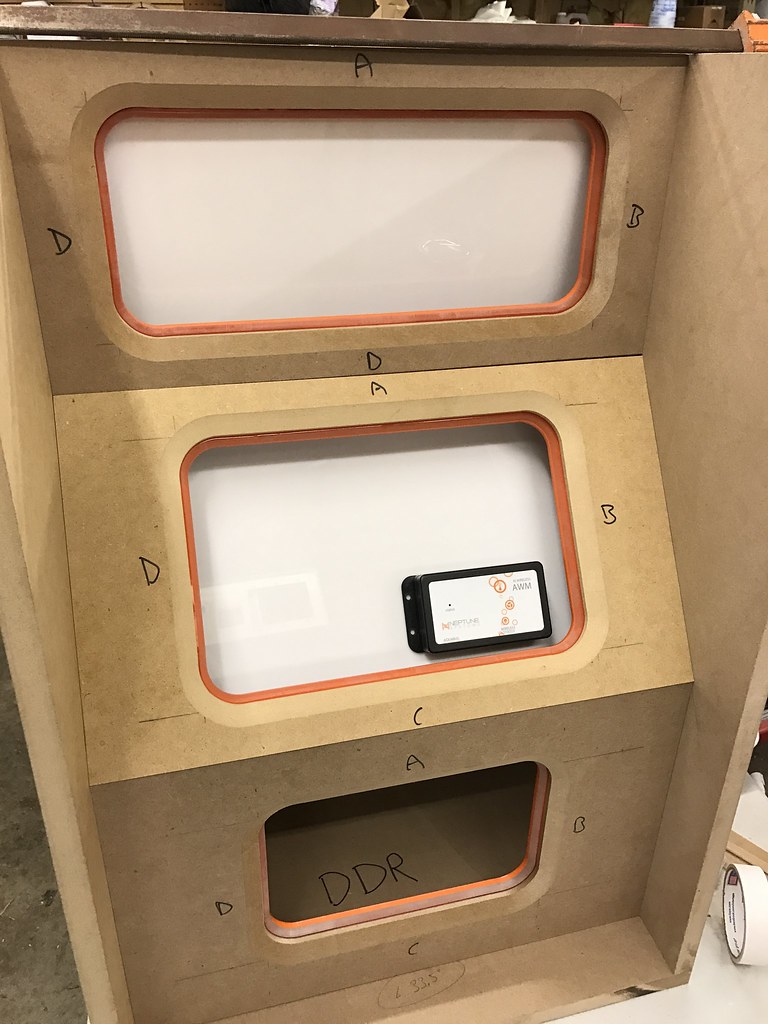
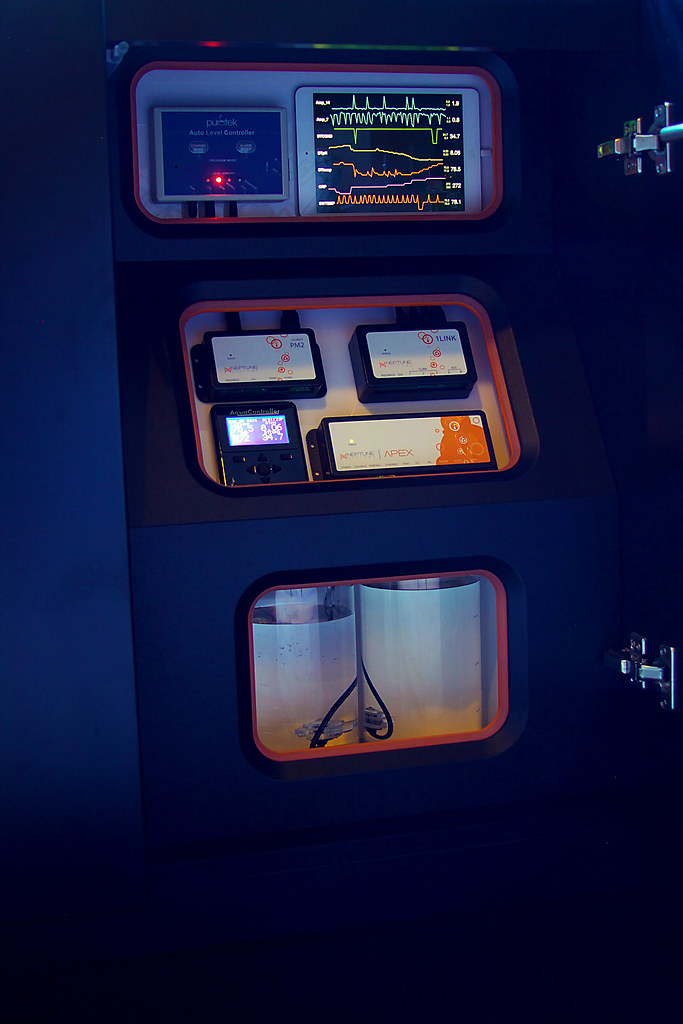
These panels will all be easily removable to get to the modules and/or to hinge up the middle panel for access to everything behind it. I may just leave them as pressure fit or maybe do something with magnets etc... I'll just have to wait to see what I'm feeling when I get to that point. These are going to be black. I haven't decided if I want to paint them smooth black, textured black or wrap them in black vinyl. Again, we'll have to wait and see what trips my trigger at that time.
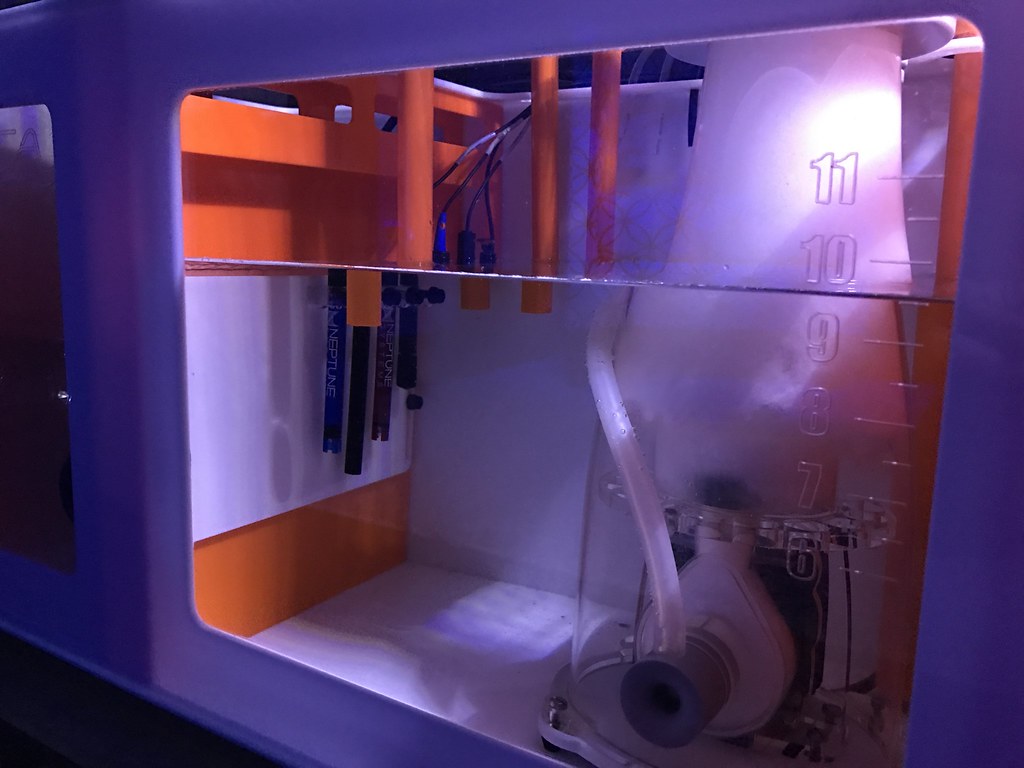
The bottom panel will actually be a viewing window for the Neptune DDR that sits behind there... illuminated by LEDs of course.
 IMG_7557 by Toby Broadfield, on Flickr
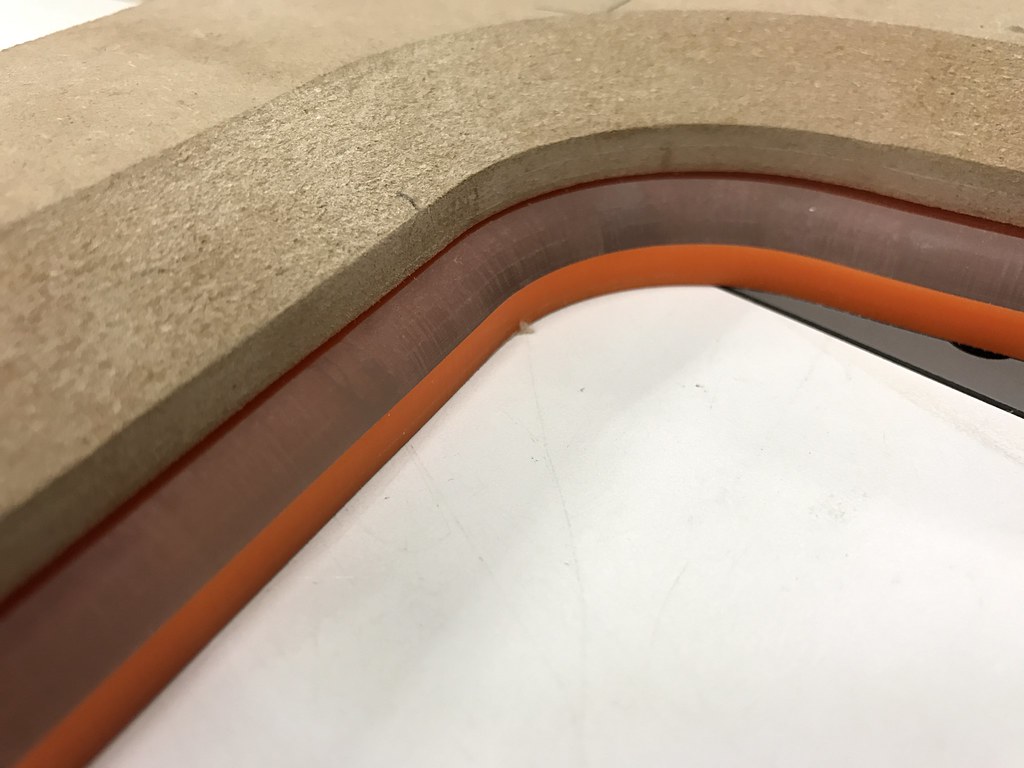
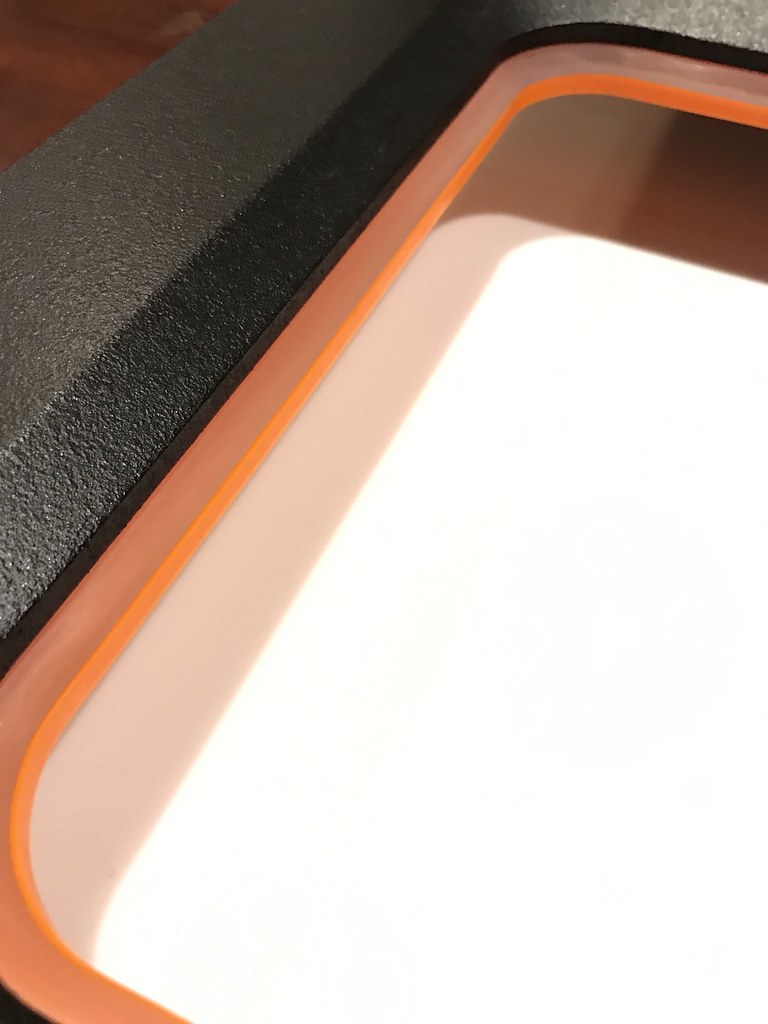
I spoke of the edge lit acrylic earlier. Here's a quick shot of how the acrylic will sit. Once done, that edge will glow orange around all of the openings. I may then have a piece of solid white 1/4" acrylic, like my sump, that sits behind the edge lit panel and steps out a bit with another chamfer.
 IMG_7566 by Toby Broadfield, on Flickr
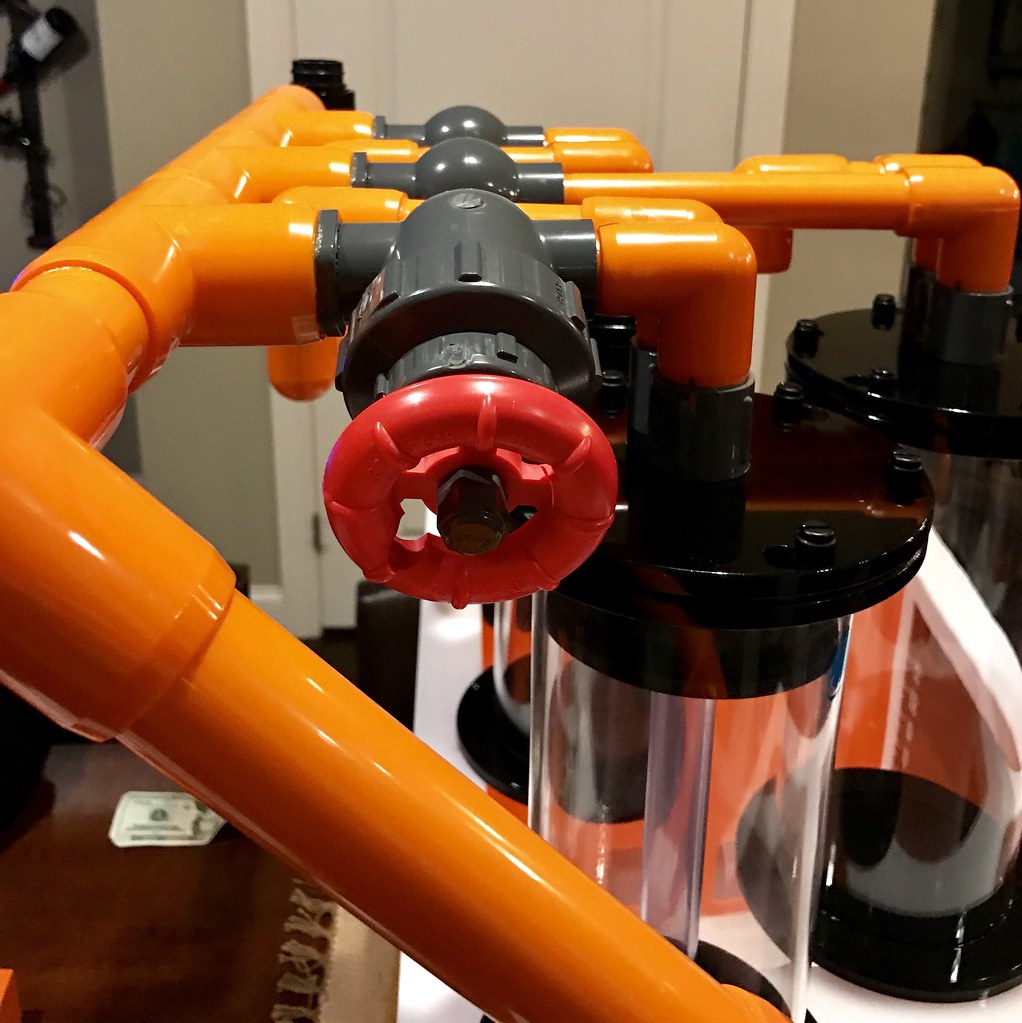
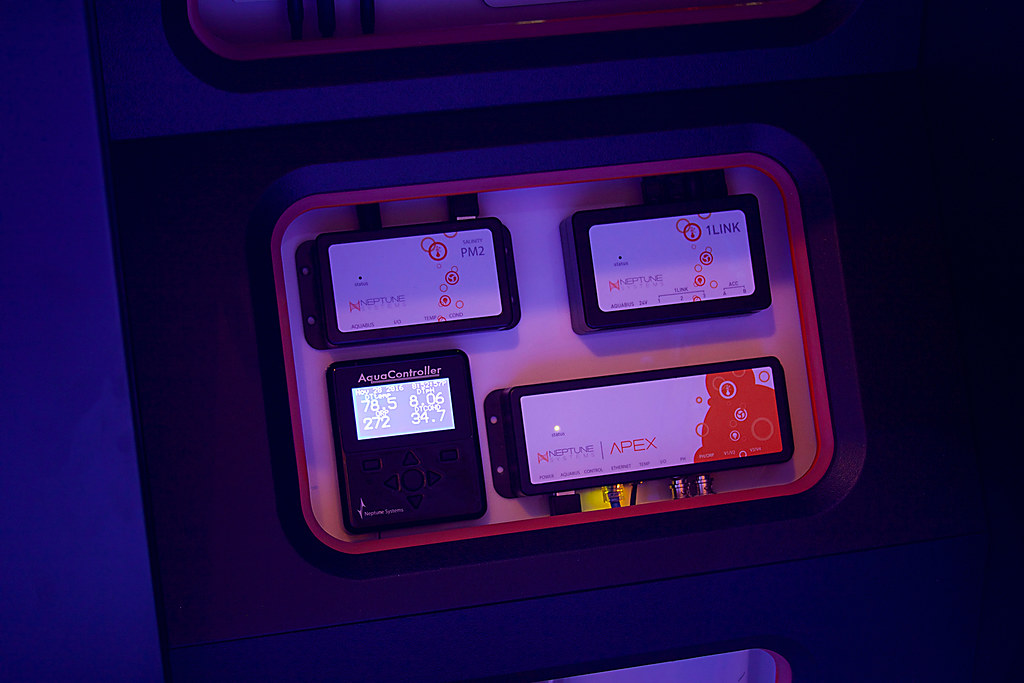
These techniques are all used in my profession and can yield things like the following:

To start off with, I did a mockup of that section of the stand, at work. This would allow me to do all of the fabrication/routering of the new panels at work. With all of the angles and fitment needed, it was going to be very time consuming. This would allow me to finish everything 100% at the shop. Then I could simply bring them home, remove the equipment and old panels, then install the new panels along with the equipment... insuring a perfect fit, even though I built it all off site. Here's a simple mockup of the right side of the stand. NOTE: I didn't feel it necessary to make the mockup the full depth of the Red Sea stand, as I was only concerned with top vertical panel and everything forward of it. And the nailer strips in the following image are only for the purpose of the mockup, to hold the base panels in place while I work on them. Those panels are held in place with hidden brackets in my stand currently.
IMG_7508 by Toby Broadfield, on FlickrThe following image is with the new base plates mocked up. These are in the same exact location as my current ones... why change something that works so well! These will hold all of the equipment as they do now. However, I will be painting these orange to tie in the plumbing color and sump from the sump side. I will also float the modules about a half inch off the base panel. This will allow me to have the grommets hidden under each module and wrap the cables back under each module and out the base panel... cleaner look. I may also mount small LED strips on the underside of each module, facing down, to accent it and create even more of a floating look. This rebuild of the sump side and controller side is going to get some mad LED usage... so hold on! All hidden of course... I hate being able to see the actual LEDs in use, no matter what angle you are looking from.
IMG_7515 by Toby Broadfield, on FlickrNext up is creating the trim panels that sit above the base panels. These will sit 2" above the base panels and will have a viewing window.... most likely a clear acrylic window mounted to the backside. But we'll see how that pans out... there's a lot that are going into these cosmetically and I may just leave the acrylic window off and leave them open. I decided to do a fairly shallow chamfer on them. Which on the inside edge will be edge lit acrylic... most likely do orange LED for the edge lighting. Then white LED under each module. More on this later. For now, here's how I did the panels... template routing!
IMG_7516 by Toby Broadfield, on FlickrIMG_7517 by Toby Broadfield, on FlickrIMG_7518 by Toby Broadfield, on FlickrIMG_7519 by Toby Broadfield, on FlickrIMG_7521 by Toby Broadfield, on FlickrThese panels will all be easily removable to get to the modules and/or to hinge up the middle panel for access to everything behind it. I may just leave them as pressure fit or maybe do something with magnets etc... I'll just have to wait to see what I'm feeling when I get to that point. These are going to be black. I haven't decided if I want to paint them smooth black, textured black or wrap them in black vinyl. Again, we'll have to wait and see what trips my trigger at that time.
The bottom panel will actually be a viewing window for the Neptune DDR that sits behind there... illuminated by LEDs of course.
IMG_7557 by Toby Broadfield, on FlickrI spoke of the edge lit acrylic earlier. Here's a quick shot of how the acrylic will sit. Once done, that edge will glow orange around all of the openings. I may then have a piece of solid white 1/4" acrylic, like my sump, that sits behind the edge lit panel and steps out a bit with another chamfer.
IMG_7566 by Toby Broadfield, on FlickrThese techniques are all used in my profession and can yield things like the following:
")