Most importantly - it fits
")
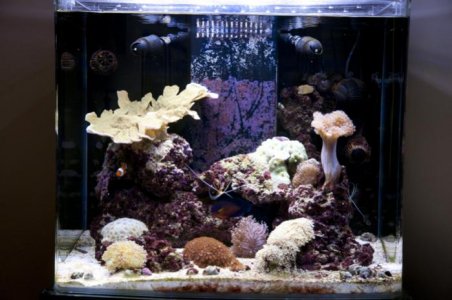
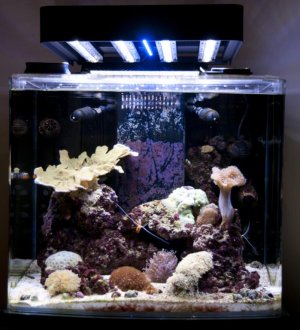
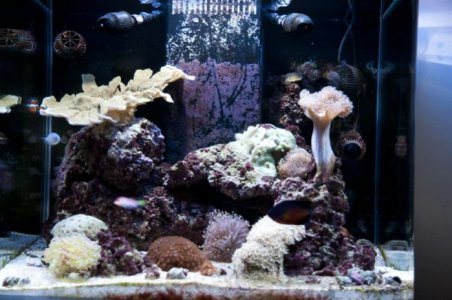
Sorry for the horrible cell cam photos - my son has once again "borrowed" my DSLR.
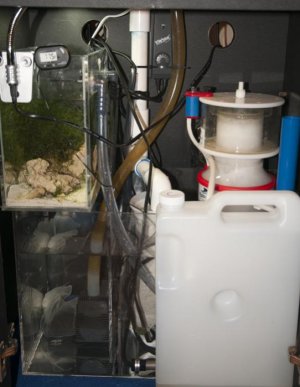
I temporarily installed it in the middle sump section, intending to run both the 9011 and the BM NAC3 side-by-side. I initially configured the 9011 using the "cabinet" (Tunze speak for sump) method using the effluent bubble trap and intake covers. After some quick testing, I found out it was not needed and converted back to the standard install method. I notice no microbubbles reaching the center chamber, much less the tank. This is fortunate as the 9011 would NOT have fit in the skimmer chamber of the sump with the bubble trap pipe installed.
So much for my side-by-side test. Over night, the BM once again stopped running due to calcium deposits. So I removed it and placed the 9011 in the left rear sump chamber. It fits nicely, and the magnet mounting allows you to easily adjust the height.
It's only been running for about 10 hours but so far....wow! It's apparent this thing draws
much more air than the BM. It's already producing very thick skimmate foam. It's dead quiet and doesn't seem that sensitive to water level changes. I've tested it between 9.5" and 10.5" and the impact is negligible (I'm setting the Osmolater to 10" as this works well with both the skimmer and power out drainage from the tanks.
The collection cup is very large, and the drain hoses from the DT and FT make it a tight fit. I've ordered the foam extraction unit which replaces the cup and is much narrower. It also increases the reaction chamber size and allows me to collect the skimmate in a larger container. Another thing I like about the collection cup is that the top locks on. When dosing MB7, the skimmate sometimes becomes so thick (even when skimming wet), it would literally blow the top off the NAC3 and spill back into the tank. This won't be a problem with the 9011.
So far, I've had a 10 point increase in ORP (higher than I have ever had in this setup.) I'm optimistic I may have finally found the best skimmer solution for the tiny 5 1/2" X 6 1/2" space confines of the Cadlights sump.
I'll post more (better) photos of skimmate production as it breaks in and I get my camera back.
So far so good.