jolliebrowngiant
New member
Materials
"¢Dorm-sized refrigerator (1 to 1-1/2 cubic feet).
"¢50 to 100 feet of 3/8 inch hard plastic tubing (depending, vinyl isn't as good a choice here).
"¢PVC fittings (90 degree elbows or straight connects, threaded or slip).
"¢Aquarium safe Silicone sealant.
"¢1/2 inch thin-wall PVC pipe (about 1 foot for the "thru-the-box" connections).
"¢Hand drill and 1/2 inch drill bit (or 5/16 inch if you prefer).
"¢Screwdrivers to fit the various hardware of the particular fridge you own.
"¢Rio 2500 or similar pump/powerhead to push the water through the chiller
If possible, remove the metal box that isolates the ice cube tray/freezer section, but leave the temp probe alone. This will give a better overall temperature control within the cooling box.
The more coils, the better the "pull-down" effect and the more efficient the unit operates. Depending on the brand/model that you are using, you may encounter insulation between the housing and the inner box when drilling your input/output holes. There is no need to seal the door.
"¢Drill your access holes in the top or sides, it really doesn't matter.
"¢Cut 2 pieces of the PVC pipe about 4 inches each.
"¢Insert through the holes drilled and seal VERY WELL with the silicone.
"¢You may want to reinforce these pipes with a little Devcon 5 minute epoxy
"¢Glue or thread your fittings onto these 2 access pipes.
prior to sealing them with the silicone. Keeps 'em from sliding back and forth and breaking the cured silicone seal should you want to move the fridge down the road.
Remember that the more coils inside the box, the better your cooling effect.
Another point to consider, the farther the run of plastic tubing from your sump to the chiller and back, the greater the line loss due to ambient room temperature. Sit the chiller as CLOSE to the sump or aquarium cabinet as possible. You could use pipe insulation wrapped around the tubingrun(s), but this is rather unsightly and not really necessary unless living in a very hot/humid environment.
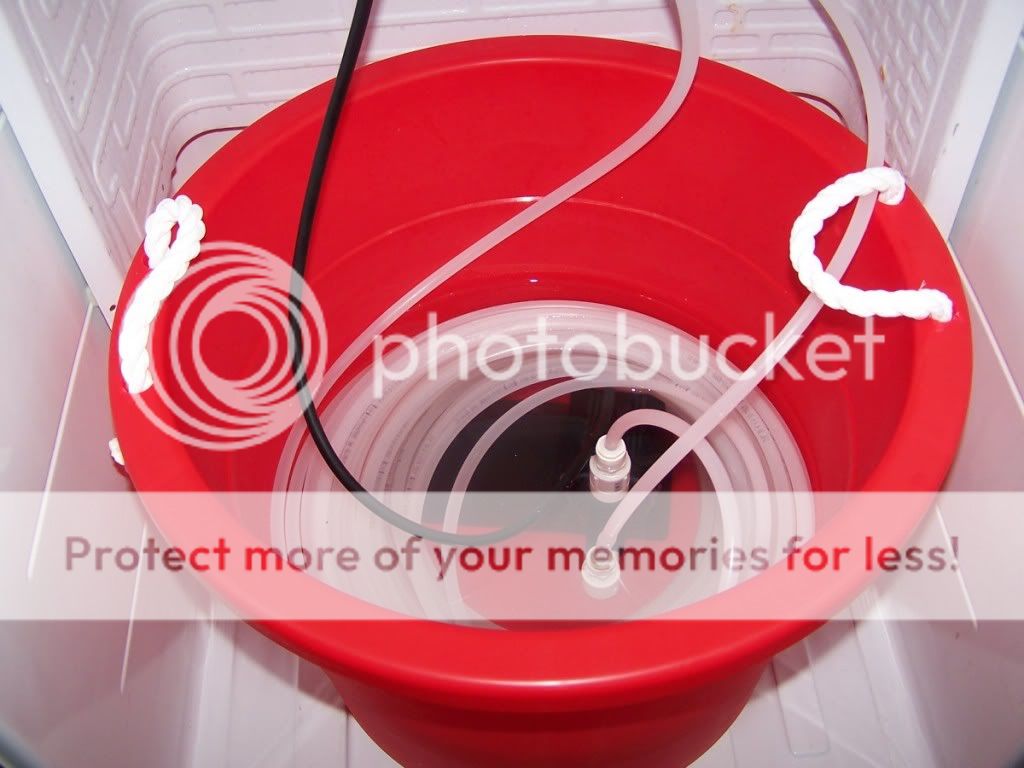
Operation is straight-forward. Remember to keep the flow fast enough to prevent freezing of the coils inside the box. If equipped with a thermostat, your fridge/chiller will be easier to control. Some models only allow you to set the main box temperature, not the freezer compartment. That's another reason why I removed the aluminum ice cube divider and tray. The probe that is attached to the wall of the freezer area will now monitor the entire cavity. Try to use opaque tubing to eliminate algae growth from the sump to the unit and back. You will probably get the black, smudged variety, not the bright green that we see in and around the lighting canopy. I used the milky-white, semi-transparent variety of hard, plastic tubing and experienced this build-up after 6 months or so.
"¢Dorm-sized refrigerator (1 to 1-1/2 cubic feet).
"¢50 to 100 feet of 3/8 inch hard plastic tubing (depending, vinyl isn't as good a choice here).
"¢PVC fittings (90 degree elbows or straight connects, threaded or slip).
"¢Aquarium safe Silicone sealant.
"¢1/2 inch thin-wall PVC pipe (about 1 foot for the "thru-the-box" connections).
"¢Hand drill and 1/2 inch drill bit (or 5/16 inch if you prefer).
"¢Screwdrivers to fit the various hardware of the particular fridge you own.
"¢Rio 2500 or similar pump/powerhead to push the water through the chiller
If possible, remove the metal box that isolates the ice cube tray/freezer section, but leave the temp probe alone. This will give a better overall temperature control within the cooling box.
The more coils, the better the "pull-down" effect and the more efficient the unit operates. Depending on the brand/model that you are using, you may encounter insulation between the housing and the inner box when drilling your input/output holes. There is no need to seal the door.
"¢Drill your access holes in the top or sides, it really doesn't matter.
"¢Cut 2 pieces of the PVC pipe about 4 inches each.
"¢Insert through the holes drilled and seal VERY WELL with the silicone.
"¢You may want to reinforce these pipes with a little Devcon 5 minute epoxy
"¢Glue or thread your fittings onto these 2 access pipes.
prior to sealing them with the silicone. Keeps 'em from sliding back and forth and breaking the cured silicone seal should you want to move the fridge down the road.
Remember that the more coils inside the box, the better your cooling effect.
Another point to consider, the farther the run of plastic tubing from your sump to the chiller and back, the greater the line loss due to ambient room temperature. Sit the chiller as CLOSE to the sump or aquarium cabinet as possible. You could use pipe insulation wrapped around the tubingrun(s), but this is rather unsightly and not really necessary unless living in a very hot/humid environment.
Operation is straight-forward. Remember to keep the flow fast enough to prevent freezing of the coils inside the box. If equipped with a thermostat, your fridge/chiller will be easier to control. Some models only allow you to set the main box temperature, not the freezer compartment. That's another reason why I removed the aluminum ice cube divider and tray. The probe that is attached to the wall of the freezer area will now monitor the entire cavity. Try to use opaque tubing to eliminate algae growth from the sump to the unit and back. You will probably get the black, smudged variety, not the bright green that we see in and around the lighting canopy. I used the milky-white, semi-transparent variety of hard, plastic tubing and experienced this build-up after 6 months or so.
")