Drjuice28's 210 AGA build from scratch (lots of pics)

OK, made some progress after some stalling...

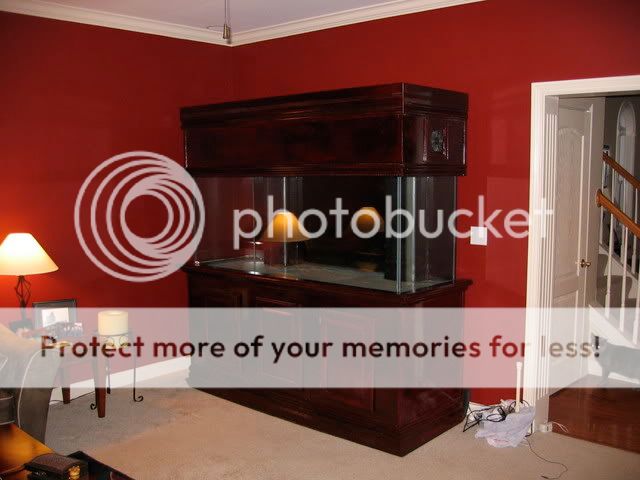
1. Finally had the tank moved into the house, and I promised some pictures. I set it on a treadmill thick mat, and leveled it with a couple of shims to the left side.

IMG_2175.jpg


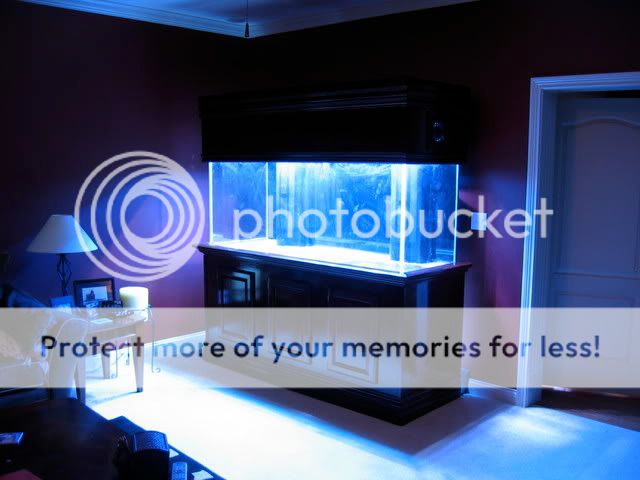
After getting it set up, I sat waiting for a replacement 250W MH bulb, as I had blown one in the build process. It finally arrived, and I lit up the beast! Without water, the tank makes the entire house glow as eerie blue. I'm sure that the neighbors wonder...

IMG_2193.jpg


IMG_2192.jpg


IMG_2190.jpg


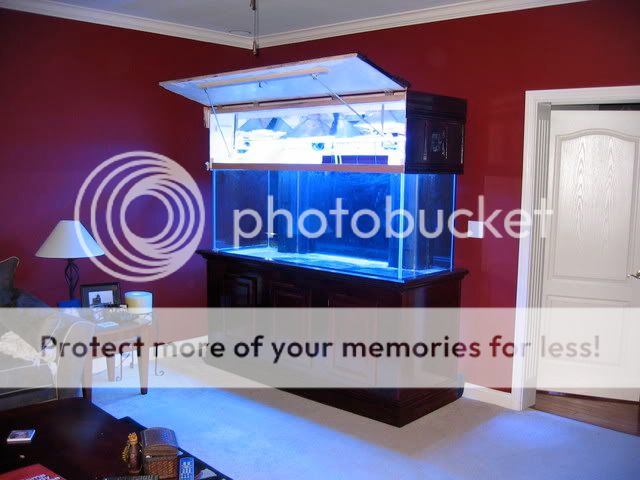
The last picture shows off the strut system that I put into the canopy lid. The prior owner didn't appear to have one, makes me wonder what a pain it must have been to do any work inside the tank. Maybe that explains why it looked so terrible and covered with algae when I picked it up!
 
I've started working on the plumbing, but it is definitely a ways from complete. I think that I'll tackle it in 2 phases. Since it will drain and return through the wall and into the maintenance closet behind, I will start with the lines in the living room. I ordered a few new bulkheads and spa flex from Savko (super fast shipping by the way). The drain lines are 1.25 inches, so I adapted them up to 1.5 inch, added a double union ball valve to each, then connected them to one another. Next, I'll do the same with the 1 inch retuns, and drill through the drywall into the back room.

The real hangup is still planning out that sump. Until I decide on the layout, I won't be able to finish the plumbing (as t connects directly) I'm looking at a bunch of Melev's setups to see which I want to make, or if I want to stay simple like I have with those I've made in the past. I feel like I need to plan reactor space for equipment that I don't yet own! Any suggestions?

I drilled my first piece of glass yesterday too! A set of glass tops came with the sump tank that I purchased a couple of months ago. Since I plan on drilling that 75G for a return pump, I thought that I'd better get some practice. It really wasn't too difficult. The key is to TAKE YOUR TIME! Plan on 20 minutes per hole, and you're sure to do fine.

IMG_2199.jpg


IMG_2200.jpg


Oh yeah, also got a couple of MP40W vortechs... :)

IMG_2197.jpg
 
Nice job on the stand! I wonder, from your full tank shot, if you've left enough room for aquascaping/working inside the tank with your lighting being so close to the water. I have 12" to the water surface from my reflector and it is barely enough to get to the bottom of a 24" deep tank.....have to get a grabber or your shoulder in there to reach the bottom!
 
Well, made some progress on the sump.

I started by drilling it for a 2" bulkhead. It took a while to build up the nerve to start, but once I did, patience got me through it. I used a starter template to get the diamond bit going, then had a hose running constantly over the site. I think that it took a good 20-30mins to get through it. End result was great, no chipping or anything.

After getting that done, I went to Lowe's to buy the acrylic needed to section off the sump compartments in the 75G. I have always liked using the .22 Lexan product, easy to work with. I cut the pieces from two 24x48 inch sheets, and rough-fitted them in. Looked great, so i started siliconing them all into place. I'll post some pics of the whole thing when its done.

Now the bad news. I had to move the holding tank that my old clowns were in since it was on the wall that I plan to plumb the new lines through. In the process of transferring the remaining live rock, coral, and clowns, I must have done something wrong. Either changed the salinity by hastily adding an extra couple of gallons of freshly mixed salt H2O, or stirred up too much detritus in the transfer, because they both passed away. I guess there won't be a big homecoming for them into the new tank after all, which is really sad. I've had them for for more than 3 years now, and I'll miss them when the new tank is up and running. :(

DSC00177.jpg
 
Great job on the sanding and refinishing. It looks a lot better than before.

When I upgraded to my 210 I had my fish (including my 2 clowns that I had for years) in a 60 gallon holding tank without a skimmer. I performed water changes also, but the transfer took longer than I thought and I lost my 2 clowns. Sorry to hear about your loss. Hopefully you can get the corals into their new homes with few casualties.
 
Man, you're a freakin GENIUS!!!

Everything really looks awesome!!!

I'm sorry to hear about your clowns though. :(

I have a lot of admiration for people who can do what you've done. I think all that work is part of the fun of the hobby.
 
Thanks for the encouragement! I agree, I'm having as much fun building the system as I will enjoying it later on once it's finished.

I've been making some real progress the last couple of days! The Marco rock has been through 3 1/2 weeks of soak with a couple of 100% water changes. I had plans to lay out some interesting aquascaping, then load it all into the tank with some extra lifting help.

Here it is all laid out in the lawn, 200lbs of Marcorock:

IMG_2194-1.jpg


IMG_2195-1.jpg


IMG_2196-1.jpg


After taping out a layout of the tank on the garage floor (including the overflows), I started building. I used a 1/4 inch drill bit, about 100 clear zip ties, and a LOT of time. Built some pretty cool structure in my opinion. The first time I tried to move one of the towers, though, it snapped a bunch of zip ties, and started to lose shape.
Knowing that I needed more support, I picked up a bag of Portland cement that a bunch of people have had good luck with in DIY rock projects. I used it to support the towers at the seams, and a bunch along the back surfaces. Here's a pic of the first one done, still wet so the color is a bit off...

IMG_2256.jpg


IMG_2254.jpg


IMG_2253.jpg


IMG_2251.jpg


I'll give it a couple of days to dry, then get the boys over to help lift these things into the tank! Each tower sits on a 10"x10" sheet of acrylic as a stable base to disperse the weight of the tower across the floor of the tank.
 
GREAT JOB on the rock works..... :)

Looks like u will need quite some guys to help u carry those rocks.... :)
 
Thanks, yeah I warned my neighbors ahead of time that I'd need to borrow them for a while...

Yep, all Marco rock. I highly recommend the stuff, it's so easy to work with, and really porous, giving you a lot of rock for the per lb money!
 
This going to be one fantastic build you have there..... can't wait for it to be in the tank...

U're the master at DYI - great job once again...!! :)
 
It has the standard AGA bracing at top and bottom if you're talking about the tank itself. I'm laying 1/4" acrylic sheets along the bottom to disperse the weight of the rocks more evenly and avoid any pressure points.

If you mean the tank and stand as a whole, I've got it on a 1/2" treadmill mat over carpet, and my living room is on a slab, no basement...
 
the guy who sold that tank probably shelled out 2k for a custom job that look shalf as good as your finished product!
 
Back
Top