You are using an out of date browser. It may not display this or other websites correctly.
You should upgrade or use an alternative browser.
You should upgrade or use an alternative browser.
Ghetto Rig
- Thread starter username in use
- Start date
 I was pretty proud of it back in 2010, until I realized it wasn't waterproof, or fish safe for that matter XD
firebirdude
User and Abuser

I...uh.... I don't even know what that's suppose to be???!:lmao:
firebirdude
User and Abuser
Where's that picture of the guy who was using the heating coil from the stove for an aquarium heater?
Biotopes
New member
I...uh.... I don't even know what that's suppose to be???!:lmao:
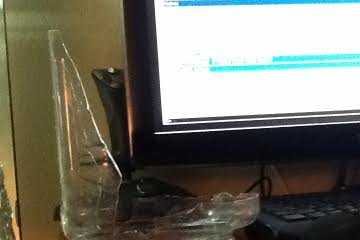
It was supposed to be a crab tank, but it wasn't close to waterproof and the front glass exploded! LOL
")
This is pretty ghetto:
Stu
any build thread on this. im interested is something this large.
Filter Sock Holder
Filter Sock Holder
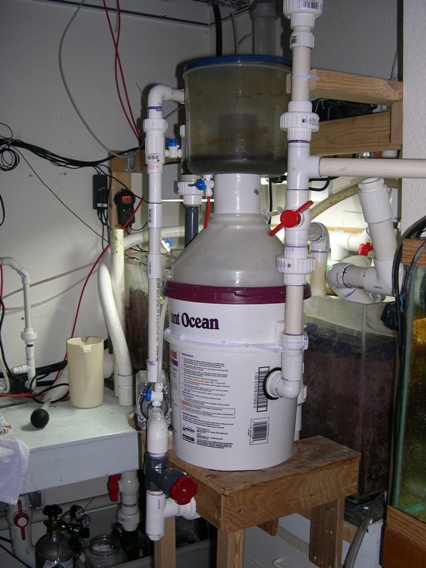
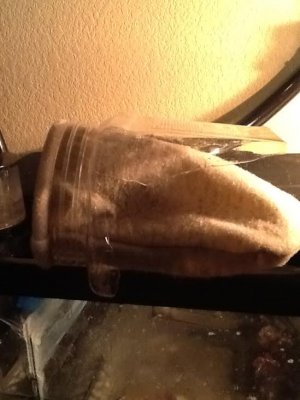
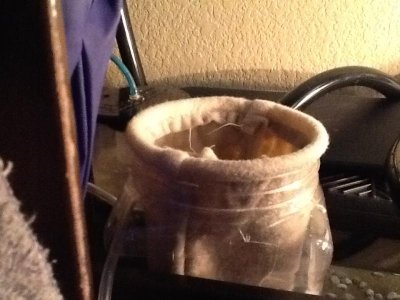
:wave:Hi Folks,
My filter sock holder. Miracle Mud canister works great for the four (4) inch socks.
http://reefcentral.com/forums/attachment.php?attachmentid=257396&stc=1&d=1388200964
http://reefcentral.com/forums/attachment.php?attachmentid=257397&stc=1&d=1388200994
http://reefcentral.com/forums/attachment.php?attachmentid=257398&stc=1&d=1388201012
Filter Sock Holder
:wave:Hi Folks,
My filter sock holder. Miracle Mud canister works great for the four (4) inch socks.
http://reefcentral.com/forums/attachment.php?attachmentid=257396&stc=1&d=1388200964
http://reefcentral.com/forums/attachment.php?attachmentid=257397&stc=1&d=1388200994
http://reefcentral.com/forums/attachment.php?attachmentid=257398&stc=1&d=1388201012
Attachments
Reeferz412
Coral Hoarder
any build thread on this. im interested is something this large.
http://www.reefcentral.com/forums/showthread.php?s=&threadid=1386605
http://www.reefcentral.com/forums/showthread.php?t=1017691&page=2
KCFITZ78
Top Prospect
DIY Internal Overflow Box w/ 2 DIY PVC Overflows
DIY Internal Overflow Box w/ 2 DIY PVC Overflows
I am using one DIY Acrylic overflow box and two DIY PVC Overflows to use in my 65 Gallon Acrylic Hexagon tank. Requires modifying a "hang on style specimen container" with slots and mounting point.

1) I created a template by laying out the slots size and spacing. I went with 3/16" wide slot by 1" long and the slots are spaced 1/4" apart.

2) Next I took the bottom template, cut out the perimeter, and took a push pin and punched holes for the centers of the circles on the template.
3) Next I taped the template on the front of the specimen container and took a marker and marked the specimen container for each hole center and then removed the template. These marks are where you drill holes with a 3/16" drill bit. I then repeated this step for the back of the specimen container.
4) I took my wife's blow dryer (shhhh don't tell her) and heated the specimen container before I drilled the holes. This will help soften the plastic specimen container.
5) Now time to drill the holes..... but do not apply a lot of pressure, let the drill do the work otherwise you might crack the container. This is done for the front and back of the specimen container.
6) Next I took a straight edge and a marker and drew lines right on the container. I drew a line from the edge of the top circle to the bottom circle to make the slot as seen in the top template. This is done for the front and back of the specimen container.
7) Next is to cut the slots. For this I used my B&D Rotary tool with a cutoff disc. A Dremel tool would work to. This is done for the front and back of the specimen container.

8) Last, I used a small file to clean up all the slots. Then I also used a grill lighter/torch to flame kiss all the slots so that any small cracks, sharp edges and burrs would melt/smooth/fuse. This is done for the front and back of the specimen container.
As far as mounting goes, I had to drill 2 holes on the specimen container tab/hanger, drilled 2 holes in my tank top and mounted it with 1/4"-20 nylon screws and nylon wing nuts ..... so this all depends on what you require for mounting it to your display tank.


DIY Internal Overflow Box w/ 2 DIY PVC Overflows
I am using one DIY Acrylic overflow box and two DIY PVC Overflows to use in my 65 Gallon Acrylic Hexagon tank. Requires modifying a "hang on style specimen container" with slots and mounting point.
1) I created a template by laying out the slots size and spacing. I went with 3/16" wide slot by 1" long and the slots are spaced 1/4" apart.
2) Next I took the bottom template, cut out the perimeter, and took a push pin and punched holes for the centers of the circles on the template.
3) Next I taped the template on the front of the specimen container and took a marker and marked the specimen container for each hole center and then removed the template. These marks are where you drill holes with a 3/16" drill bit. I then repeated this step for the back of the specimen container.
4) I took my wife's blow dryer (shhhh don't tell her) and heated the specimen container before I drilled the holes. This will help soften the plastic specimen container.
5) Now time to drill the holes..... but do not apply a lot of pressure, let the drill do the work otherwise you might crack the container. This is done for the front and back of the specimen container.
6) Next I took a straight edge and a marker and drew lines right on the container. I drew a line from the edge of the top circle to the bottom circle to make the slot as seen in the top template. This is done for the front and back of the specimen container.
7) Next is to cut the slots. For this I used my B&D Rotary tool with a cutoff disc. A Dremel tool would work to. This is done for the front and back of the specimen container.
8) Last, I used a small file to clean up all the slots. Then I also used a grill lighter/torch to flame kiss all the slots so that any small cracks, sharp edges and burrs would melt/smooth/fuse. This is done for the front and back of the specimen container.
As far as mounting goes, I had to drill 2 holes on the specimen container tab/hanger, drilled 2 holes in my tank top and mounted it with 1/4"-20 nylon screws and nylon wing nuts ..... so this all depends on what you require for mounting it to your display tank.
firebirdude
User and Abuser
Wow. That's not even ghetto rigged. That's a full on well-executed re-purpose!I am using one DIY Acrylic overflow box and two DIY PVC Overflows to use in my 65 Gallon Acrylic Hexagon tank. Requires modifying a "hang on style specimen container" with slots and mounting point.
KCFITZ78
Top Prospect
Also cut my 4 foot long PC Light in half to fit under my hood.
Here is my modified Light Fixture that was 48" long. Yes... I cut the aluminum housing in half and made my own end caps from a cutting board. I bought a used Current USA Satellite Dual 65 Watt Power Compact Light Fixture w/ LED Lunar Moon Lights.


Here is my modified Light Fixture that was 48" long. Yes... I cut the aluminum housing in half and made my own end caps from a cutting board. I bought a used Current USA Satellite Dual 65 Watt Power Compact Light Fixture w/ LED Lunar Moon Lights.
firebirdude
User and Abuser
haha love it. Good work man!