You are using an out of date browser. It may not display this or other websites correctly.
You should upgrade or use an alternative browser.
You should upgrade or use an alternative browser.
GHL Mitras Club
- Thread starter rodneyri
- Start date
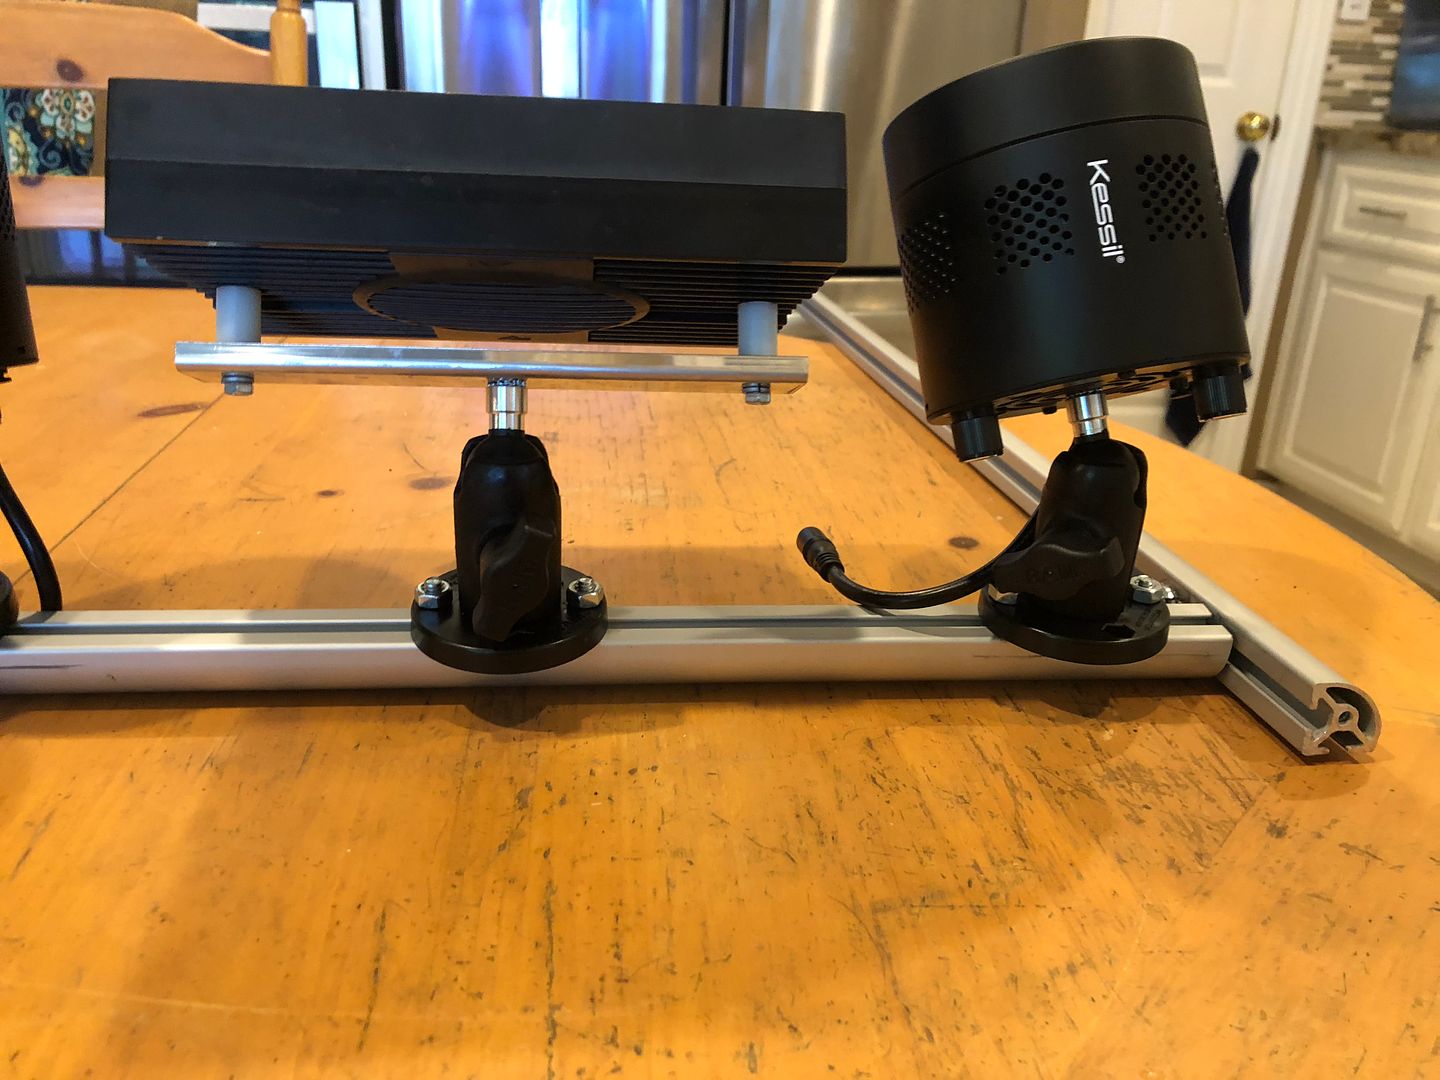
The mounts work great with any T Slot alumina extrusion just like those from 8020. You just use carriage bolts to slide into the T slot and then nuts on the articulating mount button or the nuts that you can get from 8020 that go into the T slot and matching screws from the outside to hold the articulating button in place.
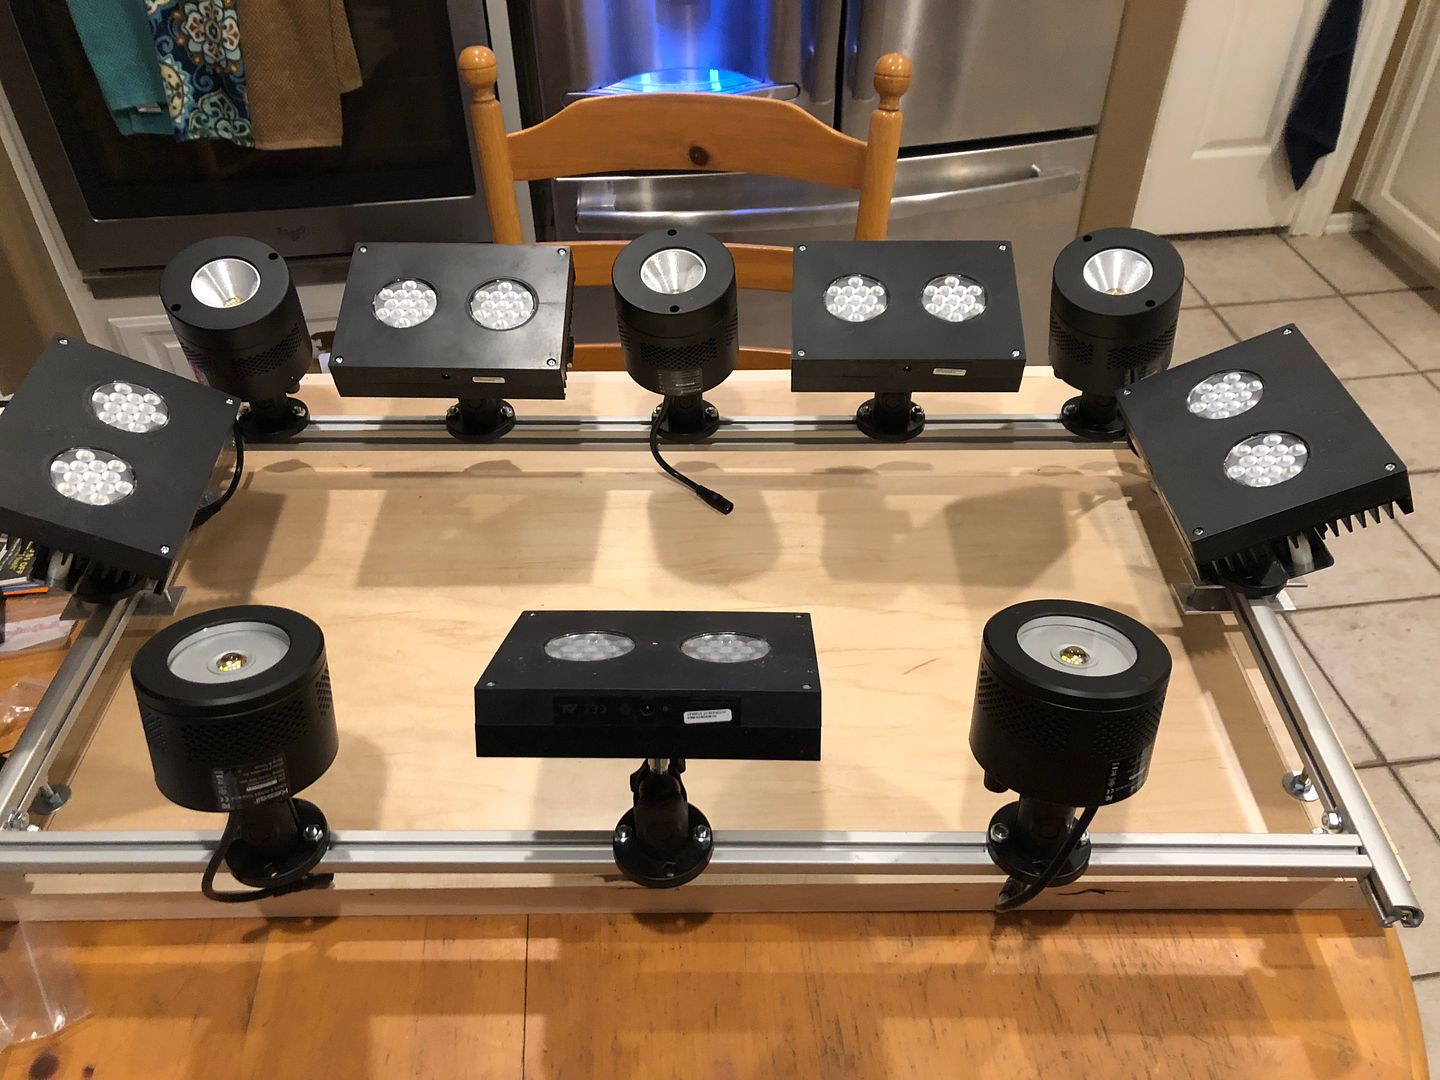
This is a rack I built for a customer using his existing lights and some T slot extrusion I had laying around. These are mounts from the same source mounted to T slot extrusions similar to thiose available from 8020. The slot is the same and in this case, I used carriage bolts. If I were to do it again, I would likely use the nuts that go into the extrusion instead of the carriage bolts.
Hey Slief........if you or any of the guys out there see this and can help me out it would be appreciated.
GHL evidently doesn't find it necessary to include any instructions whatsoever with their mounting brackets.
Looking for how and where these are to be exactly used.
Thanks.......Craig

slief
RC Sponsor
Hey Slief........if you or any of the guys out there see this and can help me out it would be appreciated.
GHL evidently doesn't find it necessary to include any instructions whatsoever with their mounting brackets.
Looking for how and where these are to be exactly used.
Thanks.......Craig
Your image didn’t show up but I got your PM. Here are a couple pictures I just took for you since I have a flex mount here.
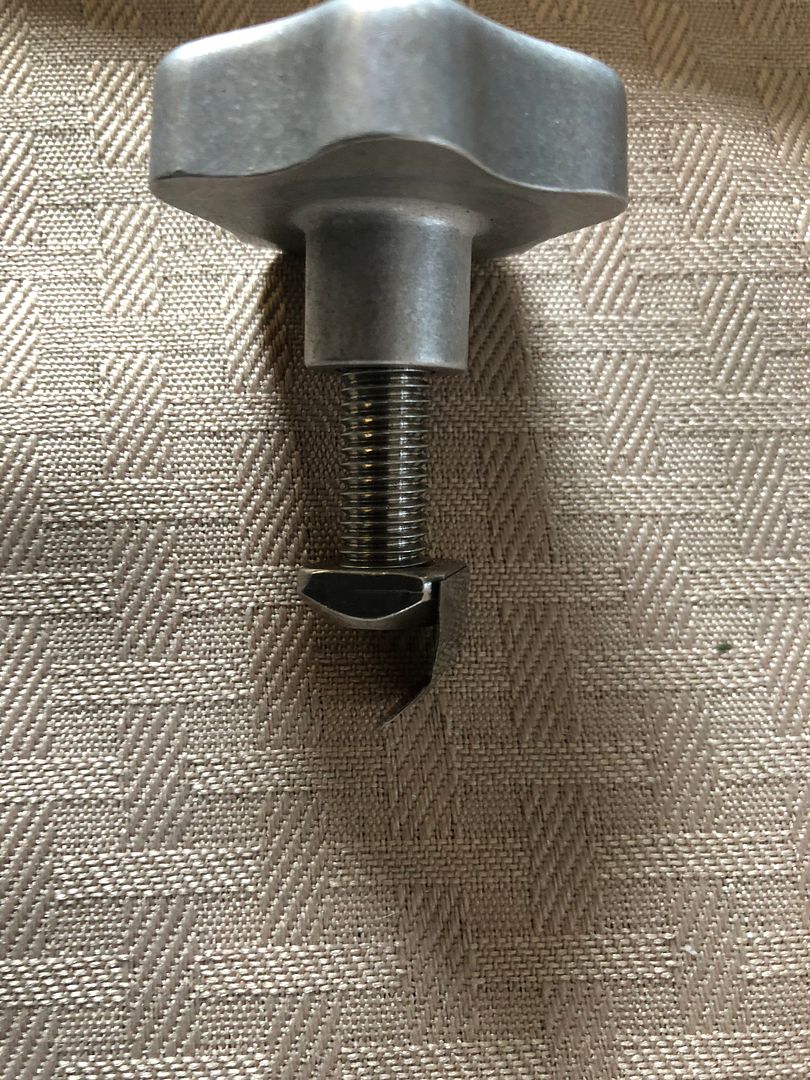
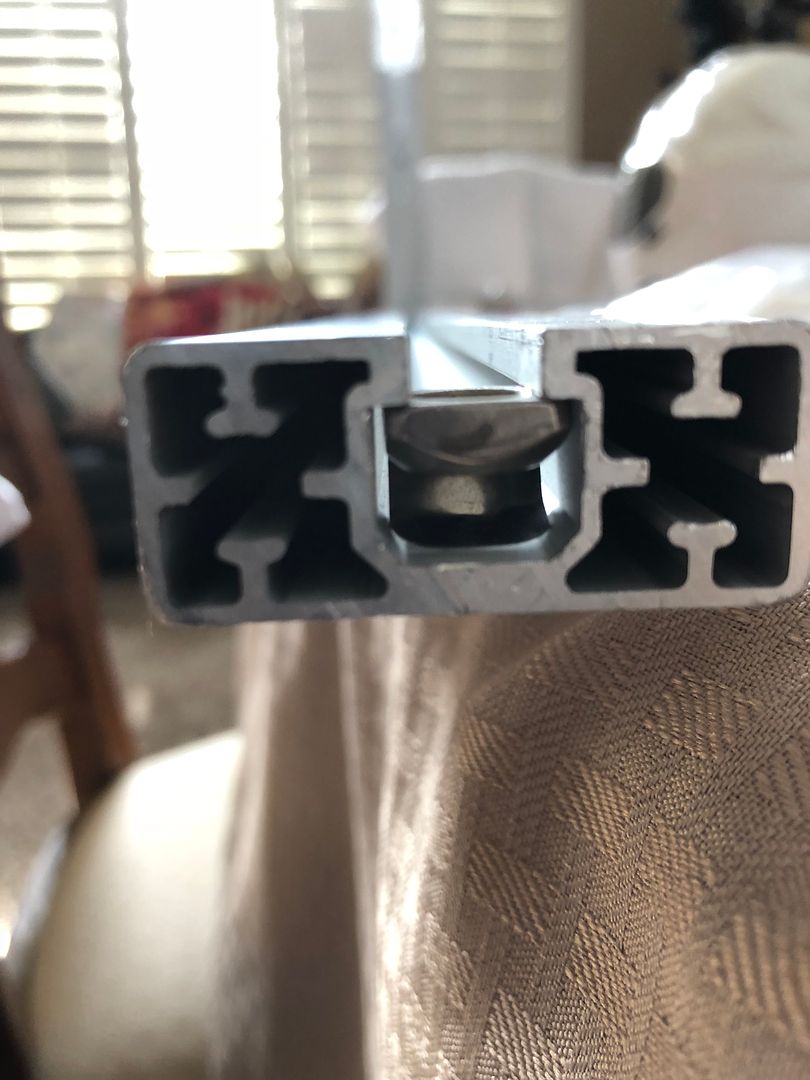
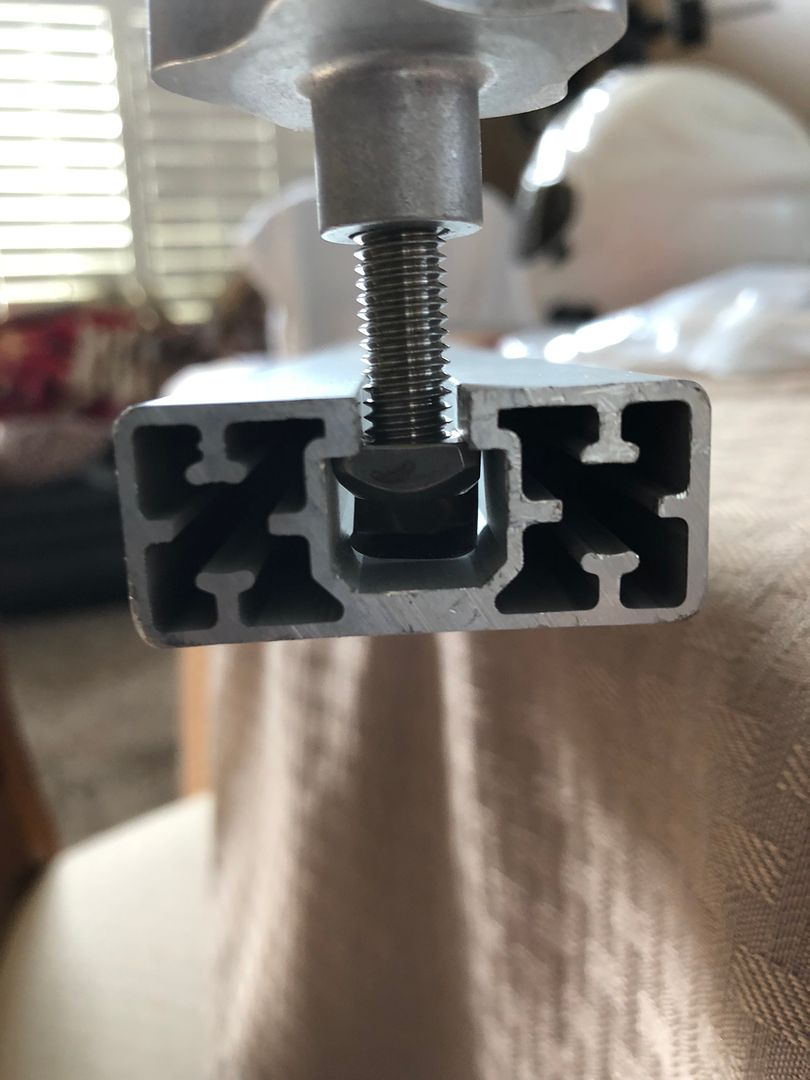
In a nutshell, the nut with the tab goes into the extrusion. You need to compress the tab a bit as you slip the nut into the slot. The tab holds the nut in place and keeps it from sliding out when you insert the bolt with the thumb screw through the stand and into the nut in the extrusion.
Drill two holes in the stand, slip nuts into the extrusion at the same spacing as the holes in the stand. Insert bolts with thumb screws through the stand and into the nuts inside the extrusion and tighten.
These pictures should make it pretty clear. I inserted the thumb screw assembly just so you can see how that all goes together.
This is the nut on the thumb screw.
This shows the orientation of the nut in the extrusion.
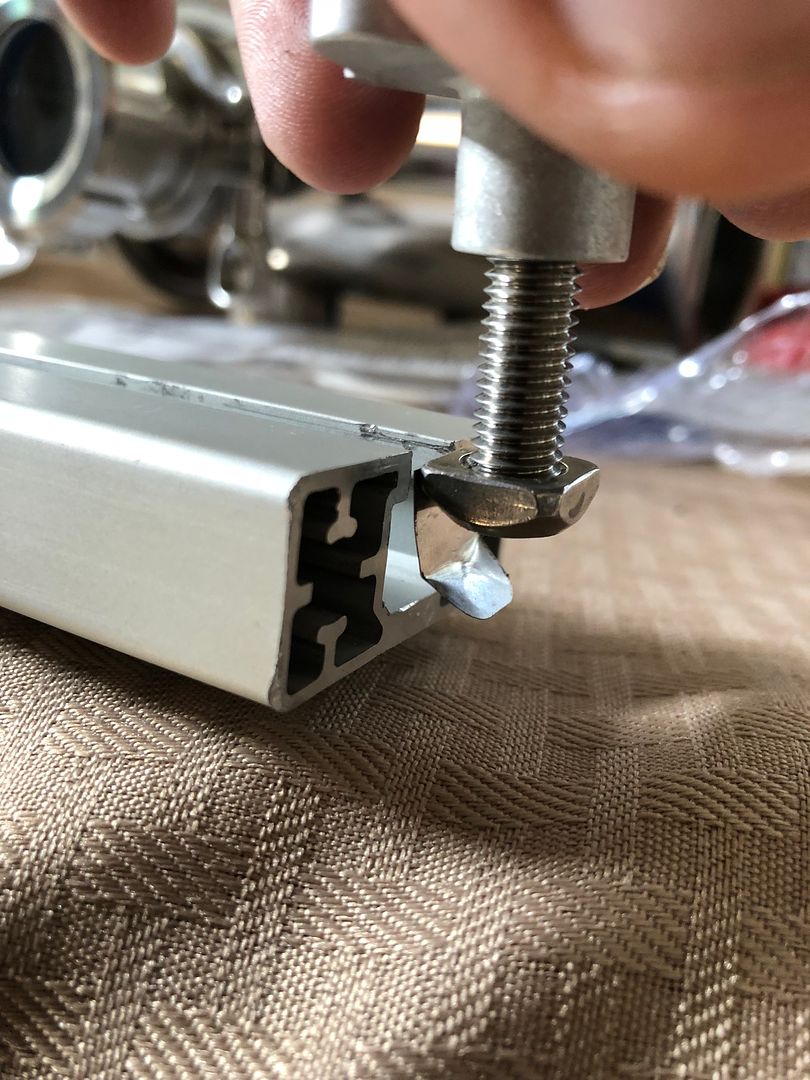
The nut inside the extrusion.
Nut in the extrusion with the thumb screw/bolt inserted.
Marco@GHLUSA
New member
Just joined the Mitras club with 4x L7206's over my 150g, 5x2x2. So far, so good. My only issue is that the keys on one unit won't light up or work very well. I've tried doing the key calibration but it doesn't help the issue. Any suggestions?
Send me a PM, please, with the details.
-Marco
Send me a PM, please, with the details.
-Marco
PM sent
brianmsu80
Member
What controllability do you have over the built-in LCD display on the Mitras LX7206?
Can you dim it? Can you also schedule for it to go on and off at certain times?
Can you dim it? Can you also schedule for it to go on and off at certain times?
nycman
New member
What controllability do you have over the built-in LCD display on the Mitras LX7206?
Can you dim it? Can you also schedule for it to go on and off at certain times?
According to the manual...
Display bright (0% - 100%) determines the display brightness during the day
Display dark (0% - 100%) determines the brightness of the display at night
Display dark Start and End determine the time in which the display is to be dimmed.
slief
RC Sponsor
Hey there Slief......been awhile, I think I replied via email to you before. But just in case I wanted to say thank you again for the previous help with advice and pics.
Was revisiting the thread and didn't reply back on here.
Take care.....Craig
:beer:
Halfmoon61
New member
nycman
New member
Does anybody have a light profile they would like to share?
Sent from my iPhone using Tapatalk
If you provide your email I can send a couple of variants of a ~12 hour lighting period - sunrise, 21K blues to 14K whites back to 21K blues and then sunset.
theshaman
Member
If you provide your email I can send a couple of variants of a ~12 hour lighting period - sunrise, 21K blues to 14K whites back to 21K blues and then sunset.
Hi. I just pm you my email
Thank you so much
Sent from my iPhone using Tapatalk
slief
RC Sponsor
A question for you Mitras LX7 users. How many lights would you put over a 48 x 30 x 22 tank and in what orientation?
The tank will be a mix of sps and lps.
You'd need at least 2 should be fine. I'd run them from to back because of the 30" width.
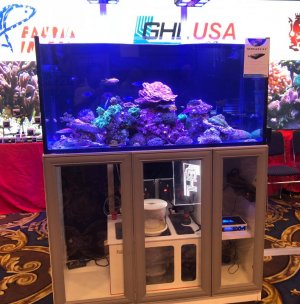
This was 2 LX7's over a 48" tank at MACNA. Not a great picture but the tank looked great under the two LX7's.
Attachments
Last edited:
nycman
New member
A question for you Mitras LX7 users. How many lights would you put over a 48 x 30 x 22 tank and in what orientation?
The tank will be a mix of sps and lps.
I am running 4 front to back on my 72x26x24. I have them dialed all the way up with a 12 hour photo period between 17000K and 21000K. Growing SPS, and Coraline algae on the front and side glass.
") , would be best. I just wasn't sure that they could cover a full 24" in that configuration.
, would be best. I just wasn't sure that they could cover a full 24" in that configuration.James77
Team RC
A question for you Mitras LX7 users. How many lights would you put over a 48 x 30 x 22 tank and in what orientation?
The tank will be a mix of sps and lps.
2 will work fine. I have 2 over a 120 (48x24x24). As said above, I would run them front to back. But you won't exactly be squeezing coverage from them...they have an amazing spread.
James77
Team RC
These are 2 of them on my 120. Easily could cover another 6-12 inches in width or length.
The tank is since filled and has livestock in it, but have not updated pics. Prior to this, my old tank was the same size and I ran them parallel(opposite of what you see), and the coverage was similar. I have them mounted with Kessil A series brackets, using a drilled DIY adapter and spacers(for fans) to mount them to.

The tank is since filled and has livestock in it, but have not updated pics. Prior to this, my old tank was the same size and I ran them parallel(opposite of what you see), and the coverage was similar. I have them mounted with Kessil A series brackets, using a drilled DIY adapter and spacers(for fans) to mount them to.
Similar threads
- Replies
- 2
- Views
- 750
- Replies
- 3
- Views
- 699