If I could add anything I would strongly suggest you use a gate valve on your returns AND pipe thread sealant on your plumbing threads. IMO the
RectorSeal is safe for use on potable water systems and used by many others here on RC. I got the idea here as I was looking for something more reliable and consistent than plumbers tape. It is a little messy but it is reef safe and gets the job done.
Using gate valves on your returns will allow you to easily (with an emphasis on easy) make adjustments to the water level in your weir. While you can use ball valves for a third of the cost, they are the least effective solution with respect to making fine adjustments.
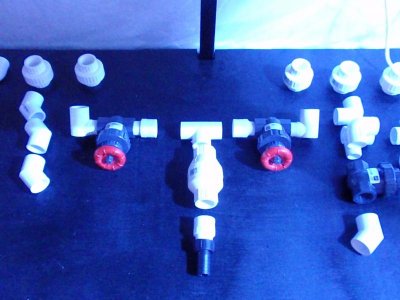
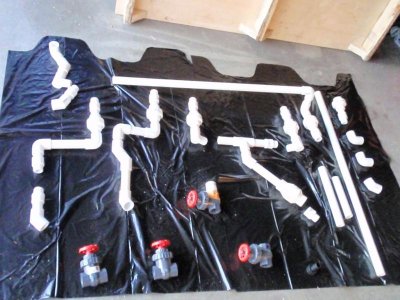
Here are a couple of pics of my
return and
drain plumbing.
Oh...one other thing. I didn't find a lot of discussion on plumbing the emergency drians when doing my research on the Herbie method so I'll share what I did. My emergency drain pipe plumbing is plumbed about 3/4" of an inch from the top of my overflow teeth. In other words, the overflow teeth are 1.5" long and my emergency drain pipe sits at .75" from the top. Hopefully that makes sense? It's easy to make adjustments to your e-drain height should you want it to be taller or shorter.
I hoped that helped. :beer:


") ). In fact the tank is so incredibly polished I can barely get a photo without a reflection of some sort (that and my photo skills suck).
). In fact the tank is so incredibly polished I can barely get a photo without a reflection of some sort (that and my photo skills suck).