You are using an out of date browser. It may not display this or other websites correctly.
You should upgrade or use an alternative browser.
You should upgrade or use an alternative browser.
Lightsluvr's 340G Upgrade
- Thread starter JohnL
- Start date
Thats who has them here as well (Attwoods). Glad to hear you found one.
Me too. I measured the Honda Fit, and believe or not, the tank should fit in there with the seats down... :thumbsup:
LL
Pacific Reefs
New member
It's time for some more pics ")
It's crazy what hatchbacks will haul. I remember lugging entire PA systems and light rigs in my Golf back in my amateur dj days.
I could have put the 100G Rubbermaid in the back of that thing... the 70G would have fit with the seats up! :spin3:
I got the tank home yesterday after work. Will cut some 3/4" plywood for a base and go buy some concrete blocks from the Depot later today.
Then I'll pick up some plumbing parts... now what did I do with those 1.5" bulkheads???
LL
Added a couple of medium sized (4"-6") clams to the tank. Will take some pictures this weekend.
LL
clams
clams
Oooopsie. I was having so much fun removing byropsis, I forgot about photos of my clam bed... I'll get 'er done.
LL
Here comes the sump...
Here comes the sump...
Placed the 70G sump in place and started plumbing the fourth overflow this afternoon...


Here is where the hole saw stopped when the drill battery died...

The above hole will be the gravity overflow back to the return chamber of the acrylic sump.
LL
Here comes the sump...
Placed the 70G sump in place and started plumbing the fourth overflow this afternoon...


Here is where the hole saw stopped when the drill battery died...

The above hole will be the gravity overflow back to the return chamber of the acrylic sump.
LL
Rib Recipe (OT, kinda)
Rib Recipe (OT, kinda)
For those who don't understand this post, I prepared smoked ribs for the 19+ club members who helped with my tank move back in June 2009. I received a lot of comments and questions about the rib "recipe". so here's the not-so-secret.
******************************
Originally Posted by Hal
Lightsluvr,
I've been devouring your build thread in the large tanks forum. Your setup looks fantastic. I envy your large fish room and ability to have an inwall tank. (I so wish I could have an external overflow.)
Your thread has been an inspiration for me to get off my butt and restart the planning for my future 260g tank. I have a quote from Miracles, but didn't ask AGE since I thought it would be prohibitively expensive. I'm reconsidering that now.
I'd also love to get your rib recipe. Would you mind?
Thanks.
Cliff
Hi Cliff - thanks for the note. Please say hello on the build thread, too.
I use spare ribs which are readily available and inexpensive here in Oklahoma. Baby Back ribs can be used as well. I modify a marinade that is commercially available. Look for McCormick Grill Mates Southwest marinade. Instead of the package instructions, mix the marinade in a bowl with 1/2 cup apple cider vinegar, 1/2 cup canola oil, and 1/2 cup of your favorite malt beverage. Add 1 TBSp brown sugar and mix well with a whip. Place a slab of ribs in a LARGE (2Gallon) zip lock bag and marinade in the refrigerator at least 4 hours. (Overnight is okay). Turn the bag every hour or so to coat the slab both sides. Use one package of the marinade for each slab. The large Zip lock holds two slabs with no problem. I smoke the ribs in an electric smoker at 225 degrees with hickory chunks for 4-6 hours, until the bone turns freely in the slab.
George
Thanks for the recipe. It's fine by me to post this in your build thread. Thanks for asking. I'm sure others would love the recipe too.
Cliff
Up to my ashtabula in sumps...
Up to my ashtabula in sumps...
I finished plumbing the 70G refugium (semi-official designation) and did a 10 gallon water test. Of course the drain bulkhead that comes with the tank leaked... So I emptied the 10G, tightened up the bulkhead and it passed a subsequent test. I installed a valve at the drain in case I ever need to empty the tanks.
The overflow (feed) fit perfectly (measure twice berfore cutting once) and I installed the fourth 1.5" durso in the DT external overflow. I slowly opened the valve to the new sump while adding 65G new saltwater into the system. I waited until all sumps were at normal operating level and began to adjust the return pump output while tweaking all of the overflows.
The system requires a little "dance" to balance all of the overflows, skimmer and sumps to match the output of the return pump. With the additional sump, I was able to coax about 20% more return flow to the DT, always a good thing.
So here's what it looks like:

A view from the other side and you can see the (2) spray bars that I hope will turn the Chaeto so they get light on all sides:

Detail of the overflow I use in both my Rubbermaids. Noth the elbow which is movable up or down. This rig allows me to adjust the water level in the sump:

I'll take some photos of the fish room in a few minutes and add them to the thread a little later. :fish1:
Any comments? Questions? Condemation for destroying the reef? :hammer:
LL
Up to my ashtabula in sumps...
I finished plumbing the 70G refugium (semi-official designation) and did a 10 gallon water test. Of course the drain bulkhead that comes with the tank leaked... So I emptied the 10G, tightened up the bulkhead and it passed a subsequent test. I installed a valve at the drain in case I ever need to empty the tanks.
The overflow (feed) fit perfectly (measure twice berfore cutting once) and I installed the fourth 1.5" durso in the DT external overflow. I slowly opened the valve to the new sump while adding 65G new saltwater into the system. I waited until all sumps were at normal operating level and began to adjust the return pump output while tweaking all of the overflows.
The system requires a little "dance" to balance all of the overflows, skimmer and sumps to match the output of the return pump. With the additional sump, I was able to coax about 20% more return flow to the DT, always a good thing.
So here's what it looks like:
A view from the other side and you can see the (2) spray bars that I hope will turn the Chaeto so they get light on all sides:
Detail of the overflow I use in both my Rubbermaids. Noth the elbow which is movable up or down. This rig allows me to adjust the water level in the sump:
I'll take some photos of the fish room in a few minutes and add them to the thread a little later. :fish1:
Any comments? Questions? Condemation for destroying the reef? :hammer:
LL
clams
OK so here are photos of the clams... the lights had only been on about 30 minutes, so they're not fully "mantled" out yet.
From left to right, Crocea, Teardrop Maxima and Derasa:

And on the other side a lone Derasa guards the toadstool.

In past tanks, I had very poor experience with smaller clams from a well known online retailer. :sad2: (They all died!) These larger clams were either obtained from a local reefer or LFS, and the Teardrop I picked up from a aquafarm dealer at Dallas' Next Wave in February. They seem to be doing well, and none of the fish seem interested in a clam appetizer...
LL
Clams are beauties, Congrats.
Showing ignorance... Because of theirs size/age, do you anticipate not having to spot feed them so much because of their ability to feed from the water column?
_________
On the sump, I really like the adjustable overflow idea, letting you change the level in the sump by raising or lowering the elbow. With a ball of chatoe in there, will you be putting a sponge over the overflow?
Clams are beauties, Congrats.
Showing ignorance... Because of theirs size/age, do you anticipate not having to spot feed them so much because of their ability to feed from the water column?
I haven't spot fed them yet. They should get adequate lighting for the clams' zooxanthellae, plus I'm confident there's sufficient phytoplankton floating around in there to sustain them... just thinkin', but always open to suggestions...
_________
On the sump, I really like the adjustable overflow idea, letting you change the level in the sump by raising or lowering the elbow. With a ball of chatoe in there, will you be putting a sponge over the overflow?
As a matter of fact, I have foam covers that came with the Vortech MP40s (never used) and will slide over the strainer when I move the Chaeto tomorrow... The covers will be easy to remove for regular cleaning and are thin enough not to impede flow.
LL
The fish room...
The fish room...
Here are some photos of the fish room:
Before:

Today:


From left to right in the photo below -
1.) 100 gallon Rubbermaid stock tank - 6-8" deep sand bed and approximately 400 pounds of live rock. Attached to this sump is 45W UV "sterilizer" fed by a Mag 5. Water is circulated over and through the LR by (3) MJ-1200 Mods rated at 1600gph each.
2.) Next to the RB sump is the Reeflo Orca 250 Pro skimmer with Dart Gold pump.
3.) 350G display tank with 15G 36" x 8" x 12" external overflow box containing (4) 1.5" DIY Durso overflows. One overflow goes to each sump and the fourth feeds the Reeflo skimmer.
4.) Under the DT is a 90G acrylic sump which acts as a water reservoir when the return pump is turned off (or loses power). The DT and both Ruubermaids drain back into this sump when the Reeflo Barracuda Gold return pump is off.
5.) The new 70G Refugium sump is on the right. It will hold a large ball of Chaeto for algae control. Eventually a container of Mangroves will join the Chaeto.

Total water volume is now approximately 550 gallons.
LL
The fish room...
Here are some photos of the fish room:
Before:
Today:
From left to right in the photo below -
1.) 100 gallon Rubbermaid stock tank - 6-8" deep sand bed and approximately 400 pounds of live rock. Attached to this sump is 45W UV "sterilizer" fed by a Mag 5. Water is circulated over and through the LR by (3) MJ-1200 Mods rated at 1600gph each.
2.) Next to the RB sump is the Reeflo Orca 250 Pro skimmer with Dart Gold pump.
3.) 350G display tank with 15G 36" x 8" x 12" external overflow box containing (4) 1.5" DIY Durso overflows. One overflow goes to each sump and the fourth feeds the Reeflo skimmer.
4.) Under the DT is a 90G acrylic sump which acts as a water reservoir when the return pump is turned off (or loses power). The DT and both Ruubermaids drain back into this sump when the Reeflo Barracuda Gold return pump is off.
5.) The new 70G Refugium sump is on the right. It will hold a large ball of Chaeto for algae control. Eventually a container of Mangroves will join the Chaeto.
Total water volume is now approximately 550 gallons.
LL
You forgot to mention the 32 oz. caffeine replenishment system located on top of the manual height access assistance tool!
Very observant, grasshopper... :lol:
LL
Fts
Fts
Well, I had the camera out for photos of the clams and fish room, so thought I may as well get a few photos of the business end of the tank:


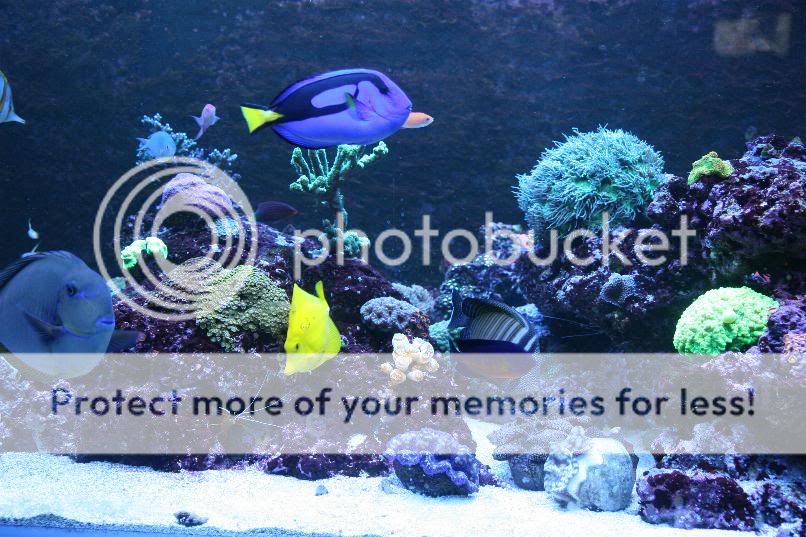


I'll be cleaning the glass today - and will try to get some photos of coral growth.
LL
Fts
Well, I had the camera out for photos of the clams and fish room, so thought I may as well get a few photos of the business end of the tank:
I'll be cleaning the glass today - and will try to get some photos of coral growth.
LL
Things we learn - skimmer
Things we learn - skimmer
I learned that cleaning a skimmer collection cup may change the feed adjustment temporarily...
After a good fresh water cleaning yesterday the skimmer went from making a head of foam like this:

...to this:

and I discovered it was prone to spillovers: :eek2:

So I have learned to 1.) have an empty overflow bucket after cleaning, and 2.) don't leave the skimmer unattended for an hour or so after cleaning! :beer:
This morning it's back to normal, set it and forget it, looking like this:

That's less than 24 hours of crud on the collection cup.
What can I learn today?
LL
Things we learn - skimmer
I learned that cleaning a skimmer collection cup may change the feed adjustment temporarily...
After a good fresh water cleaning yesterday the skimmer went from making a head of foam like this:
...to this:
and I discovered it was prone to spillovers: :eek2:
So I have learned to 1.) have an empty overflow bucket after cleaning, and 2.) don't leave the skimmer unattended for an hour or so after cleaning! :beer:
This morning it's back to normal, set it and forget it, looking like this:
That's less than 24 hours of crud on the collection cup.
What can I learn today?
LL
Similar threads
- Replies
- 0
- Views
- 137
- Replies
- 14
- Views
- 852