You are using an out of date browser. It may not display this or other websites correctly.
You should upgrade or use an alternative browser.
You should upgrade or use an alternative browser.
Minimalistic multichip DIY LED build
- Thread starter maglofster
- Start date
ClemQuat
New member
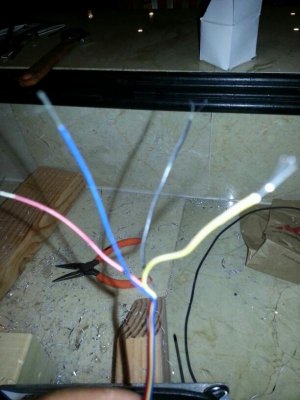
12V max for the fan. Look on the power adapter for its output. I dont believe you need to hook the yellow and blue to anything... just hook the power and ground up from the power adapter and you should be good to go.
Again, I believe this is the case, Whenever I buy or salvage used fans, they are 2 wire.
Again, I believe this is the case, Whenever I buy or salvage used fans, they are 2 wire.
mr.wilson
.Registered Member
OK:headwalls: I have read most all the posts here and am still so confused because alot of this I do NOT understand. I have a 75 gal 48x18x20ish reef tank. All I want to do is light this baby up to where the corals will be happy and still pleaseing to the eye. what will I need? I do not have a controller so I will need to dime the light mannually with pots or somthing and put them on timmers for now. I need:
What multichip LED and wattage
What driver(s)
Lens
Heatsinks
Ect?
Just want to have a good light source and get rid of my t-5 and MH setup
A long narrow tank such as yours does not lend itself well to multichips as most of the light will spill over the front and back. The 90˚ lenses cover a 30" x 30" footprint and the 120˚ lenses cover 36" x 36" when using 50 or 100w multichips.
I don't have any experience with 10w chips, but they may be a good fit for your footprint. Certainly a standard 3w array fixture will do the job, and many are the same price or cheaper than DIY; however, if you want the DIY experience, then copy someone else's design directly. Preferably someone with the same narrow (18") tank that isn't very deep (20"). Your dimensions are pretty much the same as two nano tanks, so that may be a good place to look for DIY layouts or complete fixtures.
I think TropTrea's recommendation of 175w is about right.
You may even consider 3 x Par 38 bulbs and call it a day.
Last edited:
ClemQuat
New member
did you check the output of the adapter? did you start with a known working motor? you didnt get the +/- crossed?
Several things could have happened there, but I did some real quick googling.. and what I found was people also said to ignore the other wires just hook up power/ground
Several things could have happened there, but I did some real quick googling.. and what I found was people also said to ignore the other wires just hook up power/ground
mr.wilson
.Registered Member
Quick question for the experts... My tank is a 110 Tall, 48" X 18" X 30", and I have two 100 watt chips and a number of 3 watt chips to supplement them. I am going to be designing my fixture here soon and was wondering what you guys would recommend for spacing?
Would it be better to build a more compact fixture for a single light source type look? Similar to running a single high wattage halide...
Or should I spread the fixture over a larger foot print to get better spread?
That being said my limiting factor is that I only have about 12" above the water to place the fixture... I have a full machine shop and can make anything so I was even thinking about making the chip mounting angle adjustable if that would help?
Any help would be greatly appreciated!
Thanks,
Jeremy
As with the Firefightered66, you have a narrow tank, so 100w chips are not a perfect match. I'm using 4 x 100w multichips to light 8' x 3' x 1' coral tanks. The 120˚ lenses cover 3' x 3' very well, and the 90˚ are still acceptable. Typically I like to angle LED fixtures back towards the back of the tank to get more coverage, minimize shadows on the sides of fish & coral, and keep light and subsequent algae off of the front viewing panel.
Your clearance is low and your tank is deep (30"), so narrow (90˚) optics are a good match. Having a shop opens a lot of doors. In my opinion the 3w supplemental chips will have a hard time competing with the multichips. I would keep it clean and simple. With the right chip mix, the two 100w chips are all you need. Start off with them dimmed to 50% and check PAR to make sure you aren't burning your corals since the optics are tight and clearance is low.
mr.wilson
.Registered Member
Here are some better pics of the multichips as promised. I hope these aren't deemed as commercial in nature, as I am only trying to illustrate how 400w of LED can replace 1200w of metal halide and T5. I didn't post any shots that show livestock to keep it within the RC guidelines.
The multichips provide the same PAR as the outgoing 250w MH (300 in the centre and 280 at the outer edges using the 120˚ lenses with the fixtures 2' above the water surface. The 90˚ lenses provide 400 PAR at the centre and 200 at the outer margins (18" out from centre).
The 20K multichips are a lot bluer than the 14k Phoenix, and even the generic 20k MH we had in some fixtures, so the PAR is likely higher with the LEDs considering the limitations of quantum meters and blue light.
The MH fixtures were heavy, extremely hot, and expensive to maintain. The new LEDs look sharp and give the same shadowing/shimmer as the MH. Water temperatures are way down and corals look much nicer.
Here's a shot of the old metal halides which served us well for the past 9 months.

Here is the same angle with the LEDs. You can see how the LEDs focus the light in the tank, rather than on the floors, walls and ceiling. The LEDs also provide an awesome light show on the ceiling") The PAR at the top rim of the tank was 200 with the MH and only 10 with the multichips, so algae growth is greatly reduced on the glass, yet the corals along the outer margins still get 200 PAR.
The PAR at the top rim of the tank was 200 with the MH and only 10 with the multichips, so algae growth is greatly reduced on the glass, yet the corals along the outer margins still get 200 PAR.


The multichips provide the same PAR as the outgoing 250w MH (300 in the centre and 280 at the outer edges using the 120˚ lenses with the fixtures 2' above the water surface. The 90˚ lenses provide 400 PAR at the centre and 200 at the outer margins (18" out from centre).
The 20K multichips are a lot bluer than the 14k Phoenix, and even the generic 20k MH we had in some fixtures, so the PAR is likely higher with the LEDs considering the limitations of quantum meters and blue light.
The MH fixtures were heavy, extremely hot, and expensive to maintain. The new LEDs look sharp and give the same shadowing/shimmer as the MH. Water temperatures are way down and corals look much nicer.
Here's a shot of the old metal halides which served us well for the past 9 months.
Here is the same angle with the LEDs. You can see how the LEDs focus the light in the tank, rather than on the floors, walls and ceiling. The LEDs also provide an awesome light show on the ceiling
The PAR at the top rim of the tank was 200 with the MH and only 10 with the multichips, so algae growth is greatly reduced on the glass, yet the corals along the outer margins still get 200 PAR.
Sonny n Colleen
New member
Clean setup and I love the window covering!
firefightered66
New member
Thanks for the reply Mr. Wilson. I may just go ahead and build a 3w led set up and be done with it...Thanks again
A long narrow tank such as yours does not lend itself well to multichips as most of the light will spill over the front and back. The 90˚ lenses cover a 30" x 30" footprint and the 120˚ lenses cover 36" x 36" when using 50 or 100w multichips.
I don't have any experience with 10w chips, but they may be a good fit for your footprint. Certainly a standard 3w array fixture will do the job, and many are the same price or cheaper than DIY; however, if you want the DIY experience, then copy someone else's design directly. Preferably someone with the same narrow (18") tank that isn't very deep (20"). Your dimensions are pretty much the same as two nano tanks, so that may be a good place to look for DIY layouts or complete fixtures.
I think TropTrea's recommendation of 175w is about right.
You may even consider 3 x Par 38 bulbs and call it a day.
Here are some better pics of the multichips as promised. I hope these aren't deemed as commercial in nature, as I am only trying to illustrate how 400w of LED can replace 1200w of metal halide and T5. I didn't post any shots that show livestock to keep it within the RC guidelines.
The multichips provide the same PAR as the outgoing 250w MH (300 in the centre and 280 at the outer edges using the 120˚ lenses with the fixtures 2' above the water surface. The 90˚ lenses provide 400 PAR at the centre and 200 at the outer margins (18" out from centre).
The 20K multichips are a lot bluer than the 14k Phoenix, and even the generic 20k MH we had in some fixtures, so the PAR is likely higher with the LEDs considering the limitations of quantum meters and blue light.
The MH fixtures were heavy, extremely hot, and expensive to maintain. The new LEDs look sharp and give the same shadowing/shimmer as the MH. Water temperatures are way down and corals look much nicer.
Here's a shot of the old metal halides which served us well for the past 9 months.
Here is the same angle with the LEDs. You can see how the LEDs focus the light in the tank, rather than on the floors, walls and ceiling. The LEDs also provide an awesome light show on the ceiling
so the pics you most recently posted are of halides and then of 20k multichips?
are the 20ks in the most recent pictures just plain 20k leds or the special ones you had made from orphek?
mr.wilson
.Registered Member
Nice Mr.Wilson what type of enclosure did you use
Sent from my SPH-L710 using Tapatalk 2
It ended up looking like a high tech paint can
I had a local company make a stainless steel mesh cylinder with an aluminum disc top and aluminum ring bottom. I used stainless steel rods and nuts to hold it together. The upper nuts have holes for suspension.
The mesh and open bottom keep it well vented and the blue light from the fan looks cool.
Lassef
Member
I will double check the power supply.Thanks for the help
Max 12 V DC. The polarity must be right, there is some fans that may broke if you do it wrong. Red = +, black = -
Sincerely Lasse
Lassef
Member
Thanks for the reply Mr. Wilson. I may just go ahead and build a 3w led set up and be done with it...Thanks again
If you want to go with multichip - you can see one solution with 10 watts LED (48" tall) (In Swedish - but the pictures explain a lot) here. In this thread (also in Swedish) the pictures can give some inspirations. In your case I probably had use the second solution with to tubes (50 mm * 20 mm) bolt together and a 80 mm fan in the midle (or two). In the front: take 4 white, 14 - 16 000K (20 Watts). At the back: take 5 blue - 455-445 - 420 - 445 - 455.
Place them in a zigzag pattern. ( -_-_-_-_-) Connect whites in one daisy chain, the blues in another. Try with no lenses - with lenses white - 90 degrees. Blues - a mix.
Drivers - White: LPF-90D-48 -> app 80 W. Blue: LPF-90D-54 -> 90 W. The last driver will be at the edge of what it can manage. I think it will work with 5 pcs of 20 watt in a daisy chain at 1.67 A cause the total FV should be around 52.5 V at this current. But you have to try. You can dim these drivers with pot, 1-10V or PWM
Splash guard and place them rather close to the surface.
This is just a suggestion. Trop Trea´s solution will also work.
Sincerely Lasse
Last edited:
mr.wilson
.Registered Member
Mr Wilson, I like your set up...looks like you could eat off your floor. I wish we had shops so clean around my area. On your fixture, is it a single point light source chip, or do you have additional chips around your main chip.---Rick
It's a single multichip. I posted a pic a few days ago.
The beauty of multichips is the simplicity, a single lens and heat sink. Once you start tacking on 3w ad hoc chips, it gets complicated.
The nature of a dome lens also creates colour separation, as the blue half is projected in one direction and white in the opposite direction. Multichip manufacturers want to keep it simple to control costs and limit chip failure, so they prefer to group colours rather than alternating rows of blue & white. I tried red in the centre and it was too dominant, so now I use it off to one side.
The cost of mixing colours within the row is high. I find that putting all of the whites in the middle with blues on one side and red on the other balances out the aesthetic. If you end up with a half and half (one side white & one side blue) multichip, you should line up the fixtures to overlap blue & white colour. This should minimize it.
It's also a good idea to use slightly different multichips in each respective fixture or at least set/dim them differently. If the light is completely homogenous, it looks clinical. This is a limitation of T5 (too uniform), while metal halide gives you the option of mixing colour temperatures in a fixture.
The outgoing metal halide fixtures I had looked artificial with the same 14k Phoenix in all four sockets. I used a combination of 12k, 14k, 16k and 20k to make it look more natural and broaden the spectrum. The PAR ranges vastly within these bulbs so it gave me more flexibility for coral placement. Of course you have to be careful that the colours mix and don't stand out from each other. The 6' MH fixture had 4 MH bulbs so there were no shadow lines (you could tell where the bulbs were located while looking at the tank. This is an important point in multichip design, the light should have single light source shadowing, but not a ray that can be seen in the water or it looks like artificial light.
Surface movement is a major contributor to shimmer that is often overlooked. If you don't like the shimmer pattern you are getting, adjust your surface agitation accordingly. Wave makers are a good way of increasing a natural, random look.
mr.wilson
.Registered Member
Mr Wilson, I like your set up...looks like you could eat off your floor.
Yes, you could use the 5 second rule with the floor
Similar threads
- Replies
- 3
- Views
- 209
- Replies
- 39
- Views
- 759
- Replies
- 3
- Views
- 286