My 180 4sided viewable in-wall build

Dave.M
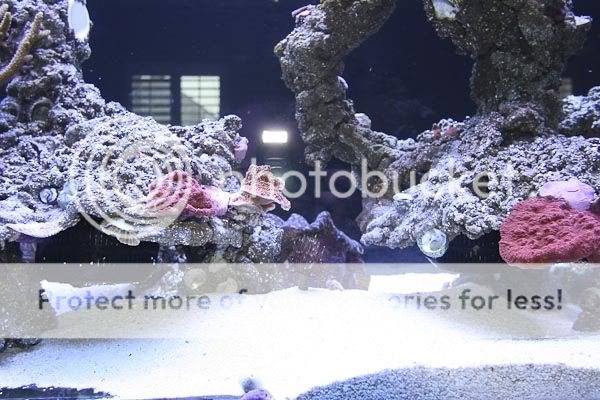
Here are some shots of the CL input-lines (feeding the CL pumps).

In this shot there are 3 of the 4 black strainers visible.
HOOKUP-4-1.jpg


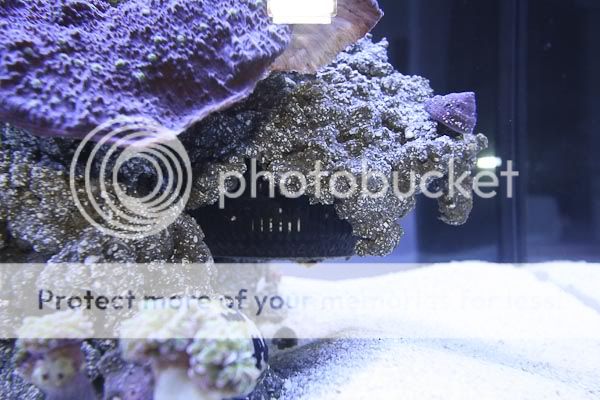
Here is a closer shot of the two on the right-side
HOOKUP-3-1.jpg


And a real-close-up of the one in the middle on its own.
HOOKUP-2-5.jpg


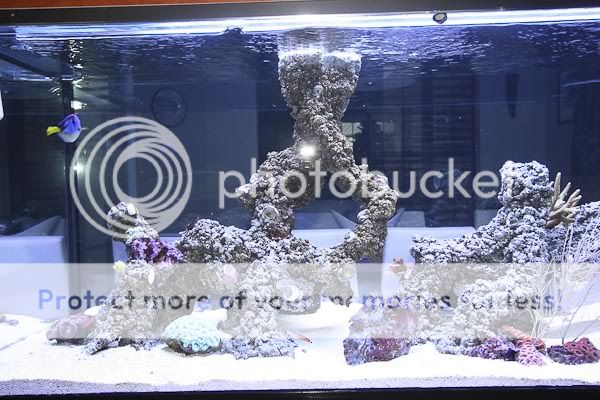
A view from the other-side of the overflows.
HOOKUP-5-1.jpg

HOOKUP-1-2.jpg

HOOKUP-6-1.jpg


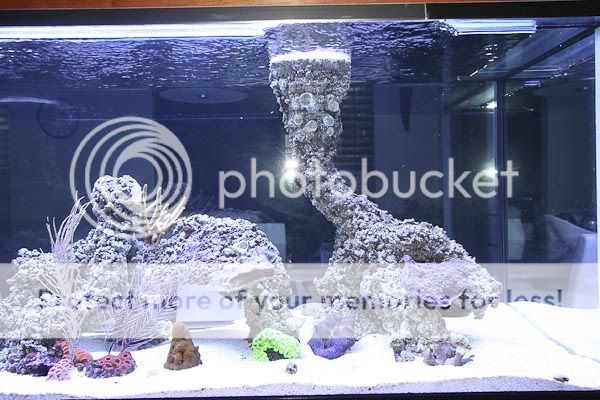
The fourth overflow is on the far left (just visible above). Here is a shot of it and how it is hidden from the {cherry wood} side.
HOOKUP-7-1.jpg
 
Ingenious concept and beautifully realized!!! Really incredible. I especially like the view from the livingroom (?) side. I love the clean modern look - very classy!

The cement work is second to none. You actually managed to NOT overdo it - not easy on a project like this.

Congratulations on a job - much more than - well done.
 
Like the others, I am very impressed with this project. Its nice to see that there are more than just a few of us who end up doing things multiple times just trying to achieve perfection. I really like the 2 sided setup you have. It is like having 2 tanks. Great work and I am excited to see more updates.
 
Ingenious concept and beautifully realized!!! Really incredible. I especially like the view from the livingroom (?) side. I love the clean modern look - very classy!

The cement work is second to none. You actually managed to NOT overdo it - not easy on a project like this.

Congratulations on a job - much more than - well done.

Thanks Tom. Very much.

In doing the cement rock work I kept one key phrase in mind at all times... Do not build rock that looks like coral.. Coral will look like coral much better.. This resulted several times in taking off built up pieces of rock work...

I am very happy with the end result and the beginning of the SPS population...
 
Like the others, I am very impressed with this project. Its nice to see that there are more than just a few of us who end up doing things multiple times just trying to achieve perfection. I really like the 2 sided setup you have. It is like having 2 tanks. Great work and I am excited to see more updates.

Thanks Austin93,
It is like having two tanks in many ways... Tonight I was putting some of my SPS back into the tank and we had to run around to all sides for placement.. Kind of fun really...

The one thing with "two sides" is that in a 25.75" wide tank is that at times it is really two thin 13" tanks... Very hard to scape in that shallow of a setup... I would strongly advise anyone doing a two side viewable like this to squeeze each and every inch of width into the tank... 36" wide would be the dream...
 
Wow! I'm glad you sent me a PM. This is an example of truly trend-setting plumbing and aquascaping. Congratulations!

LL
 
I love love it!!! I hope to one day have a grand tank similar to yours! It's an inspiration :inlove:
 
Can you tell me more about the cherry wood panels and the metal strips that run in between? Are those suspended ceiling tile track?
 
Wow! I'm glad you sent me a PM. This is an example of truly trend-setting plumbing and aquascaping. Congratulations!

LL

Thanks Lightsluvr very much for the complements. Your system is nothing to shake a stick at.

Glad to have your thoughts always.
 
I love love it!!! I hope to one day have a grand tank similar to yours! It's an inspiration :inlove:

Thanks Korrine for the wonderful comment, you are too generous. My setup really is an idea of forcing form to lead without compromising function. My local tank builder/system advisor (www.ReefWholesale.com) was driven nuts several times by my design demands. In the end, which is really just the beginning, I'm very happy.
 
Can you tell me more about the cherry wood panels and the metal strips that run in between? Are those suspended ceiling tile track?

I did not take any photos of this process, I am very sorry. I will try to describe.

the drywall was removed to just studs. I measured to the bottom of the tank from the floor and cut plywood panels out using a skill saw and a straight edge guide. I then used wood glue and finishing nails (air nailer) to attach the pieces to the studs.

The wood is cherry plywood. It was expensive when compared to other plywoods, but it matched my furniture well.

We finished the wood with Danish tung oil (fruit wood) and antique gel finish.

The lines are a product from HomeDepot. I believe they are for transitions on floorings or for tile baseboards. Not sure, but they are cheap and come in 8foot lengths.

I used cleat silicone to attach the metal strips.

Cutting slowly and carefully made all the difference for the wood.

I hope that helps.
 
Going to be doing about the same project shortly joining for ideas

Good luck. There were some surprises along the way, but it really was a bucket of fun and I hope you enjoy your build as much as I did.

LMK if you have questions.
 
I did not take any photos of this process, I am very sorry. I will try to describe.

the drywall was removed to just studs. I measured to the bottom of the tank from the floor and cut plywood panels out using a skill saw and a straight edge guide. I then used wood glue and finishing nails (air nailer) to attach the pieces to the studs.

The wood is cherry plywood. It was expensive when compared to other plywoods, but it matched my furniture well.

We finished the wood with Danish tung oil (fruit wood) and antique gel finish.

The lines are a product from HomeDepot. I believe they are for transitions on floorings or for tile baseboards. Not sure, but they are cheap and come in 8foot lengths.

I used cleat silicone to attach the metal strips.

Cutting slowly and carefully made all the difference for the wood.

I hope that helps.

Thank you very much. I figured the cherry was plywood, I just wasn't sure about the metal edging. Happen to have any metal left over that you could snap a picture of so I know what to look for? Is it shaped like a T or more flat or square? Thanks for the help. :beer:
 
Back
Top