My 210 tank build

Didn't get to commit as much time to the tank as I would of liked to this weekend but I was able to trim the wall around the aquarium and also filled some holes in the dry wall.

I chose black trim because the pictures on the same wall have black frames and also our funiture in the room is black.

DSC05517.jpg


I'm still waiting on some valves to arrive so I can put the finishing touches on the plumbing.
 
Last edited:
Brian that looks awesome, like it was there from day one!! Thanks for keeping us up to date :dance: :dance:
 
All that hard work on the new tank and then you go and put bookshelves in there. What were you thinking? :)
 
<a href=showthread.php?s=&postid=14949812#post14949812 target=_blank>Originally posted</a> by boydx6
All that hard work on the new tank and then you go and put bookshelves in there. What were you thinking? :)
My fish like to be intellectually stimulated. ;)


I was staring into my tank and thinking there is just something missing. I realized it is a frag of some purple hornet zoas. cough cough :D
 
Last edited:
Ok I know it's been a while but I wanted to provide some updates.

My Dart pump was making a little bit of a humming noise so they warrantied it. I was able to do a trade up to a Super Dart in the process. This past weekend I pulled out my temporary plumbing job and plumbed everything like I wanted it. The guys at Reeflo are awesome and make a great product......love the Super Dart.

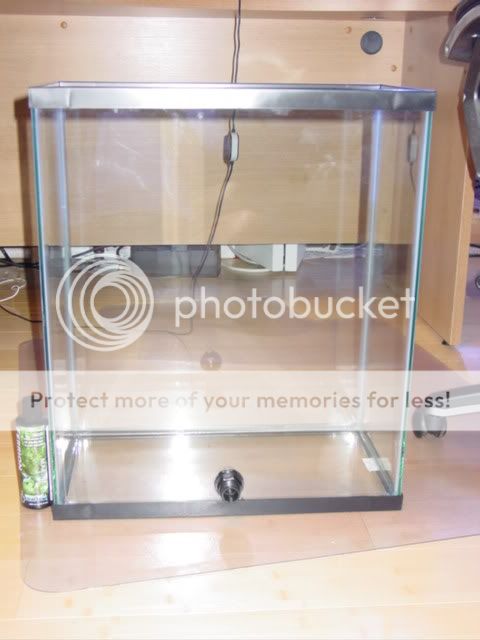
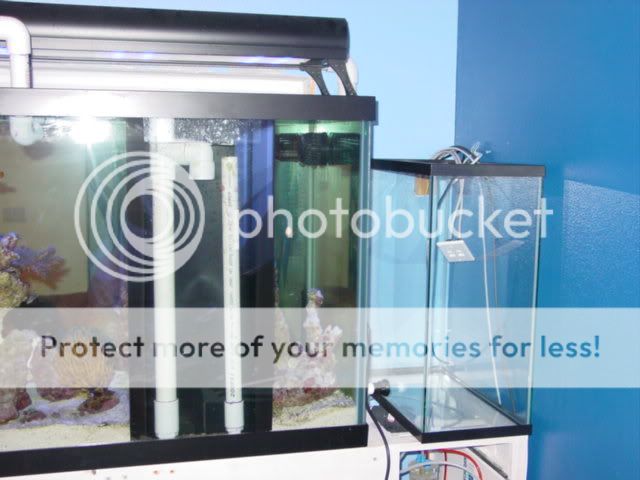
Next step is getting my ATO going. I needed a container with some odd dimensions 10"x20" footprint because of the limited space I have to fit it in. A 10 gallon tank has the perfect dimension but not enough volume and I didn't want to try drilling one. Acrylic or plexi tanks were $125+.

I went a totally different route and snagged a 20 gal x-high tank. This has to be the oddest tank I've seen but very cool looking. It's basically two 10 gal tanks stacked on top of each other. This would make a great sea horse tank. The dimensions are 20"L x 10"W x 24"H. I was able to pick up this tank new for about 1/4 of the price I was being quoted for acrylic/plexi.

DSC05541.jpg


I ordered a glass drill bit from glass-holes.com on Friday and received it today in the mail.... now that was fast!

I went ahead and made the hole in the tank and I'm ready to go. I'll finish the ATO plumbing this weekend to the float in my sump. I already drilled a hole in my 125gal sump and installed the Kent float. This way if anything goes wrong I won't be dumping more than 20gal of fresh water into my sump. More to come.... hooking up the sea swirls will be next.

DSC05542.jpg
 
Last edited:
I too am a fan of the black trim. It makes the tank blend in nicely with the rest of the artwork on the wall. Nice move!
 
I hear you. Automation is great but after reading about some tank disasters where a float stuck causing it to flood the tank w/ fresh water..... the investment in livestock is just not worth the risk.
 
Hey screamincamaro, I ordered a kit from glass-holes and plan on drilling my oceanic 30g when it comes in. Have you drilled many tanks? How difficult would you say it is?
 
I drilled 3 holes in my 40 gal frag tank, 2 holes in my 125 gal sump, and 1 hole in my new 20 gal. I haven't had an issue yet.

I don't think it's very tough you just have to take your time, keep the bit lubricated, low RPM, and let the bit do the work.... don't force it. The hardest part is getting it started IMO. If you force it too hard you run the chance of ruining your bit and also chipping the glass as it cuts through (opposed to a clean cut). Hope that helps.

On the other hand if you are one of those people that have trouble hanging a picture frame I wouldnt' attempt it. Good luck and PM me if I can be of help.
 
Last edited:
<a href=showthread.php?s=&postid=15117009#post15117009 target=_blank>Originally posted</a> by screamincamaro
I drilled 3 holes in my 40 gal frag tank, 2 holes in my 125 gal sump, and 1 hole in my new 20 gal. I haven't had an issue yet.

I don't think it's very tough you just have to take your time, keep the bit lubricated, and let the bit do the work.... don't force it. The hardest part is getting it started IMO. If you force it too hard you run the chance of ruining your bit and also chipping the glass as it cuts through (opposed to a clean cut). Hope that helps.

Lubricated as in a pool of water sealed with plummers putty like their video? Alot of people suggest to take it slow. What would you estimate total time to drill hole would be once groove has been created? Cause I'll prolly be going as slow as possible but is it like a 15min drill?
 
Yes lubricated with water. I've done it with running water from a water hose or the plumbers putty trick. It usually takes me 10-15 minutes depending on how thick the glass is.
 
The black trim really does look good Brian. It's come a long way since last time I was there. I'll have to see it again sometime.
 
I was out of town for a week and had my dad keep an eye on things. The ATO worked great.

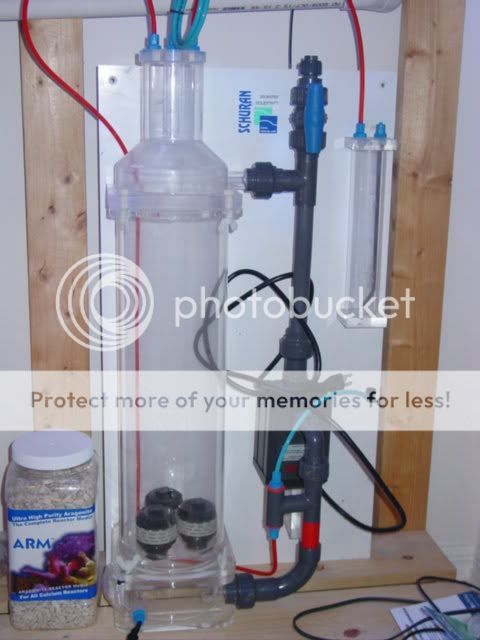
Next thing I wanted to do is look for a calcium reactor with more capacity. The Schuran JS1 was a great reactor on my 150gal with a good size load. It was so efficient with the CO2 usage I never had to fill the tank in the 9 months I ran it. I have no doubt the JS1 can keep up with my new tank I just want something with more capacity to reduce the maintenance in refilling it as the tank grows out.

I was so impressed with the Schuran JS1 I was able to track down a Schuran JS2. This thing is a monster and holds about 2 gallons worth of media. Efficient design with a huge capacity and it's exactly what I was looking for.

DSC05543.jpg
 
Last edited:
If you google it you'll find a couple of online stores that still list the Jetream 2 but I'm not sure if they are actually still available.
 
Back
Top