My 36 Gallon Bowfront Build (Lots of Pics)

crn005

New member
I guess it's finally time to make a build thread to kind of organize all of my information. So here it is! I got this aquarium while in college and had a porcupine puffer in it originally (yeah I know, stupid move. I had no idea what I was doing). I eventually just had a couple of clowns in it. After college, I moved to Seoul for a couple of years and left it in my mom's hands. Come to find out, she did two things. One, she started overfeeding my fish. They grew like crazy! Also, she never changed the water for two years! Anyways, the clowns roughed it out and now I have a good sized pair of mated clowns. So anyways, I decided to redo and upgrade the tank. It's up and running now with the clowns in it but it still has a decent amount of work left to be done. Money and time can be a little restricting at times though! So here it is, from where I started in February until now.
0066BE09-782E-462B-88CB-A57D95C91F76-23789-00001BE3F286C3EC_zpscab5900a.jpg


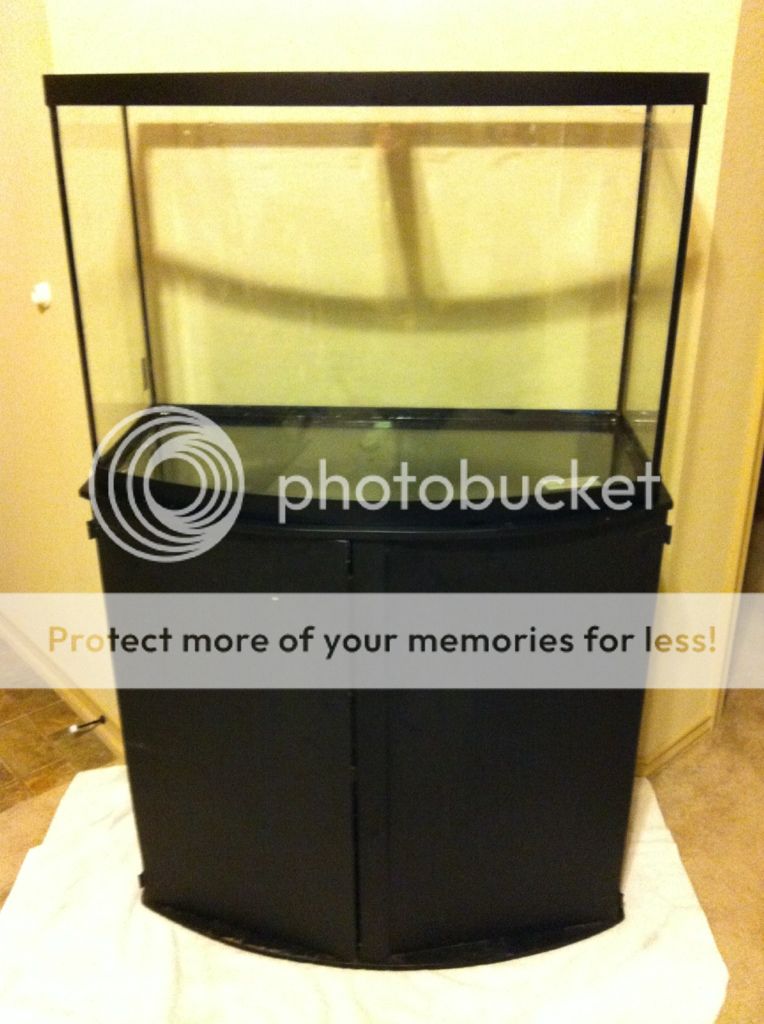
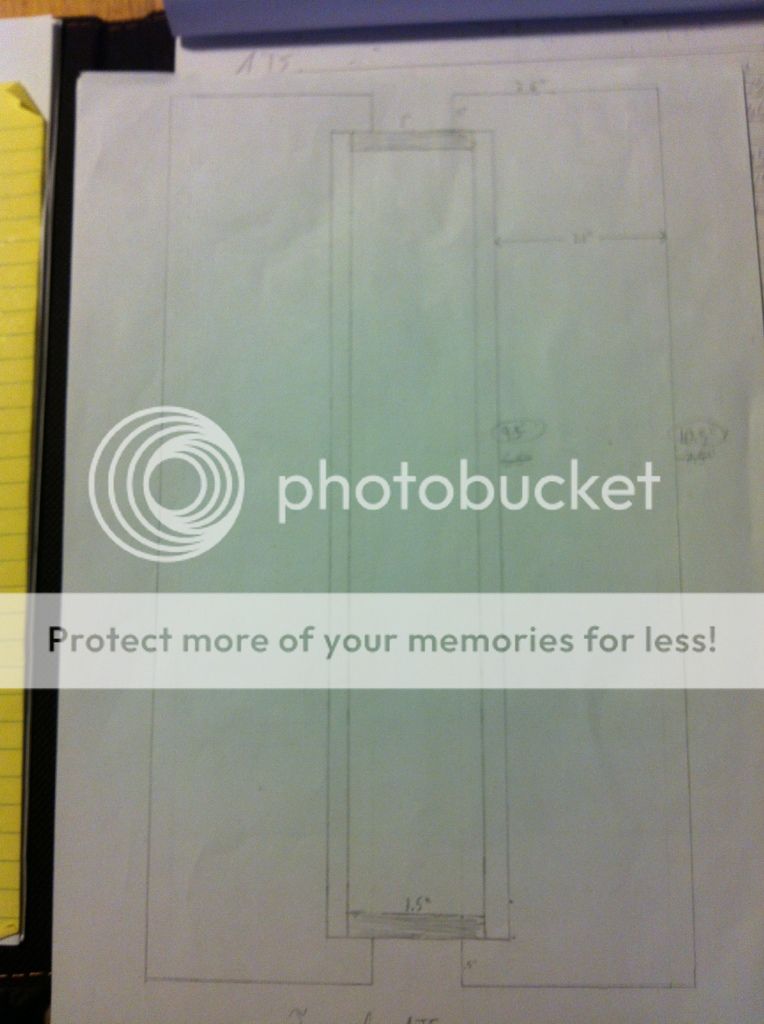
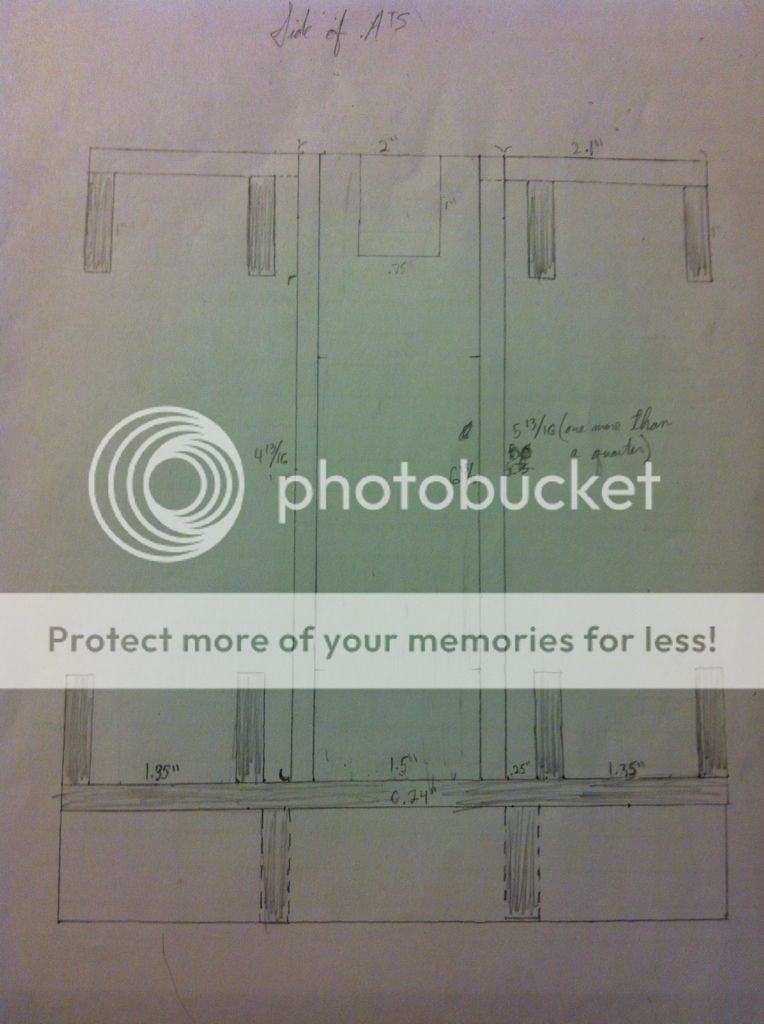
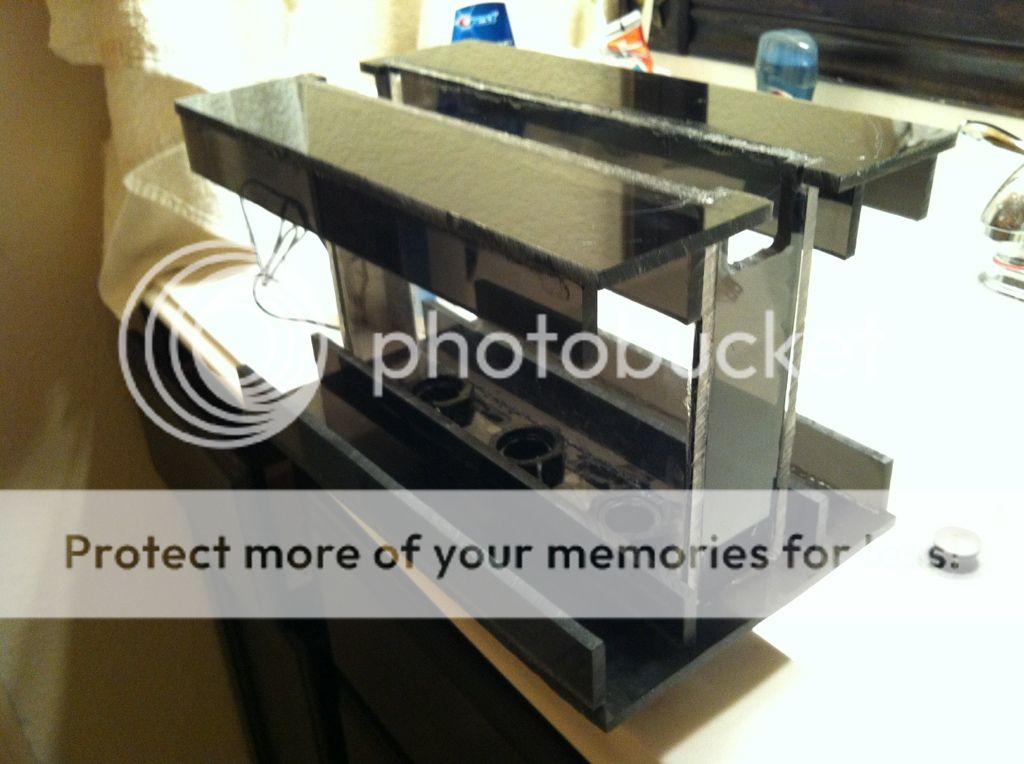
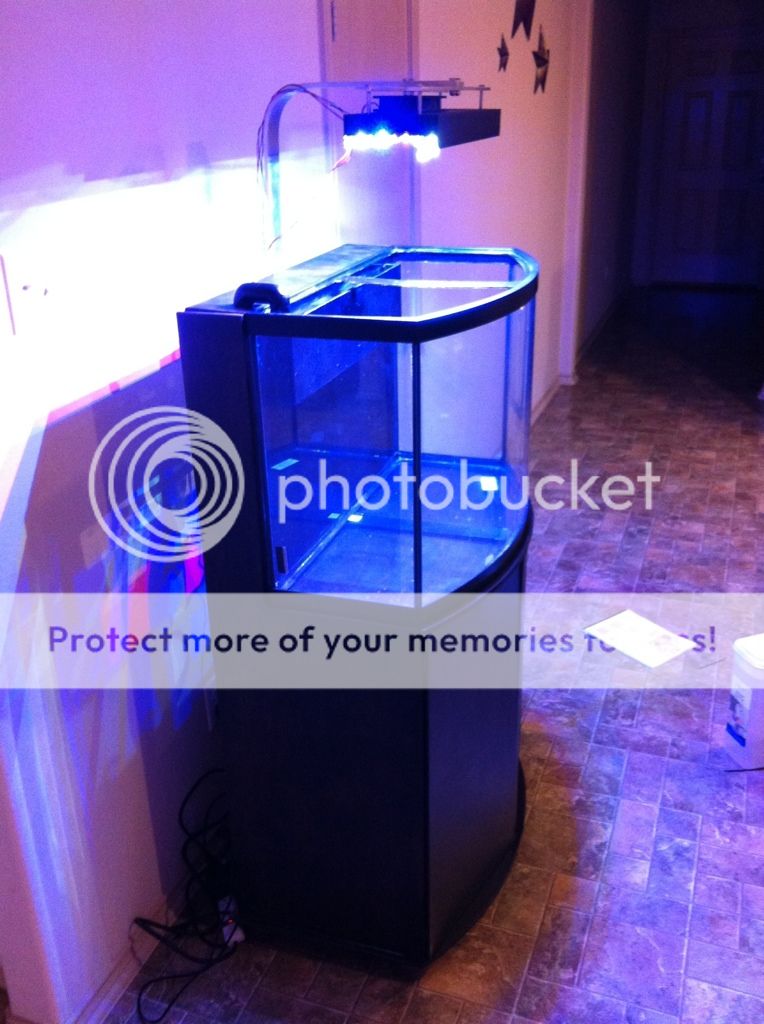
I originally decided to sand down the old stand and then stain it to match my cabinets (dark brown), but once I got to inspecting it, it needed to be redone. The stand was never sealed with anything so the creep had gotten to it. I took this opportunity to redesign it make a few upgrades. I wasn't happy about having to build a completely new stand though!
5FC2FE7E-5F14-49ED-AE35-11D61DC90AE0-1063-0000015E9B55C969_zpsaa931203.jpg


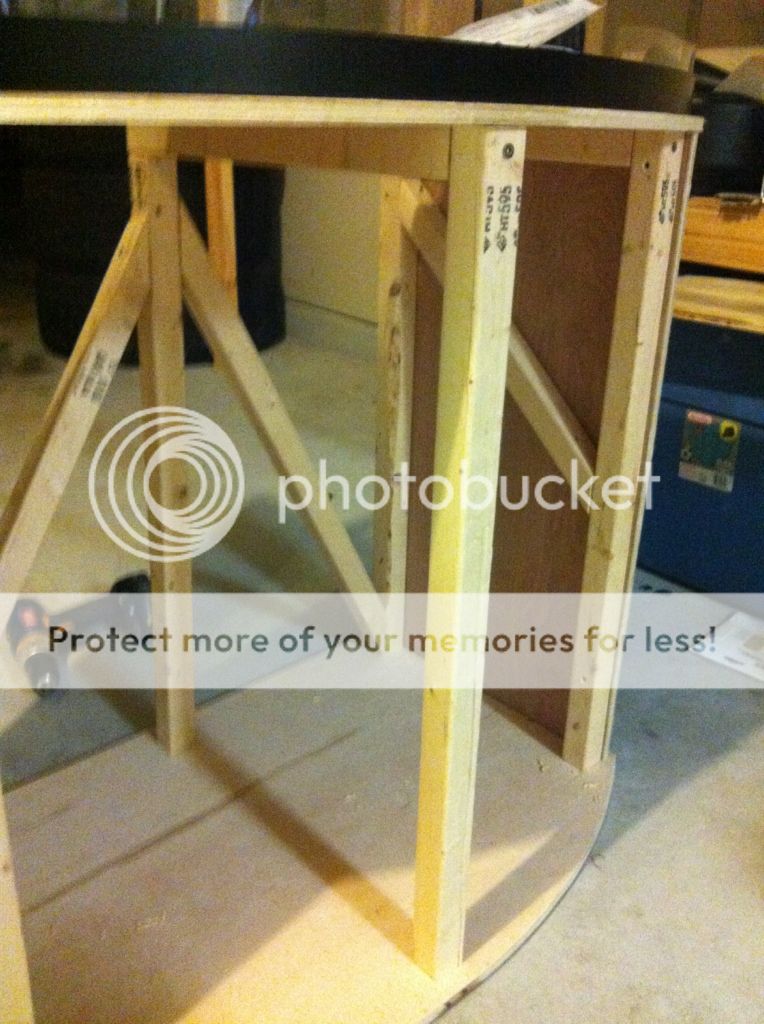
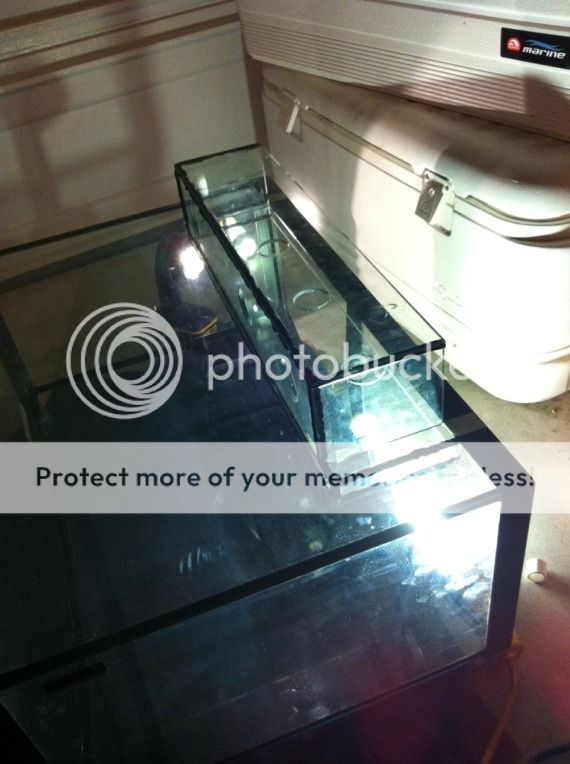
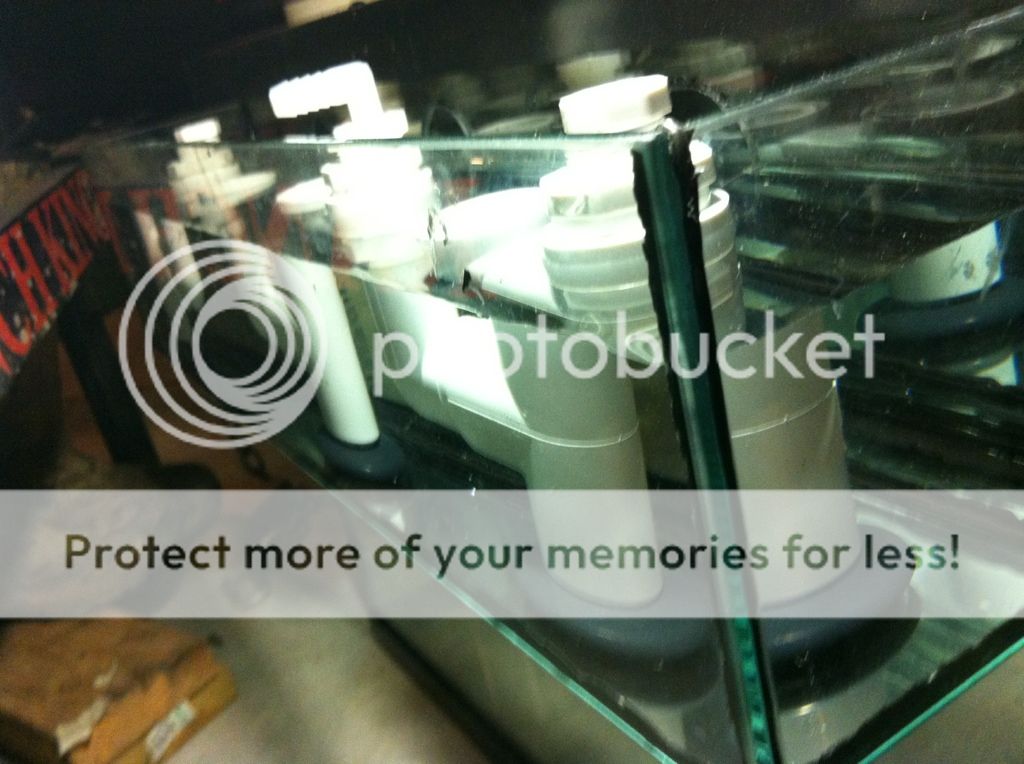
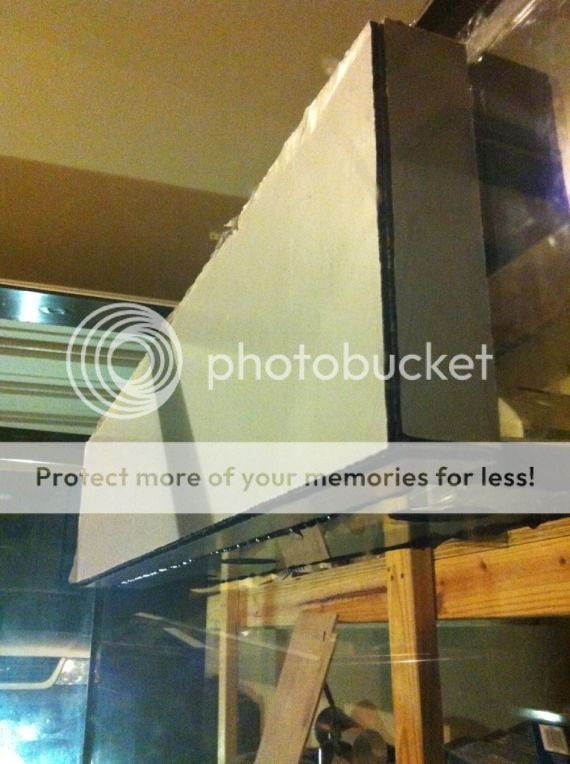
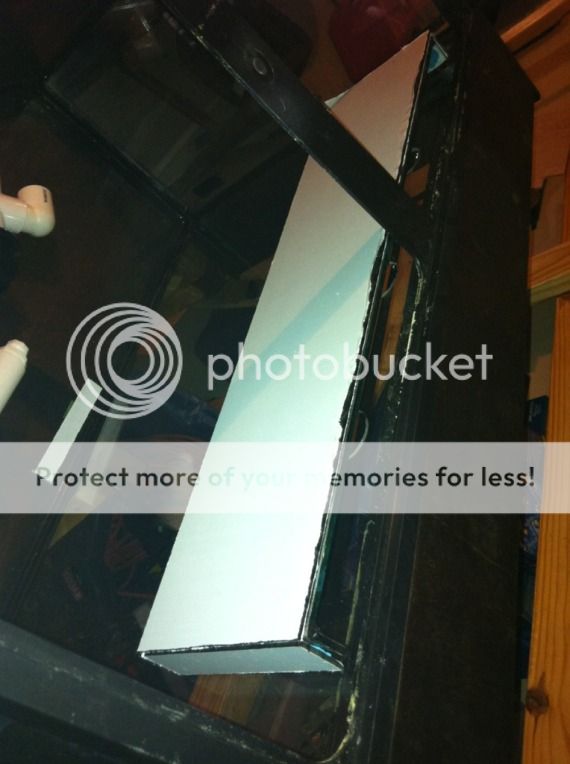
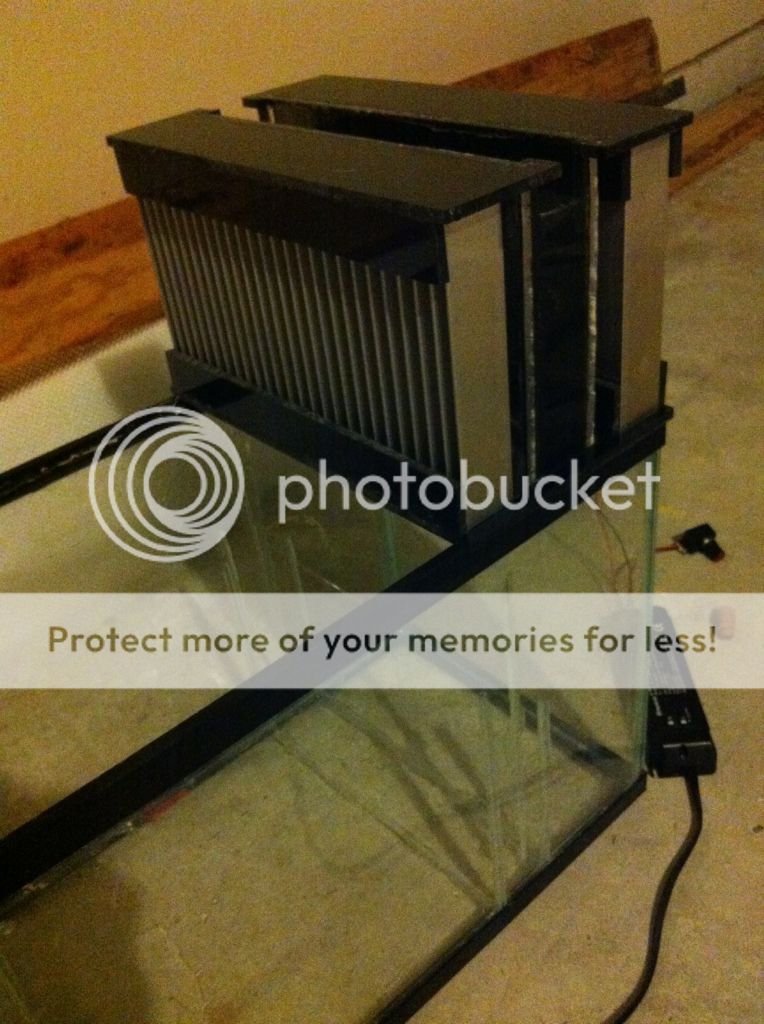
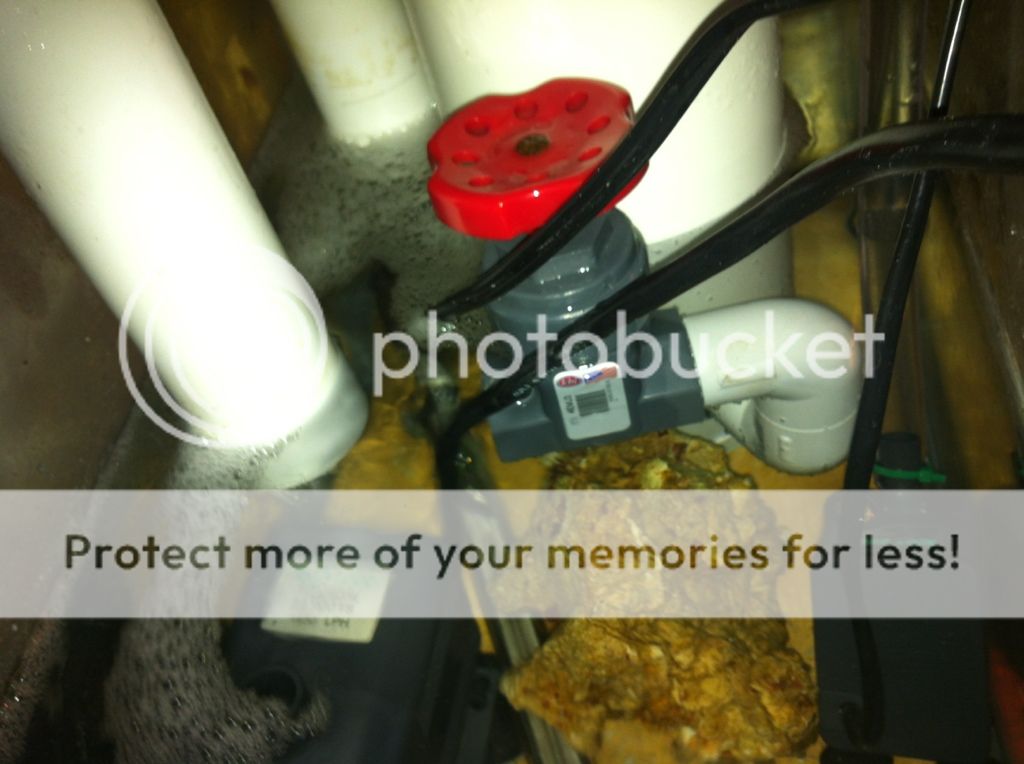
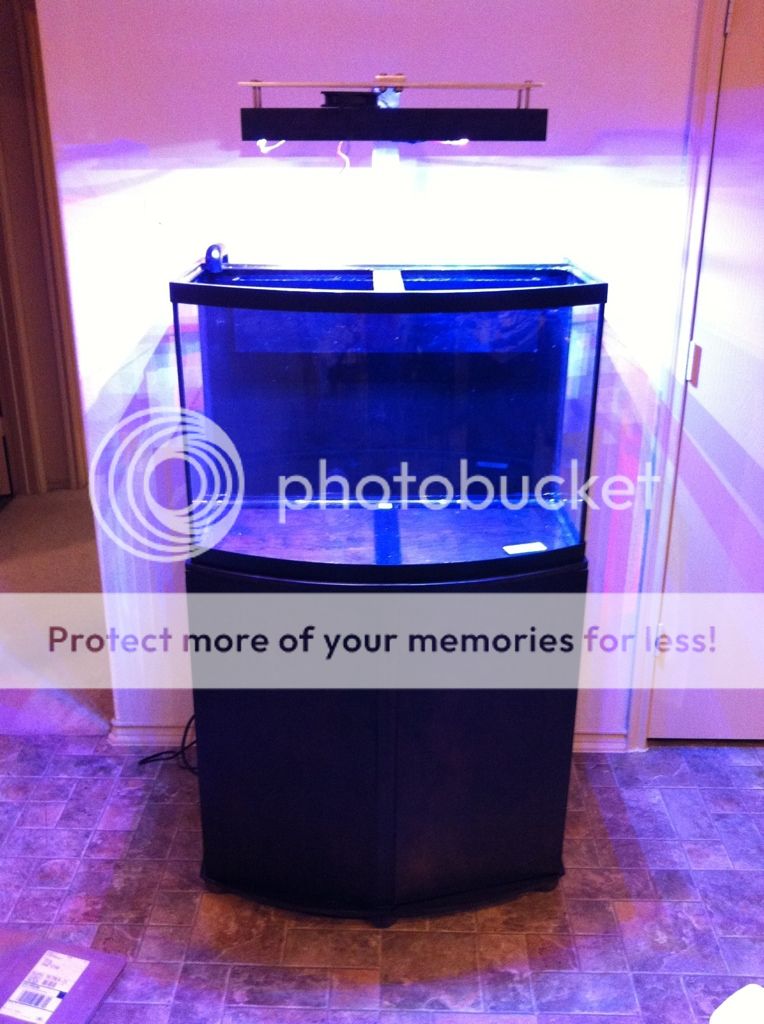
Notice how I extended the sides back and up to conceal my overflow and other equipment.
E34727B9-F3AA-4E5F-BDBF-388059E4C925-1063-0000015EA312B651_zps28cc0301.jpg

00179ADB-031C-488D-A54C-4AA3F08AFEC8-1063-0000015EB8516D93_zps7405782c.jpg

F5399254-6AFE-4BD1-99F0-117F6953BAE9-13046-000014AC5AF2D03A_zps9278a648.jpg

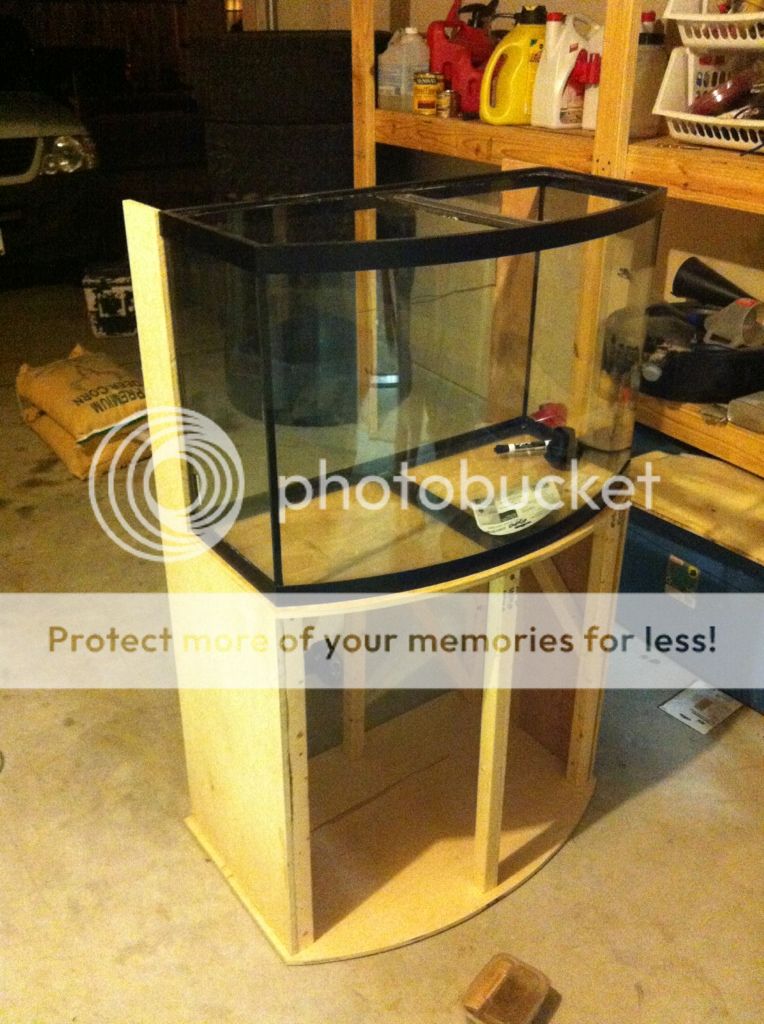
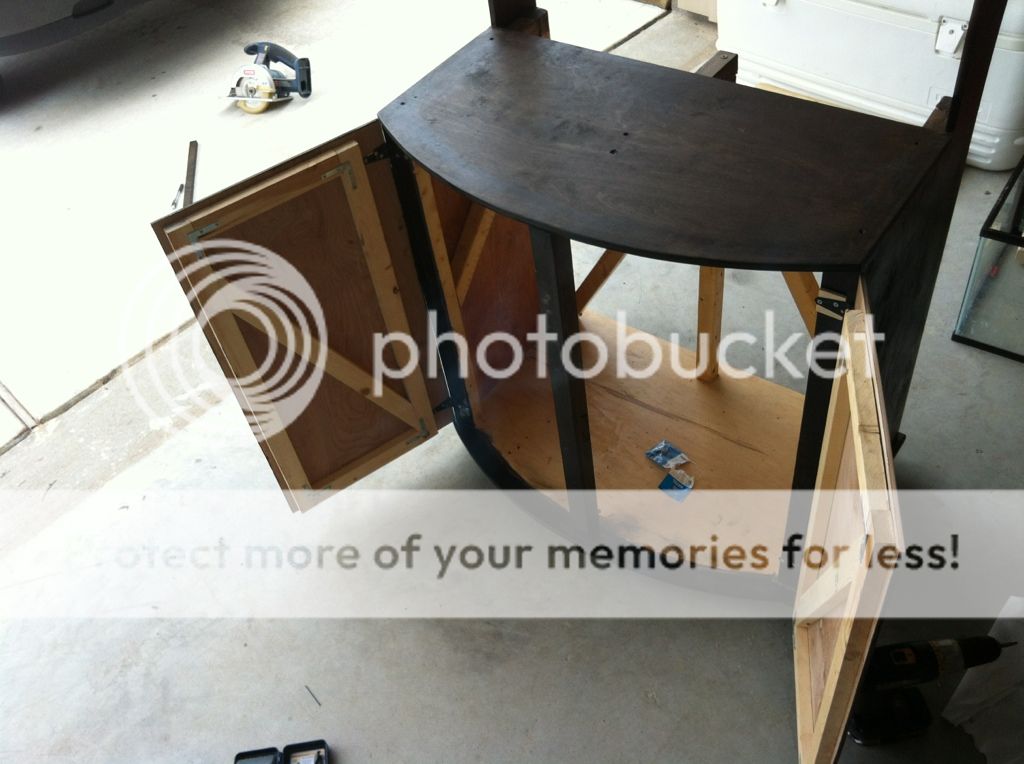
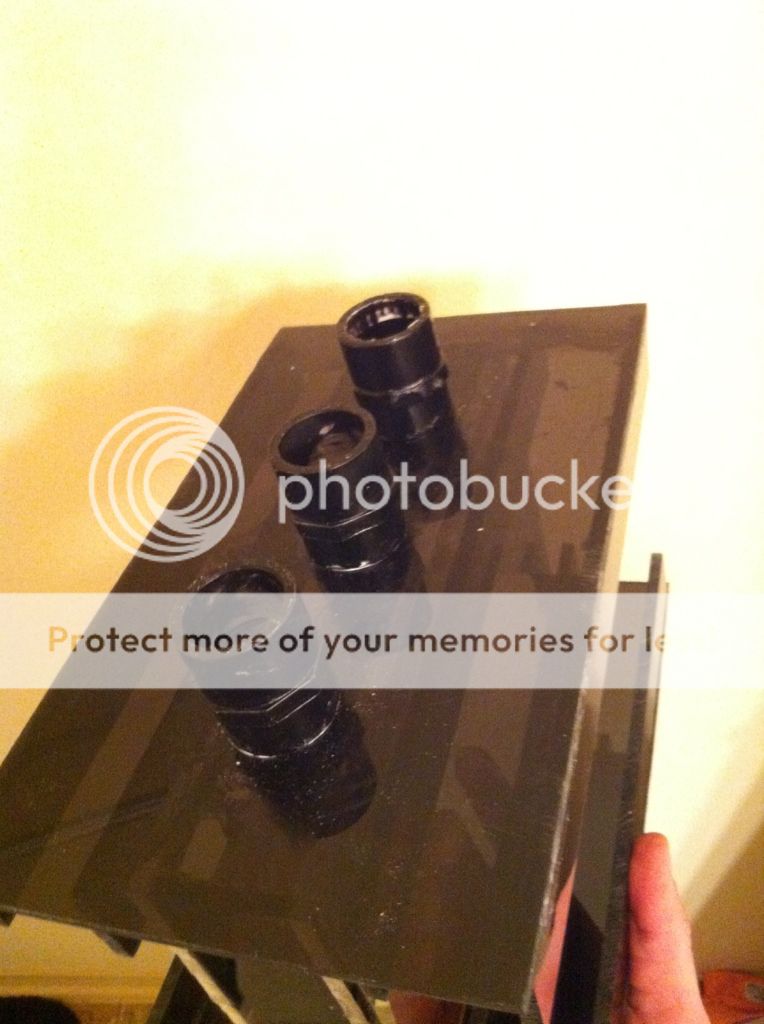
The top part is removable so I can look down into my external overflow box if I need to.
E1946FE0-6669-45D6-9605-8DC6DEFDD333-13046-000014AC79D67737_zps7a842ea1.jpg


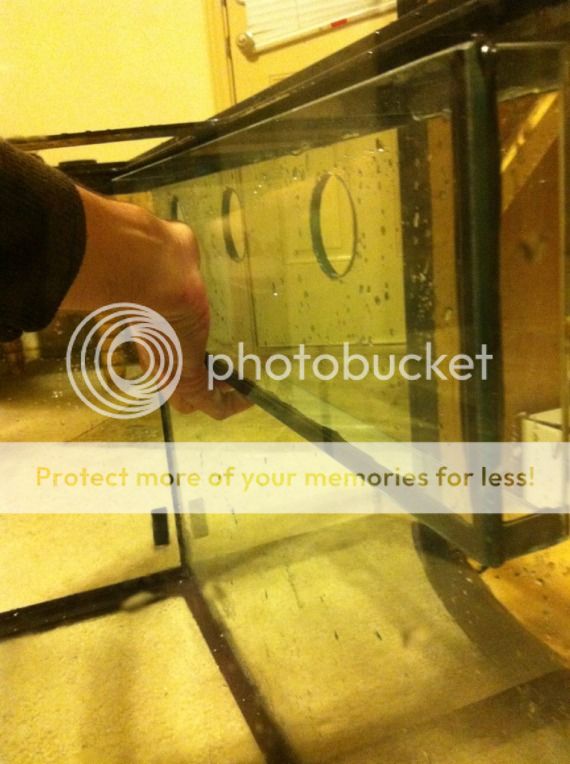
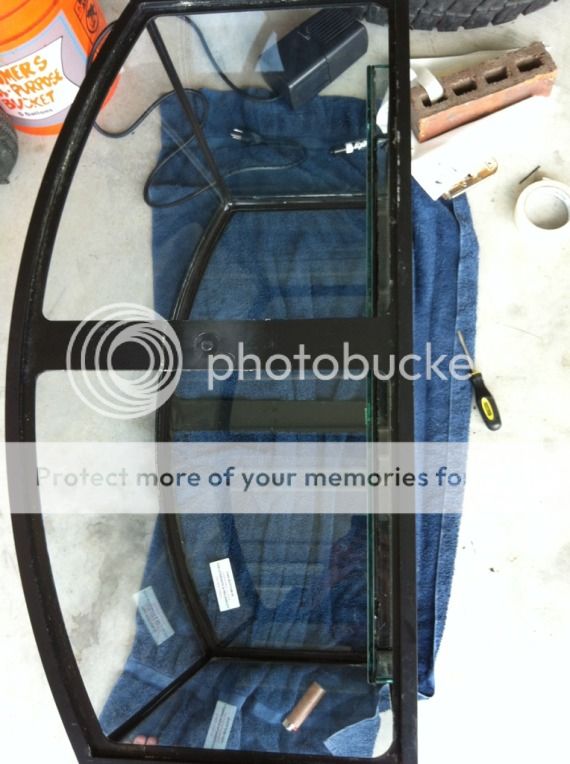
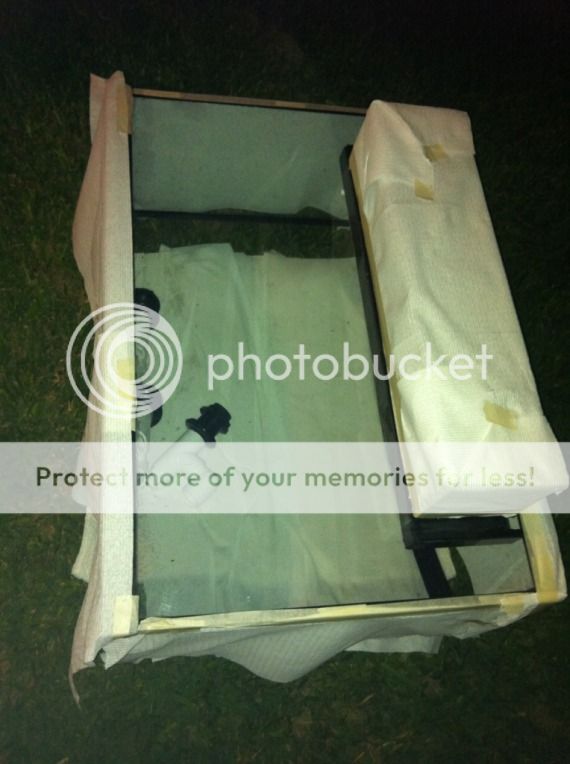
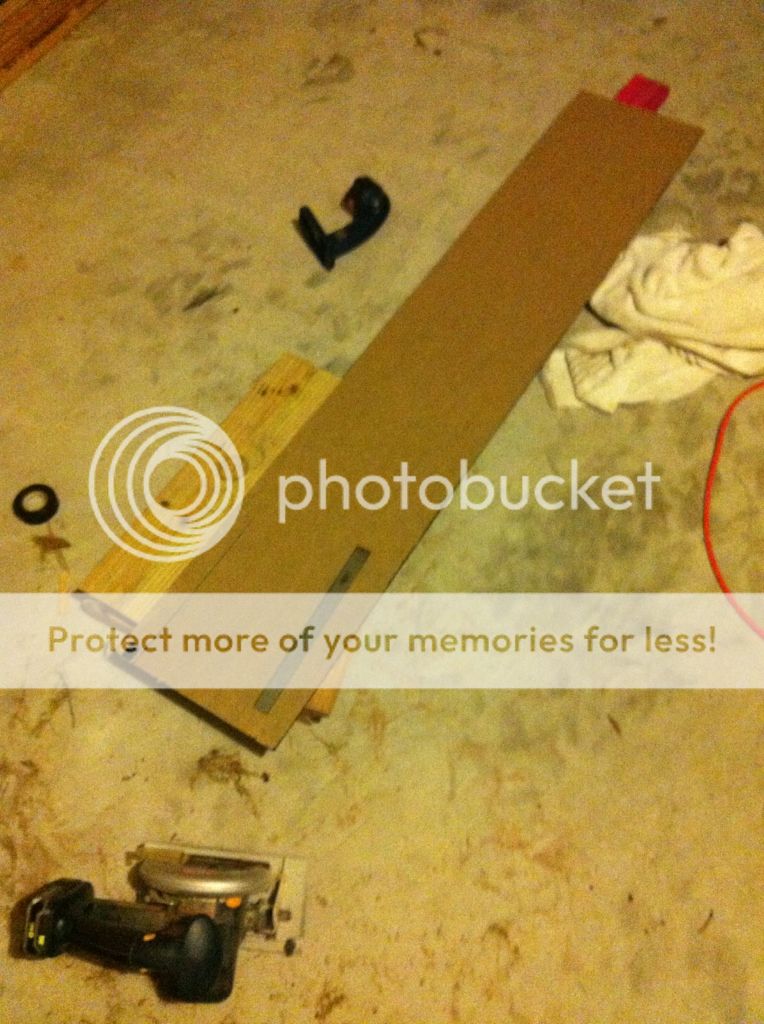
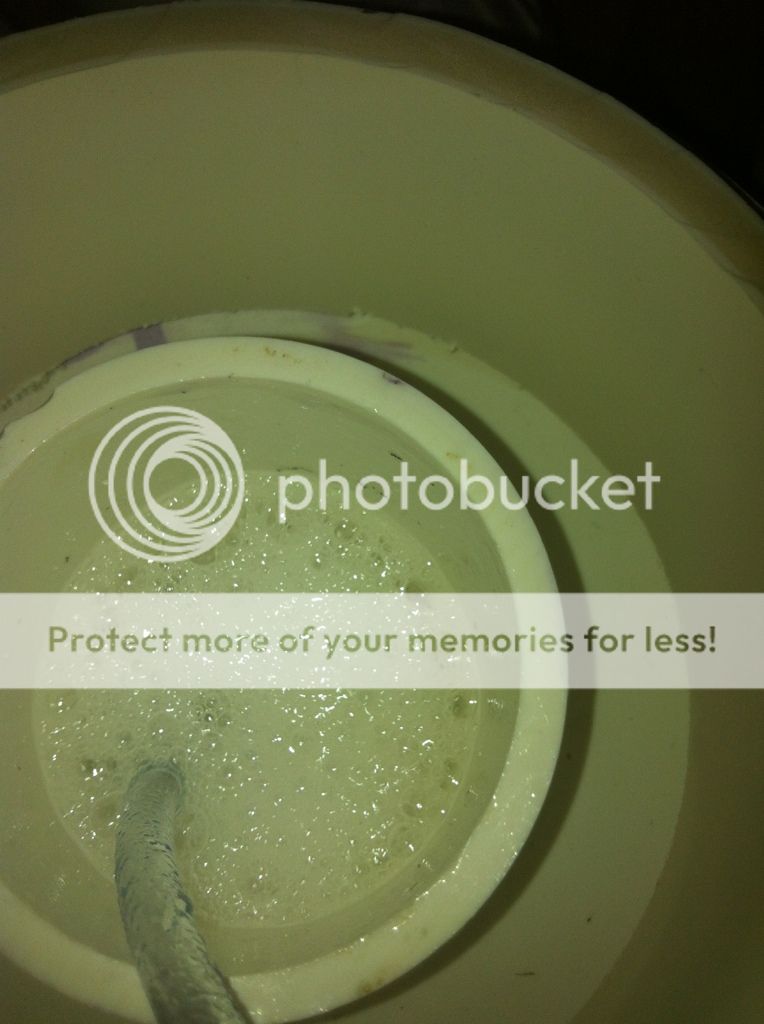
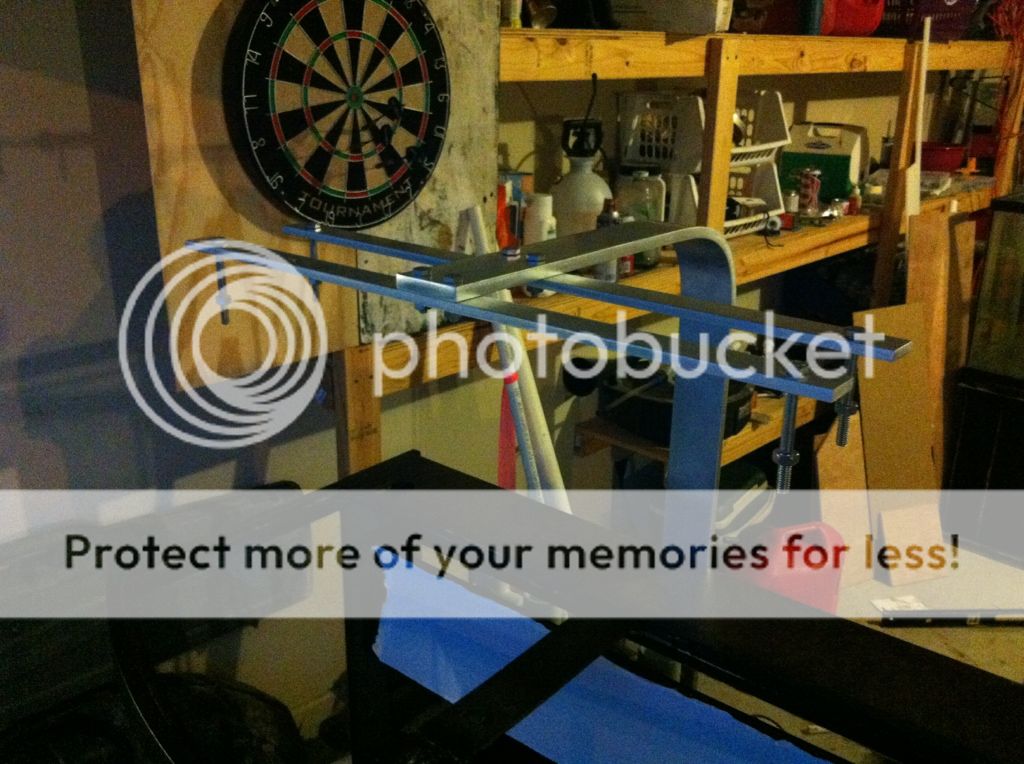
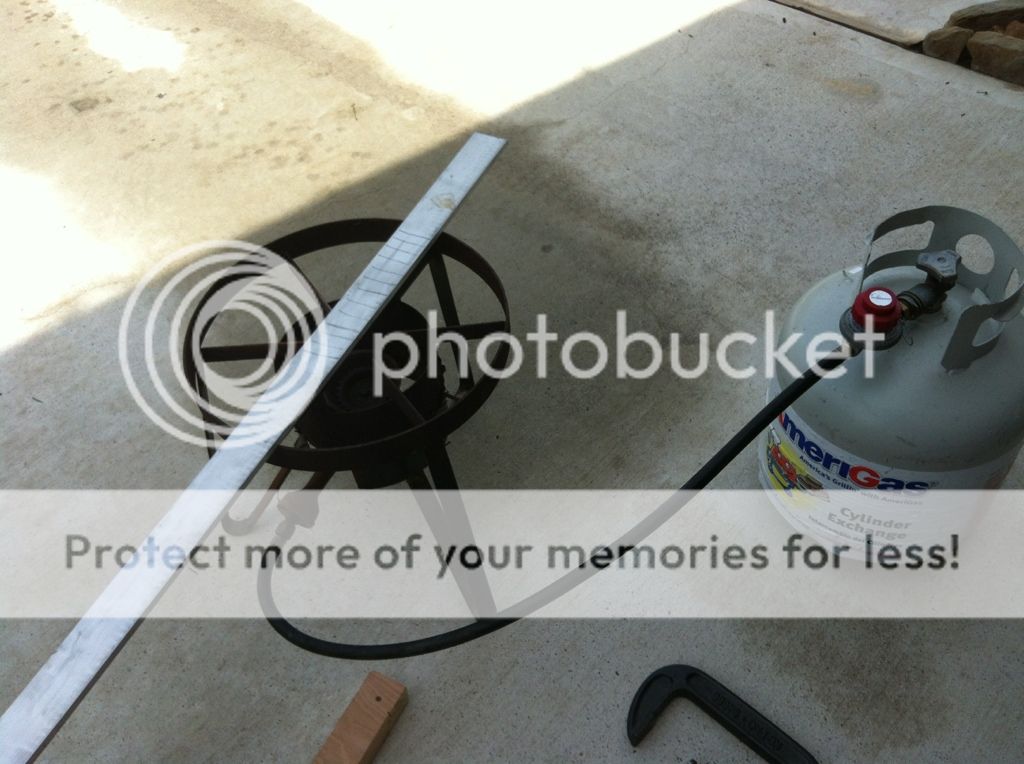
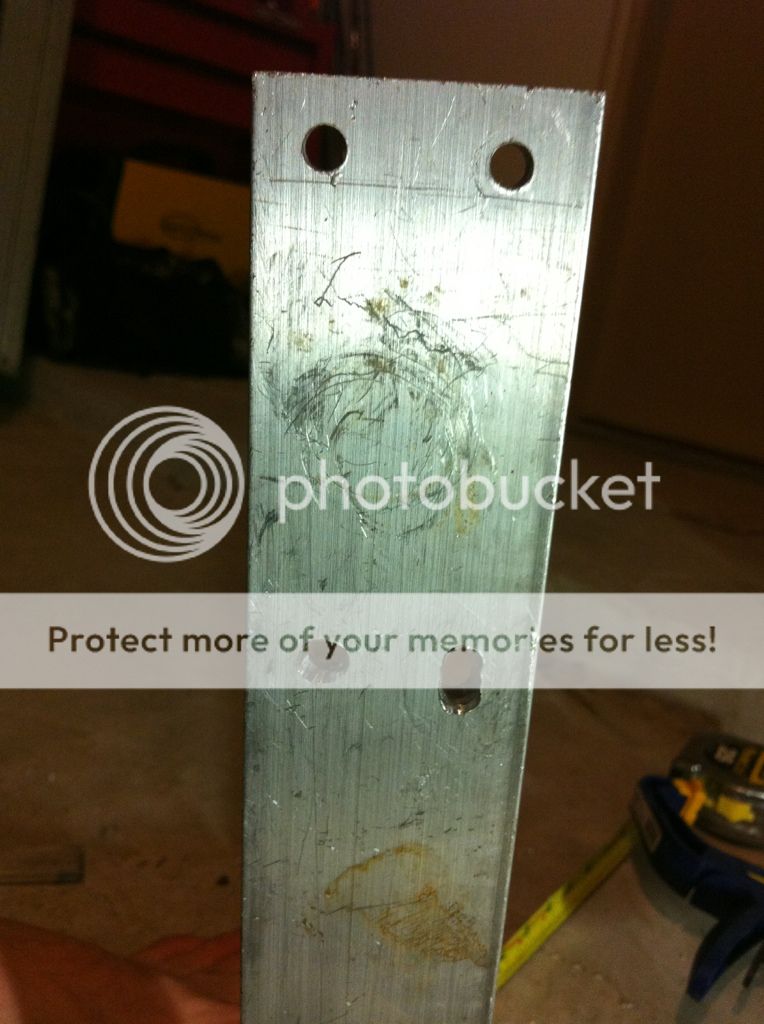
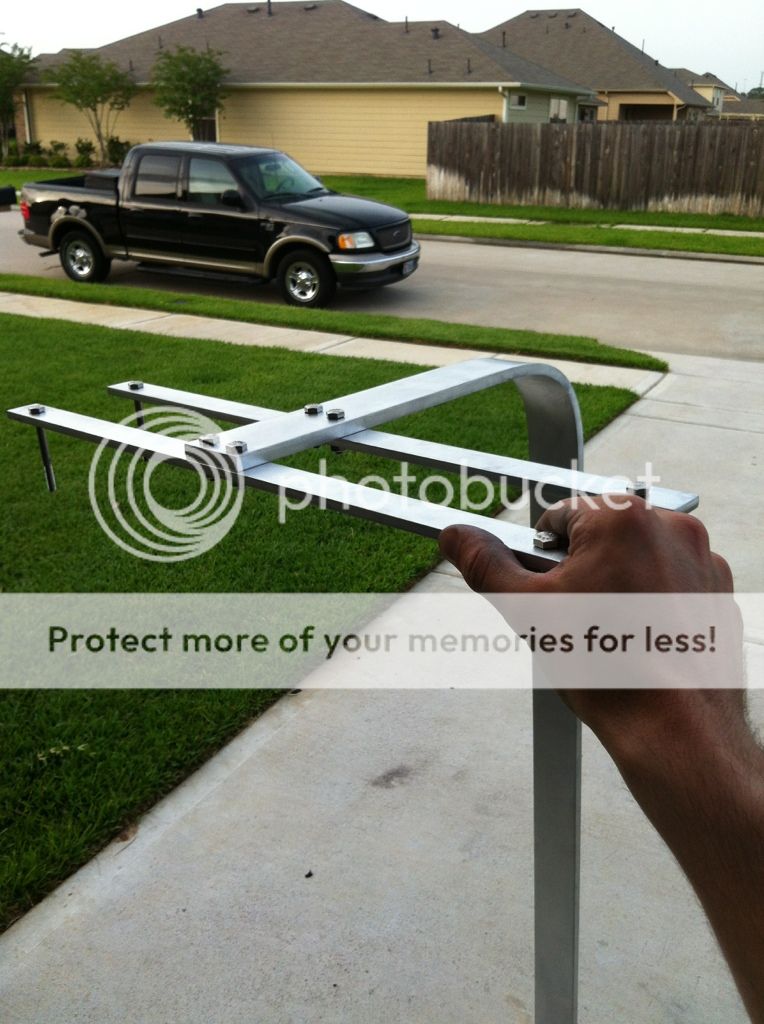
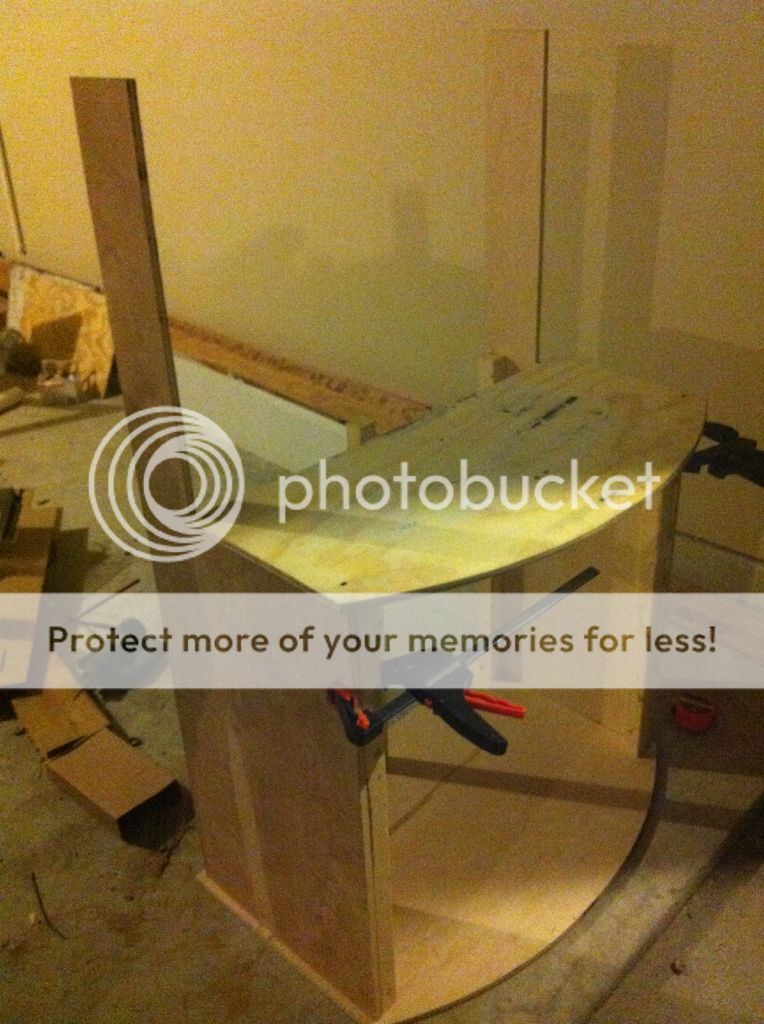
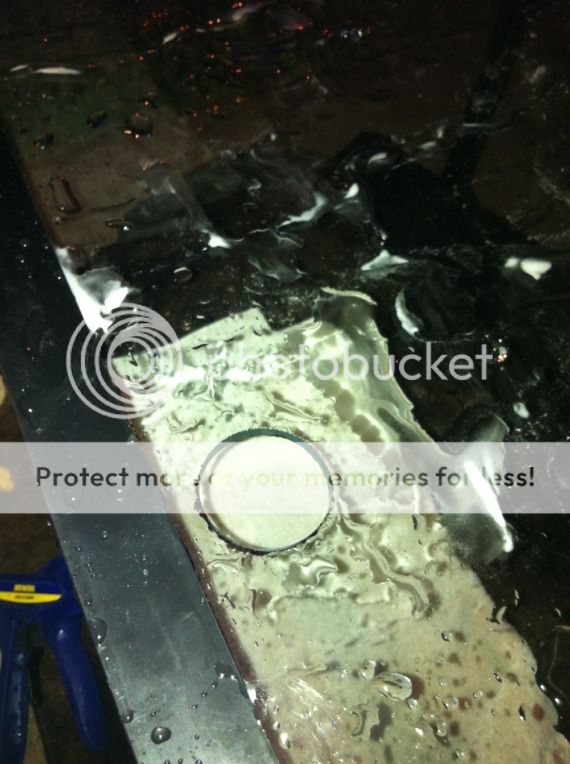
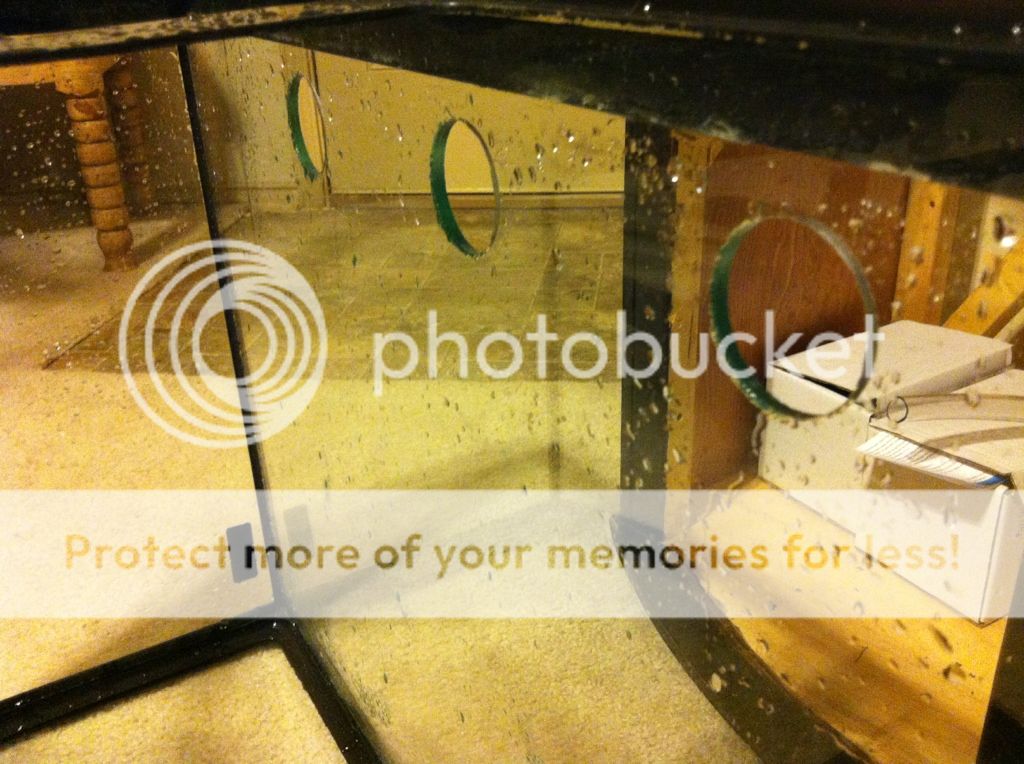
So now that I had finished making my new stand, it was time for the scary part....drilling the tank! It was extremely easy. I was nervous just like everyone else so I made a few practice holes in a piece of glass that I got from a local glass shop.

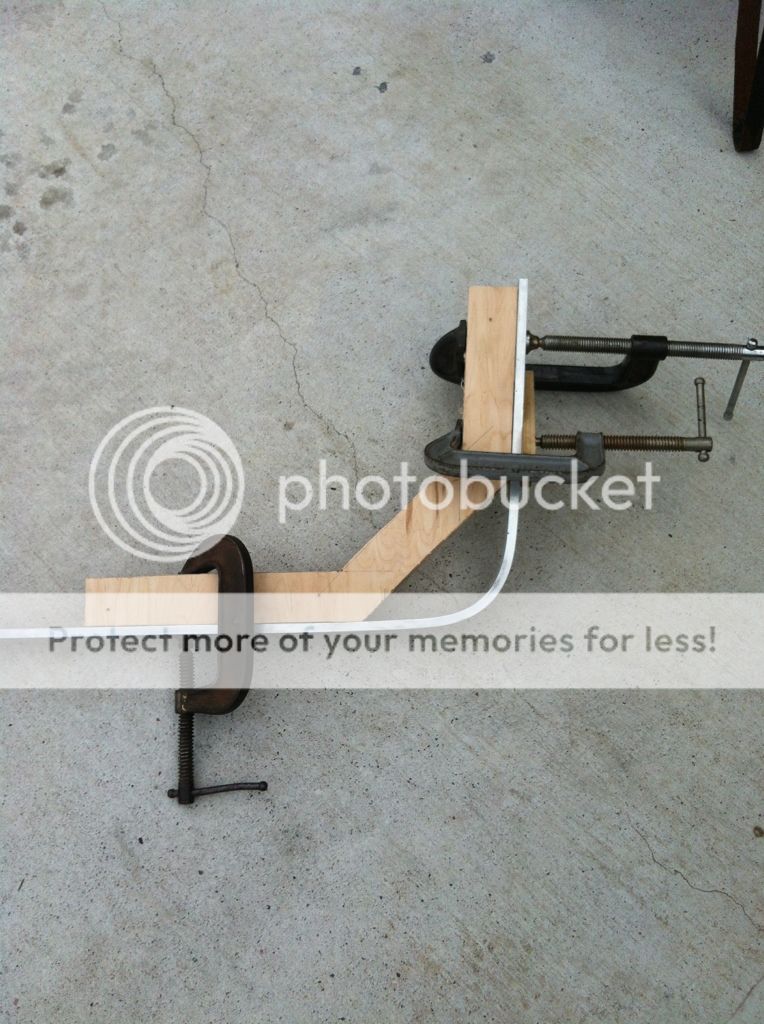
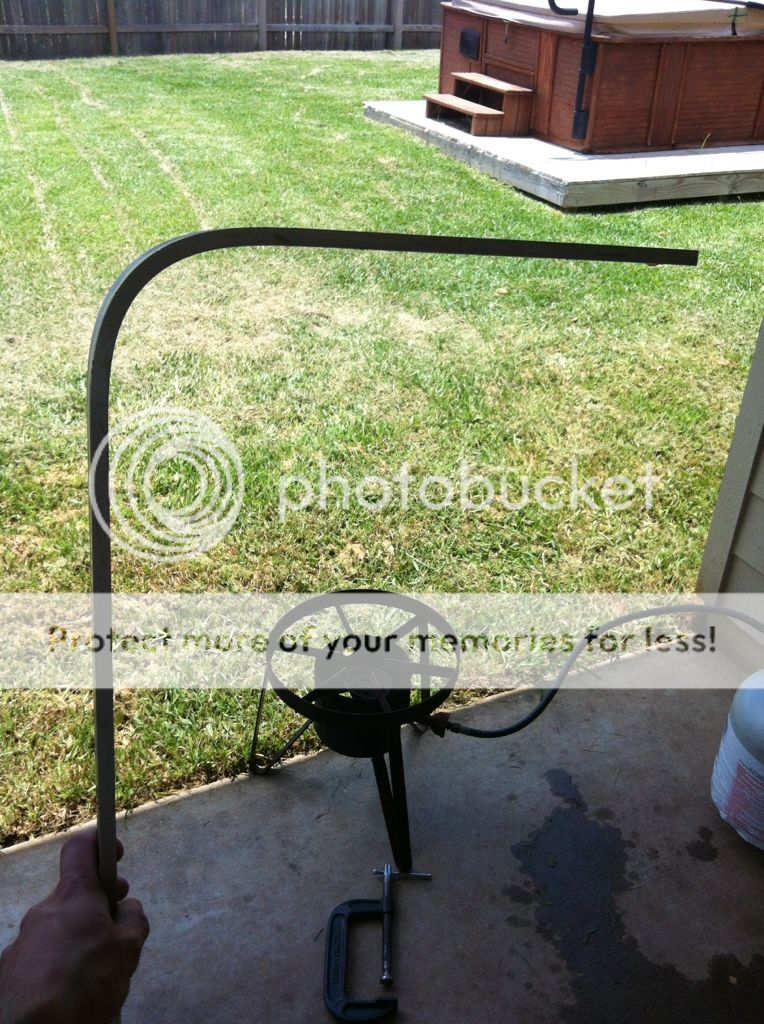
I highly advise people to use a little guide like I did. It makes it as simple as just pulling the trigger on your drill.
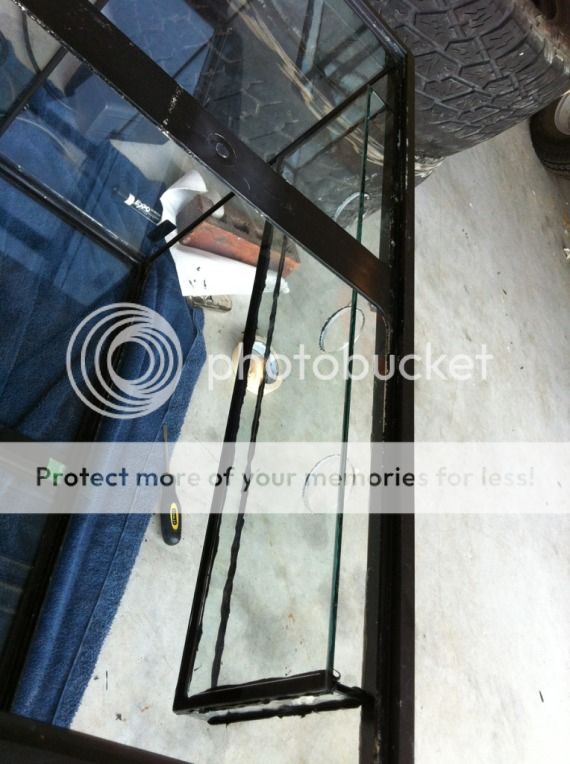
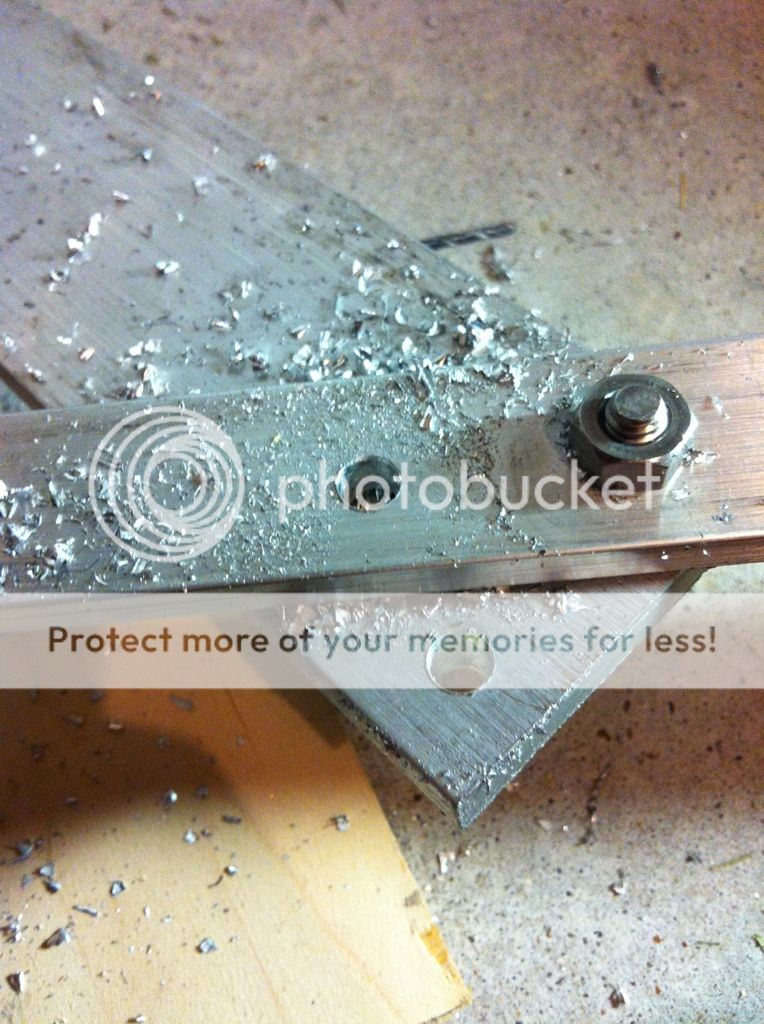
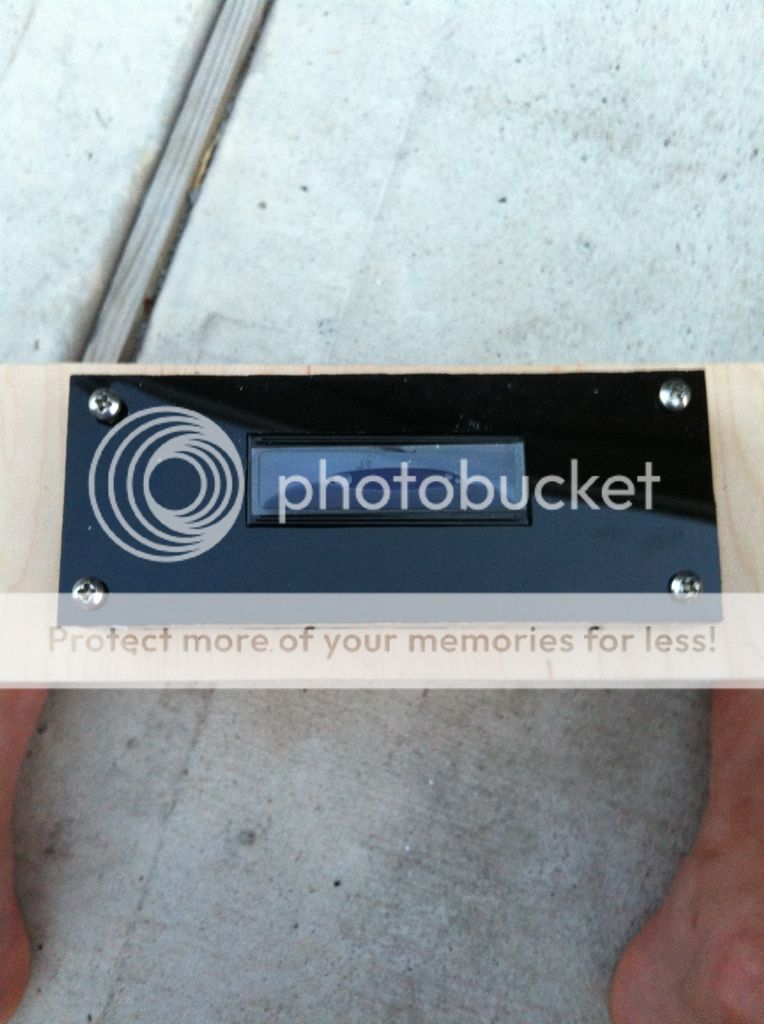
22BA3317-9F5F-462E-A8BD-46C14D85DEA0-845-0000013531A28383_zps55a246f5.jpg


Success!
59141361-19D7-480A-98CB-8894E1415793-845-00000136A871F1BF_zpsbd4ce755.jpg

85EA8724-2459-41E5-976F-62ACB890A59A-845-000001444886B4BF_zpsda5f436f.jpg
 
I decided to use an internal/external overflow. This way, I can save a lot of the space in my tank and still have a great overflow system. I didn't want to do a complete coast to coast though because the sides of the tank are very viewable and I didn't like the idea of seeing the inside of the box or the glue.
4FC5B5DE-9438-4AED-BB39-839364EF6E20-845-000001449C1E389E_zps27a32611.jpg

9F12ACCE-6A85-4BC1-B68C-4681B4BEFFE7-7762-00000CE3414AAC42_zps1967e047.jpg

5B1C9FDB-AC5A-4418-AD5E-8EB9C127362D-7762-00000CE3573AFF71_zps83c53cb9.jpg

27472CDA-932B-4CCA-86C9-134A10DD85A5-8908-00000F4BA1181084_zps92ae7118.jpg


The water test. It worked like a champ!
51C40B03-26C4-48C0-8819-6A0C1DEAF97A-14079-0000172F97B2E0A9_zpsfa6b1cca.jpg


I didn't take pictures of the boxes themselves being made Considering how quickly you have to work, I didn't have time. I would highly recommend using corner clamps while doing this. I had originally tried it without them and it was a mess.
 
I used 1/8" black acrylic to cover up the internal overflow. I just used the same silicone that I used on the overflow boxes and it keeps the acrylic on really well.
84F6C826-01F9-4D36-A3D9-31F6476527B8-22402-000022408D30E9EA_zpsa6edba54.jpg


Here it is with the cover on (the white film as well) and the tank sitting on the stand. I like how the tank sits so flush with the stand. It eliminates a lot of visual distractions.
3B957BCC-DC5E-463D-82A0-9F860E0D5778-22402-00002240B1C34C34_zps750a2e93.jpg


Time to paint it up! I just used Krylon fusion because I had some on hand. It was bubbling up a bit and not giving me good coverage at first. I just scraped those parts off and gave it another layer. It eventually worked.
6C4ECCD3-C202-4A51-999D-997FE8AF8CDA-25336-0000280483BBAB4B_zps08de79e9.jpg

AD9C7709-0122-4B50-B2EC-EAC6138686A9-25336-00002807C00BB9E8_zps9a551ce7.jpg


So at that time, I was done with the tank and stand. It was time to move on to the other parts!
 
DIY Algae Turf Scrubber

DIY Algae Turf Scrubber

While I was living in Korea, I had a reef tank as well. It was sumpless and I had a hard time controlling nutrients. I eventually modded a hang on filter to have a make-shift horizontal/vertical ATS. It worked fairly well, but it definitely wasn't ideal. From that point on, I realized the possibilities with these guys. Even a terribly done one helped my system. I decided I would make a much better one when I decided to do another build.

Here is the design that I made. It was designed to accommodate a screen up to about 8"x5". You can go a little bigger but that size screen is enough for a 3.33 cube per day system. I don't imagine that I'm going to need that much for just a 36 gallon.
Top
163236DE-DC22-45F8-823C-FF2B7E394F62-23789-00001BE2D0E6A2F8_zps8df4e5ae.jpg


Side
BC5D5F7A-557B-4129-8B28-BC67A7101947-23789-00001BE281A7CAF0_zps0338a5ee.jpg


I think some of the numbers are off on the design but I don't remember. It's just a general idea anyways.

Here is the build in progress. I bought the heatsinks and LEDs online and assembled them in the garage. Soldering is another thing that might seem intimidating but it's really easy to do, actually.

Getting ready to make my cuts!
07531D3A-0506-49F6-BAFF-69F8E17358DE-23789-00001BE2EFD0FE63_zpsc820cf75.jpg


AF0139BD-F667-412E-9EE1-E3FB9817BB70-23789-00001BE304DD3022_zps98f3ca11.jpg


Here are all of the pieces just kind of thrown together. No Weld-On yet.
B022E82A-CA27-487D-8BE7-377CA76FB501-23789-00001BE31F9C8EAB_zps7e58df23.jpg


http://i1071.photobucket.com/albums/u502/crn005/08B58EC9-B986-4CB9-9788-8C574D4BB2EC-23789-00001BE36CE30C4A_zps88d044c9.jpg[/IMG

[IMG]http://i1071.photobucket.com/albums/u502/crn005/F8DDB33B-F94C-4079-BDB3-C86AF5DCFE27-23789-00001BE381AD15EE_zps0e5bee36.jpg

For the bottom, I used some PVC fixtures and cut them down to make a make-shift bulkhead. The reason I didn't use regular bulkheads is because that they're too wide for the chamber. Considering that the ATS would be sitting over my sump, I didn't care if it had a few minor leaks.

Put them together and then take a hacksaw to the top! I painted them black as well so they would match the rest of the unit.
3593B8BF-5FDD-48B0-901C-729AE8F69AC8-23789-00001BE39084FC73_zpsfe042a8e.jpg


69EC2E0F-6259-4992-A5B7-474581FC8415-23789-00001BE3B2B63144_zps92e3fd6f.jpg
 
DIY Algae Turf Scrubber

DIY Algae Turf Scrubber

Here are the outlets lined up and ready to be put in. You have to put them in before you weld it together though. They're a really tight fit and you wouldn't be able to screw them in very well if it were already assembled.
69EC2E0F-6259-4992-A5B7-474581FC8415-23789-00001BE3B2B63144_zps92e3fd6f.jpg


Here are the LEDs being placed on the heatsink. I went with 6 reds and 1 royal blue. The blue one is the one in the middle.
F04CF7D3-C25D-43C6-B80D-327D6CA09904-23789-00001BE3D3C70A41_zpsf813c9b8.jpg


The driver is dimmable and came with a potentiometer. That way, I can play with the intensity if I need to.
34D19DBF-D5F7-4743-94D6-D403D73208E0-23789-00001BE3C7465773_zps00b8c7da.jpg


Here it is all welded together, without the heatsinks in. It gives you a good idea about the design. It's very simple, and easy to make.
703D8AA6-894E-4380-A9E6-4A66C18BBA01-23789-00001BE3FC875C4E_zps28b5e68a.jpg


I did a crummy job with the Weld-On. Oh well. The construction was very strong and that's the most important. Plus I only used a skill saw to make the cuts. I went with a very high teeth count blade to make the cuts.
40493D8D-87A6-461F-8668-5C97A0220692-23789-00001BE406715F01_zpscf2848b8.jpg


48FA0D67-07A2-43B6-988F-660731FCE994-23789-00001BE41B114551_zps90dd5581.jpg


Here is the final product.
C11D191D-3B01-4977-84F2-C59086339372-19667-0000175EF68AF56A_zps41b81ad3.jpg


852C6DE2-AEC9-4C54-9400-5C50F741FD54-19667-0000175F0A0C0A1E_zpsc5a92bb7.jpg


I hadn't thrown in the light diffusers yet in that last picture. They do a decent job of throwing around the light. As far as the acrylic itself, I got all of it from a plastics store. Just ask them if they sell scraps. Any length under 12" is typically considered a scrap piece so you can end up with a lot of great pieces to chose from. The best part is that the sell it by the weight (most places, at least). I think I paid about $20 for all of the acrylic and light diffuser. I had A LOT left over and have used it for other things.
 
LED lights

LED lights

I decided to go with rapidled for my lights and have them controlled by a Typhoon controller. I got the 24 LED solderless kit but I changed up the LEDs that it came with a bit. I ordered 10 Royal Blues, 3 Cool Whites, 3 Warm Whites, 3 Neutral Whites, 3 UV/Purples, 1 Red, and 1 Green. I plan on changing out some of the LEDs and adding a few more in the future. The reds and greens just don't do it for me. The red really gives the tank a purple look they just aren't blending that well. Plus, the reds max out at 700mA and it really restricts how hard I can push the whites considering that they're on the same string. I think I will go with 12 RB, 8 NW, 2 Blues, and 4 UV/Purples in the future. Oh, and I put in two moonlights on the kit as well. I just leave those running all the time.

Here they are all screwed in and connected. I liked the idea of going with them in groups instead of being spread out. Plus, I have a plastic braces across the middle of the tank and I didn't want any lights right above it.
B51C5802-B86C-4F4E-9DB3-2384CA80FE5A-23789-00001BE59621DC03_zps3f14078e.jpg


Turned on, without optics.
9B1B67B0-F80F-43CB-B3DE-6F4B891D4E29-23789-00001BE5A265E8DD_zpscf5a7d57.jpg


I had to dial in the drivers so they wouldn't push the red LEDs too hard. It really sucks not being able to push the whites properly.
DBF1DC7C-923C-465A-A8CA-EFB4CCB0E3F5-23789-00001BE5A9315DE4_zpsd9fb4455.jpg
 
DIY Skimmer

DIY Skimmer

After looking at a lot of different skimmers, I decided to build one. I originally made mine to work with a Rio Venturi pump. I just recently decided to change that. Using a pump to provide the bubbles is very restricting and can cause a skimmer to never reach it's true potential (unless designed correctly, of course). I think most of the modern skimmers you see today have too high flow rates. Yeah, I'm sure they work well, but I think they could work better. I decided to go with a counter-current, air driven design. I bought a Micro-Pore Air Diffuser and a Whisper AP150 pump. They work really well together. I went with the Micro-Pore because it produces the smallest bubbles of any ceramic air diffuser that I could find. And yes, I highly recommend using a ceramic stone. They last for forever and are by far the most maintenance-free. I just got it set up last week after I got some of the final tweeks done on the body.

This is the bottom of the skimmer. That pipe will be the outlet.
B160406D-FF49-42D9-8643-3B2F9261156D-7576-00000E6F299E6EBF_zpsc50234fb.jpg


These seals from BRS work pretty well.
3689CA3D-0BA2-4652-A67B-2E04FD38B4F8-8123-00000F4D80524929_zps7d69d99c.jpg


Here's in inlet. Make sure to keep the pipe short so it doesn't get in the way of the bubbles in the chamber. Also, plumbers tape is your friend. Don't ever forget that.
92BA11D7-9AFE-42AA-A998-1F53389417C4-8123-00000F4FBD8CE7F0_zps8b4bfcff.jpg


Here's a picture of the old one. I put this in here to show you how the collection cup is made. You'll want to get a couple of 4" to 2" PVC reducers. Get a Dremel and cut out the lip that stops the pipe when you insert it. Slide down the pipe untill it's a little under the lip of the reducer then weld it in. I eventually cut the rest of the pipe off below the collection cup and only left enough to help it set down into the other reducer. You'll see that later.
118A356E-8B62-4997-8E38-6957E7E94899-23789-00001BE43FD3C056_zps66f2a012.jpg


Now throw on the reducer on the top of the chamber and get the inlet and outlet ready to go.
BBF274DF-3EEF-43FC-8005-1C1B957AF440-10304-000012698BD017C2_zps2a3fc0ec.jpg


For the bottom, I used a test cap and welded it in. I picked it up at a plumbing supply store in Houston. The caps that everyone sells for 4" PVC are all rounded and they make the unit unstable. Anyways, the test caps are about $.50 each. I only needed one so the guy just gave it to me. Score!
81189C3A-D41A-4984-8FA0-2EBD674614AB-10304-0000126A421ED9A6_zps1587a1b8.jpg


Here it is all assembled before I tweeked it a bit. The problem with this design was that it was just too loud. The air exchange in the outlet was causing a gurgle sound so I lowered it to below the water level. Also, this caused a massive drop in flow through the chamber because the pump had to work harder. I need my flow at about 22.5 gph to guarantee two minutes of reaction time.
0C12C8A0-2127-4839-B1AB-BDF269595BA8-10772-000013631A9CF4E7_zps4de9db88.jpg


Here's the final product. I forgot to take a picture of it before I put it in the sump, but you get the idea. Also, I changed the inlet to shoot straight down. I literally have no more room in my sump anymore.
1B3D3291-C415-410A-86C6-90A19A6D560F-11432-0000146F7E20822B_zps0dc395c2.jpg


8DB4CBD1-FF9E-45D8-8B53-6708EA66D624-11432-0000146FA0A314F2_zps46f59ac2.jpg


14A25E49-8202-42CF-A34C-7375E7C041D3-11432-0000146FB806CDB6_zps341858dc.jpg
 
DIY LED Stand

DIY LED Stand

I saw this design on someone else's tank. It's an awesome stand if you don't want to hang them from the roof. It's not that difficult either. I used 2"x3/8" aluminum flat bar for the main part and 1"x1/4" for the lateral bars that connect to the heatsink.

Here's the finished product. It's bolted into the stand on the back.
BB09BEA8-FEFC-4CBF-96B7-1D4CD2E2C961-6008-00000AE1880B262A_zps218d545b.jpg


175CF509-D73C-4C60-86C4-43EEE11D72E3-2484-000004C0E0AE80F1_zps89ab468f.jpg


To start off, I needed to make a frame to bend the metal on.
C63A9A7F-E188-418B-A726-CA5CC3A73156-42881-000047798DD8A61F_zpsc1b662f2.jpg


I learned a little trick that helps while heating up the metal to be bent. Sharpie ink evaporates at the temperature that aluminum becomes pliable at. Just make some marks where you want the bend to be. I originally tried using a torch but it just wasn't getting hot enough. Then I had an idea. I broke out the burner and propane tank. It did the trick.
7502D50D-D591-4C54-AF92-E54671E7A29F-45512-00004C5F46B020D9_zps4fcb4bf9.jpg


Get the bar nice and hot and then clamp it down. Then bend it slightly until it you can clamp it down.
DE95FF3E-9F80-4642-B640-29C3F2317252-45512-00004C6BBDE0EB43_zps1b26d730.jpg


There are couple of things to keep in mind while you're doing this. When you're making your frame, make one of the sides of it the length that you would like your stand to extend. That way, when you're bending it, you can just line it up with the end and it will extend your desired length. Also, you need to account for the reflex of the bar once it's bent. I originally just made the frame a 90 degree angle, but once the bar cools, it will reflex back a little. So, you need to either make your frame less than 90 degrees or just manually bend it once you get your initial bend. I know it's not a good idea to re-heat the bar, but for this application, it's ok. The heatsinks aren't heavy and it doesn't weaken the metal to where it won't work for this application. So, get your initial bend (to ensure that you have a nicely rounded curve), and then after, just grab the long part of the metal and use the cement to bend it to a nice 90 degree angle.

1A86E0FC-8758-4891-A536-EF69E74DA475-5571-0000096804D4717E_zps2617b6f6.jpg


Once you have your nice bend, it's time to cut holes for the screws.
6E96CD32-9945-4778-A3BD-92C090881A7D-6008-000009CF92147C19_zps925496c1.jpg


Notice how one of the holes is elongated. this allows you to slightly move around the back lateral bar so that it fits perfectly with your heatsink.
B7DE90F0-5B4B-44E6-9E36-CDE69C074941-6008-000009DB1EDAE0EA_zps0dcd21c5.jpg


Once you get your holes drilled, head to the auto store. Find some sandpaper in the 1000-2000 range and polish up the bar a bit. I didn't go full shine polish for mine, but I think it would be good. I simply didn't have the tools to do it and wasn't worried about it. I just wanted a nice, clean finish.
44BD6D5C-FCF6-4720-89CD-321D1E0D8F70-6008-00000ADB1F24A9C5_zps94074649.jpg


When you're putting it together initially to try and get it aligned with the heatsink, use regular stainless steel nuts. Once you have it where you like it, use the kind with the plastic in them (I think they're called lock-nuts?) to make sure they don't come unscrewed.
7988407C-C344-436B-B130-581718ABD830-6008-00000ADBD0022371_zps33bcbce9.jpg


I eventually went back and drilled holes in the heatsink to run the wires through. That way, I didn't have them running out of the sides and it gives it a more clean look.
 
DIY Typhoon Controller Case

DIY Typhoon Controller Case

As most of you know, the Typhoon controllers don't have a case. I designed a really simple and easy case for them. I still haven't finished it, but it's almost done. I just need to find something to use as buttons. I ordered some 1/4" black acrylic rods but they're going to be too wide for the job. If anyone knows where to get some 1/8" black acrylic rods then please let me know! Anyways, I used 1/8" thick black acrylic that I had left over from my overflow cover to make it.
261B2DD6-86FE-46C7-9FDB-E6D9564D1B93-7829-00000E41EBFF186E_zps3302418e.jpg


404A2842-1F46-471A-B350-2C3013926D7E-12963-000017BDF141FE23_zps754554d6.jpg


I made holes in the back to allow my chords to go directly into my LED driver cabinet.
0D9E731E-B7CB-48E0-B56D-EC774D5431AA-7829-00000E3FB970B06C_zpsc4aaabd0.jpg


All you have to do is screw on the face plate and you're ready to go. I just have to find something to function as buttons....
 
As far as the plumbing, I just went with a standard Bean Animal overflow. when I orginally welded all of the PVC together, I had all three of the elbows in the external overflow box welded in facing up. Why? Because I'm an idiot. So I had to empty the tank, cut out two of the pipes, buy all new fixtures again (gate valves aren't cheap), and redo it. It was a PITA. However, everything works well now. That thing is dead silent!
 
Here it was before it got water. I was letting my dry rock that I got from BRS soak in RO water at this point to get some of the phosphates out. LaCl works VERY well at expediting the process.
E0B4DDF8-6409-4851-97E5-8EE77B16E718-2484-000004C0D11557FE_zpsd08bfd9a.jpg
 
Live/Dry Rock

Live/Dry Rock

I went with BRS Reef-Saver and Tonga Shelf Rocks. My original plan was to make a minimalistic rock-scape with sweeping shelves. I eventually changed my design. It just didn't seem to look right. I eventually settled on a different design with no shelves that seems to be much more natural.

Soaking the rocks in RO water and using LaCl to help leach out the phosphates.
D13C529B-1A9E-4D66-A463-66B264E2DFC5-25336-0000282928E254F5_zps0626b544.jpg


This was the original design. I liked the sweeping shelves but it just seemed too forced, IMO.
06440CE2-EFE4-48BE-94DF-4CF4E2070A6E-40554-000042A336CFD49A_zps6195ef10.jpg


This is what I eventually settled on (minus the brown rock in the back left corner. It was just in the to help seed the nitrogen cycle.).
E2C5EC4E-762B-4F0C-87AF-097775A01B15-1736-000002C444EA55F8_zps383d71bc.jpg


0FFC9116-4FAD-403F-A29F-B36A09AF0B08-1736-000002C459EAABB5_zpsbac36b0b.jpg


6DA1D161-E909-4E4A-A92F-BD8EB7A635A4-1736-000002C44F3FA948_zps9509a861.jpg


I'm very pleased with the newest design. It has a lot of depth to it and still allows me have some shelving corals (on the right side). It also has a little canal and island, which I really like. It's going to look great once it's littered with sps!
 
For the auto top off, I went with a double-switch system that powers a Tom's airlift pump. I picked up a little cereal container to use for my water tank. It was only a couple of bucks and works like a champ. Plus it has a little lid that you can put the tubing through. Don't mind the wires in the picture though. I still haven't sorted them out! :eek1:

B9BDA69C-8E9C-4C74-8E4E-7B2F912C422C-12963-000017CA2C64EB89_zps6ebfa9bf.jpg
 
Anyways, that's pretty much all the progress for now. As I finish up the system I will update on here. Thanks for checking out my build! Feel free to leave comments or ask questions :beer:
 
You sir, have put a lot of thought into all aspects of this build. I love all the DIY projects coming together with a professional flair. Well done!
 
Thank you very much! I love building things. I always have a project going on (that dart board you see in the background of some of the pictures is the next build). It's very rewarding to build something nice and then look at it and think "these hands made that." And yeah I had a lot of time to plan it. I was constantly planning it the last year I was living in Seoul so I could get started whenever I moved back. However, there have definitely been a lot of hiccups along the way!
 
Back
Top