You are using an out of date browser. It may not display this or other websites correctly.
You should upgrade or use an alternative browser.
You should upgrade or use an alternative browser.
My 36 Gallon Bowfront Build (Lots of Pics)
- Thread starter crn005
- Start date
crn005
New member
Thank you, everyone! As far as the skimmer, I'm still trying to dial it in. It's only been running for a couple of days so I've been letting it break in. It's a little difficult to see the inside of the chamber because of how tall it is in comparison to my stand. I don't have much clearance on top so I have to kind of use feel to see where the water level is at. I have it running a little wet right now and it's producing some skimmate. I only have my mated clowns in there right now and I'm not a heavy feeder so their isn't too much for it to pull out. I think the real test of it is going to be once I get a little more livestock in there.
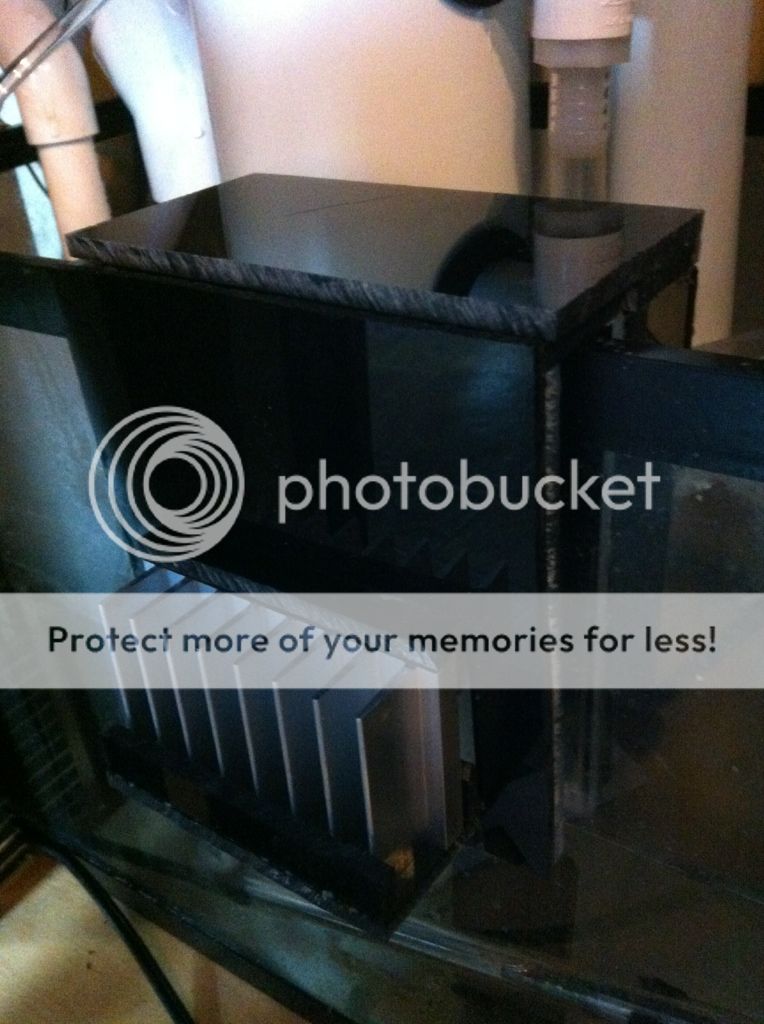
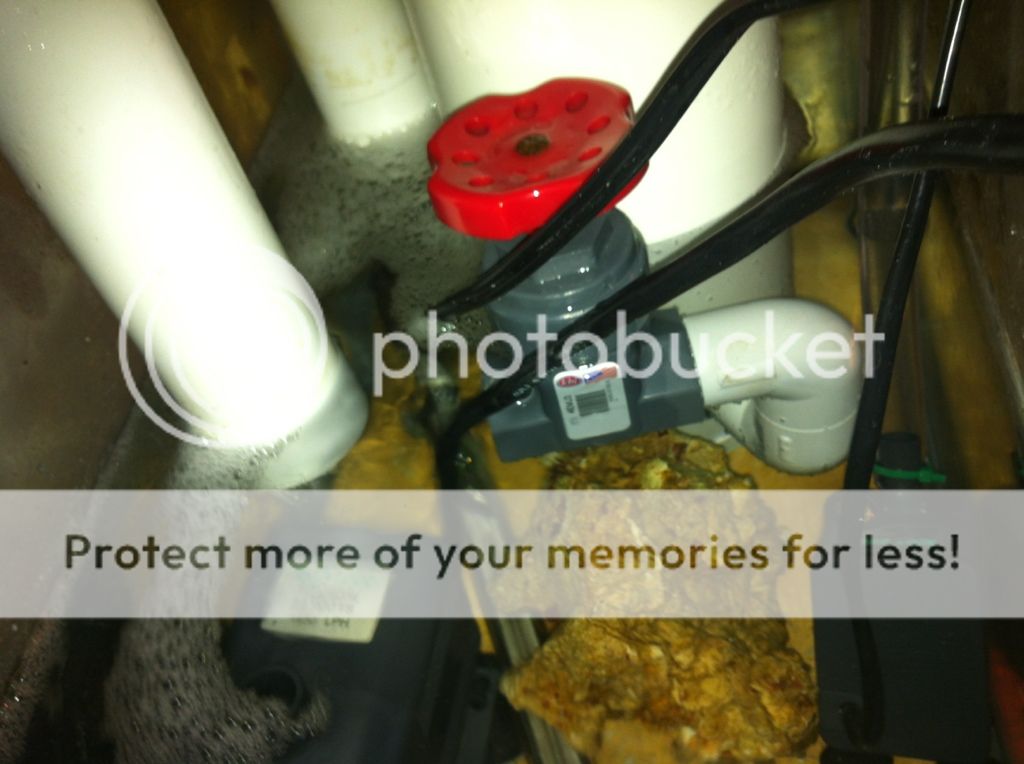
Here's a pic of my sump. It's a tight fit, for sure (and still unorganized, don't judge!)
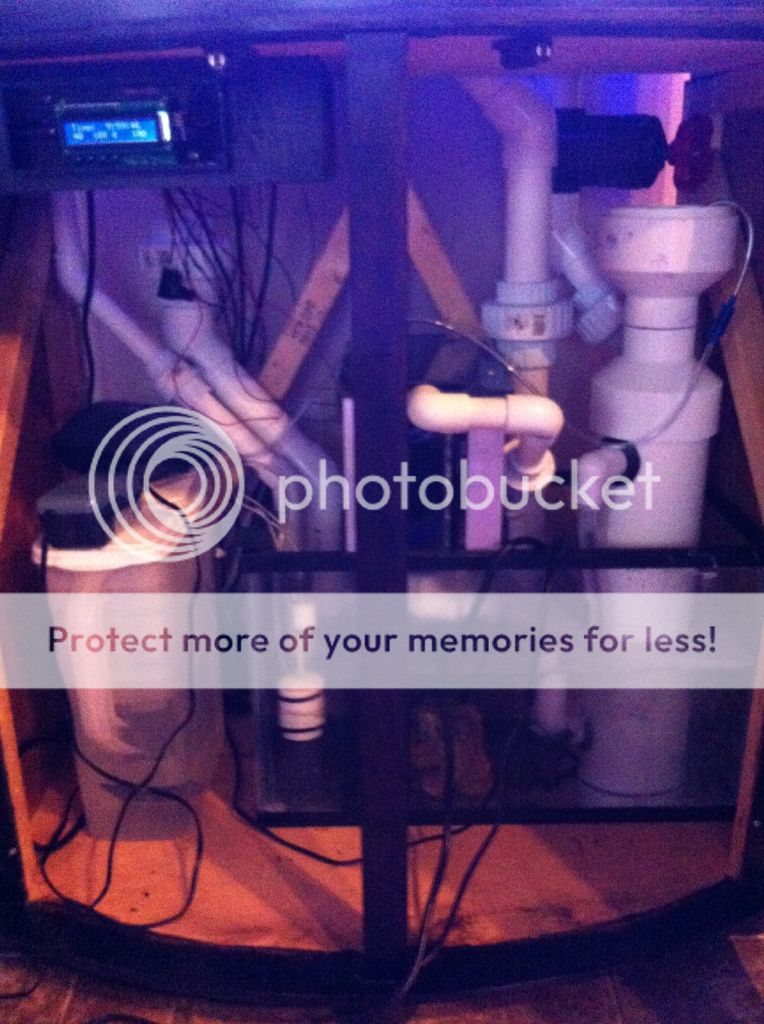
Here's a pic of my sump. It's a tight fit, for sure (and still unorganized, don't judge!)
crn005
New member
So I took off the original ATS. It was just too big and too loud for what I need. I'm currently welding up my new one that's much smaller and should be MUCH quieter. I'll have some pictures tomorrow. I'm pumped to get it up and running! The only issue I think there will be is that my skimmer is doing a great job and there's not enough nutrients to feed the new ATS at the moment. I still only have my pair of clowns and they just don't eat that much. Maybe after I get some more fish I'll see better results with the ATS. Looks like I have a great excuse to get more fish! :spin3:
crn005
New member
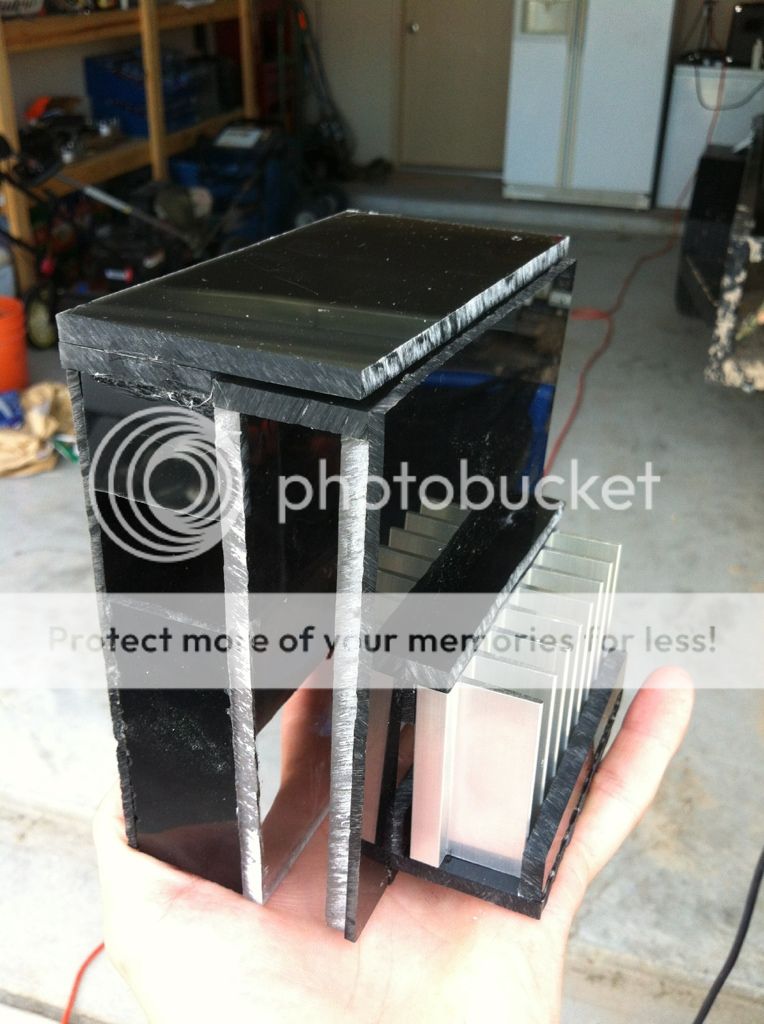
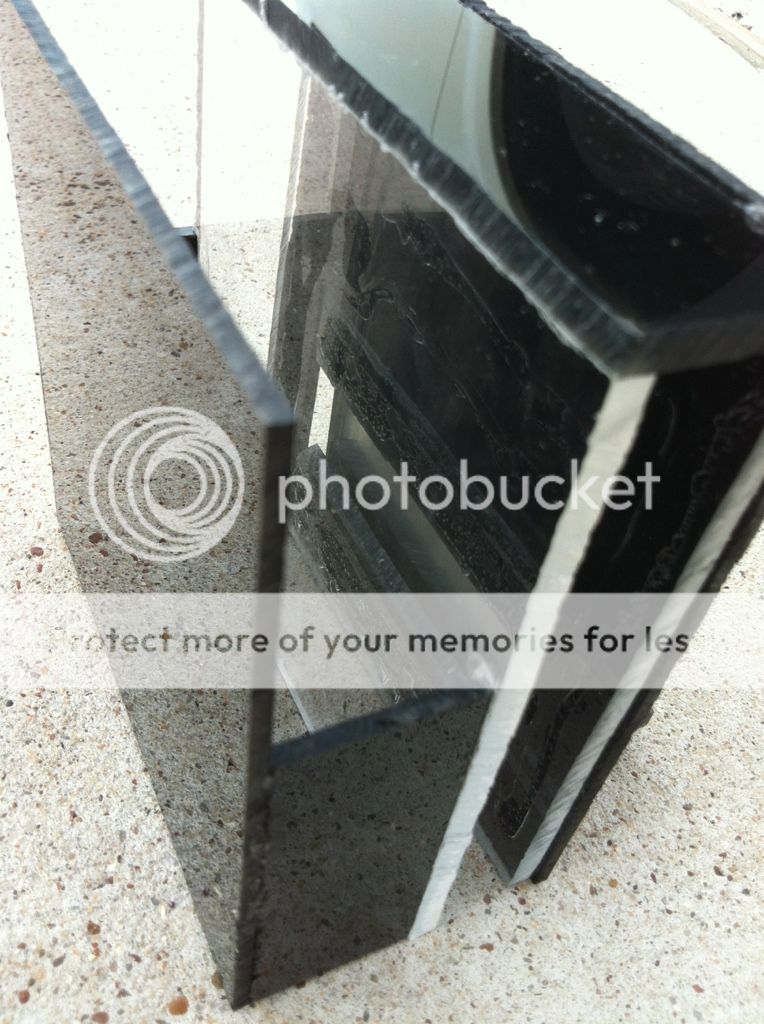
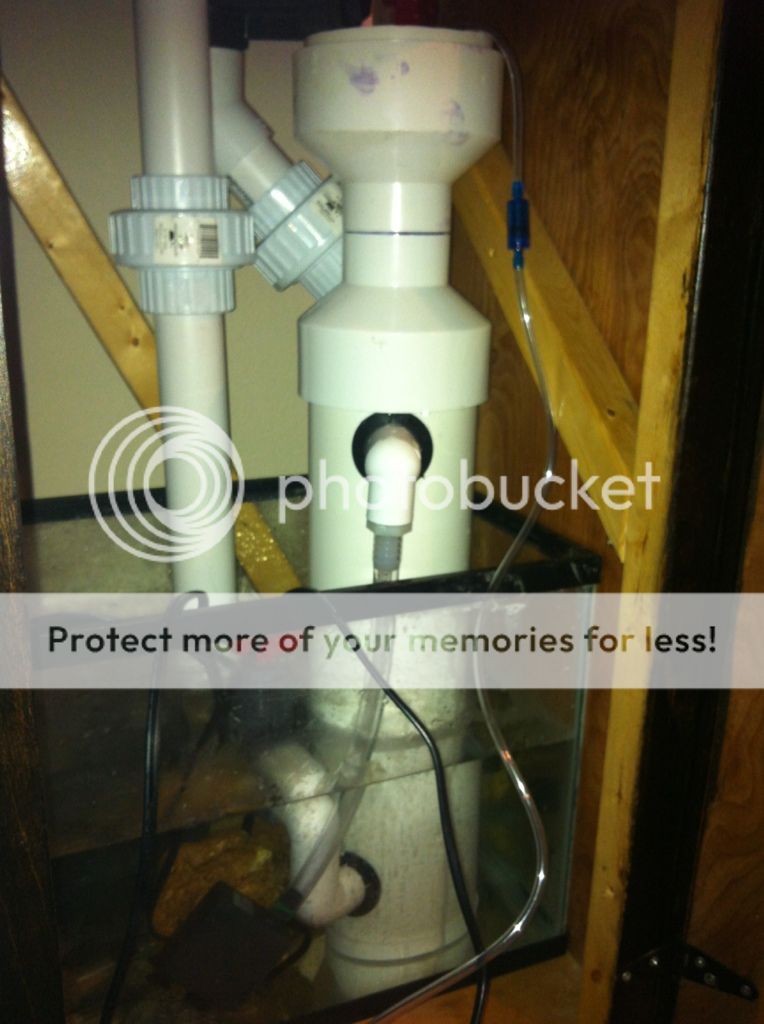
Here it is! Almost done. I just have to solder up some LEDs, build a new lid (the original one was thrown together really quick), polish it up a bit, and throw on the plumbing! Hopefully this one will work better than my previous one. It was just too big. also, this one hangs on the side of the sump so it frees up A LOT of space in my already congested sump.
crn005
New member
Ok so I've had a couple more people ask about my skimmer so I'll just put the plans on here. I'm not too good at designing software so I'll just provide pictures, parts list, and comments. All of the PVC parts are from Lowes/Home Depot.
Part List:
-4" PVC (2' section)
-4" PVC Test Cap (The one PVC piece not found at L/HD. Get it from a local plumbing supply store or online)
-4" to 2" reducer adapter (Qty. 2)
-2" PVC (2' section)
-3/4" 90 degree PVC elbow (Qty. 3)
-3/4" (slip) to 1/2" (threaded) 90 degree PVC elbow
-1/2" OD (threaded) x 1/2" OD (tube fitting) fixture
-1/2" OD tubing
-Uniseals (Qty. 2) (I got them from BRS but I'm sure you can find them locally as well)
-Taam Rio 800 Powerhead
-Tetra Whisper AP150 Air Pump
-MicroPore Air DIffuser, Single Model (you can buy online, but I went to my local hydroponics store ((yeah, you know exactly what type of store I'm talking about)) and got it for basically the same price but with no wait time or shipping fees, just call around)
-3/4" Gate Valve (I got my from Grainger's)
-PVC Glue/Plumbers Tape (Tephlon Tape)
General Idea
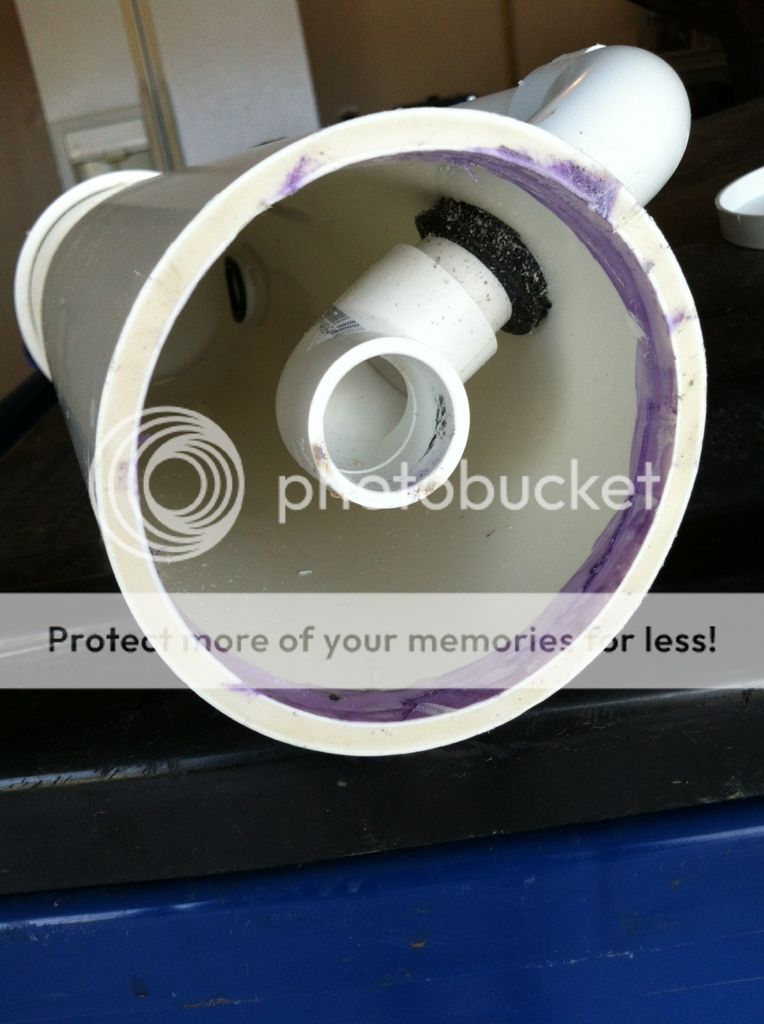
Inside, Bottom
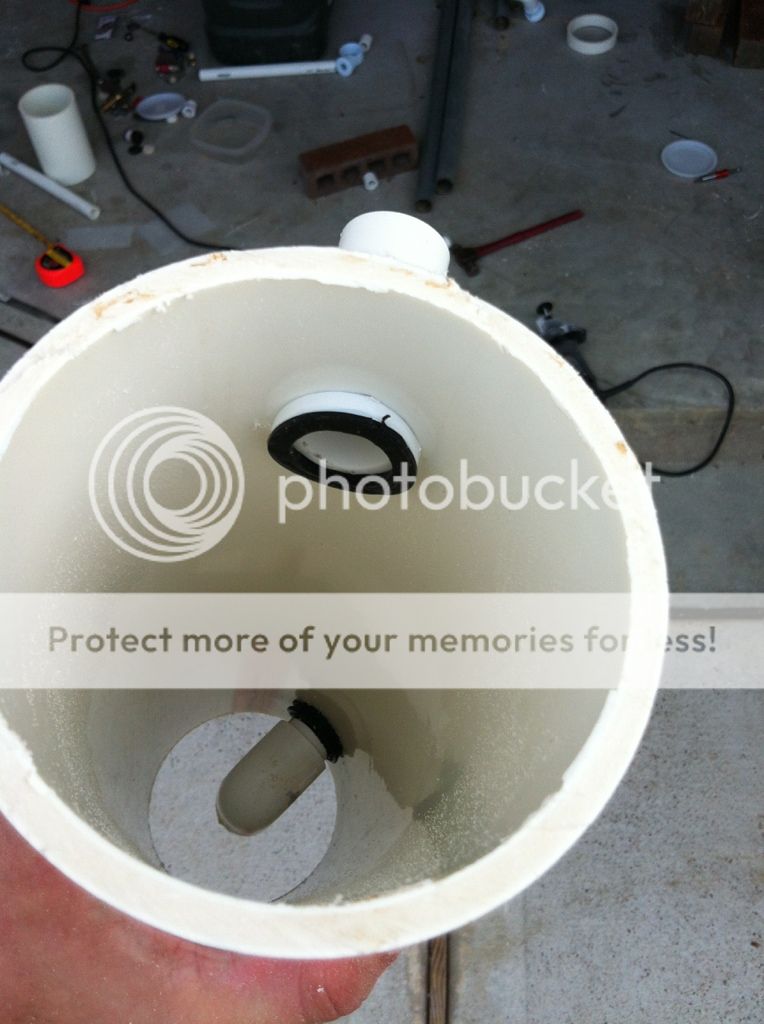
Inside, Top
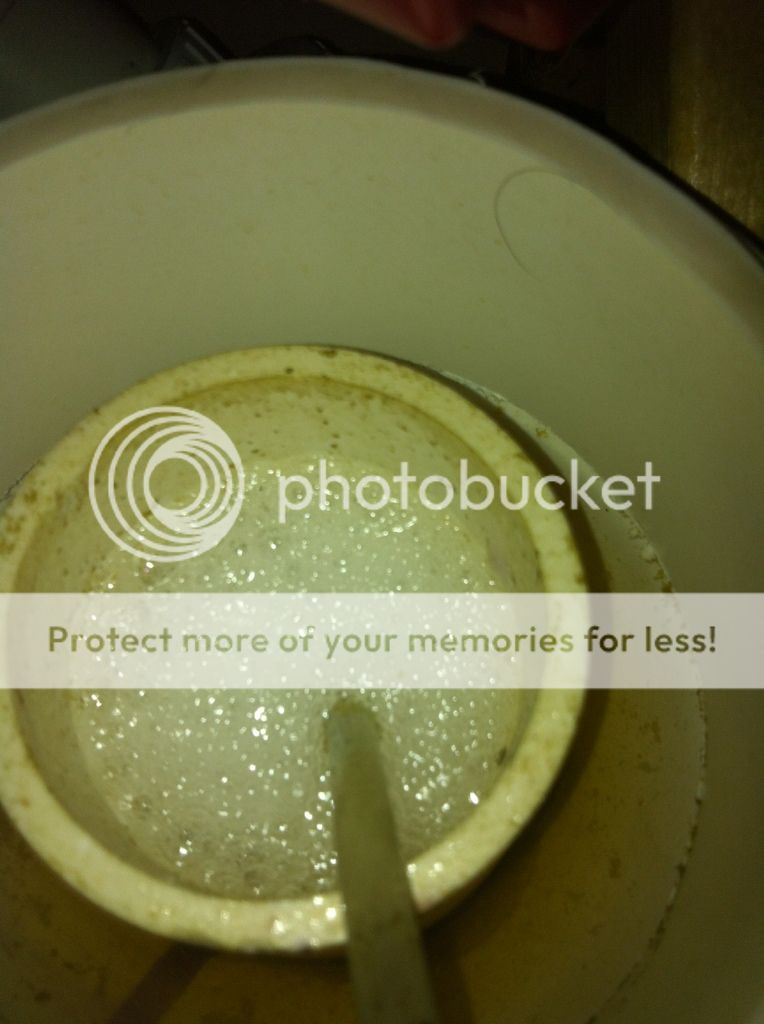
Collection Cup (Don't focus on the old chamber. It didn't work well and had to be redone)
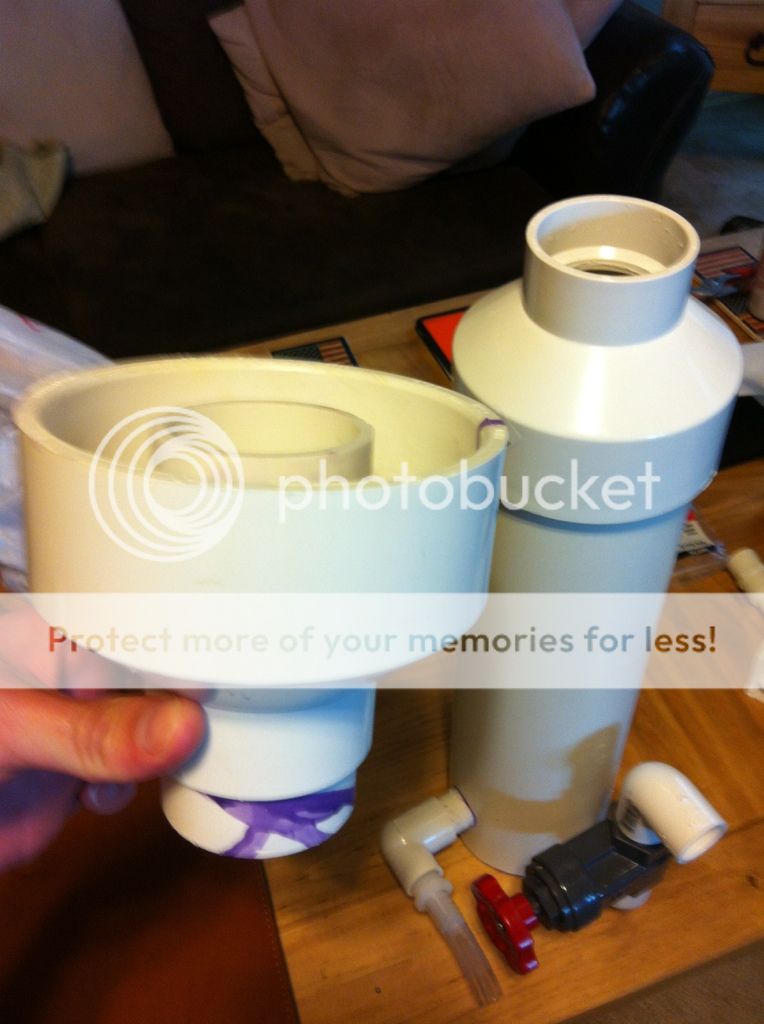
Outlet
When making the collection cup, dremel out the lip of one of the 4" to 2" adapters so that the 2" PVC can slide in then glue it. That's how the collect cup is made. Just make sure that the 2" PVC inside of the collection cup is shorter than the lip of the adapter. Also, make sure the 3/4" PVC inlet pipe intruding into the chamber doesn't go in too far. You don't want it to interfere with the bubbles. I personally used tephlon tape instead of PVC glue because I wanted to be able to take it apart if I wanted to tweak it at all. If you're putting yours inside your sump then I would recommend the same. If outside, then PVC glue for the extra peace of mind. Other than that, It's pretty straight-forward. If you use a taller chamber, then you need to get a bigger powerhead. You want 2 minutes of reaction time inside the chamber so gauge your pump accordingly. I only used 17" of the 4" PVC for my chamber due to height restrictions with my stand. I recommend going as tall as you can. For now, I have the air tube just running through the collection cup opening into the chamber to the diffuser. It would be better if it were ran through the side of the chamber at the bottom so it didn't interfere with the bubbles at all, but oh well. It works well enough for me so I have no need to change it.
Anyways, good luck! Please feel free to ask me anything else.
Part List:
-4" PVC (2' section)
-4" PVC Test Cap (The one PVC piece not found at L/HD. Get it from a local plumbing supply store or online)
-4" to 2" reducer adapter (Qty. 2)
-2" PVC (2' section)
-3/4" 90 degree PVC elbow (Qty. 3)
-3/4" (slip) to 1/2" (threaded) 90 degree PVC elbow
-1/2" OD (threaded) x 1/2" OD (tube fitting) fixture
-1/2" OD tubing
-Uniseals (Qty. 2) (I got them from BRS but I'm sure you can find them locally as well)
-Taam Rio 800 Powerhead
-Tetra Whisper AP150 Air Pump
-MicroPore Air DIffuser, Single Model (you can buy online, but I went to my local hydroponics store ((yeah, you know exactly what type of store I'm talking about)) and got it for basically the same price but with no wait time or shipping fees, just call around)
-3/4" Gate Valve (I got my from Grainger's)
-PVC Glue/Plumbers Tape (Tephlon Tape)
General Idea
Inside, Bottom
Inside, Top
Collection Cup (Don't focus on the old chamber. It didn't work well and had to be redone)
Outlet
When making the collection cup, dremel out the lip of one of the 4" to 2" adapters so that the 2" PVC can slide in then glue it. That's how the collect cup is made. Just make sure that the 2" PVC inside of the collection cup is shorter than the lip of the adapter. Also, make sure the 3/4" PVC inlet pipe intruding into the chamber doesn't go in too far. You don't want it to interfere with the bubbles. I personally used tephlon tape instead of PVC glue because I wanted to be able to take it apart if I wanted to tweak it at all. If you're putting yours inside your sump then I would recommend the same. If outside, then PVC glue for the extra peace of mind. Other than that, It's pretty straight-forward. If you use a taller chamber, then you need to get a bigger powerhead. You want 2 minutes of reaction time inside the chamber so gauge your pump accordingly. I only used 17" of the 4" PVC for my chamber due to height restrictions with my stand. I recommend going as tall as you can. For now, I have the air tube just running through the collection cup opening into the chamber to the diffuser. It would be better if it were ran through the side of the chamber at the bottom so it didn't interfere with the bubbles at all, but oh well. It works well enough for me so I have no need to change it.
Anyways, good luck! Please feel free to ask me anything else.
ChrisRaubs
New member
WoW! DIY to the last bit! Well done man! I like the way you've detailed every last bit of your journey! Now let the fun begin! ")
crn005
New member
Thank you! Yeah I try to document everything so maybe it can help someone else out. I'm still in the middle of doing some large changes to the system so those will be updated as they're completed (currently trying to get rid of the disco effect). In a little short on money and time right now so it's going slowly!
crn005
New member
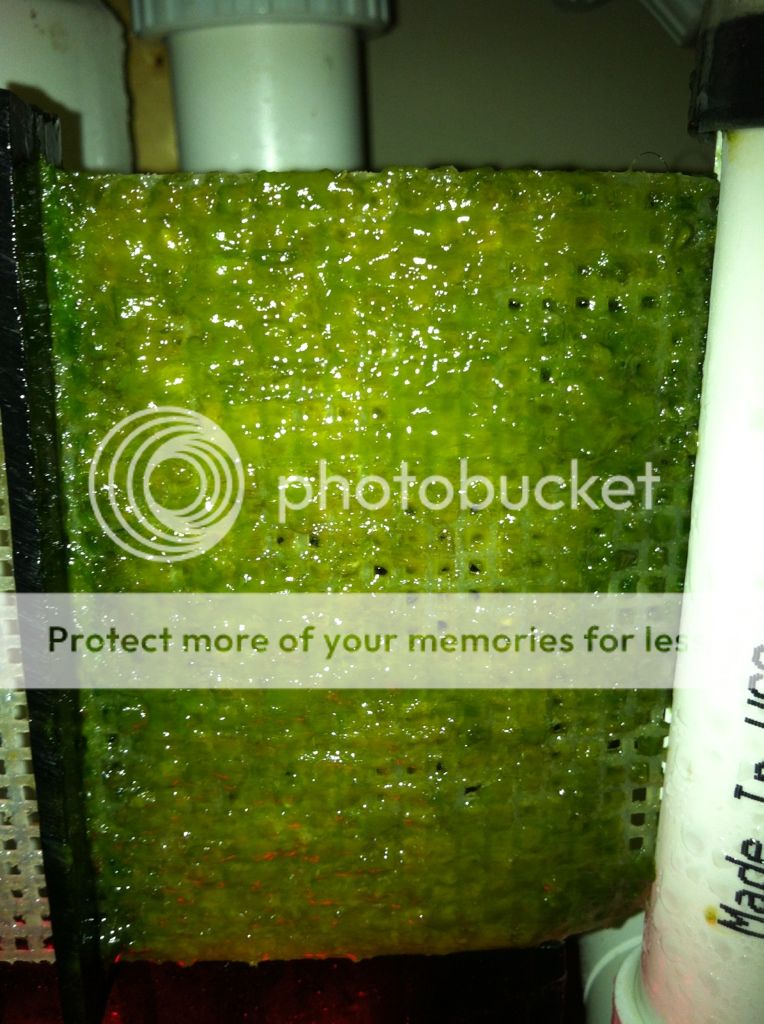
Boom! I've had the turf scrubber up and running (properly, for the first time) for three days and I'm getting some growth! I let the tank go an extra week without water changes to allow more nutrients to jumps start the screen. Right as a little GHA showed up in the tank, I plucked it off, seeded my screen with it, and put my scrubber to work. Hopefully this will work really well. It's always nice to see the fruits (or algae, yeah I know they're basically the same thing) of your work.

crn005
New member
So it's time for a little update.
Skimmer
I have a few adjustments to make on it, which I think will turn out well. It is getting about 2.5-2.75 lpm with the Whisper AP150 and that's working well, but the fact is, the common thing amongst all higher end skimmers is the amount of air they introduce into the chamber. A good rule of thumb that I've noticed is that you need at least 7 lpm. I found some other air pumps that will get me in that range but I'm in between jobs now so I don't need to spend any more money than I have to.
Algae Turf Scrubber
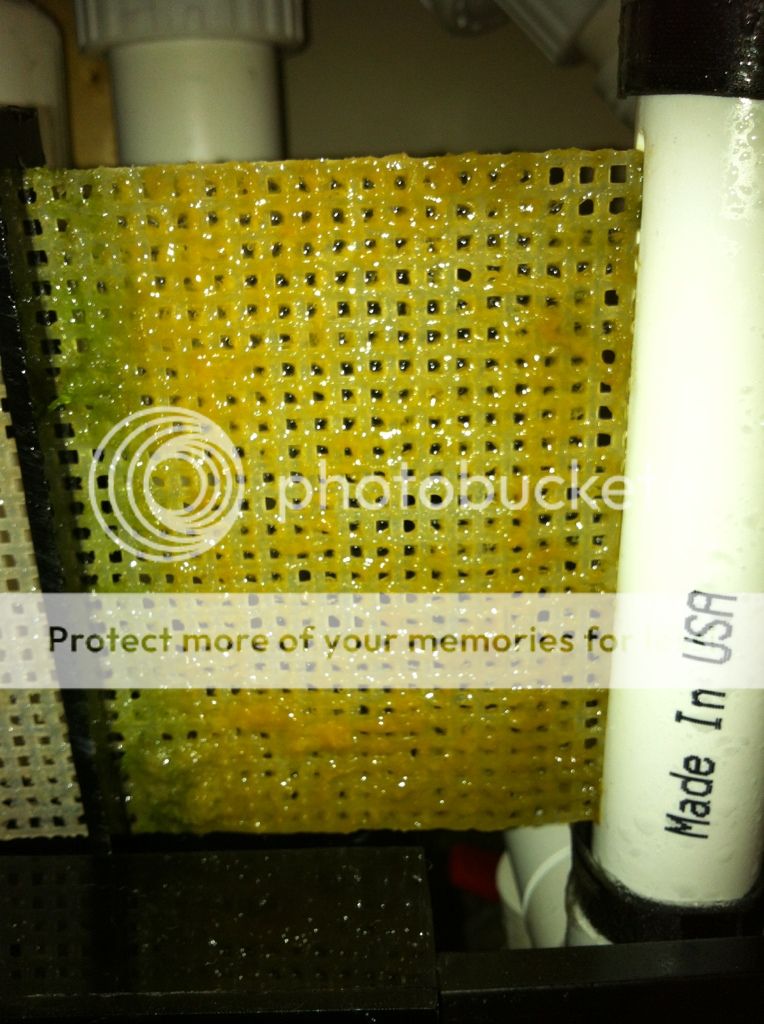
It started getting growth but it has been all too yellow and not that nice green color I want. I started lowering the light exposure time gradually and have seen a little more growth, but it's all still yellowish. Then, a funny little thing happened. I put a piece of acrylic in between the lights side of the scrubber and the side of the tank to stabilize it a bit. I accidentally blocked a little part of the LEDs towards the bottom and noticed a definite sign. There is a straight line on the screen where the lights are partially blocked that has turned into pure green growth. So, today, I finally got down to 9 hours a day and took one of the LEDs off (I had three originally, which is definitely over-kill). I think this should do the job.
Right before I noticed the line. It was just starting to develop.
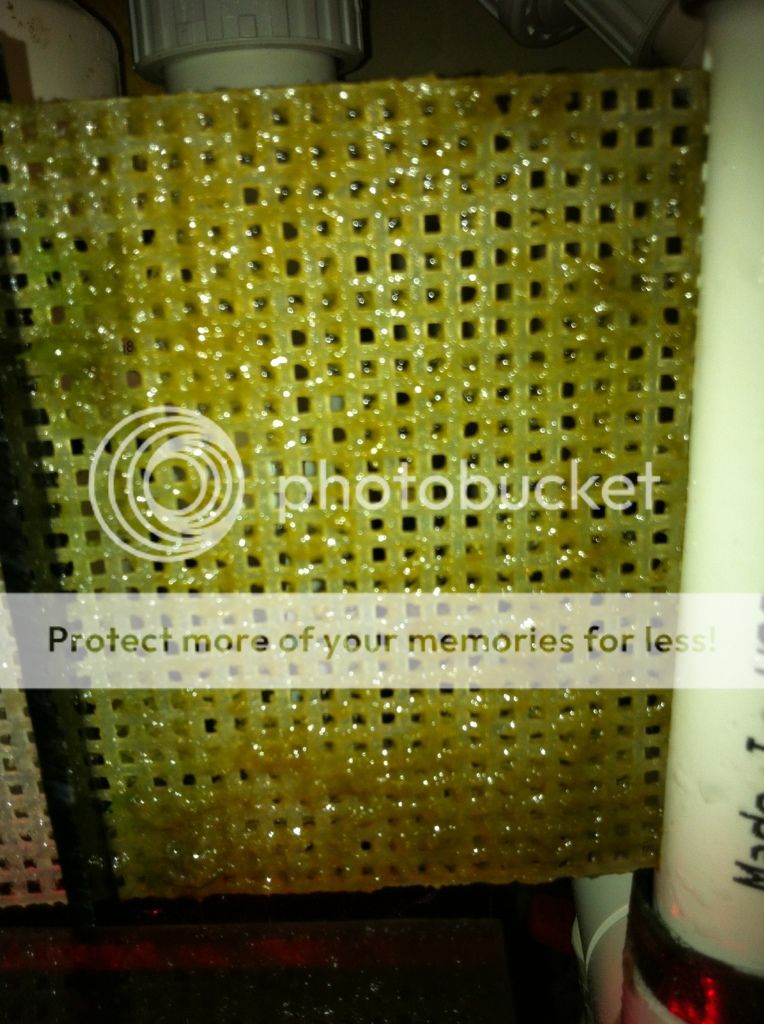
When I really noticed it.
Circulation
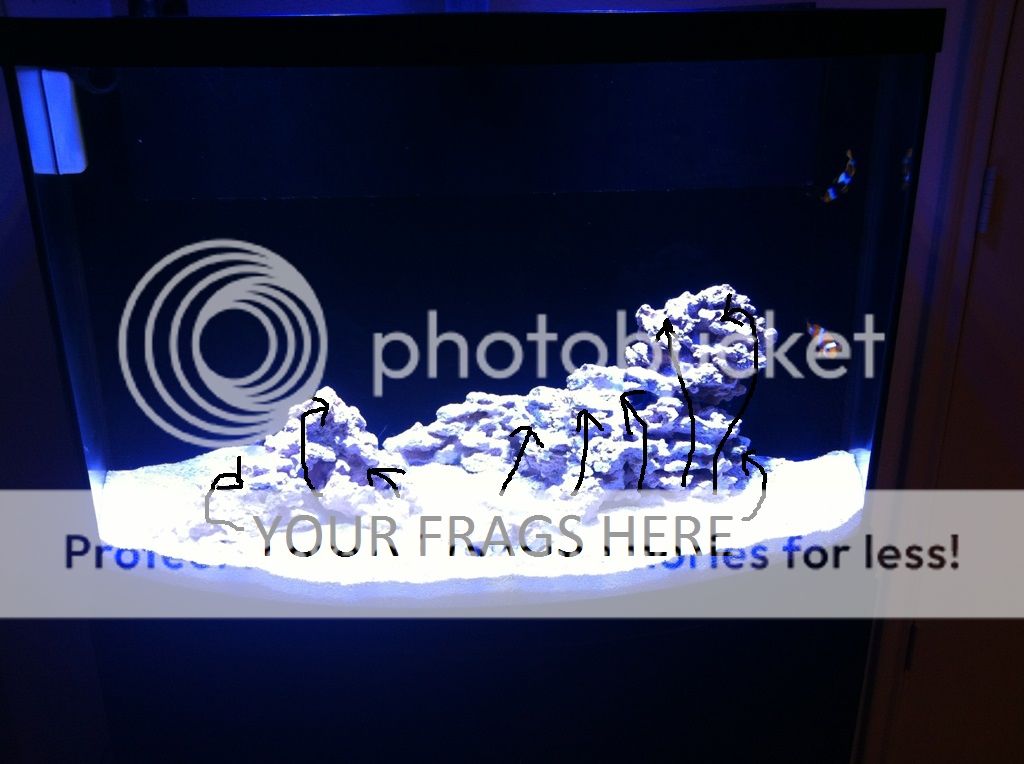
I actually have some now. I was just using the return pump from the sump but that wasn't enough. When I originally soaked the dry rock with LaCl, I got the PO4 down to about .03ppm. I grew impatient and stopped the process so I could get the cycle going. Bad mistake. I knew it was, but I did it anyways. The only real GHA growth I have is on the rocks. Luckily, the scrubber seems to be slowing down the GHA because none of the GHA in my display is green. It grows, but it's not as strong as it should be. Anyways, this should allow the scrubber to have more exposure to the PO4 leaching out of the rock and should be able to knock it out in not too long, hopefully.
As far as the rest of the equipment that I still need and the corals I want, they have been put on hold. Anyone in the Houston area hiring in HR/Sales/Recruiting?! haha
Skimmer
I have a few adjustments to make on it, which I think will turn out well. It is getting about 2.5-2.75 lpm with the Whisper AP150 and that's working well, but the fact is, the common thing amongst all higher end skimmers is the amount of air they introduce into the chamber. A good rule of thumb that I've noticed is that you need at least 7 lpm. I found some other air pumps that will get me in that range but I'm in between jobs now so I don't need to spend any more money than I have to.
Algae Turf Scrubber
It started getting growth but it has been all too yellow and not that nice green color I want. I started lowering the light exposure time gradually and have seen a little more growth, but it's all still yellowish. Then, a funny little thing happened. I put a piece of acrylic in between the lights side of the scrubber and the side of the tank to stabilize it a bit. I accidentally blocked a little part of the LEDs towards the bottom and noticed a definite sign. There is a straight line on the screen where the lights are partially blocked that has turned into pure green growth. So, today, I finally got down to 9 hours a day and took one of the LEDs off (I had three originally, which is definitely over-kill). I think this should do the job.
Right before I noticed the line. It was just starting to develop.
When I really noticed it.
Circulation
I actually have some now. I was just using the return pump from the sump but that wasn't enough. When I originally soaked the dry rock with LaCl, I got the PO4 down to about .03ppm. I grew impatient and stopped the process so I could get the cycle going. Bad mistake. I knew it was, but I did it anyways. The only real GHA growth I have is on the rocks. Luckily, the scrubber seems to be slowing down the GHA because none of the GHA in my display is green. It grows, but it's not as strong as it should be. Anyways, this should allow the scrubber to have more exposure to the PO4 leaching out of the rock and should be able to knock it out in not too long, hopefully.
As far as the rest of the equipment that I still need and the corals I want, they have been put on hold. Anyone in the Houston area hiring in HR/Sales/Recruiting?! haha
crn005
New member
Update time. So everything is the same as always. The skimmer is bangin out skimmate the same as always but the scrubber has kicked it up a notch. I removed one of the three LEDs I had on it and reduced the exposure time to 10 hours a day. Over the past few weeks, it has really taken off! It's still not growing ridiculous amounts so that you can just grab algae on any part of the screen but it's filled in and greened up quite nicely. I'm stilling having issues with the GHA growing in the DT but it's still just confined to the rocks (and a couple of spots on the glass that the rocks are close to). I think I'm just going to have to pull out portions of the rocks at a time and re-soak them in LaCl. I hate to do it but there's no way I'm going to have a successful SPS tank with all of that coming out. Luckily I only have my clowns and a mushroom frag in the tank so the fluctuation of nitrifying bacteria shouldn't be too detrimental.
crn005
New member
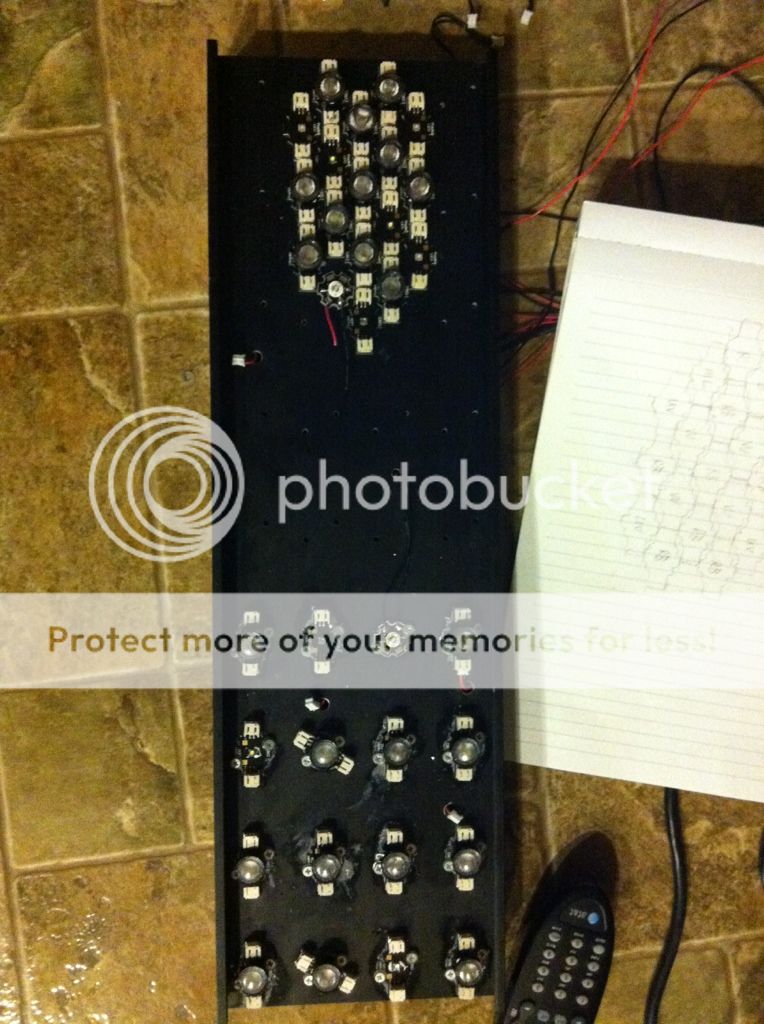
Ah! And I forgot to add this a while back! Maybe a couple of months ago I redid my lights. I moved them around. There was just too much disco effect and banding going on in the tank. Anyways, moving them so that they're all touching does wonders for helping battle those effects. It was a PITA considering that I had all the solderless hookups and lens attached to the PCBs. Here's a picture of how I placed them. They weren't soldered in at that point but you get the idea.
crn005
New member
So the water that I'm soaking my LR in is finally at 0ppm. I let it set for four days or so to make sure try had pretty much all leeched out. I scrubbed and rinsed the rocks today and I have them soaking in some more fresh saltwater with a power head on it. I want to make sure they're nice and cleaned off before drop them back in.
It sucks that I had to go this route. Right as my coralline algae started to come in too. Oh well. I was a little nervous that I only had to soak the rocks for maybe a week to get them all leeched out. But then again, I had soaked them for 2-3 weeks before they went in the tank and have been leeching out ever since.
And no pictures today. I put in a beautiful frogspawn and watermelon seed zoa frags last week. They were too pretty and cheap to pass up! However, my iPhone can't handle taking pictures of the inside of my tank. I need to break out the Canon....