My 45 gallon build

Joeb1983

Member
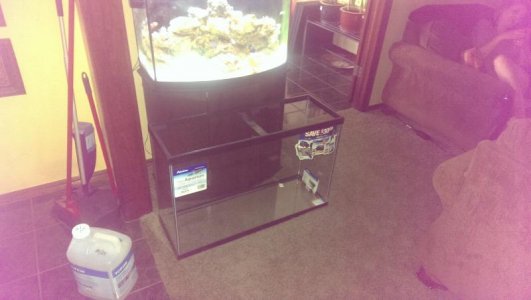
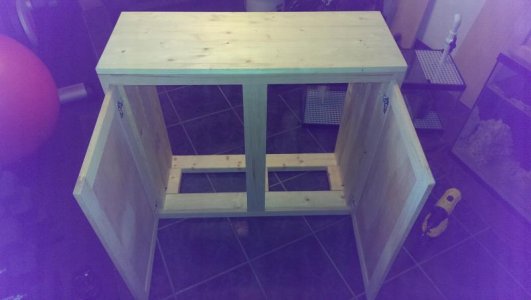
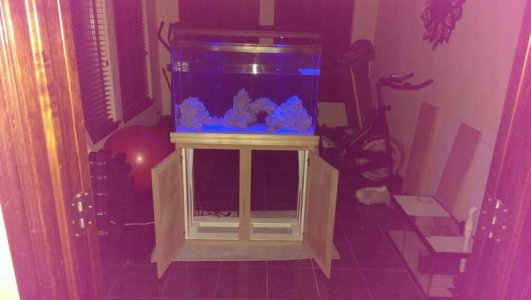
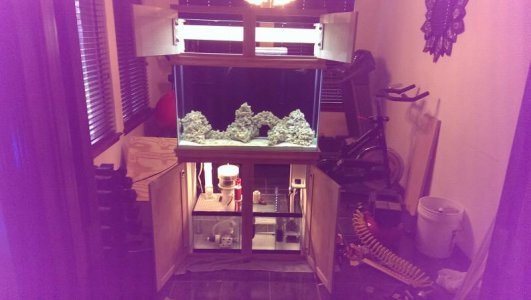
Alright guys, I decided to move up a tad in size from a 36 bow to a 45 standard using all I have learned so far along the way.

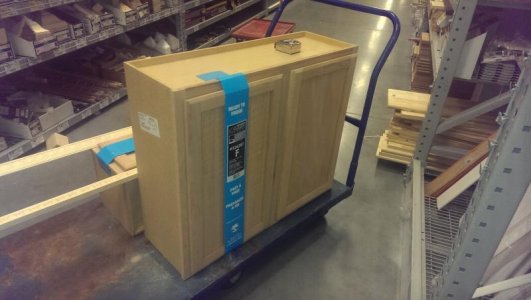
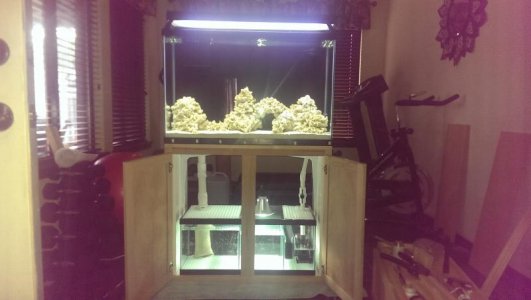
I know it is still considered a pretty small tank (especially compared to some of yours), but this is the size I decided to go with to best fit the spot I want my tank in my home. So I purchased the tank and then the hunt for a quality stand began.
 

Attachments

  • IMAG0667.jpg
    IMAG0667.jpg
    39.9 KB · Views: 22
In the meantime I new I wanted a hard plumbed tank utilizing bulkheads, etc... Drilling the bottom was not an option due to the tank. So I oredred a 700 GPH overflow and 3/4 loc-line return kit via Glass-Holes.

After receivnig the overflow and return in the mail I drilled and painted the back of the tank.
 

Attachments

  • IMAG0676.jpg
    IMAG0676.jpg
    42.6 KB · Views: 24
  • IMAG0678.jpg
    IMAG0678.jpg
    37.4 KB · Views: 21
Back to the stand... I knew I wanted a quality solid stand and the typical pet store MDF/partical board ones so readily available. The only one I could really find online was the R&J Enterpises stand that was pretty pricey and didnt look all that appealing espically only having on door for the tank size.

I read on this forums to look into a local trim carpenter for to build one. So I must have requested 15 estimates. They ranged from $300 all the way up to $2,500! :facepalm:

I talked with and hired a local guy who said he would build it for $400 unfinished.

In the meantime I ordered 50 pounds of reef saver dry rock and sand from BRS along with some epoxy. After a few evenings of hammering, chiseling, fitting and epoxying this is what I came up with for a rockscape.
 

Attachments

  • IMAG0666.jpg
    IMAG0666.jpg
    51.2 KB · Views: 20
The stand build was underway and the carpenter had all the dimensions he could need in regards to the tank and sump.

The sump build I am pretty proud of if I do say so myself. lol! I used a cheap 20 gal long and had a local glass shop cut me some baffles. Used some aquarium safe silicone and egg-crate from the Home Depot. Lets do this!
 
After over a month of excuses the carpenter is finally delivering... So I drained the tank and moved into the gym room for set-up.
 

Attachments

  • IMAG0711.jpg
    IMAG0711.jpg
    41.3 KB · Views: 25
The guy showed up to deliver the stand. Let just say it was HORRIBLE! It didnt even have doors on it.

For all the trouble over the past month he said he would finish it... The stain was still wet and the canopy was a dark mocha while the bottom was like a honey oak... Really?..

He said it was dark in his shop... Give me a break. So long story short this went on for another month and I finally decided to cut my loses.

Sorry no pics, that was the last thing on my mind.
 
So I began researching on building my own. Honestly I have the know how, but not the tools. That was the main driving factor to hire a carpenter.

Seeing how the tank is 36" and 12" deep I toyed with the idea of using standard cheap pre-built wall cabinets and beefing them up.

I read a few threads where poeple also had the same idea, but nothing really came of it. So I decided to pull the trigger.
 

Attachments

  • IMAG0787.jpg
    IMAG0787.jpg
    47.5 KB · Views: 20
Got the wall cabinets home and started to tear down what would become the base. Utilizing 2x4 studs I began to frame it out just building along as I went.
 

Attachments

  • IMAG0792.jpg
    IMAG0792.jpg
    38.1 KB · Views: 21
  • IMAG0794.jpg
    IMAG0794.jpg
    42.6 KB · Views: 18
  • IMAG0795.jpg
    IMAG0795.jpg
    46.1 KB · Views: 19
I knew it would need to handle some weight, so I rather it be over-kill than in any way unsafe. I ended up with three 2x4 "bands" for vertical/static weight and tide it all together with the sides and top for more rigidity.

Then I painted the inside gloss white for more visibilty.
 

Attachments

  • IMAG0805.jpg
    IMAG0805.jpg
    33.2 KB · Views: 24
  • IMAG0801.jpg
    IMAG0801.jpg
    33.4 KB · Views: 21
  • IMAG0808.jpg
    IMAG0808.jpg
    34.7 KB · Views: 27
With the inside painted and dry I figured I would add some brackets for lateral support.
 

Attachments

  • IMAG0809.jpg
    IMAG0809.jpg
    40.5 KB · Views: 24
  • IMAG0810.jpg
    IMAG0810.jpg
    47.3 KB · Views: 24
With the base pretty much built it was time to see if it could handle a full tank up to the holed for the blulkeads...
 

Attachments

  • IMAG0813.jpg
    IMAG0813.jpg
    39.7 KB · Views: 28
It did; so plumbing was the next objective. I used service couplers in the event of a move or a needed seperation. I also made the mistake of throwing a ball valve on my overflow drain. (The ball valve diameter inside drastically reduced the GPH, and my return pump was pumping out my sump faster than it was being replaced.) It is now out of there. lol!
 

Attachments

  • IMAG0838.jpg
    IMAG0838.jpg
    40 KB · Views: 24
Got a killer deal on a Vertex Omega 130 skimmer. Now starts the break in process.
 

Attachments

  • IMAG0844.jpg
    IMAG0844.jpg
    36.4 KB · Views: 25
  • IMAG0846.jpg
    IMAG0846.jpg
    42.5 KB · Views: 24
Now with the tank up and running for the most part, I decided to ditch the refugium idea and go with 2 Vertex RX-U 1.5L reactors. One for GFO and the other AC. (They should be here today actually)

I started wraping the stand with crown to hide the tanks trim.
 

Attachments

  • IMAG0901.jpg
    IMAG0901.jpg
    29.7 KB · Views: 20
  • IMAG0908.jpg
    IMAG0908.jpg
    41.2 KB · Views: 19
Last edited:
Since I ditched the refugium, I no longer needed the clamp light, so I picked up a slim under-cabinet led bar and mounted it inside the stand.
 

Attachments

  • IMAG0883.jpg
    IMAG0883.jpg
    32.9 KB · Views: 23
  • IMAG0882.jpg
    IMAG0882.jpg
    48.2 KB · Views: 22
Last edited:
Oh, I built a "control box" for my MP10 controller. I am in the process of making one for my reef keeper and ATO controllers for the other side seeing how they are smaller and to kep things somewhat geometric.

Well, I thought I had the skimmer dialed in, but I came home to find it boiling over throwing salt spray under the cabinet, so I was on a mission to build a blast shield. haha!

Went to the local craft store and found a plastic candy dish. Cut the bottome off, drilled a hole, used a white shoelace and a thumb-tack.
 

Attachments

  • IMAG0851.jpg
    IMAG0851.jpg
    41 KB · Views: 23
  • IMAG0915.jpg
    IMAG0915.jpg
    40.2 KB · Views: 21
Last edited:
Here is basically where I am at today. I picked up some harware that I think matched pretty well (kinda shelly)

I am working on the canopy still. Little by little. Then I can tear down the mock up and finish with a nice walnut and poly.

I am thinking of having mirrors cut and placed inside the canopy door in-lays to reflect light. What you guys think?

(Sorry for the purple hue in low light pics. There is something wrong with my phone...)
 

Attachments

  • IMAG0916.jpg
    IMAG0916.jpg
    44.1 KB · Views: 20
  • IMAG0922.jpg
    IMAG0922.jpg
    63.9 KB · Views: 24
  • IMAG0929.jpg
    IMAG0929.jpg
    42.8 KB · Views: 26
Last edited:
I am thinking of having mirrors cut and placed inside the canopy door in-lays to reflect light. What you guys think?

Home depot carries a appliance epoxy paint that has very high gloss and is bright white. Prime the inside of the canopy and hit with the epoxy paint and it should be plenty. I really dont think the mirrors will help all that much and the epoxy paint will go a long ways to keep the moisture at bay.
 
^ I still have a bunch of acrylic latex gloss white leftover from the stand. I planned on painting the inside canopy white as well for the light reflection as the t5's are mounted pretty high. (wanted plenty of room to work) I will for sure look into that epoxy however. Thanks for the reply! :thumbsup:

I noticed when the door was open the in-lay and it popped in my head to throw mirrors in them.
 
I see what you mean about the inlay in the canopy doors. Looking at your canopy I dont think you could mount the t-5's high enough for mirrors in the doors to do much if any good at all. Just paint it white, choose quality reflectors for your lights and call it a day.
BTW, nice build thread you've got going.
 
Back
Top