My 500 + gallon system. Last 13 years to now. Build, Aquascaping & more. Lots of pics

:beer:

It was long over due..

This is a picture from December 15th.. I had been working on it almost daily since then so it wasn't as bad as it was in this photo but there was still a couple inches of coraline along the bottom edge and about an inch along the top..
IMG_7332_zpsbbe8956c.jpg


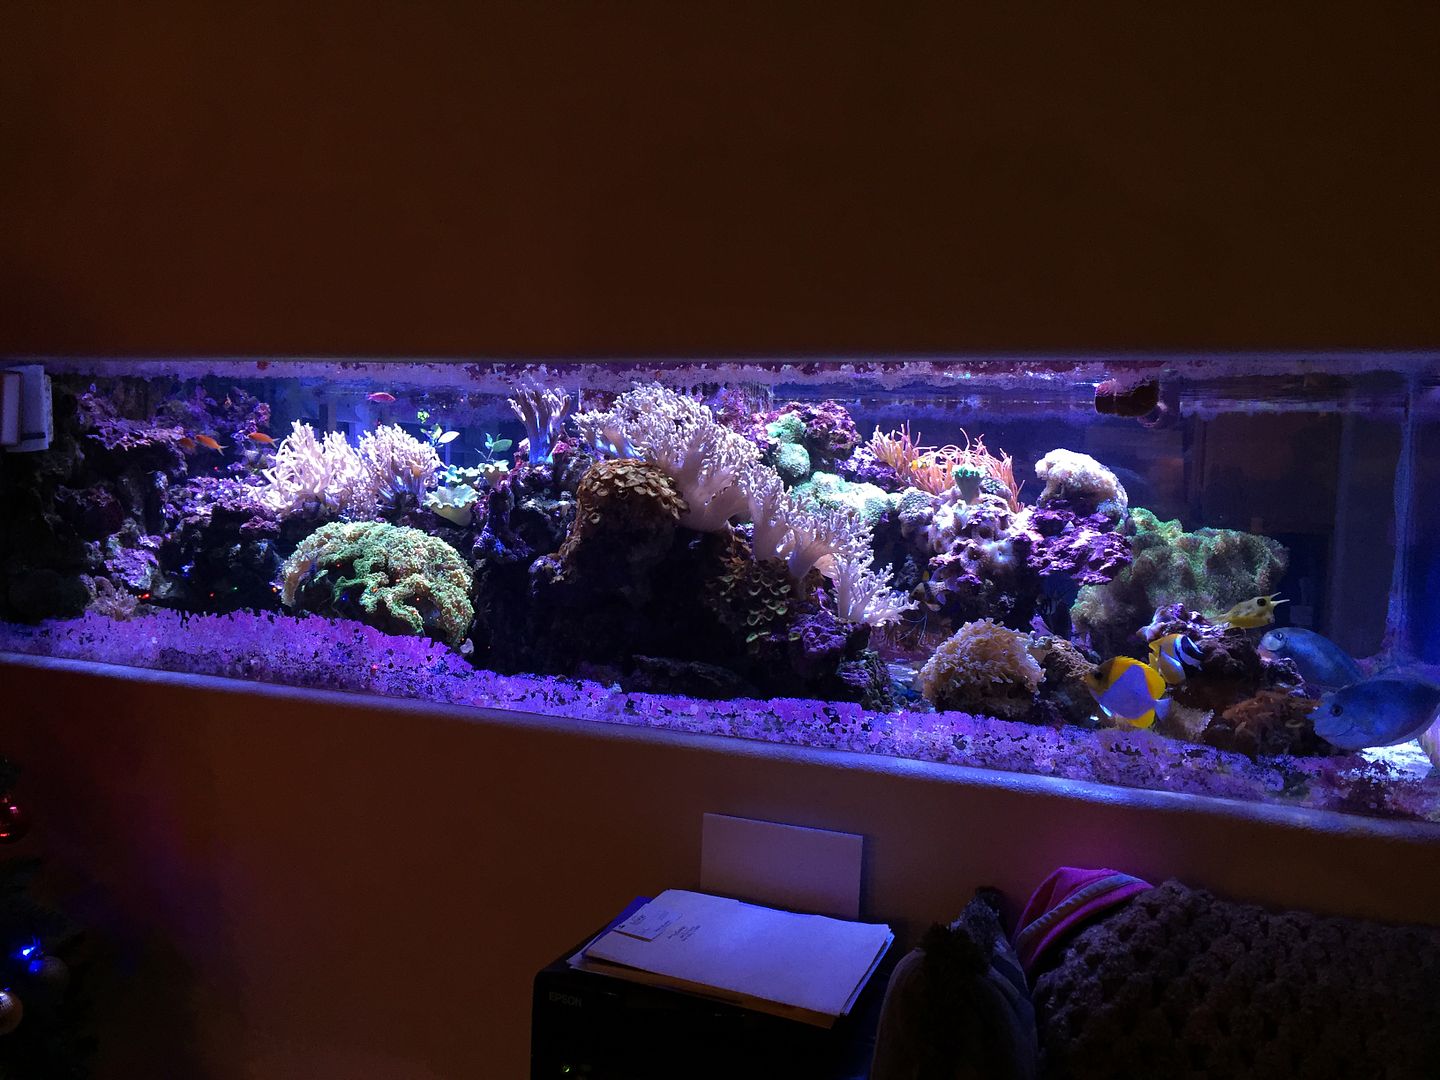
This was taken last night after we finished. No more coraline on any the viewing panes. I'm looking forward to seeing it later today when I get home from work. Everything should be back to normal although I can see from my web cam that as of now, my big RBTA is hanging out on the other side of the peninsula. Not a big thing as he just extends over to that side. He's done it before and always goes back to his normal side. He got bumped last night during the cleaning so I was kind of expecting him to be on the other side.
image_zps54f319e1.jpg

I see a small spot a little to the left of the upper corner. :lol2::lol2::lol2:
 
I see a small spot a little to the left of the upper corner. :lol2::lol2::lol2:

If there is one it won't be there long. I ordered a whole set of micro mesh wet sand paper in 9 sizes ranging from 1500 to 12000. The Micro Mesh is unique in that the grit is on a cloth backed vinyl like material instead of paper. I cut it to size and siliconed it to scrub pads that fit my cleaning magnet and stick to the velcro on the wet side. I made duplicates of each knowing I might wear one out. I also have enough to make one more pad each.
9e8f4736-61f1-44a7-a853-bcc79c57aacd_zps4a1cb5ad.jpg


I did a 20" test section earlier today along the bottom edge of the acrylic where most of the scratches are and the results were very promising. I also picked up some 300, 400,600 and 1000 grit wet sand paper that I soliconed to cleaning pads for the few deeper scratches.

Here is a video I shot showing the results of the test area.
<iframe width="1280" height="720" src="https://www.youtube.com/embed/cjB4FLg4SvA?rel=0" frameborder="0" allowfullscreen></iframe>
 
Interesting. I wonder what it may have deposited in the tank and if it will hurt anything.

Looks really good though!
 
Interesting. I wonder what it may have deposited in the tank and if it will hurt anything.

Looks really good though!

That's a non issue. It's perfectly safe. The acrylic that's removed in the sanding process won't hurt anything and the micro mesh material I used is the same stuff the that's used for other in tank scratch removal kits. I used reef safe silicone to bond the micro mesh to the scrub pads and rinsed the pads before using them. Eveything was perfectly fine after doing some work on it today. I plan on really hitting it hard tomorrow and at least finishing half the tank if not all of it. It's going to come out great.
 
Now remember there is some sports event tomorrow afternoon.

Good, I was curious. Glad it is all safe.
 
It looks much better. Metal scraper and no scratch on acrylic? Your friend must be a pro.

I have also used a metal scraper on my acrylic tacks for over 20 yrs... I only need it for 'hard to remove' coralline ... Besides being 'very careful', I believe the secret is that I have removed the sharp 90* corner edges, rounding them off with my Dremel... This has even worked with razor blades
 
What grit did you start off with and what did you finish it off with?

In the test area I started with 1500 and ended with 12000. A total of 9 steps. I have a few deeper scratches which will likely require 400 or 600, followed by 1000, then 1500 etc. I made my 400 & 600 pads with much narrower strips of sand paper so I'm not working as wide of an area. I will likely be starting with 1000 over much if not all of the bottom as there are areas where the 1000 will eliminate much of the effort in removing scratches more effectively. Depending on how the 1500 works after using the 1000, I may need to see if I have some 1200 too as an intermediate between the 1000 & 1500. I will just have to see how much work is needed between the two steps. Since this is my first time doing this, I am still learnig and perfecting my process.

My plan is to block out an entire lower panel one grade at a time so I don't keep switching sanding pads back and forth. The good thing is that it's very easy to see the progress in each step. It just takes patience, a tireless arm and a well cleaned/polished outer viewing pane to help the magnets slide more effortlessly.
 
Last edited:
I have also used a metal scraper on my acrylic tacks for over 20 yrs... I only need it for 'hard to remove' coralline ... Besides being 'very careful', I believe the secret is that I have removed the sharp 90* corner edges, rounding them off with my Dremel... This has even worked with razor blades

Interestingly, Cande continually sanded the edge on the metal blade to make sure it had a good edge. Not necessarily sharp but intead burr free. The key in the blades effectiveness was in the angle of attack. It required a fairly steep angle. If the angle wasn't perfect, the amount of effort to peel the coraline back was much greater. Leverage was also very important. After this rodeo and the fact that I am able sand out scratches with a full tank, I'm really glad my display is acrylic. I'm also glad I have very very little sand remaining in my tank.
 
I just finished one side of the tank. Actually completed the lower side where the test section was as well as a scratch in the middle left of the panel. This time around I started with 600 grit as I wanted to make quicker work of the deeper scratches.. I will say that this task is not for the faint of heart. After hitting it with the 600 grit, I got a bit nervois because the hazing where the sanding was done was scary noticeable. After bumbing up to 1000, I was releived to see that the hazing was noticeably reduced. Each progressive step got better and better and by the time I got to 8000, you really couldn't see the hazing where I hit it with the 600. By the time I completed with 12000, the results were damn near miraculous. There is one are in the middle bottom section that I could have done a better job with and I will likely go back and hit that 12-14" section again starting with the 600 grit but overall I am reallly pleased with the results. I still have one 8' side and one 4' side to do but now that I am getting more efficient at this, those sides should go really well.

On that note, I called Jim this morning and suggested he come over with a camera. I think this process is worthy of an LA Fish Guys episode as most people don't realize how (dare I say) easy it is to remove scratches from an acrylic tank that is full and stocked. He agreed so I am going to hold off sanding any more panels until he comes down with a camera later today if not tomorrow.

Jim and I have been discussing a new LA Fish Guys series that would include me. This would different from his regular series as this would focus on different technology whether it be controllers and their abilities, ATO's, Automatic Water Changes, Lighting technology, reviews and how to's. It would be more educational compared to his (more or less) reality based series. Since he is a bit old school, we will make for an interesting combination. Old school vs new school. Good cop, bad cop. It may be called LA Fish Guys Tech Talk or something like that. We are still debating that. This scratch removal process could be one of the first episodes of this new series.

Any how, I thought I would provide an update as I am really happy with the results.

Jim old school? A bit of an understatement! :) Any way you could get Jim to pronounce debris correctly? Every time I hear 'deb-breeze' I cringe. :o

Looking forward to your new LAFG episodes!

You have inspired me to take care of a few small scratches I have. They are very light scratches (tank is 'new' - 1.5 yrs) that are only noticed by me when I clean. Every time I clean I get mad at myself for making those scratches.

I'm also going to experiment with the metal scrapper. I've got an old FW tank that will be fine if I screw it up big time.

Get yourself some 600 grit wet sand paper and hit both sides of the scraper blade to remove any burrs and make it smooth. You will want to do that regularly as needed while you are working an area. That will reduce the likelihood of scratching. As I said earlier, it's all in the angle that you hit the coraline coupled with leverage. The coraline will kind of peel away when you work it just right. If you aren't at the right angle, the blad will just skim over the coraline.
 
Jim came over tonight to film the scratch removal process. Given the amount of time involved and the fact that we were hungry, we opted to just do the 4 foot viewing pane. I have one more 8' panel to do.

I opted to hit it hard with the 400 grit paper to start. This is definitely not a job for the faint of heart. It took about an hour to go through 12 different grades of paper. 400, 600, 1000, 1500, 1800, 2400, 3200. 3600, 4000, 6000, 8000 & 12000. The term "It will get worse before it gets better" is an understatement. Even though I'd already done one 8' panel starting with 600 grit and working my way up and had confidence as a result, the 400 grit makes a mess of the panel. I still got very nervous after looking at the inside panel from the side of the tank after the first step. I'm sure the first that came to mind was, I hope I didn't really make a mistake. Then again, I thought the same thing when I did the other panel and started with 600.

That said, starting with 400 made the end result even better than the first panel and each progressive step there after instilled confidence and reassurance. By the time I got to the 2400, it really started to look good and I knew it was going to come out great. I got some seriously deep scratches out. 12+ years worth and frankly, it turned out amazing and much better than I expected. Even after doing one panel alread. Like almost brand new tank amazing. So much so that I will have to go back to the first panel and redo some areas. Despite having done one panel already and knowing what was possible, this panels results really surprised me. It even surprised Jim.

I didn't get before and after shots for this thread but Jim documented it for the new series. I will try to get some good pictures of the final pane when I tackle it tomorrow or the next day. Even I'm impressed with the results. Especially given the progression from coraline removal to scratch removal. What a difference. And I'll tell ya.... I hear it all the time about glass vs acrylic. We all know glass is more difficult to scratch but it does scratch and when it does, it's permanent. While acrylic may scratch easier, with acrylic, you can remove the scratches unlike glass. Even in a full tank. As such, after doing what I did and seeing the fruits of my labor, I can honestly say that I am glad I have an acrylic tank. I was skeptical but now I'm just plain shocked. I really can't believe it.
 
Last edited:
I didn't see it mentioned, but did you alternate the direction of sanding (up/down, left/right) with each grit change?
That's what has worked for me...
 
I didn't see it mentioned, but did you alternate the direction of sanding (up/down, left/right) with each grit change?
That's what has worked for me...

Great question and very important. To answer your question, Yes.. Vertical scratches were met with horizontal sanding followed by vertical sanding alternating multiple times with each grade. The next grade started in the opposite orientation and the process was repeated for each step. Never working in a circular motion. Just alternating between horizontal and vertical.
 
Just finished sanding the last panel. It came out amazing. Like damn near new tank amazing. I'm shocked how good it came out. I worked the entire lower edge of the front 8' panel and any deeper scratches with 400 grit and worked my way out from there and outward ultimately by the time I was at 2400, I was working the entire panel from top to bottom. I spent about 1.5 hours total from start to finish not including breaks. The results are shocking.


Here are pictures looking into the tank at the ares being sanded. You can see the transition from one grit to the next by the hazing and lack of reflection. I started with 400 grit.
image_zpsb9cbbe52.jpg


Then went to 600
image_zps83402d00.jpg


1000
image_zps475b9fa5.jpg


1500
image_zpsee722b21.jpg


1800
image_zpsbe380556.jpg


2400
image_zps62a1ef35.jpg


3200
image_zpsc7eaabc4.jpg


3600
image_zps69ba6cc6.jpg


4000
image_zps1e5268f5.jpg
 
Here are a few shots of the tank after the sanding and polishing. My gaint RBTA has been hanging out on the other side of his peninsula. I think he got bumped one to many times when we were doing the coraline removal. It's not the first time it's done this. He didn't actually move. He's just stretching the other direction. He will go back to his original spot within a few days.
image_zps238bad4d.jpg


image_zpsd4d8cea1.jpg


image_zps134fe0e5.jpg


image_zpsf7e5ac7a.jpg


image_zps6c63b698.jpg
 
Back
Top