nice water mixing setup

I did my water changer with all uniseals. Had to "finese" one to stop a slow weep, which was probally my fault for not setting the pipe first before I filled it, but other than that they've worked great. I went through the sides of two different 55 gallon poly drums with 3 uniseals.

rotate the pipe as you are installing and give it a firm pull back on the pipe to "set" it into place. They work great and are supposed to hold 40 psi.

http://www.aquaticeco.com/subcategories/829/Uniseals/uniseal/0

Mine came from Bulk Reef Supply.
 
I made a gas station hose. I have a hole in the top of my container. A submersible pump in the bottom with a vinyl hose coming from it. On the far end of the hose I have hard pvc pipe over the vinyl to make it rigid and handle-able. It comes up through the hole in the top of the tank. I then feed it back down into the tank (but it doesn't fall in). This is how the water is mixed.

Then when I want to fill the sump. I pick the handle end out of the tank and put it in the sump. It can't get any easier than this and I LOVE it!

The other advantage to this style is that it's also easy to fill any type of container anywhere near the mixing container with RO water. Which is surprising how often its done when you have the ability to.
 
I like your idea, Kent. Elimination of having to use a bucket is key to any design IMO.

It can't get any simpler (or portable) than putting a barb fitting on a submersible pump, plopping the pump into the barrel and running flex hose to and from the barrel/sump/aquarium as needed.

I like how you can see the water level through those barrels, cap.
 
I also like those barrels.... Hmm.
Is the drum on the left a closed top drum?
I use those for rain barrels. They are a bit of a pain to clean out.
The one on the right looks a bit nicer...

Good idea on the scoop for RC on the lower right.
We use a similar thing for bird feed but making one out of an old plastic container with a handle is a clever.

Yes, the one on the left is a closed top with 2 3" bung holes. It wasn't too bad to clean out, but I didn't have anything caked on. If anyones looking I think there might be a few more of the clear closed ones available.

I marked the gallon jug too so it just takes 2 scoops to the lines and I've got 55 gallons of salt in the barrel.

Oh yeah, if anyone hasn't already seen it there's a thread in the DIY forum too going.

http://www.reefcentral.com/forums/showthread.php?p=16326573#post16326573
 
I forgot to follow up with my mixing station.

The left hand one has salt mix
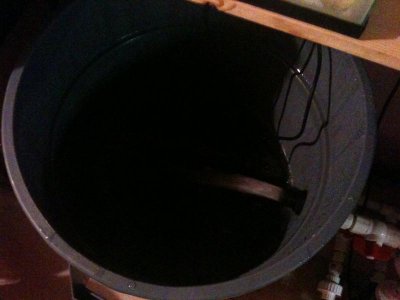
Right hand is RO/DI

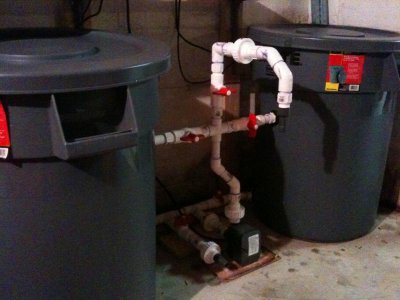
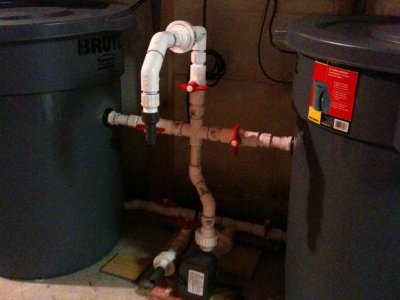
I went with two Brute 32 gallon bins. Used Gl*******s bulkheads 3/4". All PVC fittings were from Home Depot (cheapest). I found out that not all of these ball valves open easily. I picked the ones that were the easiest to actuate of the 100 or so they had. I used threaded adapters around the expensive fittings, this is mostly so that if I change things around I can re-use the fittings. Normally I'm not worried about this, but things were pretty close together here. The bottom input and top output are by union. I also have a 3/4" hose with a union end on it in case I need it.

There is a Mag 9 installed which can take in from either bin (through lower lines), or an outside input via Union. The output lines are on the top, one to each bin and a union. I currently have a spout on the union that makes filling a 5 gallon pail or a 1 gallon jug for dosing mix easy.

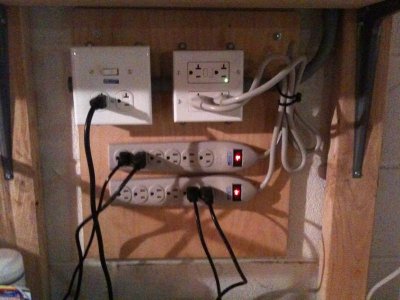
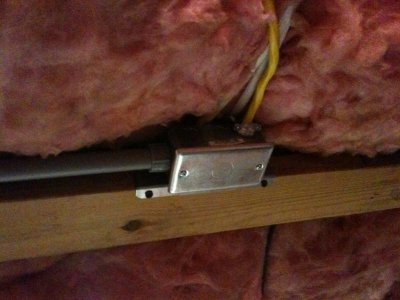
Electric is tapped of a dedicated 20 amp electric line, carried by conduit to a wooden backboard which is attached to the concrete with anchors. everything is run through the GFI for safety, all 20 amp plugs. The switch on the top left controls the Mag 9 making it easy to turn on and off.

Each bin has a power strip to control the heater inside (150 watt) and a JbJ2500 power head (on sale for $10). I went with the power strips as they are an inexpensive way to get more outlets and a low duty switch (2.98 @ Ace)

How to use:

to move RO/DI to mixing bin:
(start with all valves closed and pump off)
- open lower right (water input)
- open upper left (output)
- hit switch till water reached inner lip, turn off
- close lower right valve

Mixing salt with Mag 9
(start with all valves closed and pump off)
- Seems that the Mag really helps mix things, so I run it for a day after adding the salt mix
- open lower left (water input)
- open upper left (output)
- hit switch till water reached inner lip, turn off after a day

To pump water to 5 gallon pail:
(start with all valves closed and pump off)
- open lower left (water input)
- open upper center (output)
- hit switch to pump water. use ball valve to slow down

Lessons learned-

fortunately I was able to learn from the folks that posted back to this. The only issues I have had is
(1) the lower union which was made to pull from a bucket doesn't work unless I let some water from one of the bins go through to help keep the pump primed
(2) the nozzle for filling the 5 gallon pail is below the max water line of the bins, so there is a siphon effect. no big deal, just need to turn off the valve instead of just the switch.

At the end of the day, this setup was not cheap. It is worth every penny. I went away and my wife maintained the tank. Adding top off water was a breeze. I go through a gallon a day - just take a gallon jug, add 1/2 tsp of AragaMight (no discussion please, I'm moving to kalk), hold jug to nozzle and turn the switch on for a few seconds. add to tank.
 

Attachments

  • IMG_1153.jpg
    IMG_1153.jpg
    57.7 KB · Views: 10
  • IMG_1154.jpg
    IMG_1154.jpg
    55 KB · Views: 9
  • IMG_1155.jpg
    IMG_1155.jpg
    66.4 KB · Views: 13
  • IMG_1156.jpg
    IMG_1156.jpg
    59.3 KB · Views: 10
  • IMG_1152.jpg
    IMG_1152.jpg
    39.8 KB · Views: 8
Back
Top