psteeleb
Team RC
Sorry for your troubles Pete, I really enjoyed your other build. This one looks fun also, thanks for sharing the steps with us.
(Um pics missing above?)
not sure what happened to the pics - trying again
Sorry for your troubles Pete, I really enjoyed your other build
(Um pics missing above?
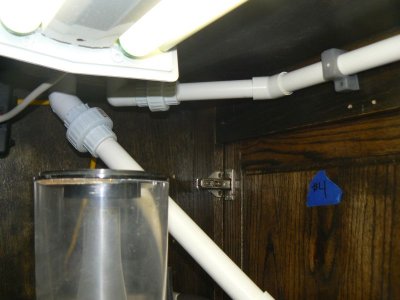
I have no doubt the new tank will be even better than the last. ") Can you explain (if you haven't already) the corrugated pipe de-bubbler you've incorporated into the sump?
Can you explain (if you haven't already) the corrugated pipe de-bubbler you've incorporated into the sump?Hey Pete, again sorry about the 280g. What a beautiful display.


Looking awesome Pete! Thanks for the pics of the de-bubbler. How do the pipes work under the water. Do both pipes sit on the bottom of the sump or are they raised up to allow the water to flow out the bottom? I'm assuming that's what the acrylic brace is for?
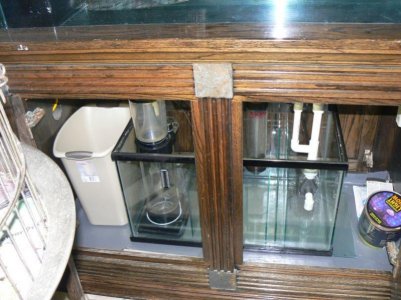
the acrylic is the old filter sock support, I decided to leave it in place in the event I wanted to revert back to it.
flow is over the top of the inner 4" pipe, and under the 6". The 6" has 4 notches cut out in the bottom that are about 1 1/2" long by 1" tall each.
The actual drain pipe is also notched and is goes to about 2" from the bottom of the sump.
if you look closely at teh first oicture you can see a notch on the right side of the 4", originally I thought the water would over flow through these notches but as you can see the flow was to turbid due to velocity and the amount of air being released.
I as sit here drinking a cold beer I realized I haven't updated for a while.
I already changed out a couple of the T5's. I replaced the 2 actinic/whites with 454's to get a little more color in the tank. i still want to add the bright LED's for the shimmer effect but it's not a high priority.
I added the first sps (basic birdsnest) about 2 weeks ago. It's doing well so I bought a frag of a mili this weekend.
So far the tank seems to be doing well. The display tank is fairly pristine where the fuge seems to be flourishing with all sorts of bloom algae, cheto and caulerpa. I did notice some Bryopsis on a zoa frag but the clean up crew and maybe the fox face took care of it before it ever got hold.
The life in that fuge makes me drool Pete! Beautiful. Makes me want to get my fuge set up asap.
Pete, man I love those feather dusters. I would love to ge tthose things go grow in my system. anywhere. I've always wanted feather dusters but it seems like in some systems they grow great and in others they won't. Amazing! Love the dendro also, may go get me a few today.