Return Flow Through Emergency Drain (ReFTED)

ruko1988

New member
Hi people!,

Anyone ever tried to guide the Return flow up through the emergency drain?
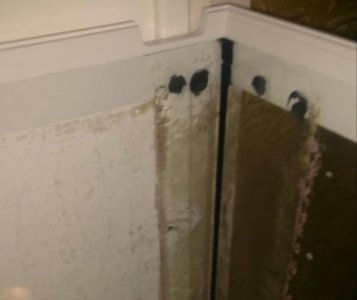
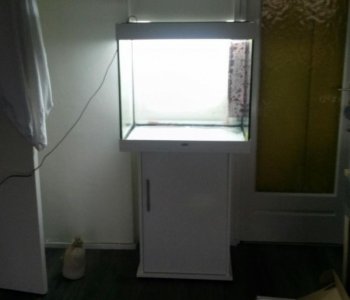
I'm planning to do this in my new reef project (Juwel Lido 200) and I wondered if anyone ever tried or has experiences with anything similar. This is what I mean (planned design so far):

picture.php

picture.php

picture.php

picture.php


Ruben
 
You'll make the emergency drain useless as a drain. So at that point, your better off just re-plumbing that drain as a return and putting in mind that you have no emergency drain. If not having an emergency drain bothers you, than just leave it has a drain and plumb an entirely separate return.
 
Hi billsreef, the core pipe (return flow) in the emergency drain takes away about 50% off the Emergency drain's volume (40-20mm) The main drain is smaller 32mm, so in the end my emergency drain will be able to swallow about min 65% (20/32) of the main drain's volume at max capacity. In normal circumstances my emergency drain will drain a couple of percents of the total drained volume, because the emergency drain's primar function to me is to level off the water in the overflow. The main drain sucks no air resulting into a quiet system. In case my main drain would become plugged for more than 65%, yes things could become tricky, but I dont see this as a big chance. Besides, i dont plan running on max capacity, so the emergency drain will more likely be able to swallow 70 to 80%. If i would become scared about the 20% I would probably find a way to sense the overflow level and reduce the pumped volume or something.
 
Last edited:
In normal circumstances my emergency drain will drain a couple of percents of the total drained volume, because the emergency drain's primar function to me is to level off the water in the overflow.

If the emergency drain is going to be typically running a portion of the overflow in normal operations, it is not an emergency drain, but simply a drain with some excess capacity. You need to figure the amount regularly draining, and subtract that from the capacity to figure out just how much excess. As the manufacturer designed it (and most people use emergency drains), emergency drains are dry under normal use and should be capable of draining 100% of the overflow needs in case of total blockage in the primary drain...you'd be surprised just how much flow a single snail stuck in drain can block.

Looking more at your diagrams, I'd suggest setting the big pipe has the single drain, and the small pipe as the return. That is the way many manufactures set up "Reef Ready" tanks, without emergency drains. This way you at least have all pipes running without restrictions. I'd worry about that doubled pipe getting clogged easily as your flow will only be via a narrow ring.
 
Hi Bill,

To me the second pipe is an emergency drain, as it will function for at least 95% as a emergency drain. Please note the OEM tank is without any overflow and piping. This is a custom engineered design of the OEM. I already simulated the flow rates for both pipes and some blockage scenario's in my 3D model. Theoretically this should work, but again, I'm only calculating a 70-80% blockage of the main pipe, because i'm not afraid for 100% blockage. I also think there are ways to prevent life stock or debris getting in your pipes in the first place. I do understand your criticism as this is unconventional, but please do keep following this thread through live testing.

Ruben
 
I also think there are ways to prevent life stock or debris getting in your pipes in the first place.

Keep in mind, that debris and livestock often have a way of defeating any preventions us mortals seem to come up with. I've run plenty of systems without emergency overflows, but also find constant monitoring of the overflows and "critter strainers" is necessary to avoid problems. You'll likely be fine with your set up if you keep a close eye on things, but just remember not to consider it fail safe.
 
Only one way to find out...

* The emergency MUST be free from and obstruction. You have it going to the gate valve which is a single point of failure.

* I like to make my emergency noisy with lots of gurgle and splash so I know something is wrong when I enter the room.

* The "siphon" assuming this is a herbie is way too tall. It will suck air. I like to make mine 4-6 inches tall and not glued in. It is a good plan to put a restriction at the top of the syphon so that when a snail or leaf or rock or random object does get stuck you have less to disassemble. I too though it would never happen until it did and it was a mess.

* With your design you be limited on return flow. You are forced to close the syphon and restrict the return pump on the output side with a gate valve to run the emergency at 80-90%.

Design and test for "what whould happen if that failed" and you will rarely be wrong.

* Fit the emergency with a "T" not an elbow. The water level rise before the elbow starts to syphon unless you have a vent hole drilled means water on the floor. You want the emergency to be noisy anyways.
 
Edits: it looks like the emergency does not go through the gate valve but the drawing is amigious enough.

You are using a mix of the cheap ABS bulkheads and the HD grey ones. The gray are AWESOME but they mean a much smaller pipe relative to ABS. It is actually easy to break the black ABS with threaded PVC so glue on the outside and slip fit on the inside. I like to make my plumbing disassembable so that would mean nut side on the inside.

Do not glue the PVC on the inside unless you are forced to. If you make it easy to take apart and clean it seems like cleaning become less of an issue.

Second edit. I am grumpy. If your tank is not tempered on the back wall (and you do not need it flat to the wall) or a custom build you can drill two holes in the back near the top for the return and the 3rd component of the fancy drain with three holes (I forgot the name) but it is syphon with ball valve restriction (same as you have drawn), dry emergency (you have this without the fancy bits), "wet emergency standby???", and then return out the back. Complex, but fail safe and you will not see the plumbing behind the overflow anyways.
 
Last edited:
In normal circumstances my emergency drain will drain a couple of percents of the total drained volume, because the emergency drain's primary function to me is to level off the water in the overflow.

Don't know that I would say 'primary' function, but I run my backup drain this way, just without the return through the middle.
 
The purpose of this design is to be able to put the tank with the back against the wall and not seeing any pipes or hoses at the sides. At the same time I want to keep my overflow as small as possible so I have maximum useable volume of the tank.

The dragonflow is also using the pipe through pipe idea, the difference is that it is used in a single standpipe setup, running the return flow through the main drain. The holes at the bottom of the outer pipe will dry out the entire overflow volume at a system stop, which is something I don't want with my compact sump. Dragonflow also seems less fail safe and noisier, as there is no emergency pipe involved and it sucks down air with the surface water.

The pipe heights are not definite until live testing, I want both pipes as high as possible to minimize the overflow water drop noise. The main pipe is set just below the level before sucking air. This all is also to minimize the excess water returning to the sump at power stop.

Please note the gate valve is put on the main drain, not the emergency drain. Next post I will show the arrived parts.
 
It is actually easy to break the black ABS with threaded PVC

That comes from overtightening. Just got to ease up a might on the muscle ;) With a bit of teflon pipe dope or the right amount of teflon tape (too much can cause that cracking issue also), you just need hand tight and small bit extra.

I like to make my plumbing disassembable so that would mean nut side on the inside.

While some people seem to get away with this, remember, proper installation of a bulkhead is with the gasket under the flange...on the water side.
 
Got the thank and cut out the corner filter.
 

Attachments

  • uploadfromtaptalk1422575088178.jpg
    uploadfromtaptalk1422575088178.jpg
    27.2 KB · Views: 6
  • uploadfromtaptalk1422575212163.jpg
    uploadfromtaptalk1422575212163.jpg
    32.3 KB · Views: 6
I think you could use the larger pipe as the siphon line much easier than making it inside the emergency. I like the concept. What sizes and pipe schedule are you using.

I'm assuming you have a standard Reef Ready tank with a 1" and 3/4" bulkhead.

Using schedule 40, a 1/2" pipe inside a 1" will give you .31007 remaining square inches for the emergency. a 1/2" pipe gives you .30385 square inches while a 3/4" pipe is .53325"
So you really have a slightly smaller than 1/2" pipe you are using as your emergency and your 3/4" siphon being supplied by a 1/2" return line. So why not use the larger 3/4" pipe for the emergency?

The siphon line will be much easier to plumb because you can just cut the 1" line six inches below the overflow weir and adjust the water level using the gate valve. Plumbing that would be much easier than fiddling with the emergency water level. You could also then use the 3/4" emergency as a straight drop without horizontal runs. The gated siphon line will work just fine if reversed from your diagram above.

Makes me want to try schedule 20 pipe on a herbie.

FYI if you use schedule 80 for the pipe your internal area drops from .31 sq inches to .16. big difference as now you are 1/4" of pipe. Also the internal elbow will need you to enlarge the cross or T fitting under the tank.

That is close to 600 GPH flow, much better than you'll get from a quiet durso.
 
Last edited:
What sizes and pipe schedule are you using.

We have metric pipe sizes, below are the approximated pipe sizes in imperial units

Emergency: 40mm --> 1.57" ~ 1 1/2"
Return flow (through emergency) 20mm --> 0.79" ~ 3/4"
Main drain 32mm --> 1.26" ~ 1 1/4"

The thickness of each pipe is 1.8mm --> 0.07"
 
I'm assuming you have a standard Reef Ready tank with a 1" and 3/4" bulkhead.

This tank (/all JUWEL) tanks are without any overflow or holes, the bulkheads will be a 1 1/4" and a 1 1/2". Picture below shows the outlines of the overflow and the holes that will be drilled out soon.


picture.php
 
If you are drilling the tank why not implement a bean animal setup. It's flawless and takes up minimal space in the display. It will also be much easier to plumb.
 
If you are drilling the tank why not implement a bean animal setup. It's flawless and takes up minimal space in the display. It will also be much easier to plumb.

The purpose of this design is to be able to put the tank with the back against the wall and not seeing any pipes or hoses at the sides. At the same time I want to keep my overflow as small as possible so I have maximum useable volume of the tank.
 
Back
Top