Some PCB design ideas for DIY LDD-L driver based builds

lingwendil

Man who sold the world
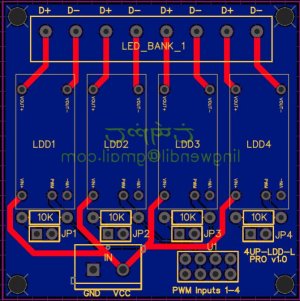
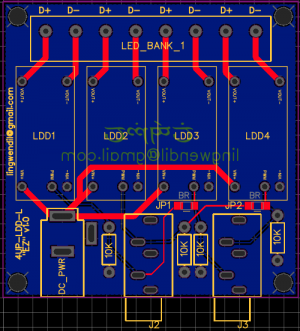
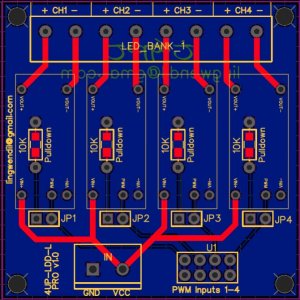
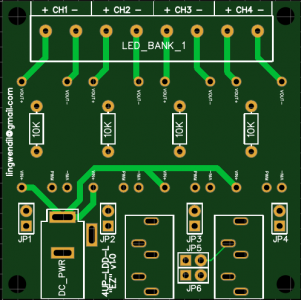
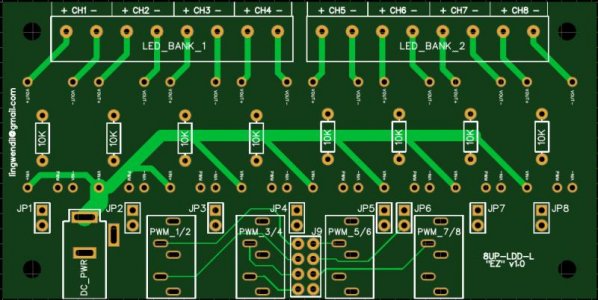
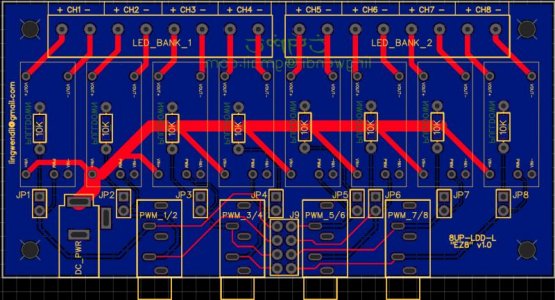
Just in case anybody finds these interesting, after building some larger scale LED setups for a couple propagation and fishroom setups I've been wanting something different than the usual offerings from places like Coralux, Steve'sLED, RapidLED, etc. All of the boards you see offered for sale work for lower voltage builds (12-24 volts) just fine, but the LDD-L drivers are compact, easy to use alternatives to the LDD-H series for smaller builds, or when multiple smaller strings are required. I for one use them extensively for nano fixtures, or for filling in the extra colors on "full spectrum" types of builds, in conjunction with 21 volt laptop power supplies, ranging in size from 3 to 7 amps, which is plenty in most smaller to medium situations.

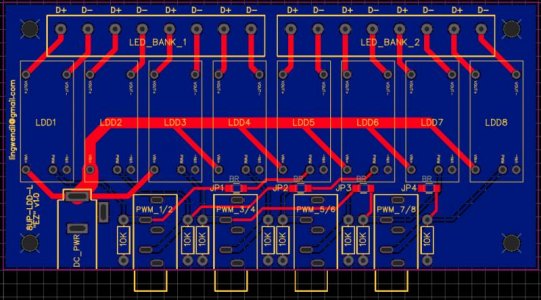
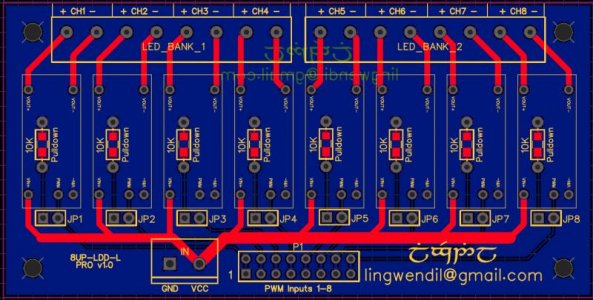
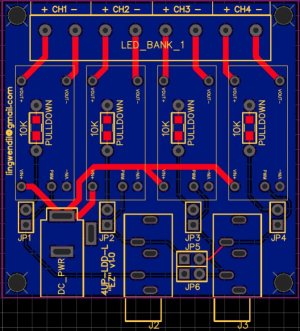
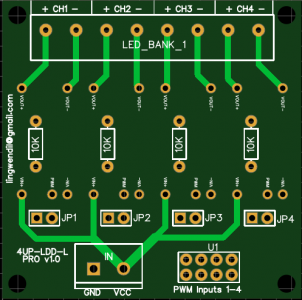
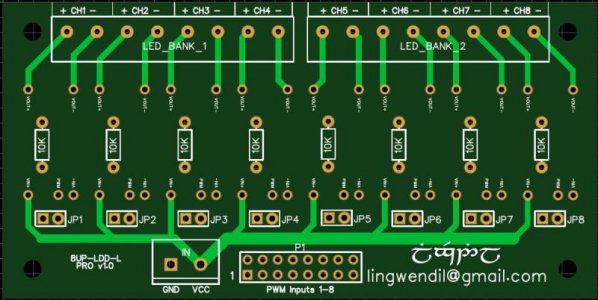
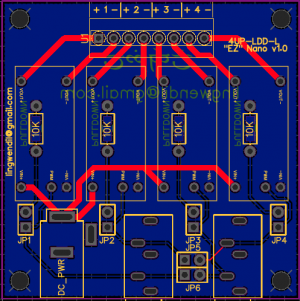
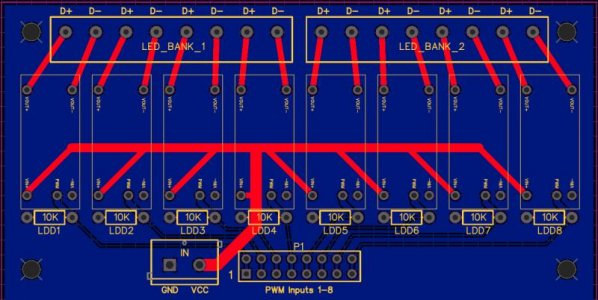
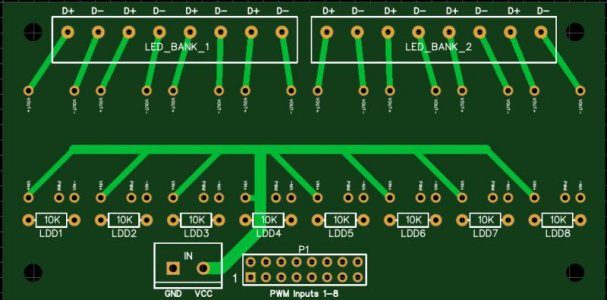
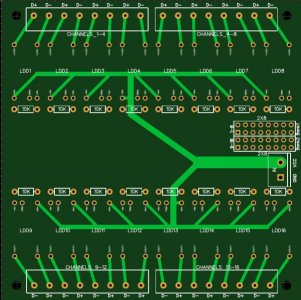
These can be jumpered to allow channels to be doubled up, to allow four or eight channels of control on the eight driver version, and eight channels of control on the sixteen channel version, with daisy chaining also possible for stacking boards as needed for larger scale configurations. All parts are through-hole, so easy enough for even a novice to solder up :)


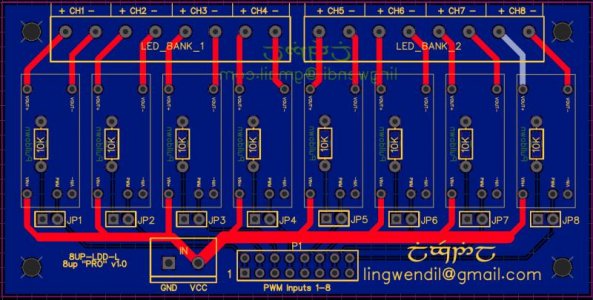
Keep in mind these are sort-of a power-user board, and while they offer pretty good flexibility, they are not as of now compatible with the Bluefish mini- although with the use of a level shifter they would be, the fullsize Bluefish will work however. I have been primarily using the LDD-L with the Storm controller or the very nice 16 channel controller featured over at Ultimatereef- https://www.ultimatereef.net/threads/simple-multichannel-up-to-16-led-controller.784531/ Any controller using the PCA9685 PWM driver would be a perfect fit for a companion to this board.


I'm also working up some sketches for larger versions using the LDD-H drivers as well, but due to the larger physical size I'm not sure I'll put more than eight drivers to a single board to keep them affordable for small runs of PCBs. Suggestions are welcome.
 

Attachments

  • LDD8MULTI.jpg
    LDD8MULTI.jpg
    61.2 KB · Views: 0
  • LDD8TOP.jpg
    LDD8TOP.jpg
    49.4 KB · Views: 1
  • LDD16multi.jpg
    LDD16multi.jpg
    99.4 KB · Views: 1
  • LDD16TOP.jpg
    LDD16TOP.jpg
    76 KB · Views: 1
Well, I figured I could do as much, especially for you ;)

Here's the Nano version, meant for small rigs or supplemental lighting on larger systems, can be set up for four channels (with jumpers to run as two channels) and the proof of concept for the jumper addition. I'm thinking a big jumper block for the larger boards, or even DIP switches may not be a bad idea, as having it all at the input connector may prove a bit crowded or confusing.

I started a thread over at the "other site" (damn interboard censorship :() too, and it seems discussion has picked up on it over there a bit more!
 

Attachments

  • LDDNANOPROmulti.jpg
    LDDNANOPROmulti.jpg
    79.1 KB · Views: 1
  • LDDNANOPROtop.png
    LDDNANOPROtop.png
    66.5 KB · Views: 0
For anybody who cares, these are an open source design, once things are finalised the files will be open to free use by anyone interested!!!

Here's the first iteration of the "EZ" Nano board, onboard DC power and 1/8" TRS (stereo) jacks, so that all one needs to do is drill corresponding holes in the panel and allow the TRS jacks to protrude slightly, and then insert power. I'll work up a drilling template too (easy peasy) to make it easy enough to use. Sure beats air-wiring things on small fixture builds!

Since this is the "EZ" version, I've left off the jumpering feature to allow it to be a very simple board, if one wishes to parallel channels they would need to do some jumpering of their own, or go with the "Pro" version of the board.

The DC jack chosen- Kobiconn 163-179PH-EX:

https://www.mouser.com/ProductDetail/Kobiconn/163-179PH-EX?qs=Xb8IjHhkxj5l2UOaIqcGCw==


The TRS/stereo jack chosen- CUI SJ1-3533:

https://www.mouser.com/ProductDetail/CUI/SJ1-3533?qs=WyjlAZoYn50TSYIwwZxYnQ==

If anyone knows of any alternatives that may be cheaper/preferable for similar quality let me know.
 

Attachments

  • LDDEZmulti.jpg
    LDDEZmulti.jpg
    78.9 KB · Views: 1
  • LDDEZtop.png
    LDDEZtop.png
    68.7 KB · Views: 0
Not these ones, but after I'm happy with these I'll start on versions for the LDD-H series as well. They are physically much larger, so only half as many are likely to fit in a given board size. Complete new design will be needed due to the differences.
 
Well, I figured I could do as much, especially for you ;)

Here's the Nano version, meant for small rigs or supplemental lighting on larger systems, can be set up for four channels (with jumpers to run as two channels) and the proof of concept for the jumper addition. I'm thinking a big jumper block for the larger boards, or even DIP switches may not be a bad idea, as having it all at the input connector may prove a bit crowded or confusing.

I started a thread over at the "other site" (damn interboard censorship :() too, and it seems discussion has picked up on it over there a bit more!

They are nice boards. Might have to get a few printed up once you're happy enough to release the designs!

Tim
 
Hopefully some people will be interested in some! I'll probably do a handful of each for myself at least. Getting the drivers lashed up neatly is the biggest hurdle I usually face, as once that's done a suitable case is much easier to figure out, especially if retrofitting to an existing rig, or doing it in a distributed setup for more complex applications :)

The EZ Nano is my favorite so far, should make it easier for the small tank builds to have the same functionality as the big boys, without so many compromises. The majority of my personal setups have been smaller by necessity, so having a nice compact solution is a godsend compared to huge LDD-H PCBs when you don't need or want the higher voltage string capability.

Even my 5.5 gallon freshwater planted has four channels of control! For less than a dozen LEDs! The drivers take up more space than the emitter stars do.
 
EZ Nano and EZ8 now feature solder bridge functionality so that solder blob jumpers can be fitted (or 0R 0805 SMD resistors if you're anal) to jumper the boards for 2 (nano) or 4/6 (on the 8) channels, respectively.

Also changed the ouput silkscreening so it makes more sense :)
 

Attachments

  • LDDEZmulti29.png
    LDDEZmulti29.png
    84.6 KB · Views: 2
  • EZ8_multi29.jpg
    EZ8_multi29.jpg
    75.8 KB · Views: 1
  • ch.png
    ch.png
    13.9 KB · Views: 1
Last edited:
Ok, now I'm happy with the Nano and 8UP pro, looks nice and tidy, and optimized the jumper traces. Each channel can be jumpered on/off, adjacent channels can be connected in parallel, and SMD resistors can be used. I like it.

Going to tidy up the EZ versions next.
 

Attachments

  • 8up-pro30.jpg
    8up-pro30.jpg
    75.3 KB · Views: 0
  • nanopro30.jpg
    nanopro30.jpg
    83.3 KB · Views: 0
Ok, now I'm happy with the Nano Pro, 8UP Pro, and EZ Nano versions. I'm having a heck of a time figuring out a good way to do the on/off jumpers for the 8UP EZ, as it's a little cramped on there! I'll have to get creative with scooting parts around.
 

Attachments

  • EZNanomulti30.jpg
    EZNanomulti30.jpg
    92.9 KB · Views: 0
Alright, got the boards to a mostly final state for the 4 and 8 channel versions. Attached are the current board designs for the Nano PCBs.

So far this has been a very enjoyable (and challenging!) project, and I'm very pleased with the boards so far. We have standard functionality across all four, with similar layout and schemes to make them easy to understand as well as making upgrades easy when moving from one to the next. Small too! The nano versions are 50mm (2") square, and the 8Up boards are 50x100mm (2x4") for nice compact builds.

Now we just need a cool logo or symbol of some sort to silkscreen onto them :)
 

Attachments

  • nanopro31top.png
    nanopro31top.png
    70 KB · Views: 0
  • nanopro31bottom.png
    nanopro31bottom.png
    75.7 KB · Views: 1
  • EZNanotop31.png
    EZNanotop31.png
    73.5 KB · Views: 0
  • EZNanobottom31.png
    EZNanobottom31.png
    82 KB · Views: 0
And here are the 8Up versions-
 

Attachments

  • 8up-pro31top.jpg
    8up-pro31top.jpg
    56.6 KB · Views: 2
  • 8up-pro31bottom.jpg
    8up-pro31bottom.jpg
    43.8 KB · Views: 2
  • EZ8top31.jpg
    EZ8top31.jpg
    62.4 KB · Views: 0
  • EZ8bottom31.jpg
    EZ8bottom31.jpg
    48.2 KB · Views: 1
"Lingwendil"

It's the moniker I took for myself. I'm a huge fan of Tolkien, and it means "fish friend" in Quenya, the high-elvish (or "elf-latin" as some say) language from the Lord of the Rings and related series. It's written in the alphabet ("Tengwar") used throughout the various works Tolkien wrote.


(yes, I'm a colossal nerd :))
 
Ok, here we go! here are the (tentative) final versions of the 4 and 8 channel boards!

All boards can be jumpered to turn on/off each driver, and each board features jumpers to allow running channels in parallel. Might have a small graphic of some sort added and then it's likely off to production, and files will be posted once it passes the sniff test.

Also, the 8up boards should slot into a Makers sink upper rails nicely once finished :)
 

Attachments

  • semifinalezpro.png
    semifinalezpro.png
    82.6 KB · Views: 0
  • semifinaleznano.png
    semifinaleznano.png
    89.5 KB · Views: 1
  • semifinal8uppro.jpg
    semifinal8uppro.jpg
    74.5 KB · Views: 1
  • semifinalez8.jpg
    semifinalez8.jpg
    82.7 KB · Views: 1
Back
Top