With the huge popularity of the Chinese 165W LED fixtures, I was looking for a clean tank mount solution. I really don't like the look of ceiling mounts and in my case as the tank sits under a stairway, that's not even an option for me.
I looked around for any tank mounts that could be modified, but not really finding anything, I decided to make my own. This is a super easy and rock steady tank mount that you can make from parts from your local home depot store and the only tools you need are a hack saw, drill and screw drivers.
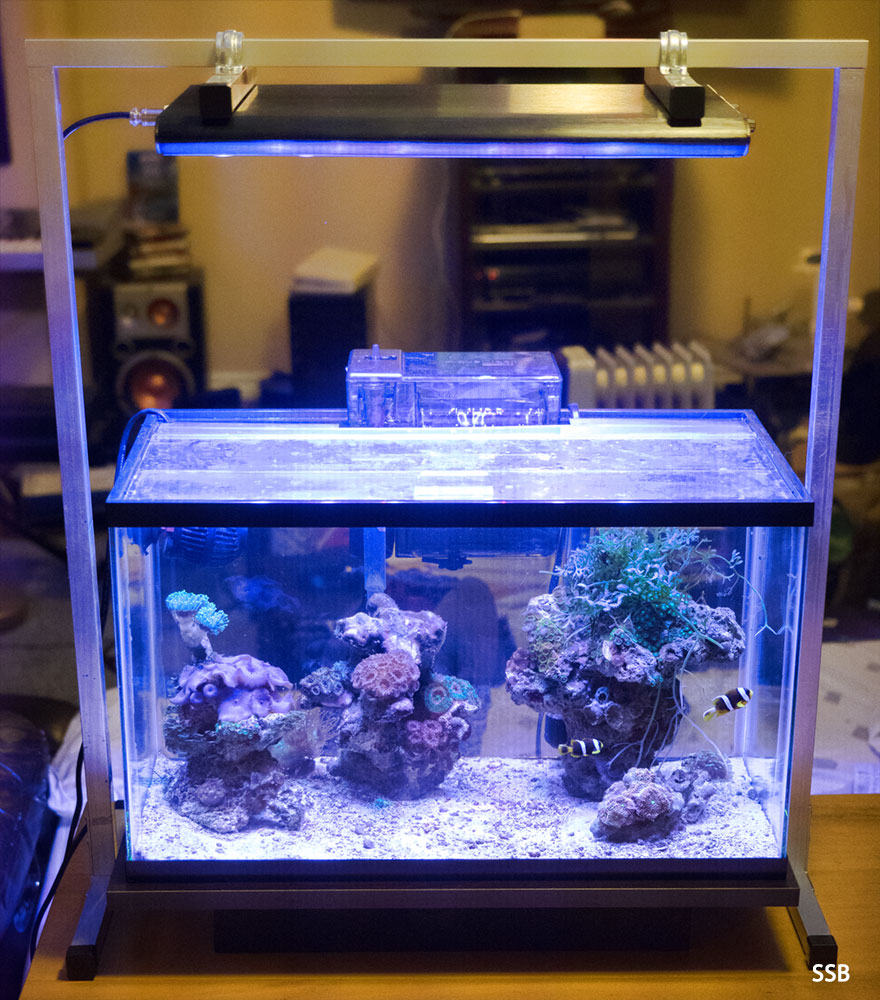
Looking at the mount from the front you can see how clean it looks. I left the aluminum square tube pieces unpainted, but you could paint them if you want.

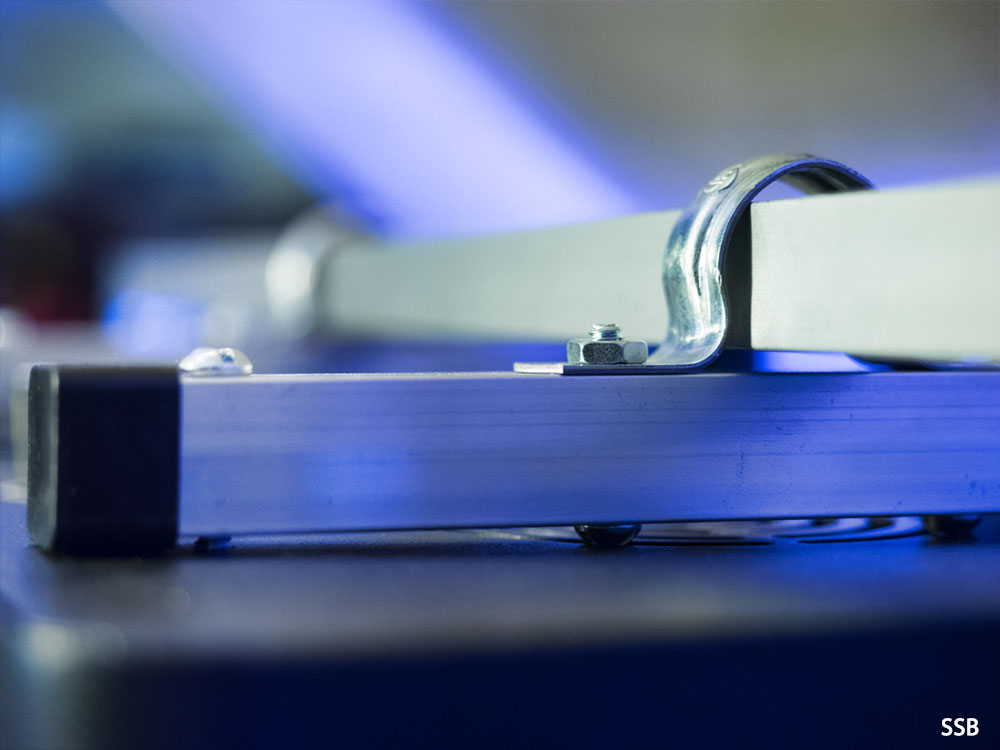
Mounting it on the fixture, is non-destructive and you don't have to drill any holes into the fixture. Instead you just unscrew the four hanging mount brackets and utilize those holes for your mounting bolts. The fixture bracket is attached to two heavy duty 3/4" metal electrical conduit straps that allow you to slide the fixture along the top rail to wherever you want to position it.
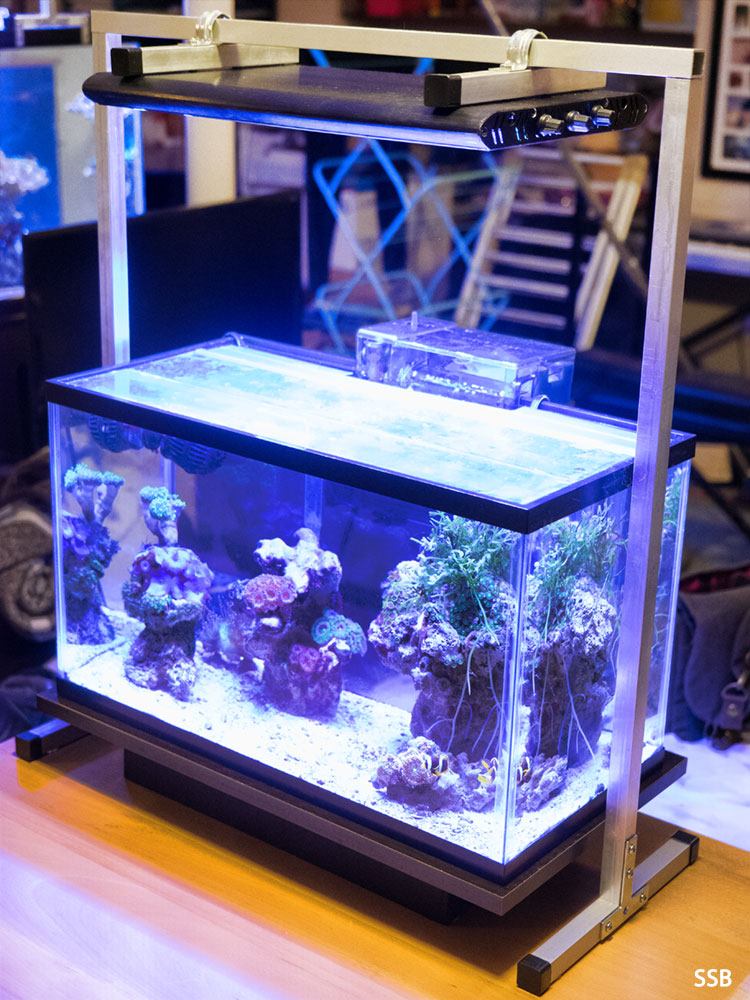
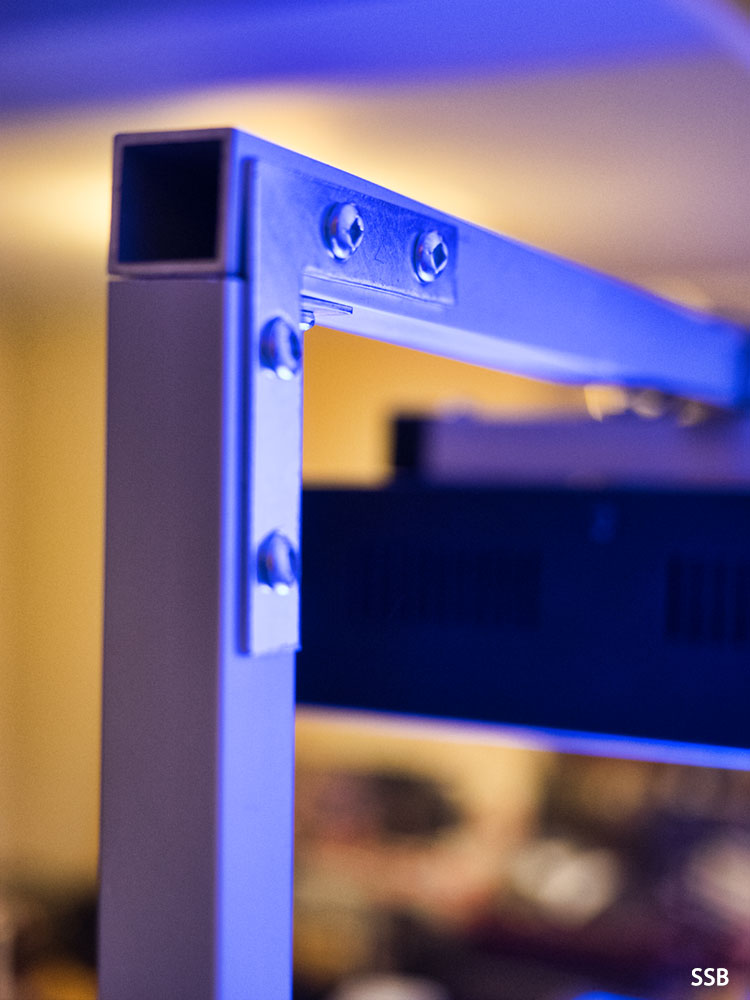
The aluminum square tubing is 3/4" inch and it's very easy to hand cut and drill. I also got some plastic end caps for the feet for a more professional look. The feet rest on the tank rim and mine are 8 inches in length. My vertical columns are 12 inches, allowing my fixture to be about 10 inches from the water, you can make your longer or shorter if you with. You also see a 90 degree angle bracket in the corners. I used self-tapping metal screws, but drilled small holes first and was able to easily screw them into the soft aluminum using a hand screwdriver.
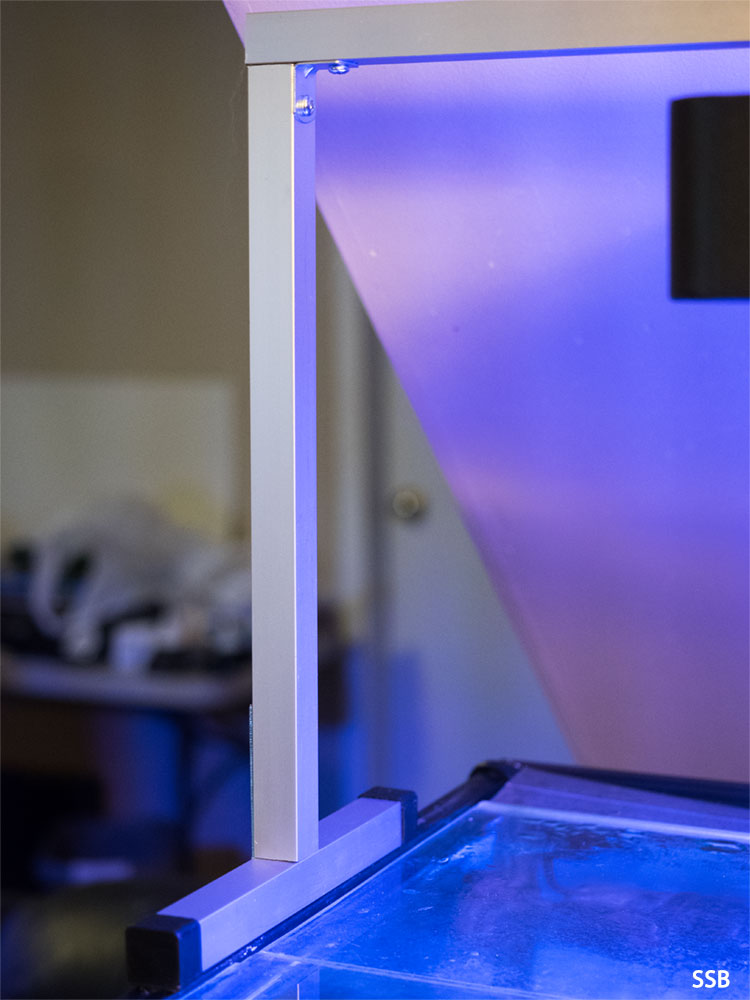
I wanted the stand to look clean when you are facing the tank, so most of the bracing is on the side edges on the outside or the back of the frame. Those T-brackets are awesome and just one is needed for the columns for a solid joint with no movement. I used two small straight pieces on each foot to prevent the mounts from sliding off the top of the tank. They are not screwed into or clamped to the tank, as that is not needed. This way you have complete stability, while having the flexibility of moving the tank mount and fixture towards the front or back of the tank when cleaning or for placement of the lights.
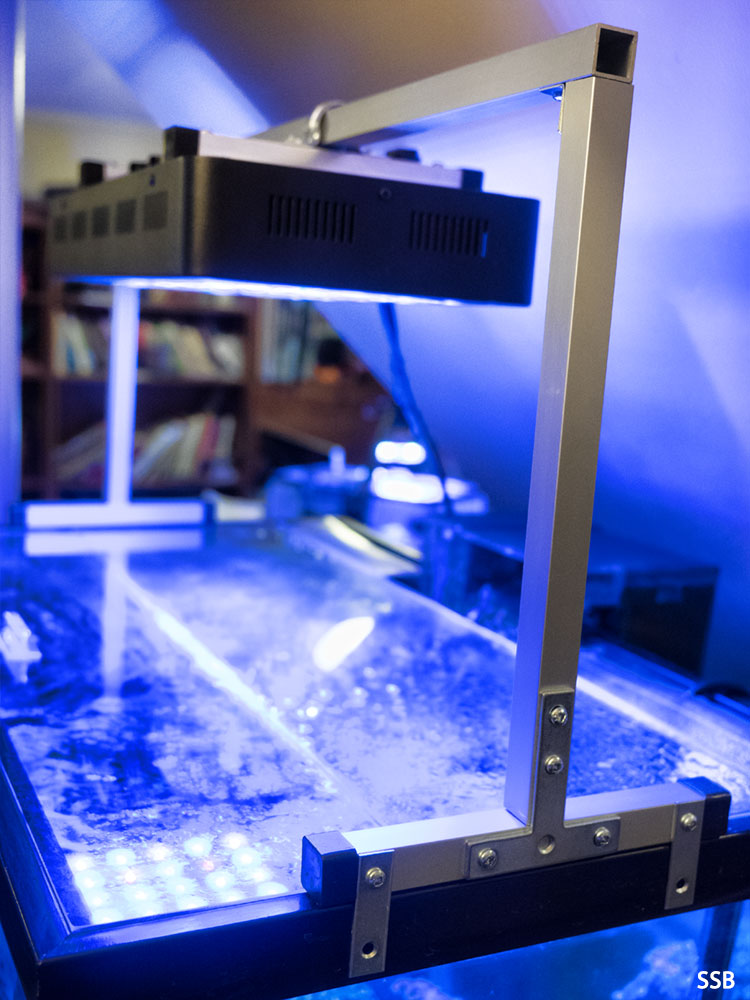
L brackets on the back of the frame corners at the top provide extra support for the frame and are not visible from the front when facing the tank for a cleaner look. This frame has zero movement in any direction and is rock solid. Also the 3/4" aluminum tube is very strong and has no sag,
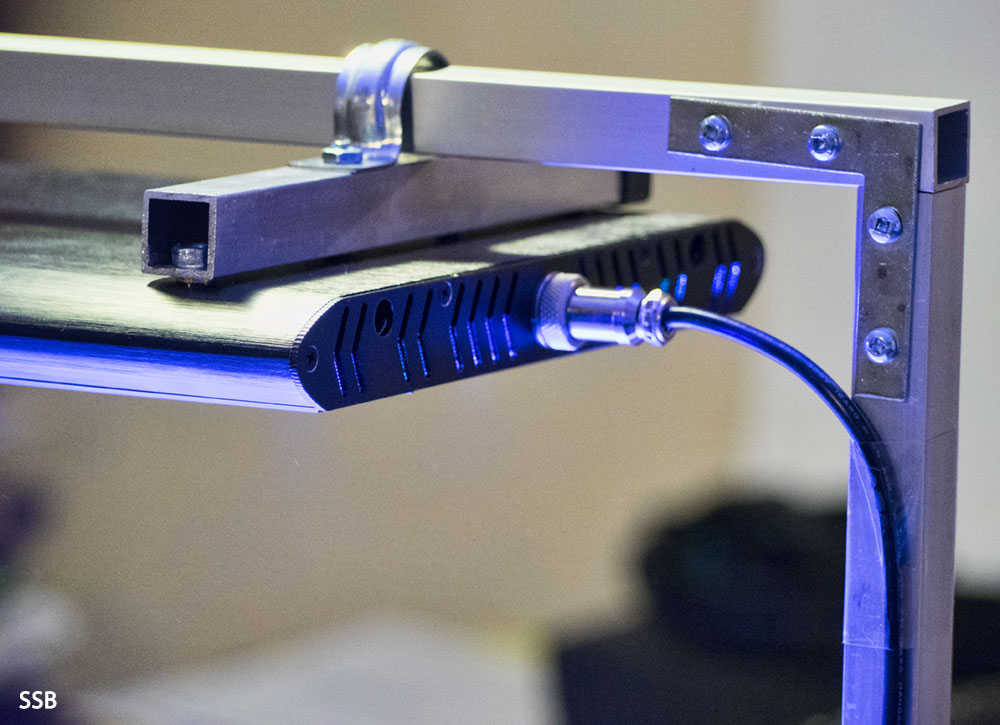
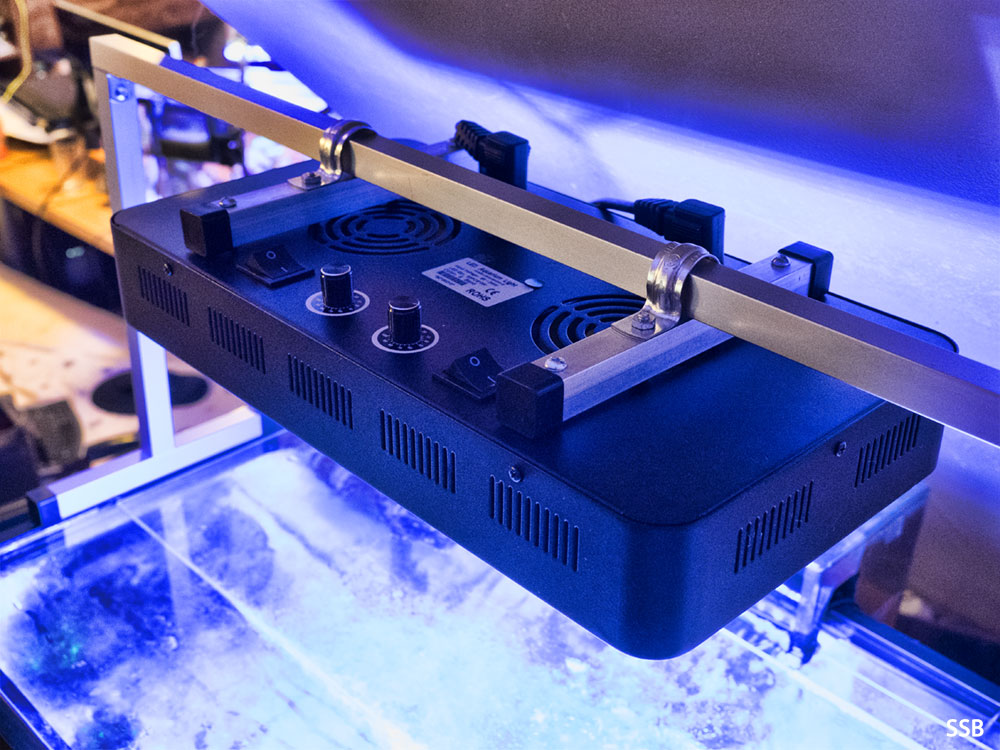
Here you see how the fixture mount looks and works from the top. As mentioned, you are just using the four existing holes in the case where the existing hanging mounts were screwed in. The aluminum mounts were cut to be just a bit smaller than the width of the fixture and capped with two of those plastic end caps for a cleaner look.
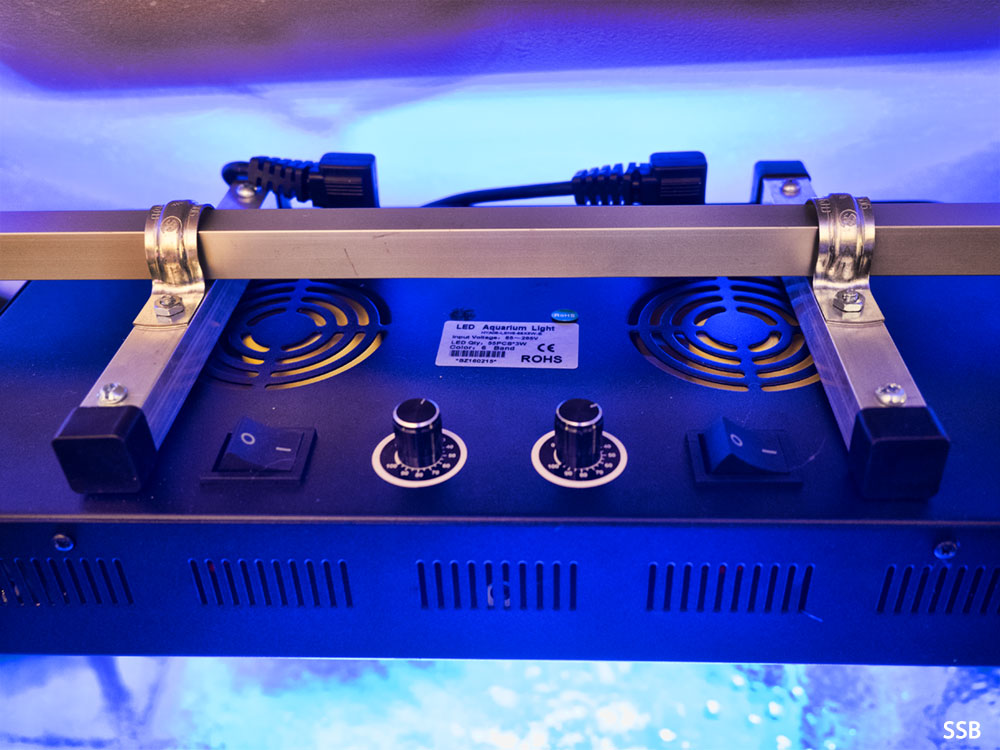
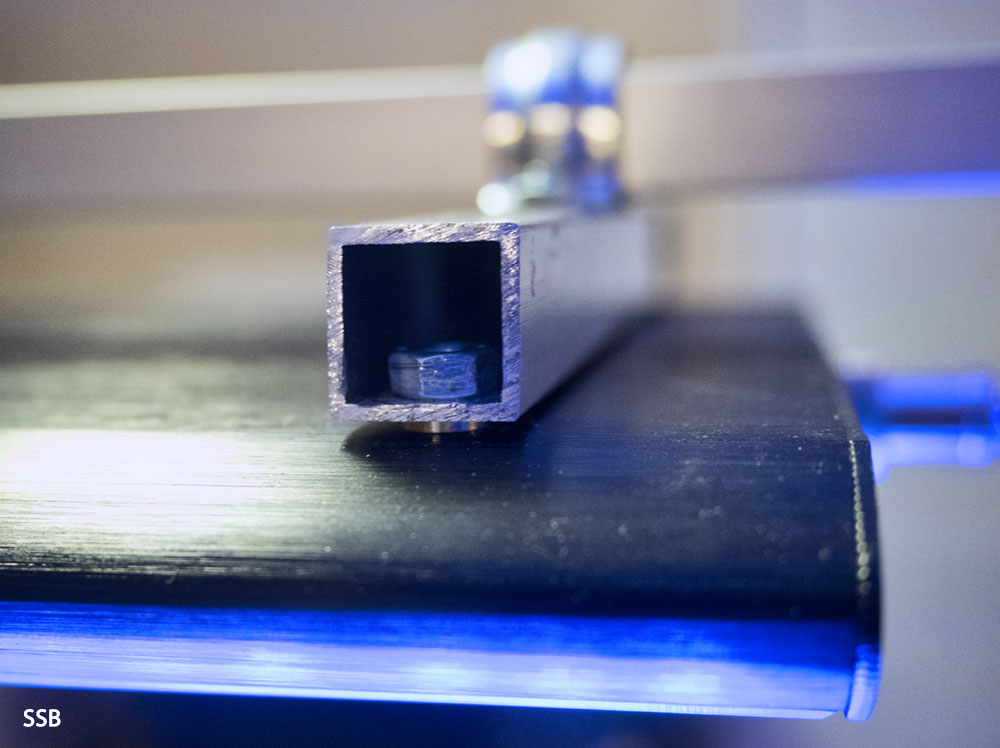
This photo shows how the mounts work. I have 3/16" by 1.5" long bolts going through the aluminum mount and a bolt on the underside, opening up the six screws on the fixture to attach the mounts. You also see the 3/16" x 1" upside down two bolts that attach to the electrical metal conduit straps. Their heads are visible and as a bonus provide a bit of an air gap between the mounts and fixture for unobstructed air flow from the top fan vents. Just remember to have these two upside down bolts sticking upwards before you screw the two longer 1.5" end bolts into the fixture case. Then the very last step when you are done is to just put the metal conduit straps into the two upside down bolts and tighten the nuts by hand which hold the fixture braces to the straps.
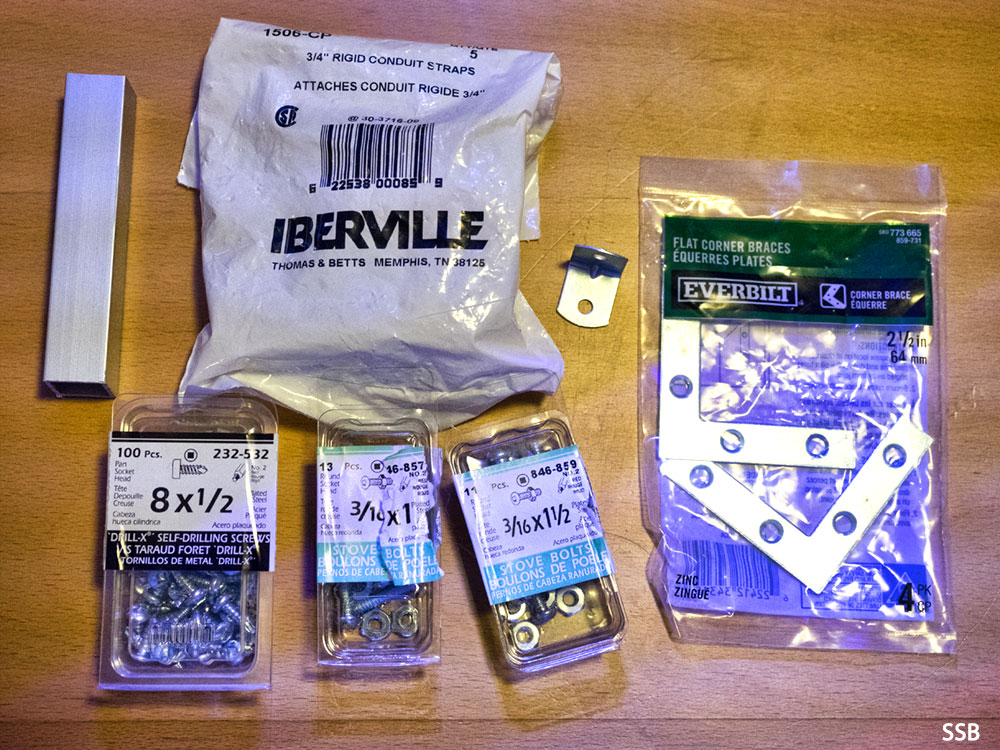
Finally here is a photo showing the various different bolts and those self-drilling screws.
Enjoy and I hope this inspires you to build your own tank mount, if you do be sure to post your pictures in this thread. My 50 gallon is 30 inches wide but you can apply this same design principle to longer tank lengths and mount multiple fixture or to the longer 300W Chinese fixtures as well.
I looked around for any tank mounts that could be modified, but not really finding anything, I decided to make my own. This is a super easy and rock steady tank mount that you can make from parts from your local home depot store and the only tools you need are a hack saw, drill and screw drivers.
Looking at the mount from the front you can see how clean it looks. I left the aluminum square tube pieces unpainted, but you could paint them if you want.
Mounting it on the fixture, is non-destructive and you don't have to drill any holes into the fixture. Instead you just unscrew the four hanging mount brackets and utilize those holes for your mounting bolts. The fixture bracket is attached to two heavy duty 3/4" metal electrical conduit straps that allow you to slide the fixture along the top rail to wherever you want to position it.
The aluminum square tubing is 3/4" inch and it's very easy to hand cut and drill. I also got some plastic end caps for the feet for a more professional look. The feet rest on the tank rim and mine are 8 inches in length. My vertical columns are 12 inches, allowing my fixture to be about 10 inches from the water, you can make your longer or shorter if you with. You also see a 90 degree angle bracket in the corners. I used self-tapping metal screws, but drilled small holes first and was able to easily screw them into the soft aluminum using a hand screwdriver.
I wanted the stand to look clean when you are facing the tank, so most of the bracing is on the side edges on the outside or the back of the frame. Those T-brackets are awesome and just one is needed for the columns for a solid joint with no movement. I used two small straight pieces on each foot to prevent the mounts from sliding off the top of the tank. They are not screwed into or clamped to the tank, as that is not needed. This way you have complete stability, while having the flexibility of moving the tank mount and fixture towards the front or back of the tank when cleaning or for placement of the lights.
L brackets on the back of the frame corners at the top provide extra support for the frame and are not visible from the front when facing the tank for a cleaner look. This frame has zero movement in any direction and is rock solid. Also the 3/4" aluminum tube is very strong and has no sag,
Here you see how the fixture mount looks and works from the top. As mentioned, you are just using the four existing holes in the case where the existing hanging mounts were screwed in. The aluminum mounts were cut to be just a bit smaller than the width of the fixture and capped with two of those plastic end caps for a cleaner look.
This photo shows how the mounts work. I have 3/16" by 1.5" long bolts going through the aluminum mount and a bolt on the underside, opening up the six screws on the fixture to attach the mounts. You also see the 3/16" x 1" upside down two bolts that attach to the electrical metal conduit straps. Their heads are visible and as a bonus provide a bit of an air gap between the mounts and fixture for unobstructed air flow from the top fan vents. Just remember to have these two upside down bolts sticking upwards before you screw the two longer 1.5" end bolts into the fixture case. Then the very last step when you are done is to just put the metal conduit straps into the two upside down bolts and tighten the nuts by hand which hold the fixture braces to the straps.
Finally here is a photo showing the various different bolts and those self-drilling screws.
Enjoy and I hope this inspires you to build your own tank mount, if you do be sure to post your pictures in this thread. My 50 gallon is 30 inches wide but you can apply this same design principle to longer tank lengths and mount multiple fixture or to the longer 300W Chinese fixtures as well.