The BobbyV Build - 150 Rimless Starphire with Shadow Overflow 60x24x24

You might want to look at Octo Varios for a return. They are popular, been out for a while, not bargain but not high end and get good reviews. Also there run dry shutoff is clutch.


Sent from my iPhone using Tapatalk
 
You might want to look at Octo Varios for a return. They are popular, been out for a while, not bargain but not high end and get good reviews. Also there run dry shutoff is clutch.


Sent from my iPhone using Tapatalk

Thank you for the input. I will make sure to check them out. Merry Christmas.
 
Putting together a Manifold. The days of using multiple pumps are over.

Yes this is an old dresser from my starter furniture after college.

We were going to throw it away but I had the idea to keep it for additional garage storage. I can also use it as my hardcore 2nd area work bench which I can beat up and not care what I do to it.

Stain it and Scratch it up doesn't matter. Worst case if I am board later on, just sand it and put a nice coat of varnish on it makes it new again!


49268286838_0dfdddfdc3_c.jpg
 
Last edited:
The return lines are coming together. Hard line plumbing you must be precise in your cuts. Measure multiple times and cut once!


Also the plumbing for the frag tank is coming along nicely.

Adding a Murloc return, just easier and will not look half bad coming off the manifold. Only a 18 gallon display frag tank.

Yes I Herbied the drain on the frag, I had to. No noise is the goal.


There are nicer builds but for the average guy I am pretty proud.

Added the adjustment for the main drain at an easier access on the fly. The overflow water line will be visible so this would be more convenient to adjust the drain speed accordingly.

(Yes the main return is an inch off but I was more OCD about vibrations from the drain. I only meant it to be off half an inch but seeing I didn't cut it perfect and glued it together. I was like, "Ehh Good'nuf!")

Manifold from Left to Right:

  • Reactor Feed
  • Refugium Feed
  • Additional Misc Feed for whatever technology lays ahead
  • Frag Tank Feed Return

49278000681_45e96a8d08_c.jpg


Last edited:
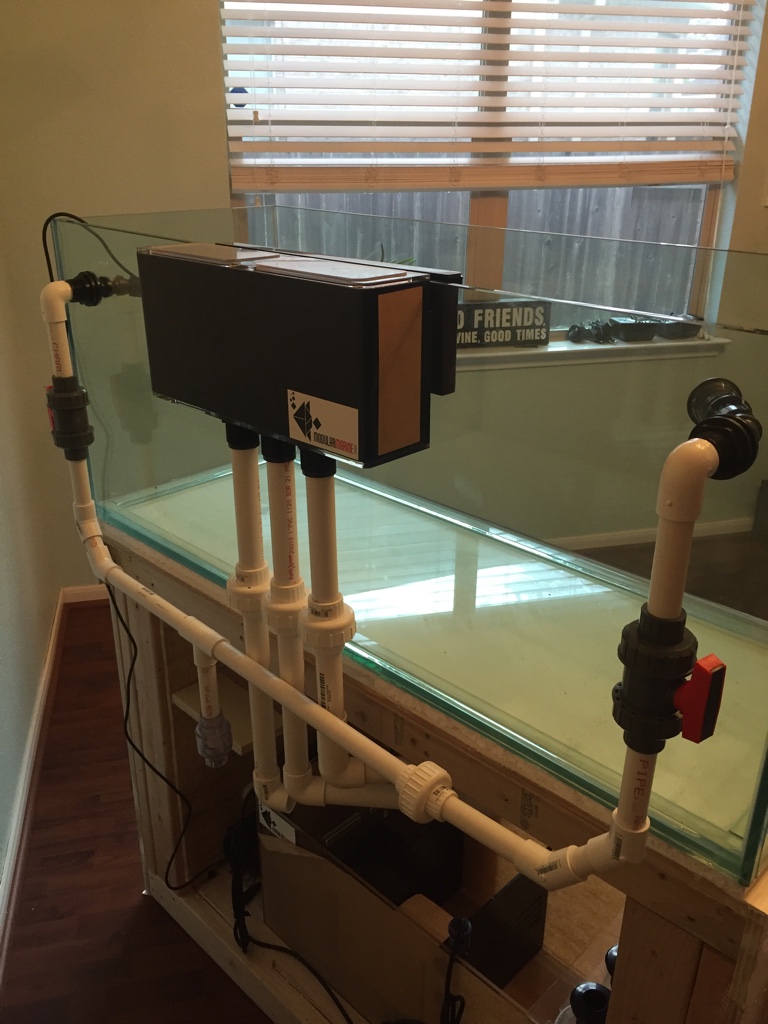
Felt better to reinforce the return and manifold. The PVC I had did the trick perfectly!

Also installed a BRS Deluxe reactor for Carbon ROX and finished up the return pump plumbing.

Spoke with EcoTech customer service and inquired about the new Vectra Pumps. They said they have re-machined the tolerances to allow more water flow and less friction to develop.

They claim that ever since the redesign they have had good success. So with that said. I am going to go with an L2 and run it around 50%.

Hopefully it will last me a LONG TIME!

Ordered a 4 Bulb 48 inch ATI traditional fixture.

Going to pick up an ReefBrite XHO Actinic LED strip for it.

Why 4 bulb? Technically it will be enough PAR with 3 Blue Plus and 1 Coral Plus.

I plan on running a 10 hour all 4 bulbs photo period to compensate for PAR.

Not worried.

I should be "just ok".

Found some threads of those measuring PAR with a 4 bulb ATI and it was low 300's middle tank for reassurance.


Last edited:
Amaizing work. Looks super clean and very good idea with the sideways pipe. [emoji106]

Sent from my Pixel 4 XL using Tapatalk
 
Doing the math and having previous experience with 2 ATI light fixtures prior, I am convinced this will give me just enough PAR power.

I will have it hanging 3 inches above the tank which will be about 5 or so inches above the water surface.


Last edited:
Decided to go BOLD and hang the fixture from my actual ceiling.

In this case you measure 132 times and pray to the light fixture gods that you are not an idiot.

Nailed it perfect on the first try and did not mess up my ceiling. :wildone:

In summary, I am keeping it old school with ATI. Only burning 300 watts and should have 300 par in the middle area of the tank.

I have 6/7 inches of clearance on all 4 sides of my tank to put my hands in.

Loved how it turned out.

Yes when I was drilling the holes I was like . . . please don't be a "Duffus"!

It will be perfect amount of light spread. You will see.

I know the fixture looks small, but these fixtures perform remarkably well.


Last edited:
I am not a rock scape artist . . . so I went with the simple effective 3 island cave approach.

Plenty of room for the fish to swim within and hide to get out of the lights.

Room for future growth and compliant with power head turbulent flow.


To supplement only using 80 pounds of Marco Reef Saver Rock I decided to add additional bio media into the sump refugium area. The bio media came with a convenient mesh bag with a plastic zipper. I bundled it up tightly and plan to never touch it. It also doubles as a nice pod hotel. So if I ever choose to clean out the refugium and suck up all the detritus. I know that a percentage of pods will always be left inside the bundle of Bio Media Spheres.

Our dog approves!

49384822547_0cb764cfe0_c.jpg


49384627671_000ce02ee5_c.jpg


49384160208_d726f1cf56_c.jpg
 
Nice look. I know it doesn't look great now but it is a smart approach. Once corals grow in it will fill up. Also now there are options for man made Tonga branch that you can wedge in the corals and rock to add for additional coral placement.


Sent from my iPhone using Tapatalk
 
Back
Top