Treg's ~ A.G.E. built Flat Back Hex

Treg

Premium Member
The wife and I have been planning this upgrade since we bought our new home over 2 1/2 years ago.
We spent well over a year making sketches and tape marks on the floor.

The new tank will be sitting in a 62" x 30" corner in the dinning room so to maximize width we decided on a flat back hex design.
This allowed us another 6" in width and no sharp corners sticking out for kids to run into.

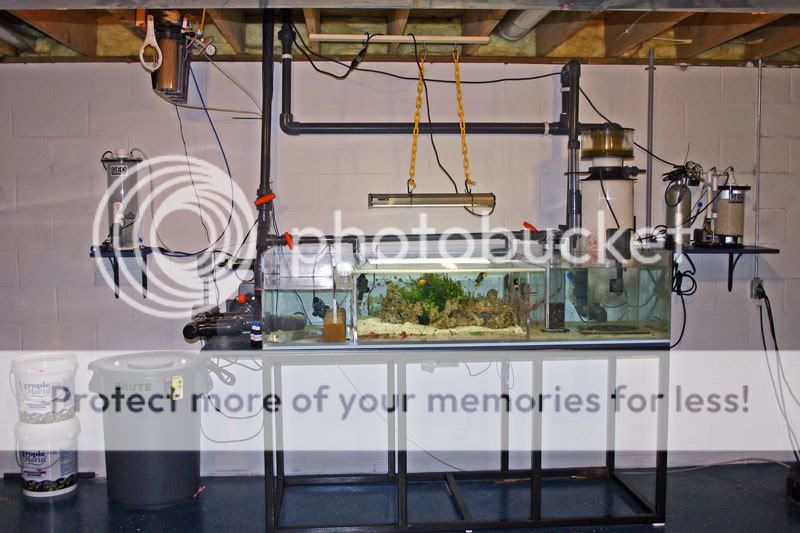
After seeing Naka's tank, Being a fan of my Bare Bottom tank the PVC floor was real appealing.
Wanting a closed loop in the bottom made the PVC even more inviting. No worries of drilled glass breaking.

So in February I submitted drawings to A.E.
A couple last minute modifactions were to add 2" in height and an acrylic brace verses a starphire brace.


Final outside dimensions ~ 60" x 36" x 26".

Tregs-Tank.jpg
 
Things took a little longer then projected on AGE's end, as I'm sure they will also on mine but as of July 3rd, the new FBH tank is finally in our home. :)

Here's a few shots of the build coming together.

754.jpg


789.jpg


791.jpg


792.jpg
 
Oh daaaamn buddy ... that looks sweet! Finally, a tank that can put your 902 to work. :) Can't wait to see this come together, congrats!
 
Ty! Ty!

The 902 and large GEO custom built sump was all pieces of the puzzle a year ago. :)
We've just moved a littler slower on this then we had planned on.

Busy Busy. You know how it goes... It's allowed us a little more time for details tho.

Sump-Room-2.jpg
 
Thanks all.

20,
I think there is a chemical process they use to treat the acrylic allowing silicone to bond.
Tom could answer that better I'm sure but I imagine it is a trade secrete to a point...


GMFett,
I've had no complaints about the 902's performance on the 90g. :)

Nog.jpg


Heres where the new tank will sit and the 90 that is being replaced.

IMG_1624.jpg


FishFeed.jpg
 
I'm building my own steel stand for this. I built the sump stand and its still upright after a year... :)


Heres the top ready to be tacked. I laid the top and bottom out and clamped them to a board cut to the footprint of the tank.
This helped keep everything flat and square.
Steeel2.jpg


After tacking each, I removed the board and started welding.
Welding.jpg


Then boxed it together with the 4 main legs.
Weldlegs.jpg


Then the remaining 5 legs
Weldlegall.jpg
 
Water is in as of lastnight, just a little bit cloudy yet.


It was a looong weekend to get there but its up and running. :)


FTS1.jpg


FTS2.jpg
 
Very nice looking tank! the roses look beautiful as well.
i was wondering how they attached the acrylic bracing to the glass tank?
 
Thanks John.


Again I couldnt say really how it is done, AGE would have to answer that but I know they are not going to tell you exactly how. ;)


I can say that it is very solid. :)
 
Thanks guys.

We love seeing the fish swimming around in a big tank now.
It was a long wait but we couldnt be happier. :)

Those pics look pretty crappy with the water cloudy, they really dont show the depth of the aquascape at all.


purebullet417

Heres a thread I started on the sump. I havnt updated in a long timetho...

I have a new Geo bult 4' x 2' frag tank to plumb into the sump too, just as soon as I find time. :)

Sump-Room-1.jpg


Sump-Room-3.jpg
 
Back
Top