Tucson reef tank

ADVRESOURCE

New member
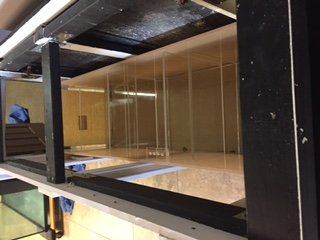
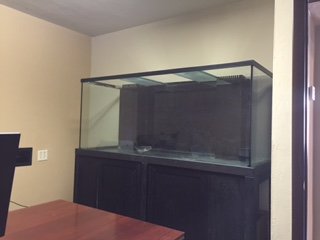
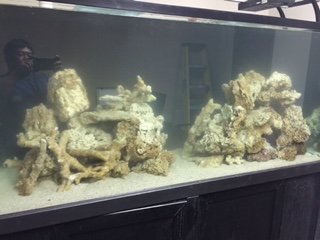
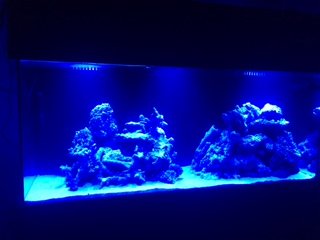
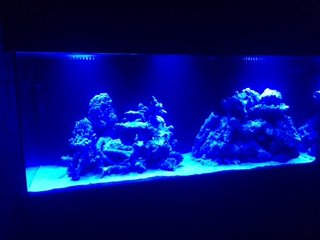
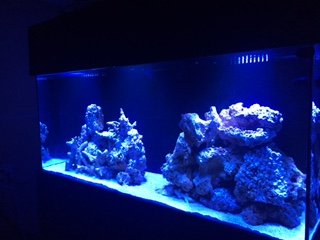
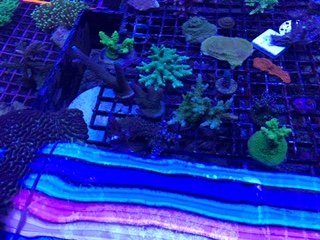
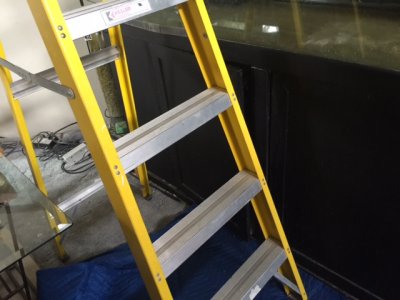
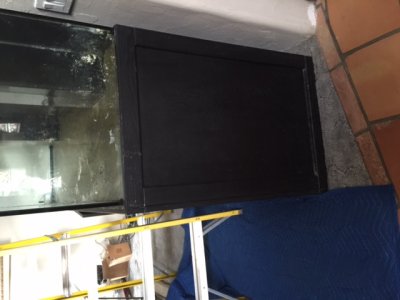
I decided to move my 240 g mixed reef from my home to my office. The tank was in my home for around 10 years. I remarried and the tank took second fiddle. I purchased an office building and completed a renovation. After looking at one of the spare offices, it seemed like a good home for my reef tank. The office is adjacent to a store room. There's water and drainage in the storeroom so water changes and the likes would be fairly manageable. My office is around the corner from Dan's "Reef in the Desert" fish store, Fishy Bizness. The tank dimensions are: 72"x24"x34" with two overflows, two 1" returns and two 2" drains. My sump was an old glass tank with an external barracuda pump.

First step, cleaning.

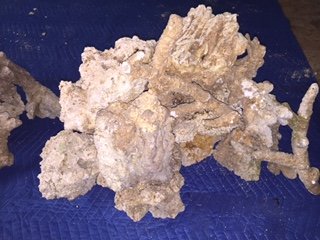
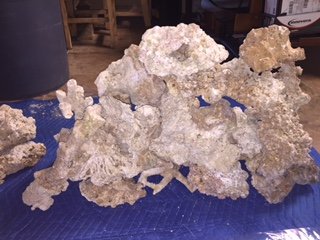
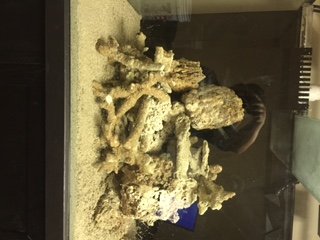
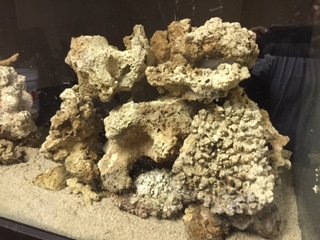
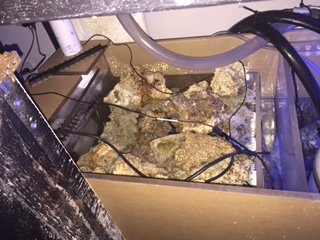
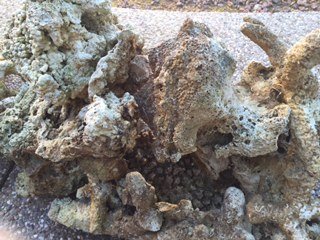
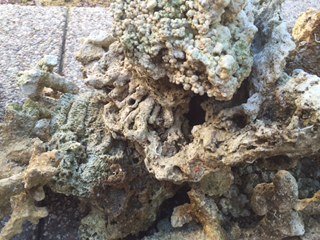
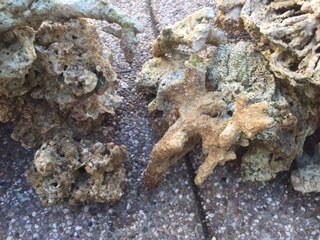
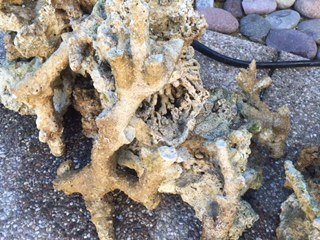
1. Rock was placed in garbage cans
2. Sand was scooped out for disposal
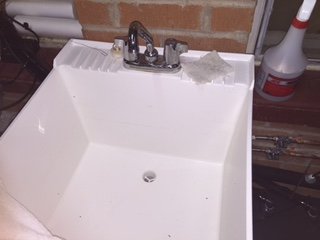
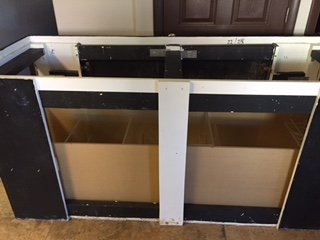
3. Vinegar water and RODI was used to cleanse the tank and stand
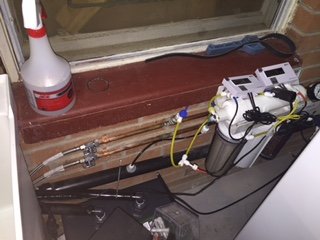
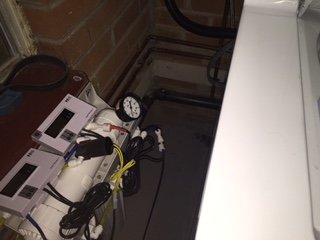
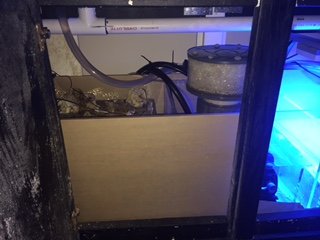
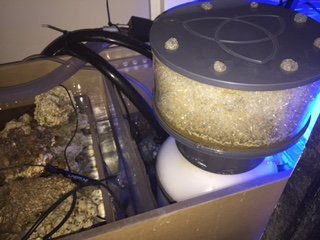
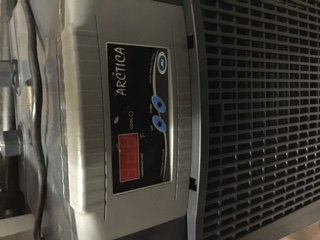
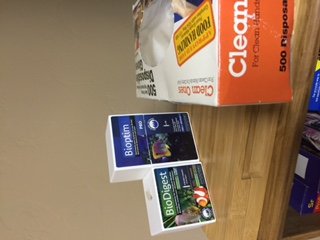
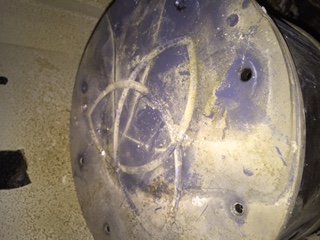
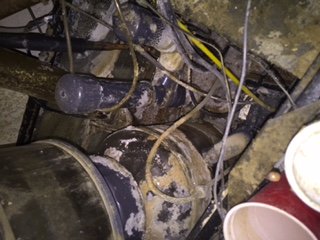
4. All pumps, sump, refugium, CA reactor, skimmer, mag drives, ozone, and chiller needed to be cleaned and reviewed for salvage.

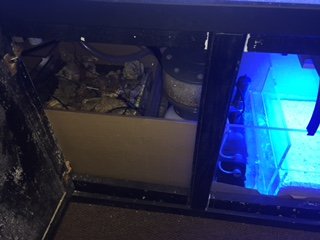
The process of cleaning was tedious at best. But, I able to get all the equipment boxed up. I filled the tank with RODI water and scrubbed and scrapped all of the surfaces. I filled the rock garbage cans with the old RO/DI water from the tank.
 

Attachments

  • IMG_1562.JPG
    IMG_1562.JPG
    39.5 KB · Views: 2
  • IMG_1563.JPG
    IMG_1563.JPG
    43 KB · Views: 2
  • IMG_1579.JPG
    IMG_1579.JPG
    99.4 KB · Views: 2
  • IMG_1581.JPG
    IMG_1581.JPG
    81.7 KB · Views: 2
Tucson reef tank

After cleaning the tank as best I could...it's tall and I'm short. I decided to get some help with moving the tank and stand to my office. The tank stand was affixed to the carpet and needed a lot of vinegar water to pry free. The LFS, Fishy Bizness, guys were great. There were 3 guys and me. We first dollied the tank to the front steps of my house. Then the guys removed the van doors from it's hinges.

We were at a dilemma since the tank was so heavy and the concrete stairs soo steep. Thus, we retrieved some plywood planks from my garage and built a make shift ramp. We ended up rolling the tank down the ramp on furniture dolly's. It took everyone of us to insure that the tank didn't roll off into the surrounding desert.

Finally, we lifted the tank onto the van. We set the wood stand up on my Tundra and off we went to my office.

The stand was in desperate need of reinforcement before we would attempt to place the tank.
 
Tucson reef tank

I decided to go the LFS and study their SPS tank. It was quite nice and I decided that this time around I would do mostly SPS, tangs and then we'll see.

I checked out their flow strategy, read a bunch from the Reef Central posts and determined I needed a new sump, return pump, reactor pump, chiller and chiller pump, ph probes and lighting.

Mike and Justin from the LFS are a great source of knowledge. Plus, they are really nice and helpful.

My parallel conquest was to design a sump. I wanted a 72"x24"x20" sump that had bubble chambers to catch all of the bubbles. I also wanted a filter sock area, a live rock section, an in tank skimmer (reused), a built in deep sand bed refugium and a return section. After some help from Mike and Justin on some fine tuning, it was time for an acrylic manufacturer in town to build this beast.
 
Tucson reef tank

I had a lot of rock from by previous venture. Thus, I washed and stacked the rock on the front porch of my house. I had Fiji rock and Tonga and others that I cannot name. I figured to under utilize the rock and create a lot of caves, pass through, with lots of ledges for coral. I also didn't want to stack the rock against the back glass. I wanted more of a peninsula with a swim gap. The other consideration was height. I wanted to have plenty of room for growth but, I also needed to have good lighting. Thus, I felt that placing the tallest point at max 22" for a 33" high tank would be sufficient. I had to add a layer of base rock to pull this off.

The balance of rock would go into the sump.
 

Attachments

  • IMG_1600.JPG
    IMG_1600.JPG
    38.4 KB · Views: 2
  • IMG_1601.JPG
    IMG_1601.JPG
    39.1 KB · Views: 2
  • IMG_1604.JPG
    IMG_1604.JPG
    39.2 KB · Views: 2
  • IMG_1607.JPG
    IMG_1607.JPG
    41.2 KB · Views: 2
Sounds like a great re-build! following along.
BTW 34" is nice but way too deep. I can't get over imaging that at least half of your head is submerged in water to be able to reach the bottom of the tank. :)
 
Tucson reef tank

With recommendation from my LFS, I ordered AI hydra 52 HD lights (4) - 3 for the DT and 1 for the DSB refugium. I also ordered 2 Aqua Excel DC pumps 1 x Variable Speed Submersible DC pump DC-10000LV ( 2641 GPH ). and 1 x Variable Speed Submersible DC pump DC-6500LV ( 1720 GPH ). The 6500 would be for the chiller and the 10000 would be for my return. My plan is to do the same as the LFS and go low flow through the sump for maximum skimmer and biological filtration.

I calculated the return with 260 gal total water volume at 3-5x flow rate. I used the RC loss calculator with the various lengths, heights, and 90's and found that the 2641 gph pump does the trick. I plan on getting the DT flow from 2 - MAXSPECT GYRE XF150 GENERATOR FLOW PUMPs.

I also had to order new bulk heads for my overflows. Two 2" drain bulkheads and two 1" return bulkheads. Marine Depot was extremely patient with me and took back all of the returns without charging me a restocking fee. I must've ordered 3 sets of bulkheads (all wrong) before I finally got it right.

JBJ ARCTICA TITANIUM CHILLER DBM-250 1/3HP was the one I purchased after seeing someone trying to sell a 1/2HP commercial JBJ on RC. The tank volume determined the HP.

COBALT AQUATICS MJ1200 MULTI-PURPOSE POWERHEAD/PUMP is the pump I'm using for feeding my Calcium reactor. I'm using the GEO CA reactor.

My skimmer is a REEF DYNAMIC 80-350, which is awesome.

I also utilize the liquid level controller by SpectraPure along with a float shut off by Max Spector - it has the pirate looking octopus on the magnet.
 

Attachments

  • IMG_1676.JPG
    IMG_1676.JPG
    86.8 KB · Views: 2
Tucson reef tank

On January 20, 2016, I had to add a drain, sink and water, and RO DI system to my office store room. I had hopes for my plumber to do the sweating, and gluing but, he was working in North Dakota so I decided to tackle the job.

It took longer than expected but, all went well. I ordered a wall pass through so I could get water and electrical into the adjoining office.
KoldLok Integral Solid Grommet Part No. 1010 KoldLok-1010 Grommet

I had my electrician install a 100a subpanel for my fish tank needs.
 

Attachments

  • IMG_1849.JPG
    IMG_1849.JPG
    22.3 KB · Views: 2
  • IMG_1850.JPG
    IMG_1850.JPG
    33.2 KB · Views: 2
  • IMG_1851.JPG
    IMG_1851.JPG
    37.9 KB · Views: 2
  • IMG_1852.JPG
    IMG_1852.JPG
    24.2 KB · Views: 2
  • IMG_1853.JPG
    IMG_1853.JPG
    28.1 KB · Views: 2
Tucson reef tank

With the tank sitting on furniture dolly's in my office space, I had to re enforce the tank stand. The LFS guys recommended front, back and side support. I also had to cut openings on each side of the cabinet, with a jig saw, to get the old sump out and make room for my new sump, which had been ordered.

I used three 10' long 2x4's to strengthen the front and back along with stabilizing the front to back support. I used L brackets and a lot of flat brackets and screws. Good thing for electric drills and screw guns.

When finally primed, painted and installed the stand into the office using 6' furniture slides that I purchased for the move.

The Fishy Buziness guys came to help lift the tank onto the stand and slide into the new location. Also, the sump came in and looks awesome. We installed that beast into the stand.

Now for the fun stuff. Plumbing.
 

Attachments

  • IMG_1682.JPG
    IMG_1682.JPG
    33.9 KB · Views: 2
  • IMG_1683.JPG
    IMG_1683.JPG
    31.8 KB · Views: 2
  • IMG_1684.JPG
    IMG_1684.JPG
    29.4 KB · Views: 2
Tucson reef tank

I purchased a bunch of plumbing T's, L's, caps, 2" PVC and threaded insert and created two durso drains - boy are they quiet. The drill hole in the cap is 5/8". I read a bit on Durso stand pipes and all of the review on RC seemed to look good. I built and installed them and they are quiet.

I also plumbed the returns with 2" PVC and going into the filter sock area I had placed a 45 around the same level as the top of the filter socks. This technique came from my friend Steve who was a very successful reef keeper. The technique offers a lot of surface turbulence while minimizing the bubble effect caused by submersion of the drain pipe in water.

I used 1" vinyl hose as the return. I ordered a plastic Y fitting to split the return and have only one 90 per return. I flow water toward the center of the tank with lock line and a spreader nozzle. The spreader nozzle is placed a little above the water line for good oxygenation and in case there's an electrical outage to stop the siphoning effect.
 
Tucson reef tank

I added the medium grade sand into the tank around 1" height (80 lbs) while I place another 60 lbs into the DSB. The oolite on the bottom (20lbs), medium middle (20lbs) and course on top (20 lbs). I have a AI Hydra 52 HD over the sand bed. I purchased all of the sand from the LFS and they were very kind to wash all of the dry sand used in the DSB. The DT had live sand.

The next feat was to aqua scape the rock. I place a nice big blanket on the floor. I used plastic tape and created the exact dimensions of the tank with overflow boxes and stacked rock on the blanket until I was satisfied with the aqua scape.

Next came water from the LFS - Catalina ocean filtered water.
 

Attachments

  • IMG_1699.JPG
    IMG_1699.JPG
    22.1 KB · Views: 2
  • IMG_1732.JPG
    IMG_1732.JPG
    46.6 KB · Views: 2
  • IMG_1729.JPG
    IMG_1729.JPG
    45.4 KB · Views: 2
Tucson reef tank

I added the rock work to the tank. Waited for water. "THIRSTY"
 

Attachments

  • IMG_1738.JPG
    IMG_1738.JPG
    31.5 KB · Views: 2
  • IMG_1740.JPG
    IMG_1740.JPG
    36.1 KB · Views: 2
  • IMG_1742.JPG
    IMG_1742.JPG
    48.3 KB · Views: 2
Tucson reef tank

Guys came out from Fishy Bizness, LFS, and filled 260 total gallons of water in two trips. Next comes equipment installation and lighting.
 

Attachments

  • IMG_1746.JPG
    IMG_1746.JPG
    33.4 KB · Views: 2
  • IMG_1747.JPG
    IMG_1747.JPG
    41.7 KB · Views: 2
Tucson reef tank

Remarkably, NO leaks. The skimmer worked great. I was able to partially figure out the lighting. Fine tuning is definitely required. The return pump DC control is quiet and controllable. I ran low flow through the sump.

Next I installed the sump light. Purchased new PH probes - Neptune lab grade precision probes. One for my sump water and one for my controllable CA reactor.

I calibrated the sump probe with 7.0 and 10.0 calibration standards and calibrated the CA reactor probe with 4.0 and 7.0 standards.

All seems to be working properly. My tank reads 8.1 while my reactor without CO2 reads 8.3 (double checked effluent and it is 8.3).

I don't have any fish or coral during my 3 month cycling so I'm not turning on the CA reactor. Although, I added large media to the reactor and have the feeder pump installed and pumping. Also, the recirculating pump is flowing.

I also installed the Gyre in tank flow pumps.

Based on recommendation from the LFS, I am keeping all of the lights off to the tank and DSB.
 

Attachments

  • IMG_1748.JPG
    IMG_1748.JPG
    28 KB · Views: 2
  • IMG_1749.JPG
    IMG_1749.JPG
    27.4 KB · Views: 2
Tucson reef tank

I changed out the 4" filter socks about once each 2 weeks. I wash with towels with about 1/4 cup of bleach. Twice, once with bleach and the other without chemical. I dry twice and air dry. The LFS professional, Justin, keeps me posted on all of the do's and don'ts for what goes in the water. No soap or detergents, no copper, no nothing. Crazy glue yes. Gloved hands. I purchased surgical gloves. Frag kit from Marine depot- in bamboo case.

The sump is an amazing thing.
 

Attachments

  • IMG_1788.JPG
    IMG_1788.JPG
    32.5 KB · Views: 2
  • IMG_1791.JPG
    IMG_1791.JPG
    33.2 KB · Views: 2
  • IMG_1792.JPG
    IMG_1792.JPG
    47.1 KB · Views: 2
  • IMG_1793.JPG
    IMG_1793.JPG
    39.4 KB · Views: 2
  • IMG_1795.JPG
    IMG_1795.JPG
    31.8 KB · Views: 1
Tucson reef tank

I hooked up the chiller and CA reactor pumps. Set the tank to 76degF and have the reactor fill pump going but no CO2 until livestock is added.

Added some Pods from LFS and added Arctic pods, rotifers and tisbe pods today.
 

Attachments

  • IMG_1744.JPG
    IMG_1744.JPG
    24.2 KB · Views: 2
  • IMG_1745.JPG
    IMG_1745.JPG
    32 KB · Views: 2
Tucson reef tank

As recommended to speed up the tank cycling, I added both PD01136 PRODIBIO BIO DIGEST - 30 VIALS and PD07213 PRODIBIO BIOPTIM PRO - 10 VIALS OF 10ML EACH. I also purchased the frag kit so that I can glue down frags that I'm collecting.

It's chemical testing so I'm checking PH, Temp, CA, Alk, Nitrate, Ammonium, and Phosphate each Monday. I will attach the results. All pretty good.
I also provided the light spectrum as recommended by someone on the reef tank.
 

Attachments

Sand correction

Sand correction

I added the medium grade sand into the tank around 1" height (80 lbs) while I place another 60 lbs into the DSB. The oolite on the bottom (20lbs), medium middle (20lbs) and course on top (20 lbs). I have a AI Hydra 52 HD over the sand bed. I purchased all of the sand from the LFS and they were very kind to wash all of the dry sand used in the DSB. The DT had live sand.

The next feat was to aqua scape the rock. I place a nice big blanket on the floor. I used plastic tape and created the exact dimensions of the tank with overflow boxes and stacked rock on the blanket until I was satisfied with the aqua scape.

Next came water from the LFS - Catalina ocean filtered water.

120lbs of sand in DT
 
Tucson reef tank

Well, I'm only 3 weeks in. Waiting...but, purchased some SPS that are being held at the LFS for me.

Within 3 months, I should have around 50 pieces to add and maybe some fish.
 

Attachments

  • frags.JPG
    frags.JPG
    55.2 KB · Views: 2
Depth

Depth

Sounds like a great re-build! following along.
BTW 34" is nice but way too deep. I can't get over imaging that at least half of your head is submerged in water to be able to reach the bottom of the tank. :)


Yes, maybe snorkel for placement. Plus, 36" tongs.
 
Back
Top