60 Gallon Cube Build

Dry fit the plumbing

Dry fit the plumbing

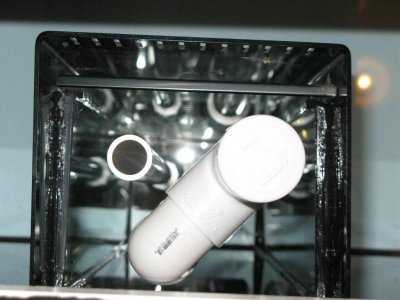
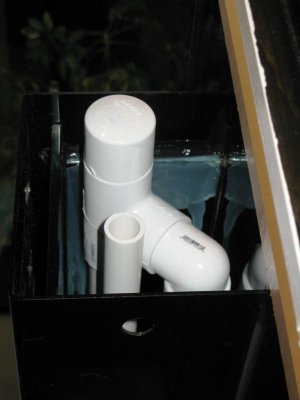
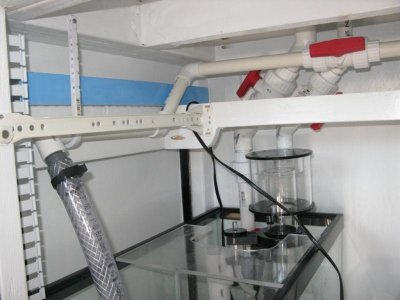
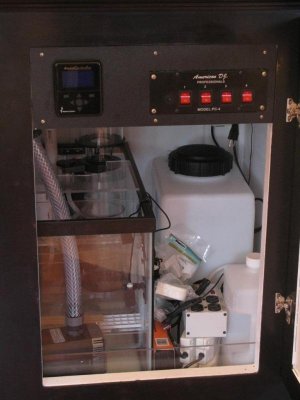
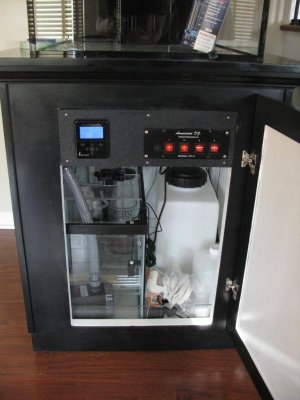
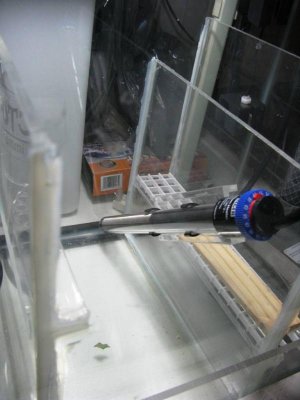
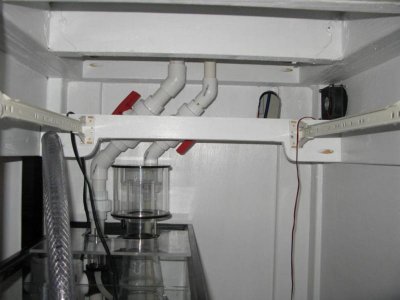
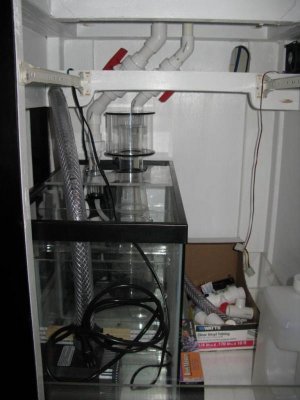
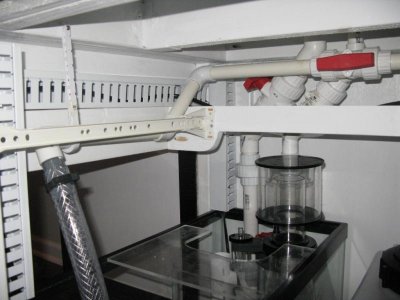
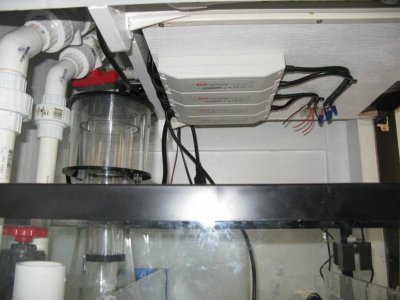
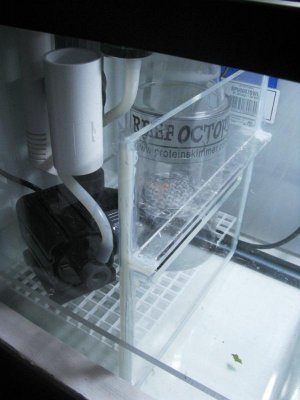
Well I dry fit the 1 inch drain and 3/4 emergency drain today. The skimmer will be jamed in there quite tight...


I did have one issue where my threaded union is stuck in the bulk head. trying to take it out is tightening the bulk head. I will need to throw the durso in there and have someone hold it tight so I can get my dry fit union out of the bottom...


Yes I know I need to put the vent in the top of the durso... just dry fitting today...
 

Attachments

  • IMG_2984.jpg
    IMG_2984.jpg
    50.5 KB · Views: 26
  • IMG_2985.jpg
    IMG_2985.jpg
    34 KB · Views: 25
  • IMG_2986.jpg
    IMG_2986.jpg
    43.5 KB · Views: 20
  • IMG_2987.jpg
    IMG_2987.jpg
    51.3 KB · Views: 31
Hey, I was thinking about doing a splash guard like that on my drain/skimmer chamber as well. Should really help keep salt buildup on the inside cabinet surfaces down. Is that 1/4" acrylic?
 
that is but once alc the braces are in place it will cover almost all the fuge. Should help cut down on evaporation as well
 
Drails are done. return is dry fit...
 

Attachments

  • IMG_2990.jpg
    IMG_2990.jpg
    49.1 KB · Views: 25
  • IMG_2991.jpg
    IMG_2991.jpg
    52.5 KB · Views: 31
Well I got the wire duct in place behind the return pipe... word of advice.... dry fit all your pipes then get all your wire duct in place before you glue the pipes...


The only place I can fit my meenwell drivers is under the electronics tray. I can put them under the framing but then I will need to extend all the AC cords on them.
 

Attachments

  • IMG_2992.jpg
    IMG_2992.jpg
    51.8 KB · Views: 29
  • IMG_2993.jpg
    IMG_2993.jpg
    56.5 KB · Views: 34
Cant find a good space for the 4 meenwell drivers..... I am thinking under the electronics tray (upside down) like under your sock drawer...
 
Nice build thread and great info. I am currently building my own 60 cube. I am wondering what type of bulkheads you chose and why? I am trying to decide if threaded or slip is right for my durso pipe and return or not?
 
Just curious is the electrical up to code next to a water source like that. I remember outlets in a bathroom needed to be gfi protected, but I thought the outlets still needed to be a certain distance away from a water source. Could be wrong, you may only need the gfi protection. Just some food for thought in case anything were to ever happen and an insurance agent needs to get involved.
 
Just curious is the electrical up to code next to a water source like that. I remember outlets in a bathroom needed to be gfi protected, but I thought the outlets still needed to be a certain distance away from a water source. Could be wrong, you may only need the gfi protection. Just some food for thought in case anything were to ever happen and an insurance agent needs to get involved.

Wich water source the RO/DI? or behind the tank? If its behind the tank, this needs to be asked to every signe build thread on fish tanks...Kind of hard to make the pump work without it unless you are running perminant extension cords...

By the RO/DI ... well that is (as all the others) a GFI and the GFI is required when the outlet is within 6 feet of water... It can be right over your bathroom sink without a code issue...
 
Electronics Drawer

Electronics Drawer

Well I started constructing the electronics drawer. I mounted the apes display and my non controlled power to the front of the drawer. On top of the drawer will be the apex base unit. two EB8 modules (I only have one now) a 4 outlet power strip for the 4 meenwell drivers (so they only take up one outlet on the EB8). I am going to mount the 4 meenwell drivers under the drawer.

This all will keep in neat and tidy...
 

Attachments

  • IMG_2999.jpg
    IMG_2999.jpg
    54 KB · Views: 29
  • IMG_3001.jpg
    IMG_3001.jpg
    46.7 KB · Views: 26
Captian, we have power

Captian, we have power

Well started mounting the electronics today. I still need to make the LED cable from the drivers to the canopy. I also need to install the cable management arm for the back of the electronics drawer...
 

Attachments

  • IMG_3022.jpg
    IMG_3022.jpg
    41.6 KB · Views: 27
  • IMG_3026.jpg
    IMG_3026.jpg
    47.1 KB · Views: 29
  • IMG_3027.jpg
    IMG_3027.jpg
    53.6 KB · Views: 26
  • IMG_3028.jpg
    IMG_3028.jpg
    51.5 KB · Views: 31
I hate it when you wind up with an elecrical cord that is about a foot too short. Now I need to make a bunch of little extension cords or cut off the ends and heat shrink on extensions...
 
LED's Up And Running

LED's Up And Running

light bleeding out of the tank is a bit much. We'll see what it looks like with water...
 

Attachments

  • IMG_3046.jpg
    IMG_3046.jpg
    54.9 KB · Views: 26
  • IMG_3047.jpg
    IMG_3047.jpg
    54.1 KB · Views: 27
Is that container in right rear for ATO? How many gallons? What is the dimension? Where did you get it?
 
7 gallons made by ace roto mold and sold at tank depot (I think). I dont have the dimentions on hand but it is about 10 wide by 14 deep (about), The dimentions are on the web site. Much better than a 5 gallon bucket...
 
Thanks, the planning is the key because you get excited to put in a new toy but that gets in the way of something else... It has been 3 months so far and I cant get ahead of myself. All the cabling is the absolute last thing to do because that tray saves space but it gets in the way of moving the reservior in and out or getting to the plumbing...
 
Heater Mount

Heater Mount

Well we all know those suction cups never last. They also dont stick to cheap acrylic (that I used for my baffles...1/4 inch but cheap none the less). Also it is hard to fit a 150w heater in a 20 gallon high fuge. So I made an acrylic mount that I attached the factory heater clip to. It holds the heater diaganally on the baffle and is welded to the baffle so it is not going anywhere...
 

Attachments

  • IMG_3086.jpg
    IMG_3086.jpg
    72.3 KB · Views: 24
  • IMG_3087.jpg
    IMG_3087.jpg
    72 KB · Views: 27
  • IMG_3090.jpg
    IMG_3090.jpg
    44.1 KB · Views: 27
  • IMG_3089.jpg
    IMG_3089.jpg
    45.5 KB · Views: 27
well cut the egg crate for the bottom of the tank, the skimmer table and also made a splash guard for the return side of the fuge...

I am really going to be mad if I need to raise or lower the skimmer much... it is so darn tight un a 60g cube. it will make a real mess if I put water in it. Guess I need to at some point
 

Attachments

  • IMG_3091.jpg
    IMG_3091.jpg
    64.1 KB · Views: 25
  • IMG_3092.jpg
    IMG_3092.jpg
    46.3 KB · Views: 28
  • IMG_3093.jpg
    IMG_3093.jpg
    53.2 KB · Views: 28
Back
Top