afernandez
Never Quit!!
Very very nice as usuall. The tank looks awsome not that we expect anything less from you :lol2: .
Btw: organized is not even the word
Btw: organized is not even the word
")
Thank you... Not exactly sure just yet but half a container lasts around 5 days.Very amazing peace of work. Everything looks very neath.
I do have a quick question, what is your evaporation rate with an open tank? How many liters or gallons per day?
Thanks man. There were lessons that were learnt from the previous buildHoly crap Andrew, you've gone from strength to strength - something that seems pretty uncommon after a tank move. The new 'scape looks awesome and the new cabinet work is much more functional! Good stuff
Thank you... I keep it half full with around 26litres.Ahhh at last some pictures:celeb1:
And what can I say, amazing clean setup, I love it.
How many litres of RO water does the ro container hold?
lol...Thanks... I do like the electrical panel too. I'm adding a few finishing touches to it.Just MASTERCLASS....:smokin:
Its so well organized...
The electrical board does resemble the instrument panel in the cockpit of an aircraft...Now we know where you got your inspiration from :lol2:
Your organizational skills is my inpiration to get things as organized as possible in my build.
The islands looks so cool and im sure its prime real estate now
Happy Reefing!!
:beer:
Thank you very much. Appreciate it.Very very nice as usuall. The tank looks awsome not that we expect anything less from you :lol2: .
Btw: organized is not even the word
Yeah.... he is a strong one. Very surprised too. I'm pleased with the aqua-scape too. Much more open and believe it or not more area to place coral.I'm so glad to see your Achilles tang survived all the troubles! Everything is looking great, and I like the new aquascape.
lol... I knowI really wish you would get serious about this hobby & quit messing around!
;-)
Yes it will be... I am doing a few things differentlyNice save way to go with the new setup! It will be interesting to see this ones maturing process, and to see how much you have learned from your previous tank. Good luck!
ThanksThat's gr8 man....
Thank youYou've done it again!!!!!!!!!!!!!!!!!!
Everything looks amazing!
Well well well done!!!!!!!!!!!!!!!!!
Thanks and your welcome. I usually just refill it directly from the RODI unit. Very little effort is required... although I do have a 20L container ready to go in case of an emergency.Ok, so it's about 26 liters per 5 days. That's still managable.
Again, very nice set up, my compliments and thanks for your reply.
Thank you... but I don't have any sketches of the new stand. I will try to find from my builder. If my pockets were deep... I would have got a larger tank, but then I would need all new equipment. :fun5:Nice work there, Andrew. I spent a whole full day started on page 1 and finally catch up at here.
Do you have the computer sketch up on the new stand with dimension and all the details like the first stand that you built?
My pocket is not as deep as yours, but I'm going to follow your path no matter what my misses will say. :beer:
That was what I used to use. I have a basic schedule at the moment. An important thing to remember is to only start one new additive at a time otherwise it is too hard to see if it is working.Just went back a few pages to see your kz dosing schedule. It's alot but for those results I am seriously considering it
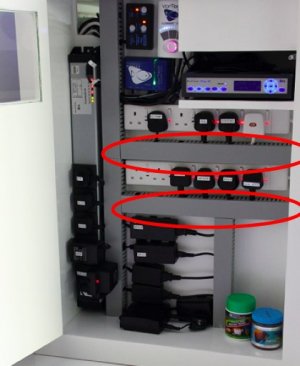
Thank you. They are used for cable management. All the electrical cords are behind the grey cover.great work on the electrical panel
may i know what are those rails you used?
is there a certain brand or place i can search?

Thank youvery nice !
That's a very nice system to hide all the cables. The problem that i have is that alot of my powercords are longer than i need so i have alot of excess cords that i need hide. How did you solve that problem?
Aren't you afraid of heat building up in those ducts.