Algae Scrubber Basics

Flow looks fine. Just use 1 light though... looks like at least 2 are on.


I got and am only using 1 light. It must have been a reflection. Thank you for the advice and I cannot wait to see how this works.

I've been in the hobby for 25 years and this is my first ATS and the first time I've ran without a skimmer.

I've watched a lot of videos about your products and spoke with other who have great things to say.

This will be a fun journey.


Sent from my iPhone using Tapatalk
 
Floyd,
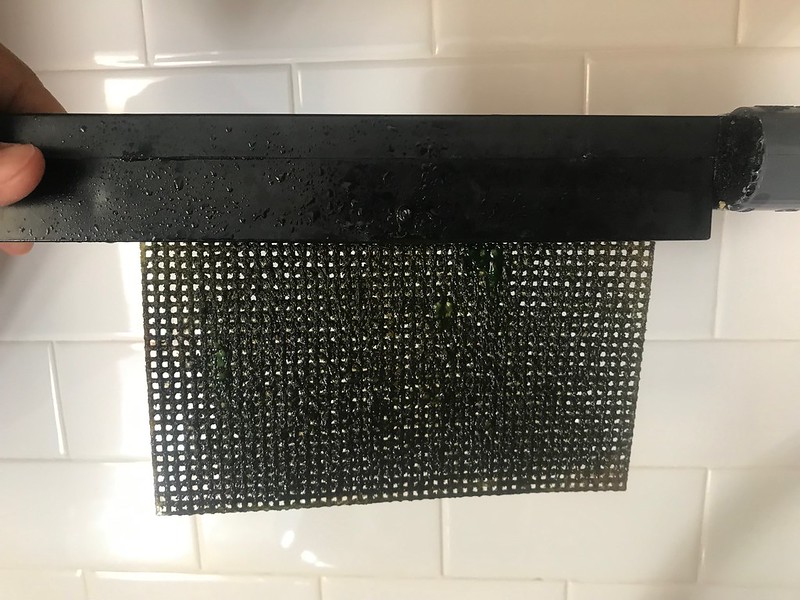
Here is what my latest growth looked like....any thoughts. I've never had this growth or texture before. It wasn't like normal hair algae, it was this weird color and came off in sheets....almost like it was not attached very well to the screen.

T
935bdbcf23f38598e36c8e0bb9cc4fc0.jpg


Corey


Sent from my iPad using Tapatalk
 
That kind of looks like it grew out and then something blocked the flow and the light bleached out the algae. When you harvest, do you scrape/scrub the tips of the light blockers and scrub out the slot?
 
I clean the slot. Run my fingers up/down the sides and pull any excess off. I'll give it one more good rub.


Corey

An additional note, I always use a brush to scrub out the slot to make sure it's clear, and then I use a scraper or my thumbnail and run it along the inside and outside edges of al the light blockers, then scrub them with a stiff brush. I do this every harvest or about every 10-14 days.

Also make sure you are scrubbing the top 1" of the screen with a stiff brush (I use a grout & tile brush) to make sure there is no growth forming.

I don't think either of these are the cause of your issue. It might be a stage in the re-start of the screen, hard to say. Keep us posted
 
Just did a quick check on the progress of my Turbo’s Aquatics L2 Rev4 ATS. It has been running for about 4 weeks now. It’s running on a brand new tank and the screen has been sitting in my rock curing tub for a few months prior to setting up the scrubber. I have it at about 25% intensity with the potentiometer dimming knob at the 6 o’clock position, running for about 9 hours a day opposite of my DT lights. I was expecting the slime growth stage, common with most ATS screen break in periods. To my surprise, I have a nice and even layer of firmly attached hair algae developing on the screen. I may look into either upping the intensity or increasing the photoperiod to get some faster growth now that the screen seems to have broken in properly. Very impressed with the performance of this ATS thus far... Thanks Bud! :)

48113933118_b54eb52a20_c.jpg
 
Yup, I would add a bit of intensity - maybe a 1/8 turn - and then extend hours. Being a new tank, you'll want to go slow on intensity, but you can run very long hours at low intensity.

You can add a few hours to the daily photocycle of the scrubber with each harvest. Watch growth and take pics so you have a record and don't have to guess and recalling what it looked like.

Intensity is "instantaneous". If you don't have nutrients being supplied, cranking intensity can cause photosaturation. But if you get good growth at a given intensity, adding hours won't cause photosaturation (unless nutrients get really low and you curtail feeding significantly, etc).

As for cleaning, you don't have much to clean off per that pic, so I wouldn't do much. No scraping, no brushing, just rub & rinse with fingertips while running under tap water.

Scrub top edge and slot pipe of course
 
Thanks Bud. I just checked the screen, took a picture and put it back online. I’ll go 1/8th of a turn and leave her be. I’ll take a shot of the screen in a couple of weeks.
 
An additional note, I always use a brush to scrub out the slot to make sure it's clear, and then I use a scraper or my thumbnail and run it along the inside and outside edges of al the light blockers, then scrub them with a stiff brush. I do this every harvest or about every 10-14 days.

Also make sure you are scrubbing the top 1" of the screen with a stiff brush (I use a grout & tile brush) to make sure there is no growth forming.

I do this with every cleaning. It makes sure you are growing algae for as much and long as possible between cleanings.
 
Finally finished! Here's my algae scrubber that I built for my 75g tank, after weeks of planning.
<iframe src="https://drive.google.com/file/d/1RIyU-aTcu7eDUtBkQI3jvzhbO12sqajP/preview" width="640" height="480"></iframe>
<iframe src="https://drive.google.com/file/d/16ouNMKd_k6PXQN1QszwnXFfn2UIMtK0j/preview" width="640" height="480"></iframe>
<iframe src="https://drive.google.com/file/d/1NCKJI7pMiJqxTGGB7pGP7HkJoNuVqksr/preview" width="640" height="480"></iframe>
<iframe src="https://drive.google.com/file/d/11W2YYxLg8Fabh5puYTYL-FlvrXa85O3s/preview" width="640" height="480"></iframe>

I realized that because of my sump setup, I could not have the unit just sit on top of the sump -- there is simply no space. It would've had to have gone in the return section, and then everything in there would be cramped, and the light on the outside of the sump would have been in my way....I could go on. I realized the best would be for it to go on the empty wall opposite the end of my sump. I also knew I'd have to design things from the ground up, to maximize the plastic sheet space, minimize noise, light leak, and space used by the unit. That's how I ended up mounting it the the side of the stand and draining with a bean animal system.

This is my sump before and after:
<iframe src="https://drive.google.com/file/d/1k2umRWao02L85L0lZjcndDwBgpBte6us/preview" width="640" height="480"></iframe>
<iframe src="https://drive.google.com/file/d/1cr3ycZ8J3nIQ80DBv00aKDSdwJ7Cw-UV/preview" width="640" height="480"></iframe>

The box is made of ¼" acrylic, but I made a prototype in 1/8". The prototype, I cut out on the circular saw and was displeased with the edges. For the real deal, I went to my local library, which got a new handheld CNC machine, the Shaper Origin, and boy was that cool! Anyways, I ran into many challenges along the way.
For one, I couldn't get the slot pipe to be even flow, so I ended up stacking 4 cutoff bits on my Dremel for the desired width of the slot, instead of going around the edges.
The light I got (it was the exact same cost as making one DIY, but came with a casing and a fan) is the exact width and height of the scrubber, but I had no way to suspend it, so as you can see in the photo, I built a stand. The surface actually pops off so it can come out, and the distance from the acrylic to the union I calculated to keep the stand rock solid.
To combat light leak, I cut out some cardboard fit to the sides of the scrubber, one side covered in aluminum foil and the other in navy duct tape. It works for now, I guess. The front piece is only taped up on one side so it swings open for easy look at algae.
Finally, I wanted the pipes as out-of-the-way as possible, so you can see the drains come out and then go to the sump at a 45 degree angle so they aren't right up front, but what you don't see is that the input pipe goes up from the sump against the front of the stand, over the door opening, and then connects to the spray bar w/a union.

Here's my tank:
<iframe src="https://drive.google.com/file/d/133UZ4VvlQ6ok7GVkZvVjjOhR1iBPouaA/preview" width="640" height="480"></iframe>

I'll update in a few weeks when algae comes in, but so far....thoughts?

Thanks!
--Harrison
 
Might need to dim or shade it to start, since it probably is very strong. Check the case ground pin too for safety. Then see how it grows as-is.

Easy performance mod is to simulate 2-sided by placing a white plastic sheet behind the screen, and cut some tall diamond-shaped cutouts in the screen so light can get through and reflect back to the other side.

Best mod is to get a light on the other side. 2-sided is always far better than 1-sided, for waterfalls, because of the mat-down. This does not happen as much in upflows.

But just see how it does now.

Yeah I was worried, once I turned it on, that it was so bright. I made the reflectors to try to bring light to the other side but won't be able to install the one on the back till I clean the screen and remove the scrubber.

I don't feed that much, so I guess I figured the nice large screen could compensate but to be honest I never did the math........

In the future if needed I guess I could add those waterproof strip LEDs to the inside although they may have to go in at an angle. It simply wasn't ideal to have a light on the other side for space, cost, and ease of access reasons.

Will the algae just not grow if it is too bright? I could find something to put in front of it I guess.

Thanks!
 
The algae will not grow if too bright. A little too bright in the middle is ok, and will create growth rings which are fine to start out. But that big light might blank out the whole screen, so shading half of it with a black cloth or something would help.
 

Oh that is so cool! Thanks for sharing! I seem to have hit the mark on pretty much every one of the recommendations, save for that my screen is taller than need be and my pump might be a little underpowered (200ish gph). Still the flow coming out is very good, when I lower the shield it distributes the water evenly across, too.

Thing is, these calculators make me feel like maybe I'm not feeding my fish enough!? I put 2 or 3 cubes in a bottle, and it used to last me almost a week and now I feed it twice a day (as opposed to pellets the other time) which takes about 4 days to finish. That's like an avg of only ¾ a cube a day for all my fish. Maybe the seaweed makes up for it? Hmmm

And for the light, what about just putting a piece of paper in front? That will diffuse and dim :)

Thanks! --Harrison
 
Back
Top