Algae Scrubber Basics

AWESOME summary, Floyd!

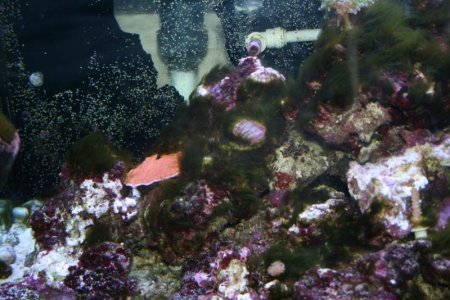
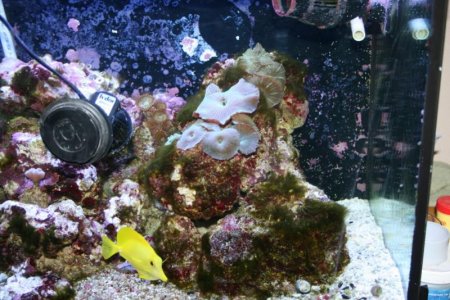
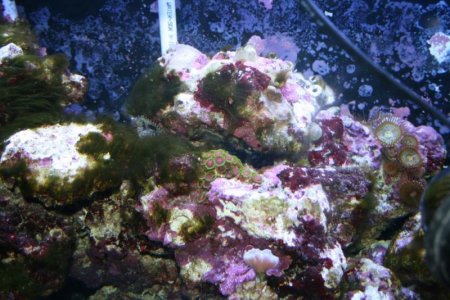
I just want to post a small update on mine and post some pics of what I dealing with. I got it plumbed in and the lights are mounted and it is Operational. I found a power strip at lowes that has four timed outlets on it. I set the lights to be on 4 hours and off 4 hours just as a test. I appreciate everyones help!

Oh and the powerhead in the middle pic was just there to blow some crap out of the rocks.
 

Attachments

  • IMG_8702.jpg
    IMG_8702.jpg
    80.2 KB · Views: 4
  • IMG_8703.jpg
    IMG_8703.jpg
    91.2 KB · Views: 5
  • IMG_8704.jpg
    IMG_8704.jpg
    84.8 KB · Views: 4
K is a rating of color. I think lumens are what you are describing.

K rating is color temperature, yes, but it is based on human perception of the brightness of the light.

Lumens are a measurement of the intensity of the light, which is a mathematical figure.

3) I added you to the summary of summaries. Wish I could change the title now since they are not all DIY.

Sweet, thanks man!
 
Floyd, amazing write up!!! It should be mandatory to read if someone was interested in building a scrubber. My write was far less throughout, do I feel my write may help get a few more people interested in building one... But yours answers so many more questions!! If we started this thread with your write up, I think we wouldn't have 1,000+ post thread of questions! Thank you for this, I will see if I can get an admin to put copies of your posts just after mine on the front page.

Again... You did a great job,

~Stephen

Ps. After your write up... I will be making a few modifications to my design as well... And it got my thinking... I really need to measure the flow of my pump... :D Thanks again
 
I don't think they can insert posts only modify; so IMO the best you can do is a link. But then you are going to need a link to part 2 (if he writes and I hope he does). Then again he has to correct the first part (he and I PMed). So I think the answer is that when Turbo post the next part he posts the whole thing. And then when some new person comes a long with the question "why do we measure flow?" we send them to the summary and don't answer the question - then they have to read it :) - with a polite if you have more question come on back. It seems to have worked well with the LEDs threads; it also means we don't have to keep bothering the moderators.
 
I have to clarify one thing. It's quite complicated and technical, but TheFishMan65 is somewhat correct, I didn't quite explain the lumen/K rating issue very well.

The Kelkin (K) rating is established by comparing the light source to the color emitted by a blackbody radiator when heated to a given temperature. For fluorescent sources, this is called the correlated color temperature (CCT), and it just differentiates the source from an incandescent source. What that means is that "K" rating is for hot body sources (like tungsten filaments) and CCT is what the K rating would be if the source was a hot body - they're the same number, so you always see "K" for simplicity. Me, I like to confuse you with technical jargon so you think I'm super smart.

With a fluorescent source, the light is mercury based (UV band) and then the phosphors that coat the tube fluoresce and essentially shift the light into the visible range. Different combinations of phosphors result in a blended light that has the appearance identical to an incandescent source with an established K rating, and then the fluorescent source is given that K rating. But there are many ways to blend phosphors and come up with the same K light. That is why you can't simply go by K rating.

You can have any number of different sources of light (HPS, MH, LED, linear Fluorescent, compact fluorescent, Incandescent, Induction, etc) with the same K rating, and they will all look very similar to the human eyes, but the spectral curves will look completely different. Even different manufacturers will have different spectral curves, but within a particular source group, they're pretty close. So a 2700K CFL will be pretty much the same across the board, unless it's labeled something special (like "grow lamp")

As far as lumen output goes, when you look at the lumen rating on a lamp, you are looking at total lumen output. So just because one has 2x the lumen output, it doesn't tell you what wavelength that lumen output is at. Lumens are largely human perception as well.

What algae cares about is specific wavelengths and that's harder to pin down than just grabbing a bulb with a given K and Lumen rating. I know I'm not covering it all, and for those of you who know a enough about this subject, I'm probably raising other questions and I might not be 100% perfectly correct with this explanation, but I'm trying to keep this general and simple. Feel free to correct me with perfection-based explanations if this really bugs you!

Most of sources will work OK, and that's why you see so many people growing algae with just about any light source. But we're after optimal growth, and hundreds of people have been using 2700K CFL and 3000K T5HO grow lamps and have been getting the best results.

But, I'm not here to convince anyone who believes otherwise, because I'm not likely to change your mind if you've convinced yourself otherwise. Give it a try, compare a couple different sources side by side, and post your results here for all to see!
 
I've been following this thread since before it was a sticky and srusso was helping out. Srusso, you got me interested and i'm pretty sure this is what I need to get my own tank back in shape. Just last weekend I finally got everything together and plumbed up. My screen has been ready for some time (roughed up) and I thought it wouldn't hurt to go ahead and seed it, so I pluched some turf off my rockwork and pushed it through the mesh holes, then just let it float in my tank near the overflow. It was like that for about a month and wound up getting some decent growth on it. Now that it's plumbed up and water's flowing properly across it, the algae there is greening up much brighter than it was when it was floating. I'll get some pictures up later tonight. I'm in the process of building a new toy box/kiddie coffin but plan on improving the current build and making myself a contained 3D growth box. I'm pretty good with acrylic and have enough spare parts laying about the garage to make a good one.
 
I'm contemplating pulling my skimmer.. I noticed it's still pulling crap out of the water some, dialed in a dry setting. So, as long as it's producing something I may keep it on... But my ATS is really taking off, so, I anticipate within a month the ATS will catch up with the display and be able to handle the crap in the display without the skimmer.

When I take the skimmer offline. I'll keep an eye on changes in the tank.
 
Well folks, it's time for a little experimenting. I'm helping out someone who bought some corals from me a while back, he has to move out of the house he is in by Friday, and needs a temporary home for his stock in his 125. So I'm setting up a 37 gallon and going to put in his 100+ lb of LR, various corals (including a 18" tall leather), 4 chromis, and various CUC for 4-6 weeks. I'll share more info on the tank and some pics as I go along, but what I'm going to do it build a quick scrubber and monitor the N and P drop rate. Right now I know his N is around 80-100 and haven't tested the P. So for now this is a teaser, I pick up everything from his tank tomorrow afternoon. Until then!
 
are you guys still using skimmers on your tank with the scrubber?

My tank has only ever had the algae scrubber. Although the person who gave the tank and equipment to me also gave me his old skimmer. I never bothered with it... The previous owner said that his skimmer was a huge PITA b/c if the water level in his wet/dry sump changed it messed with his skimmer. That including other reasons, made me look for alternate filtration. I have never looked back since...
 
Well folks, it's time for a little experimenting. I'm helping out someone who bought some corals from me a while back, he has to move out of the house he is in by Friday, and needs a temporary home for his stock in his 125. So I'm setting up a 37 gallon and going to put in his 100+ lb of LR, various corals (including a 18" tall leather), 4 chromis, and various CUC for 4-6 weeks. I'll share more info on the tank and some pics as I go along, but what I'm going to do it build a quick scrubber and monitor the N and P drop rate. Right now I know his N is around 80-100 and haven't tested the P. So for now this is a teaser, I pick up everything from his tank tomorrow afternoon. Until then!

Floyd, I did this however, intentionally. I bought my 125g used from a person wanting to get out of the hobby. He didn't want to mess with selling his corals individually. So I bought all his corals too. He promised to deliver the tank to my house and help me set it up. He lived 3-4 hours away..

So, what to do with corals that filled a 125g In the meantime while it cycles etc? Well, I had a 55g, that had just gone through a 8.0 ammonia cycle due to a crash (my fault....) It was fully cycled then (had been 5 weeks). However as it recovered from the crash it was covered in cyano. This concerned me some, but I put the corals in the 55g. It filled the 55g to the top brim, and I had corals laying every which way, hoping none were touching and causing warfare. They were in the 55g for 3 weeks under PC lighting. (Lots of SPS- Caps, vaces, some LPS - frogspawn, brains of different types, and some softies, 12-15" leather, toadstool, etc.)

Every coral for 3-4 weeks survived in my 55g, with nothing more than a hob filter, a bakpak2 HOB skimmer, and a 340 gph return pump. I didn't have any fish in the tank, so that probably helped, but, just saying. It's going to be hard to notice if the nitrates come down because of no fish, biological processes in the tank or because of a scrubber. I personally wouldn't mess with the scrubber, unless you really wanted to.. Not just for 4-6 weeks.
 
It could be more than 4-6 weeks, so I figure why not. I can't set up my 120 until I get my PE test results back, which is 7-9 weeks away. So this gives me an excuse to have a reef tank at home until then, and an excuse to play a little!

Here's his tank:

IMG_9816.jpg


IMG_9817.jpg


IMG_9818.jpg


IMG_9819.jpg


The big leather was about 2/3 of it's full size.

We'll see how well it all crams into a 37! It will be BB, the gravel is covered in cyano so I told him to pitch it. Step 1 is to transport and set up, and hopefully not kill anything in the process.
 
Here's an update on the scrubber I run. A quick background, I originally had too low of a flow rate, and too narrow of a slot. This actually worked out to even the flow across the screen OK, but wasn't enough filtering. So I increased the return line diameter, which immediately fixed the flow, but now the slot tube was restricting flow. So I corrected the slot tube width (it was closer to 1/16" than 1/8") and I was able to run the pump wide open. The pics below are from the end of the first week of this screen running full-out for an entire week for the first time since setting up the scrubber (10/10/10)

IMG_9805.jpg


IMG_9806.jpg


This is definitely different 3D growth than I was seeing before. Correcting the flow rate has changed the game, and my opinion about 3D growth (which was wavering). Prior to this, it seemed that the lower end (submerged) was in a more stagnant pool, and not getting enough flow. Now, the water level is actually below the level of the drain pipe, the algae is so think that it traps air pockets and causes the water to kind of siphon upwards. I'll post a YouTube video so you can see this. But the point is that I am now getting turbid flow even at the very bottom of the screen.

The growth continues to do great

IMG_9811.jpg


IMG_9812.jpg


IMG_9813.jpg


IMG_9814.jpg


And you can see that the screen is very mature, with algae filling in the holes across the entire screen.

IMG_9815.jpg


When your screen gets to this point, IMO roughing it up any more during cleaning is really not necessary, just scraping with a plastic dish or paint scraper will not damage the screen and it theoretically will last you for years and years.
 
Pictures as promised.
First up, my tank. It's a 90 that I set up with rock and coral frags from my 180 I recently tore down. No idea on PO4 levels or anything. I will try to test tonight. I work evenings and that kinds messes up things.
2011-04-14_10-37-23_203.jpg


I fought algae in my other tank and was pretty ****ed to see it here too, even though I expected it to show up eventually.

2011-04-14_10-37-52_268.jpg


the ATS from a distance. You can clearly see it's a vertial sheet. Instead of teeing off from the drain or making a stand-alone, I teed off of the return pump. It's a Mag7 and providing pleanty of flow to both tank and screen. I have two Koralia 4's in the tank for flow.

2011-04-14_10-38-02_592.jpg


The screen. I roughed it up with a hole saw per instructions and wound up nicking a hole in the screen. No bigge. Ideally, this screen will serve as a seed for a better unit I build down the line. the large patches of turf are what I seeded on the screen already and let float in the tank while I got off my hinde end and made the ATS.

2011-04-14_10-38-14_38.jpg


closer shot. I currently have a single CF lamp on it and it appears to be working well. The CF is one that was recommended in a previous thread that I found at either Lowes or Home Depot. I wanted to have one on each side but alas, room is not my friend.

I'll get the tank chemistries posted soon.
 
For this to be successful, don't you need either both sides lit or a much bigger screen. What size screen you using? Remember 1 square inch per gallon of water. I think two lights will do you better even if lighting only one side, both lamps on one side will help grow a lot more algae. Just a thought.. Otherwise I think you're a great candidate for an ATS. My 125g 6ft tank didn't look much different from yours, Only my HA was dark green and very stringy...

Very annoying!
 
For this to be successful, don't you need either both sides lit or a much bigger screen. What size screen you using?
When I first read the thread with srusso some time ago I got the impression that 1" sq per gallon TFV was what's needed. I have since read that that thought has changed (or I just took more careful stock of what I was reading this time). Since the CF pack came with 2 bulbs and I've got enough know-how I can get it worked out and add another buld. That'll be a project for the weekend. I'm not happy with how the ATS is sitting currently and will try to swing it out to the middle more and hit that bad boy from both sides. Again, this is mostly to get the ball rolling. I'm not going to leave it this half-aresed.
The screen is an 8x10 I picked up from Hobby Lobby. I plan on making a 3D box so I'll turn it horizontal and add another screen when the time comes. Given the degree of HA i've got I want to see what a poorly rigged (IMO) ATS can do while it waits for a more perminent (and professional) home.
 
I agree, just to battle HA requires dedication and effort. So, want to help you do it right. I seem to be starting to win the battle thanks to my 1 month old ATS. :) There's things I need to improve too...
 
Back
Top