Algae Scrubber Basics

Just FYI. The "summary" post I planned is morphing into a beast of an update. I have decided to include a ton of pictures, and as I went about collecting them, I'm finding other things to add. So it might be another day or so. But it is coming, I promise!!

Srusso, awesome vids. I would not differ with you, however. If I had a sump with that much life in it, I'd leave it alone too. My sump has some life in it, but the flow rate through it is pretty high. There's a bunch of coralline algae and some LR rubble around the pump intake, and a bunch of tube worms, but huge pod colonies. The DT has a ton of LR, so pods do fine in it.
 
I am still having mirco bubble issue's, I do not think it is from the scrubber but from the water coming in from the DT, the water used to go into socks and now that it does not it is creating quite bit of the bubble's which are going back into the DT. Would adding a little bit of live rock in the sump where the water flows out of the tube's help any?
 
Floyd R Turbo

I am trying to get my stuff together does it matter the count on the screen I have seen 5 and 7 count?

I have a 34 gallon tank that hold about 22gallons net what size screen would I need?
also a 210 gallon?

if I light both sides I cut the size of screen in half?
 
Just FYI. The "summary" post I planned is morphing into a beast of an update. I have decided to include a ton of pictures, and as I went about collecting them, I'm finding other things to add. So it might be another day or so. But it is coming, I promise!!

Srusso, awesome vids. I would not differ with you, however. If I had a sump with that much life in it, I'd leave it alone too. My sump has some life in it, but the flow rate through it is pretty high. There's a bunch of coralline algae and some LR rubble around the pump intake, and a bunch of tube worms, but huge pod colonies. The DT has a ton of LR, so pods do fine in it.

That is the same thing I felt when putting this thread together. I figured I would go over the basics and the rest would just happen naturally. Looking forward to seeing your summery.

Thanks, I dont touch the sump b/c I figure it will one day act as a fish fry raising zone one day. I would like to try my hand at breeding and raising a few fry in my sump. I once tried filming a view of my sump at night, with a flash light... Couldn't get a thing filmed but watching my sump at night with a flash light is so cool.
 
I am still having mirco bubble issue's, I do not think it is from the scrubber but from the water coming in from the DT, the water used to go into socks and now that it does not it is creating quite bit of the bubble's which are going back into the DT. Would adding a little bit of live rock in the sump where the water flows out of the tube's help any?

Yes, that is what I do. Take a bunch of LR pieces (not too small) and build a wall around your pump intake.

Floyd R Turbo

I am trying to get my stuff together does it matter the count on the screen I have seen 5 and 7 count?

I have a 34 gallon tank that hold about 22gallons net what size screen would I need?
also a 210 gallon?

if I light both sides I cut the size of screen in half?

#7 mesh. Go by tank size, not net water. Do not include sump volume.

Screen size for a double-lit screen is 1 square inch of dimension per gallon of tank size. So 100 gallon tank needs 10x10=100 square inches. Or 20x5. you get the idea. The length dimension is based on your available flow rate to the slot tube.

So your 34 needs to be 6x6 or 8x4.5 or 10x3.5, etc.

The 210 would probably need to be a T5HO scrubber for efficiency's sake, so 20 to 22 inches wide and 10" tall, needing 700-750 GPH flow and 8 24" 24W T5HO lamps. Again, this is dependent on flow available. If you have 1400 GPH available, you could do a 44" wide screen and use 2x48" 54W T5HOs on each side, and have the screen only 44 x 5 tall.
 
what t-5 bulb is best I know you say 2700k but I have not seen one that low?

what size header tube (with the 1/8" slot ) is best?

Thank you
 
3000K

http://www.aghydroponics.com/T5-2Ft-Grow-Bulbs-24W-HO-3000k-p/litbulbt5-pxfl24830.htm

The slot tube size really doesn't make that much of a difference, a larger tube will allow a slightly greater flow rate, but it's the width of the slot that matters most. Santa Monica's 100 scrubber uses 3/4", I use 1", I would just match your overflow drain size.

At this rate, I'm going to go through a lot of my summary before I get a chance to post it!
 
At this rate, I'm going to go through a lot of my summary before I get a chance to post it!
Floyd - I'm not familiar with the practice of summary posts. Though I did see you "reserved" the 1,000th position (or something close). It's a bit OT, threads here often go massively OT, and thus diminish the potentially great value of the thread. As such, the concept of a "Summary Post" - or some such mechanism to distill the value of the thread (within the boundaries of the original topic or post) will GREATLY benefit the community as a whole. Particularly those versed in the search function. ;)

On behalf of the community as a whole, thank you for going to the trouble.

And to the community at large - I've been lurking here for years have not been aware of this as a tradition. So apologies if it's one that I've missed, but summarizing discussion at every 1,000 posts seems an EXTRAORDINARILY valuable tradition to continue. I'm quite grateful to those who go to the trouble. :)
 
Last edited:
I originally thought I would have the time to finish a summary post by 1001, or shortly thereafter. I quickly posted on 1001, but I guess on RC you only have about 2 hours to edit a post, so that's well and gone.

I guess it's not really common practice, but I'm taking a page from the huge LED thread that TheFishMan65 did a summary on. When a specific topic warrants it, I think it's extremely valuable. So thanks for noticing and it'll be worth the wait...
 
When a specific topic warrants it, I think it's extremely valuable. So thanks for noticing and it'll be worth the wait...
Well, IMO moderation here needs to figure out that not heavily moderating posts has an impact. Primarily that being threads going WAY off topic. Which honestly hurts everyone. It hurts the people trying to use the search to find valuable information. And it hurts the people trying to make a buck off the forum because the value of the threads is being distilled by OT posts.

Granted, generally moderation is provided by community members as a good will service in the spirit of giving to the community. And that's MUCH appreciated. But in a community THIS LARGE mods cannot possibly be expected to keep up with every thread (and actually have a life).

So it seems to me that a compromise way of keeping value in our threads would be to allow the OP to modify the original post in perpetuity - in order to point to summary thread. It's done this way in some other VERY big forums, and IMO should be considered here.

Also - if flagging this as a "bad post" will get this opinion noticed by moderation, please flag away. It's the community at large that I'm seeking to help. Thanks. ;)

Apologies for going OT. :)
 
OT ??
Actually I got the idea from a rock thread. The OP posted periodically as the recipe changed.

Tracking these summaries is a whole other issues - my best approach was to use my signature :) maybe it will take off, maybe not. It sounds like I converted Turbo :)
 
We need to be able to edit the OP no matter what time it was made. This will allow people to come in and read the first page to find out what it is they need and not have to read through 50 pages to see how things have changed over time if improvements were made. Thats what destroys threads. People who can't read, dont bother reading, etc. How many times do we have to say to use a bulb closest to 2700k??? How many times do we need to say USE A ROUGH SURFACE??? How many times do we have to say, You nee to put your bulb closer, etc........... Usually the first post is pretty good, but it needs to be able to be edited so that people who are good at following directions can read through this article and skip through all the BS. IMO
 
Ah but look at what has happened. Even if the first post was editable who is doing the summary. Srusso (no criticism meant) isn't doing the summary Turbo is. What if the OP leaves or is moved on. Then do you appeal to a Mod to take over? Who decides who is best qualified. And remember this is a carry over from the old days when threads were split. Very often no one read the first split so who cared if the first post was editable. No I agree things change (hopefully for the better).

Another issue there are a million threads for LED questions. The same summary applies. How do you handle that? Also several threads on Bio Pellets and Scej12 just did a nice summary, but it applies to all the different brands.

So IMHO you need a list of summaries available and a link to them. That list needs to be stickied (I don't care if it is mine or done some other way). And perhaps the mods need to be petitioned to be added to the summary list.
Thats what destroys threads. People who can't read, dont bother reading, etc
etc would mean going off topic right :) maybe we should move this discussion.
 
We need to be able to edit the OP no matter what time it was made. This will allow people to come in and read the first page to find out what it is they need and not have to read through 50 pages to see how things have changed over time if improvements were made. Thats what destroys threads. People who can't read, dont bother reading, etc. How many times do we have to say to use a bulb closest to 2700k??? How many times do we need to say USE A ROUGH SURFACE??? How many times do we have to say, You nee to put your bulb closer, etc........... Usually the first post is pretty good, but it needs to be able to be edited so that people who are good at following directions can read through this article and skip through all the BS. IMO

Once Floyd is done with his summary, I am going to have the first post updated.
 
Algae Scrubber Build Basics, Summary Post 1 of 2

Algae Scrubber Build Basics, Summary Post 1 of 2

Algae Scrubber Build Basics, Summary Post 1 of 2

This thread has really taken off, and I'm happy to see so many people interesting in building algae scrubbers. Just so everyone doesn't have to read through this entire thread to understand the concept and get most of their questions answered, I will try to summarize.

There are many options when it comes to building your own scrubber. Hopefully this post will wrap up all the basic concepts as clearly and concisely as possible. It seems that many people look at this concept and think they can make some kind of major improvement, and post their idea. Then, a newbie can look at that and think that it makes great sense and mimic it, without understanding the pitfalls. I feel that it is important to understand the concept and purpose behind the basics, and why you should rarely deviate from them.

In the future, I will prepare another summary which should cover problems with your scrubbers, and how to pinpoint the issue. However, most of the issues people encounter with their DIY builds can be directly attributed to missing one or two of the basic principles.

So consider this a "best practice" summary. That is, there are several ways to build a scrubber, but there is always a cheap and easy way, as well as the most effective and efficient way.

I make several references within this post to the Algae Scrubber site. Reef Central generally blocks links to other forum sites. So you might have to search a bit for a thread I reference, but I'll do my best to get you pointed in the right direction. The site is algae scrubber dot net.

Slot Tube and Screen Material

The principle behind the vertical waterfall style algae scrubber is that you can light it from both sides and place the lights very close, which requires less light and material than the older horizontal style, and vastly increases growth. The screen is inserted into a section of horizontal PVC pipe which has a slot cut into it. The screen is typically held in place by zip ties running through a cut-out section of the screen.

from my scrubber
IMG_8700.jpg


Others have come up with other ways of doing it also, like by using shower curtain rings (plastic ones - see pics of Amphiprion's build under the "Protection" section) or sections of PVC pipe, one size larger that the slot tube

pic of waucedah_joe's scrubber on the Algae Scrubber site
AS_waucedah_joe.jpg


Most use zip ties. They work the best, they're cheap at Wal-Mart, so you just replace them with each cleaning. Or you can do like I do, and pry the locking part open with the tip of a razor blade, and re-use them until they are worn out, which seems to be around 2 or 3 months. Or, you can find releasable zip ties, but you have to buy them 50 at a time (or at least, that's all I've been able to find)

Planning your Scrubber

From post #1
ScreenFeed.jpg


The very first step you need to do before buying, measuring, or sketching up anything, is to decide how you are going to supply your scrubber, and determine what your available flow rate is. For a top-of tank design (not shown in the picture above), you would need a separate riser pump to feed the slot tube. For a sump design, there are 2 ways of doing it. Fed from the drain supplying the sump, or fed from a separate pump. The former is what people usually do.

In any case, you need to measure the flow rate. Do this step. It is critical. Do not, I repeat, do not calculate the flow rate based on pump curves and head-feet of pressure. This may sound like a total pain in the behind, but just trust me on this one. Would you rather go through all the effort of building a scrubber, only to have problems and find out that you didn't have as much flow as you thought you did? Believe me, I've been there.

If you've been reading this thread, you will see that at some point I started making a big deal about this. The reason is that it is a big deal and I think many people don't realize that their pump does not pump at the rated flow, and in the majority of cases, it doesn't come close to the flow calculated by using a standard head-foot calculator program or table. Not even close. So I have chosen to make it the #1 priority for scrubber design, hands down. You have to know your actual flow.

For a drain fed scrubber, fill a pitcher with the water entering the sump. You will probably need to rig up a temporary pipe or routing configuration so that you can fill the container. For a pump-fed scrubber, set up the pump in a sink filled with water to the same level as your pump will be submerged, and connect the tubing required to reach the height of the connection to the horizontal slot tube, so that you mimic as best as possible the actual conditions.

Now that you've done all this, fill the container and record the time it takes to fill it. Do this at least a dozen times. The way I do this is by using a recording device, like a digital voice recorder or a cell phone and just calling out "Go" and "Stop", then afterward, playing it back and using a stopwatch to get the time intervals. You could also have someone else run the stopwatch and write down the times. Average out the times and then figure out how many gallons per hour of flow you are actually getting. If you have multiple drains, measure and extrapolate GPH for each individually, and then add together.

For instance, if you are using a 1/2 gallon pitcher, and it takes 4.5 seconds to fill it, then you would have (0.5 gallons / 4.5 seconds) x (3600 seconds / 1 hour) which would be 400 GPH.

Don't be surprised if you have a lot less flow from your pump than you thought you had. I had less than 1/2 of what I thought it was. Head-feet calculations are usually way off, because most people don't use big enough return hose or have other restrictions in the plumbing. Some of it is inherent to reef-ready aquarium design (1" drain, 3/4" return, Danner Mag-Drive 9.5 and larger pumps need 1.5" return, see a problem?). So don't feel bad. A lot of people are in your situation, but they just don't know it. Really.

Start with a clean pump. If your pump is not clean, soak it in vinegar for 15 minutes and scrub it good. After running a scrubber for about 4-5 months, your pump flow will drop about 15%, and by 6 months, it will have dropped by 25%, so you want to know your best-case flow and build around that. It's a lot easier to start with a throttled-back clean pump and open it a little when the flow rate decreases. Figure out your system flow rate, multiply by 80%, and that will be a good starting point. But, it's not going to kill you to start at full flow, and end up with a little less over time. You might just want to clean your pump a little more often, say every 3 months. So it's up to you. Just being aware of your system conditions puts you miles ahead.

Screen Size

Once you figure out your flow point, then it's time to figure out your optimal screen dimensions.

There are 2 ways of looking at this: square inches based on length and width dimension, and square inches based on illuminated surface area. The latter is technically more accurate, but since most people light both sides, the former is usually referenced.

For every gallon of water in your display tank, you need 2 total square inches of illuminated screen material. This means that if you run a screen that is vertical and lit from both sides, then you need a screen with dimensions (length times width) that is equal to the size of your tank, or 1 square inch of material per gallon. This is what you will see commonly referenced, and what I continue to reference for simplicity's sake. Double the dimensional measurement for a vertical screen, lit from only one side. Double it again for a horizontal or slanted screen.

Sizing of the screen does not require inclusion of the volume of water in the sump. Note that this is a correction from most of what has been posted previously (even by me - oops).

So, just so we're 100% clear on this:

Vertical, lit from both sides: 1 square inch of screen material per gallon (2 square inches of illuminated screen area per gallon)

Vertical, lit from only one side: 2 square inches of screen material per gallon (which is also 2 square inches of illuminated screen area per gallon)

Horizontal: 4 square inches of screen material per gallon (4 square inches of illuminated screen material per gallon). Lighting must increase also (noted below). Also note that this is a correction to what was listed on Post #1 of this thread (that post listed that a 10 x 10 screen was good for 40 gallons, instead of 25 gallons)

Screen Dimensions

So now that you know your actual flow rate AND the total size of your screen (and you need to know the total dimensional area for this part, not the total surface area), now you are ready to figure out your dimensions.

You want 35 GPH per inch of screen width. Simply take your GPH (that you just measured) and divide by 35, and this will be your optimal screen width. Then, take that number and divide it into the gallon size of your display tank to obtain the height dimension of the screen. Use the size of your tank, not the gallons that you think are actually in it (so do not account for volume of Live Rock, fish, decor, etc) and do not include your sump volume. The result is the total area of roughed-up screen that you want.

In general, you want to add at least one inch to the height dimension for the section of smooth screen that will be inserted into the slot tube. Specifically, you want to allow for the distance that the screen will be inserted into the slot, plus at least 1/4" of smooth screen below the slot tube to help prevent algae growth into the slot, so this "one inch" is just a good rule of thumb, and should be increased depending on the diameter of your slot tube. A little extra smooth screen at the top never hurts. The critical area, and the only area that contributes to scrubbing power, is the roughed-up and illuminated portion of the screen.

Pipe

As far as pipe diameter is concerned, just match the size of the drain pipe that you currently use. If you're doing a pump fed scrubber, either top of tank or sump, try to match the feed tubing and components to the recommendations from the pump manufacturer.

The slot tube itself should be Schedule 40 PVC at a minimum. Don't use vent pipe, flexible hose, or thin-walled PVC. The reason is that cutting a slot in the tube weakens it enough that it can bow over time and cause the slot to change width. This is especially true for a large scrubber. Anything over 24" should probably have 2 slots, with a small section in the center left uncut (maybe 1/4") with some kind of means of support at the center.

pic of yesman's scrubber (from the algae scrubber site)
AS_yesman.jpg


I'm not saying that it won't work, and I'm not critiquing the design pictured above. It just got me thinking that it can't be good to have that pipe flexing that much. So this is a new recommendation I am making for scrubbers with screens over 24" wide. But check out that growth!!! That's 6.5 pounds of algae (drained).

Cutting the Slot

This arguably the most difficult part of building a scrubber.

The width of the slot should be approximately 1/8" wide, the same length as the screen which you are using (as exact as possible), and as straight as possible. The best way to cut the slot straight is by using a table saw, and being very careful. Since most people don't have access to a table saw (or aren't very careful), a dremel with a cutoff wheel it the most popular way of cutting the slot. This takes time and patience. Mark the slot, and cut carefully. If you mess up, do it again. PVC pipe is cheap. Once you solvent weld it and endcap and a union to it, it is not as cheap to replace (but still relatively cheap)

From the Algae Scrubber site (also posted in this thread)
SlotCutter.jpg


Screening Material

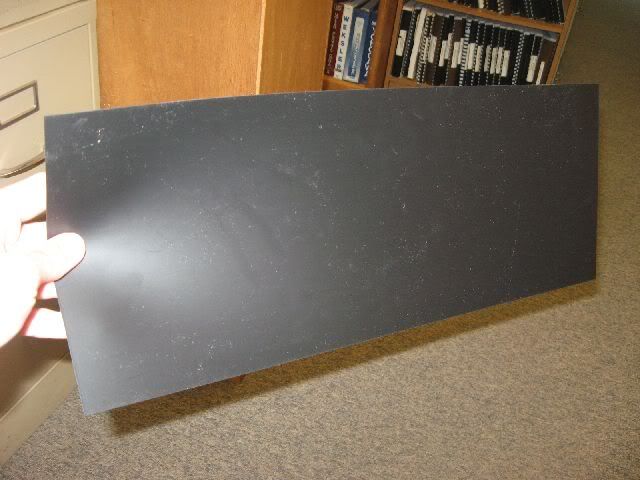
The search for the "perfect material" for growing algae in the vertical waterfall configuration has always come back to the same material, the #7 Mesh Plastic Canvas, roughed up with a hole saw or a rasp. You can feel free to experiment, but this material has been proven to work over and over again.

A new screen is slick and smooth. It needs to be roughed up so that the algae has anchoring points. Once the screen is established, algae can grow very thick, and it will get heavy. I have seen pictures of screens that weigh several pounds. This weight is distributed across the screen, and with a rough base, it will hold very well.

from the Algae Scrubber site
Canvas.jpg


HoleSaw.jpg


The top section of the screen, where it is inserted into the slot tube, should not be roughed up at all. This helps prevent algae from growing into the slot and blocking the flow. This is really not of major concern if you properly cut the slot, so no additional steps should be necessary. The reason is that if algae happens to grow up into the slot tube, the water pressure will increase, which will inhibit the growth of algae creeping further into the slot. A balance point is achieved.

Slot Tube Crosscuts, and others

Originally, it was recommended to place crosscuts in the slot tube. You will see this on older builds. This is not recommended anymore, so don't do it. The idea was to allow for water to continue to flow if the algae grew up into the slot and clogged it, and also to prevent squirting. The result was that algae grew easily into the slot, because the pressure wasn't high enough to prevent it - flow was just diverted to the crosscuts. Then, the pressure was higher through the crosscuts, which resulted in squirting. The solution is the perfectly straight and correct width slot.

There have been many other attempts to 'improve' on the slotted tube design, but for one reason or another, they just don't work as well. I could list and describe them, but many of them are pictured on the Algae Scrubber site, under the sticky topic "Hundreds of new design pics are posted...".

Continued, see next post (unless someone sneaks in a message)
 
Last edited:
Algae Scrubber Build Basics, Summary Post 2 of 2

Algae Scrubber Build Basics, Summary Post 2 of 2

Algae Scrubber Build Basics, Summary Post 2 of 2

Lighting

There are 2 basic types of light sources that 99.9% of people use: CFL and T5HO. In both cases, the optimum spectrum / light temp for growing algae is 2700K-3500K, with 2700K-3000K getting the best results.

You can use higher K ratings, but this is the optimal range for scrubbers. Algae prefers blue and lots of red light, and very little green. Think about it. Algae looks green because it reflects green. Green (555nm light) is what humans see the best, and it is what most light measuring devices are built around. The lighting industry is all about human perception. K ratings are simply a measurement of the human perception of light intensity. Algae is not human. But enough about that.

I also discuss LEDs below. This is an unproved area, but expect advancements in the near future. Power Compact, or PC lamps, PL-L lamps, etc, are not recommended, because they run way too hot for the amount of light you get out of them. I don't even care for them for tank lighting.

Quantity of lighting is dependent on the size of the system. In general, you want 1 watt of light per gallon of water for optimal scrubbing power. You can get away with less, but at the worst case you should use no less than 0.5 watts per gallon. Note that for CFL, this is actual wattage, not the incandescent equivalent wattage.

As you will notice throughout this thread, it is generally stressed to follow the 1 watt per gallon guideline. This is because it solves many scrubber issues. The reason behind this is scientific. 1 photon of light interacts with algae and causes one molecule of N and one molecule of P to be absorbed, and makes one molecule of chlorophyll. The more photons, the more nutrient reduction you get.

The horizontal screen, which needs 1.5 Watts/gallon, without exception. This is mainly because the horizontal scrubber has a much larger surface area to cover, so you need more light sources to spread the light out evenly. Also, horizontal/slanted scrubbers are generally not as efficient, unless you use a dump-bucket or surging style, which is more complicated.

You need to run your lighting for 18 hours per day (6 hours off). All life needs downtime. Plants are no exception. They have adapted to the environment over millions of years. So don't go thinking that you can run lights 24/7 and get 25% more algae growth.

You want the lights as close as possible, within reason. The effective power/intensity of light follows the inverse square law. If you move a light twice as far away, the intensity drops by a factor of 4. If you move it twice as close, you get 4x the intensity. The balance point seems to be about 4" from the screen for CFL, and about 2" with T5HO. The reason for 4" away for CFL stems from both a hot spot issue with the end of the lamp, as well as the concentrated signature of the lamp; CFLs need to be a bit further away to cover the proper area without too much intensity. T5HOs do not have this problem, as the light is more evenly spread. More on that later.

As far as spacing is concerned, CFLs need to be spaced according to the allowance of the design. If you need 2 per side, just position them for the best coverage. This is really on a case-by-case basis. As for T5HO, you generally want a lamp spacing of 2-3". For T5HO, your scrubber will generally need to be designed around the lamps and spacing. CFLs are more flexible in this respect, allowing a variety of configurations.

The lamps must be replaced every 3 months. This is not just a rule for scrubbers, you will see many people make this suggestion for refugium lighting as well. That is because there is a power drop-off and a spectrum shift that takes place over time, and when you go much past 3 months, you hit that drop-off point. We can't see the difference, but then again, we're not algae - it can. The result is that your screen will slow down growing and reduce filtration. This you do not want! So replace your lamps every 3 months.

The light source needs to be positioned so that it is pointing directly at the screen material. Do not place the fixture so that it points parallel to the screen (from the ends or the top), place it so that directs the light toward the screen. Perfectly perpendicular is optimal, but if you have to point it at somewhat of an angle just to make it work, that will be fine. This is more of a concern for CFL than linear sources (T5HO), however I have seen a few T5HO build with the lamp 4 inches above the screen, shining straight down. They didn't work so well.

CFLs and Reflectors

The most common CFL used is the 23W Spiral. This is the actual wattage, not the equivalent wattage. You can use either the bare-lamp style, or the floodlight style. The floodlight style lamp does not require a reflector, since it is built-in. However, it should be noted that a spiral CFL with a proper reflector does a better job of spreading the light. Floodlights work best for a narrow screen.

pic of SSpiro's scrubber
RC_SSpiro.jpg


Multiple floodlights are needed for wider screens

pic of dkirk's scrubber

RC_dkirk.jpg


The bare lamp style will work without a reflector, but it will do the job much better with one. There are 2 ways of reflecting a bare-lamp CFL: 1) with a dome-style reflector, and 2) with a side-style reflector.

With the dome-style, the end of the lamp is pointed directly at the screen, and the side light is reflected to the front. This is probably the most effective CFL reflector, because it provides a wide light signature, and it's only a few bucks. Please note that without a reflector, a lamp pointed directly at the screen will do very little, since a very small percentage of the light comes out of the end of the lamp.

pic of fraggleRock's scrubber
RC_fragglerocks.jpg


With a side-style reflector, you are re-directing the light from the sides and back (relative to the screen) of the lamp toward the front. Finding a reflector to do the job can be tricky. Using an HID reflector is a good route, or a DIY beer can reflector can work also. Even some Mylar or aluminum foil will work - anything is better than nothing!

pic of srusso's scrubber - fixture on left has reflector
RC_srusso2.jpg


One thing to remember when handling CFLs: install them gently. Most people are used to twisting in an incandescent lamp tightly. CFLs fracture easily at the base where the element (tube) meets up with the ballast. Cranking on them like causes these fractures. So if you can't grab on to the base to tighten, just get the lamp in there snug enough for the connection to be made. This goes for the lights in your house and office also - it's the #1 reason why CFLs burn out early.

T5HO lamps and Reflectors

Again, 2700K-3000K grow lamps work the best. I personally use the PlantMax 3000K Red/Bloom lamp.

T5HO lamps are inherently superior to CFLs. They spread the light out more evenly than CFLs, and they can be placed closer to the screen without overpowering the algae. With that factor alone, bare T5HO lamps likely fall in between bare CFL and properly reflected CFL as far as scrubbing power is concerned.

Reflected T5HO is very arguably superior to all. However, it is more difficult to build a T5HO scrubber. It's easy to point a clip-on CFL. Not so easy to mount and protect endcaps, connect to a ballast, etc.

My Scrubber (Rev 2)
IMG_9160.jpg


Again, any reflector is better than none, but with a custom build, you can really use all the power of a T5HO lamp. The TEK-II from Sunlight Supply are expensive, but I have had great results. Other individual-lamp reflectors will do very well. Stock fixtures work best when each light has an individual reflector, but again, just about any reflector will do better than none.

LED:

LED lighting has it's advantages. The most obvious one is lamp life - they never actually burn out. LEDs have what is called an L70 (or L80) rating, which is the number of hours, running at rated junction temperature, at which the lumen output will have dropped to 70% of it's original output. At this point in time, that is usually about 50,000 hours. At 18 hours/day, that's about 7.6 years to L70. The unknown factors for LED are the long-term phase shift and the effect of steadily decreasing output. Phase shift is the reason that most small municipal airports are avoiding LED lighting like the plague: white light shifts to blue over time, runway lights are white, taxiway lights are blue. Getting them confused is bad. The LED industry is rapidly evolving, so the L70 numbers will continue to increase, cost will decrease, and issues like phase shifting will be improved upon.

The bottom line is, unless you know what you're doing, don't even think about LED. If you think you know what you're doing, then experiment as you desire. But realize that 1) you are experimenting on your reef into which you have invested a large amount of money, 2) LED scrubbers do not have a track record to speak of, 3) only recently have there been builds with any sort of success, 4) they are still not tested for long-term stability and reliability. LEDs are a completely different source of light, and while the spectrum can be focused, that means you can overpower them easily, and just like you can bleach your corals with too much light, I feel that you can overpower your scrubber and stall it out. At this point, do not rely on an LED scrubber for total filtration, only for supplemental filtration. There are just too many unknowns, but it has great potential.

So with all that being said, if you do an LED scrubber, don't come crying to me when it doesn't work. Just sayin. If you really, really want to make an LED scrubber, I highly suggest you check out rygh's thread "Version 3 ATS: Vertical, LED, Bigger" on the Algae Scrubber site, under the Designs topic heading. There are also several links to various LED threads under the FAQ section. Attempts at building LED scrubbers have been done for years, but there are only a couple that showed any promise. So that should tell you something.

Protection

You should always plug your lights into Ground-Fault protected receptacles (GFCI). You should actually have all your equipment plugged into these.

As far as spray and salt creep is concerned, you want to avoid the buildup of material on the lamp itself. The best way of doing this is to put an acrylic shield of some kind between the screen and the lamp. There will still likely be some buildup due to evaporation, so you will want to wipe off the lamp periodically (as needed). This is rather easy for T5HO lamps, and more difficult for CFLs.

The most basic spray blocker would just be a couple of plastic panels draped over the tube like this:

pics of Amphiprion's scrubber (from the AC site and re-posted on the Algae Scrubber site)
AC_Amphiprion2.jpg


AC_Amphiprion1.jpg


I got this at a local hobby store for less than $2. It's a smooth plastic sheet, just the right rigidity. I have suggested that this would make a great spray blocker, and would also block light from the slot, further reducing the chance of algae growing into it:

IMG_8716.jpg


You can just punch holes in this, and loop it through your zip ties. I don't have a picture of this, so you'll have to use your imagination.

To take it a step further, you can enclose the screen in a box. This can be done either open-bottom or closed-bottom.

The advantage to an open-bottom enclosure is that it's easy to build, and you can extend the screen to the water in the sump to virtually eliminate noise and microbubbles. Pictures illustrate this the best, and there are many other builds like these. If you're to this point, you should have a grasp of the basics so I won't go into much detail about the "how"

pic of rysher's scrubber
RC_rysher.jpg


The closed-bottom designs are more advanced, so I'm not going to go into those here. You don't need a closed-bottom box unless your space mandates it. A closed-bottom box needs to be watertight, so you have to know what you're doing. Having a secondary drain can add some noise, which some people don't like. Putting a top on the box can silence it. but you lose evaporative cooling and possibly some oxygen transfer. But, it's the only way to achieve 3-D growth, which will increase your scrubbing power even more.

pic of dkirk's scrubber
RC_dkirk.jpg


I have flip-flopped on the 3D growth concept, but after fixing the flow issues on my scrubber, I started to see a huge difference in the dynamics of flow in a 3D system, and now I am all for them.

End of Summary #1

I wanted to get this summary posted as soon as I could, so I decided to stop here. Plus, I need to get some work done! I think this covers most of the major points that are involved in designing and building a scrubber.

The next summary will cover cleaning, operation, maintenance, and problem solving.

If you have any suggestions or corrections, please post them and I will note them for future summary posts.
 
Last edited:
Once Floyd is done with his summary, I am going to have the first post updated.

Unfortunately, it's too long and has too many pics for a single post. So I don't know if you'll be able to update Post #1, but I'm sure you can add a link to it.

Just FYI, RC's post length limit is 25,000 characters, and 10 pictures. I just found out the first one!
 
Well, some pics of my screens and progress of some of my rocks that were covered in HA..

There are some before and after pics.. So, first without further ado, this is today:
<a href="http://s569.photobucket.com/albums/ss134/SchnauzerWauzer/Saltwater%20Aquarium/?action=view&current=1302650151896.jpg" target="_blank"><img src="http://i569.photobucket.com/albums/ss134/SchnauzerWauzer/Saltwater%20Aquarium/1302650151896.jpg" border="0" alt="Photobucket"></a>

Same rock /clam combo dated 02/28:
<a href="http://s569.photobucket.com/albums/ss134/SchnauzerWauzer/Saltwater%20Aquarium/?action=view&current=IMG00201-20110228-1713.jpg" target="_blank"><img src="http://i569.photobucket.com/albums/ss134/SchnauzerWauzer/Saltwater%20Aquarium/IMG00201-20110228-1713.jpg" border="0" alt="Photobucket"></a>


"Before" 02/28:
<a href="http://s569.photobucket.com/albums/ss134/SchnauzerWauzer/Saltwater%20Aquarium/?action=view&current=IMG00200-20110228-1713.jpg" target="_blank"><img src="http://i569.photobucket.com/albums/ss134/SchnauzerWauzer/Saltwater%20Aquarium/IMG00200-20110228-1713.jpg" border="0" alt="Photobucket"></a>

Today:
<a href="http://s569.photobucket.com/albums/ss134/SchnauzerWauzer/Saltwater%20Aquarium/?action=view&current=1302650170350.jpg" target="_blank"><img src="http://i569.photobucket.com/albums/ss134/SchnauzerWauzer/Saltwater%20Aquarium/1302650170350.jpg" border="0" alt="Photobucket"></a>

3.5 week old screen:
<a href="http://s569.photobucket.com/albums/ss134/SchnauzerWauzer/Saltwater%20Aquarium/?action=view&current=1302650386362.jpg" target="_blank"><img src="http://i569.photobucket.com/albums/ss134/SchnauzerWauzer/Saltwater%20Aquarium/1302650386362.jpg" border="0" alt="Photobucket"></a>

<a href="http://s569.photobucket.com/albums/ss134/SchnauzerWauzer/Saltwater%20Aquarium/?action=view&current=1302650411074.jpg" target="_blank"><img src="http://i569.photobucket.com/albums/ss134/SchnauzerWauzer/Saltwater%20Aquarium/1302650411074.jpg" border="0" alt="Photobucket"></a>

<a href="http://s569.photobucket.com/albums/ss134/SchnauzerWauzer/Saltwater%20Aquarium/?action=view&current=1302650386362.jpg" target="_blank"><img src="http://i569.photobucket.com/albums/ss134/SchnauzerWauzer/Saltwater%20Aquarium/1302650386362.jpg" border="0" alt="Photobucket"></a>

I think it's doing great!
 
Back
Top