Atomic081
Member
Hello Everyone,
My wife, 2 kids (2yr and 1 month) and I are in the process of building our dream home. During the framing of the house, I have been planning the build of a monster reef tank. I own my own construction company building custom homes and because of my construction background, I plan on doing a lot of the work myself. Now after 8 months of working on the house, I am finally able to start working on the tank. I also need to make a living while I build my own house, so my time to work on this house has been limited to lots of weekends and the occasional late night. So the slow build of the house might make this tank build take a while, but I hope you all enjoy the ride as much as I will.
Overview:
The Tank will be 120” long x 48” deep x 32” tall plywood tank (798 gallons). The total sytem volume should be somewhere around 1200 gallons. The tank will be in the wall facing the family room of our walkout basement. A 240 square foot fish room (10x24) will house the tank and all of its filtration. I’m planning on the tank to be a mixed reef with a rock wall on the back and two sides of the tank. The family room will have wainscoting paneling 3 ft. up the wall. My goal is to incorporate the wainscoting into the exterior wall of the tank and make it feel like a part of the room.
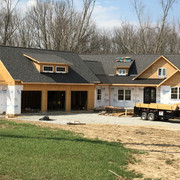
Front of house as of today:
Basement Floorplan

I am not one to get caught up spending money on unnecessary things in this hobby. I always try to get my best value in the equipment I buy. Because of this I will be building a plywood tank. As I stated above, my construction background helps me with being comfortable with this endeavor. I also won’t be spending tons of money on the newest latest and greatest things also. I try to buy things used if I cannot build them myself.
Google sketch image of Fish room

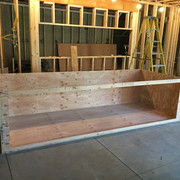
Plywood Tank Build
Tank is 120"x48"x32"
Step by step plans for building the tank.
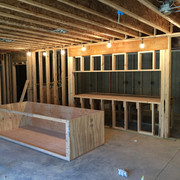
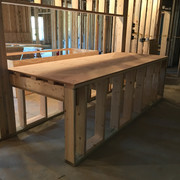
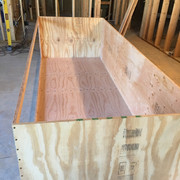
1. My plan is to use 4'x10' 3/4" plywood to make an open box 32" tall. I will be making the tank in my future family room outside the hole because of the space I have in this room to move and install the glass
2. Cut out a hole on one end leaving 4" on each side and 2" on the top and bottom for the Glass
3. Once the box is made I’m going to Fiberglass the inside of the box. Special attention to the corners will be made. Will also add Black paint to the fiberglass.
4. After this I will coat the fiberglass with 3 (or more) coats of Epoxy to make it waterproof
5. Put Tank on its front edge leaving hole for glass down
6. Install a (rough measurements) 120"x30"x3/4 Low iron Glass over the hole facing down. Place 1/8 spacers in caulk to insure good bead. Have a powered caulk gun for this already.
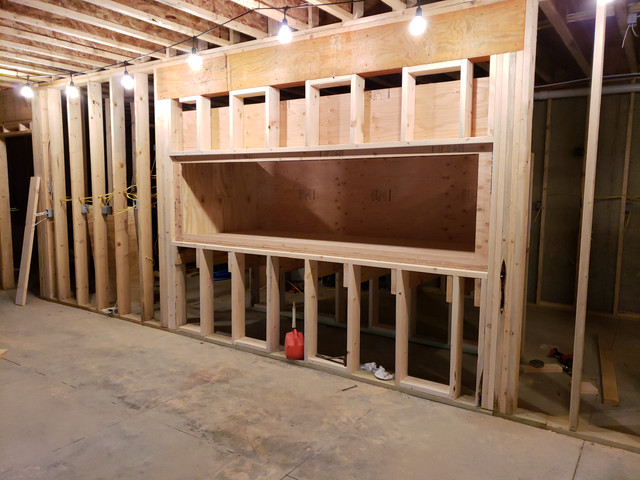
7. At this point the tank is made and I will slide it into the hole from the outside. (Stand will already be made inside the hole)
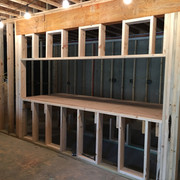
8. I will then be building a 2x4 wall around the tank level with the height of the tank and securing the wall to the structural wall of the house.
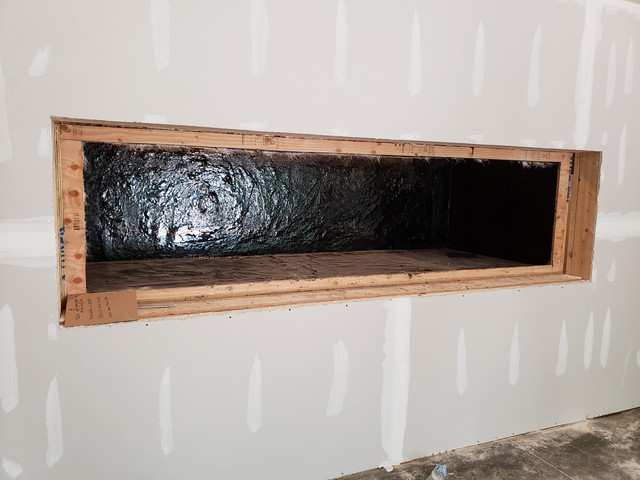
9. I will be setting the tank back 2" into the 2x6 wall the hole is already in. I will use this 2" to put structural trim on the front side of the tank with the glass panel. This will be done all the way around the hole to help support the front edges.
10. I do want to use the 2x4 wall to hide plumbing for overflows and Electrical
11. After plumbing is done I’m going to foam a good portion of the 2x4 wall with a closed cell foam. This is done for 2 reasons.
1. Insulation of the tank since it’s in a cool basement.
2. Structural support between the plywood of the tank and the 2x4 walls. I know since the tank cannot be screwed to the wall, this will be a good way to tie them together.
12. At the end I am going to work on some sort of top bracing from the 2x4 wall, to the front of the tank/2x6 front wall. I will be running 4 250w metal halide lights, so my goal is to adjust the front bracing to that it doesn’t interfere with the lighting.
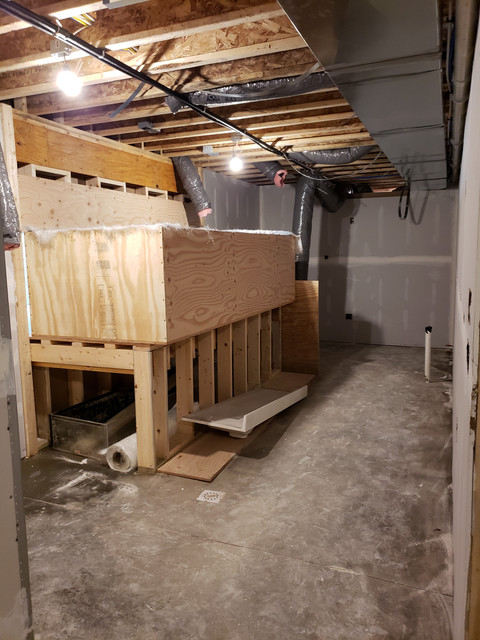
Stand
The stand will be made with 2 rows of 2x6s 16” OC on the front and back of the tank and 2x8s spanning for support in the middle of the tank. I will probably put a center “wall” in the stand also, but I hate losing the storage space under the tank.
Once the tank and stand are built, I will be making a raised 12” walkway around the tank. Im not sure of the height of this walkway yet, but I want to be able to work in the tank and be comfortable.
Sump
I will be using a 150 Gallon Rubbermaid stock tank.
4 Filter socks coming from the display tank to help with sediments.
Tunze 3155 ATO
6 Eheim Jagger 300w Heaters
Controller
NONE!!!! Sorta…..
My whole house will be a Samsung “smart things” house. This allows me to hook up timers, cameras, water leak sensors, and ive found I can even hook up a temperature probe to the tank. Im not 100% sold on reliability because its untested on fish tanks, so some of the major items will wait for a while before they are setup on this system. The room is wired so that every outlet is prewired with a switch. All the switches are in the same area for ease of use. I plan on putting the lights and maybe automatic feeder on this system to start. Then if my kids want to watch a movie in the family room, all they say is “google, turn off the fish tank light”. The lights turn off for up to 3 hours, but stay on a normal schedule other than that time. Same thing with the feeder (still working on this). Kids can feed the tank using voice control and I can make it so the tank will only feed so many times a day no matter how many times the kids try. I want the kids to interact with the tank, but stay out of my fish room when I’m not there…. Door will be locked!!!
Someday I’m sure I will add a controller when the technology is better for testing Calc, Mag, and Alk. Until they become more affordable, this will work.
Pump
Reeflo Hammerhead/Barracuda
6000 GPH
Lights
I plan to make a lighting rack to over the display rack. My goal is to hook up a winch to this to raise and lower the rack as needed when working in the tank.
Display tank will have 4 250w Metal halides.
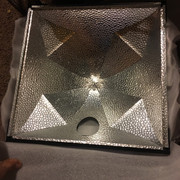
Lumenmax Elite Reflectors
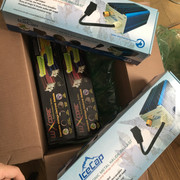
Luxcore/Icecap 250/400w Electronic Ballasts
Additional Blue supplemental lighting will be added later. Nothing fancy, just some blue LED strip lights.
Skimmer:
This thing is a beast. Ive looked at other Skimmers rated for a tank this size and most are not near this size. Im hoping it will exceed my expectations. I bought it used, so its worth a try!
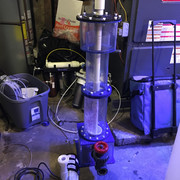
MTC HAS-1000
• 6" Diameter reaction tube
• 5.25" Diameter neck
• 8" Diameter head
• Total height 48"
• Base footprint 10" x 10"
• Easy clean air injector
• Precision needle valve for air adjustment
• Ozone injection port included
• 1" Water input
• 1.5" Output with schedule 80 gate valve included
• 1/4" Cell cast acrylic tube
• 1/2" And 3/8" cell cast acrylic base
• Suitable for systems up to 750 gallons
• Baffle plate to help increase contact time
• Automatic waste collector included
Dual Carbon Reactor:
GFO Reactor:
Calcium Reactor:
Geo 618
Ive had this for my 220 gallon tank for 3 years and never set it up. Its too small for this tanks water volume, but I was told I will just be replacing the media more often. If this is a problem then ill upgrade later.
Refugium:
Size: 48”x24”x12”
This tank is my current frag tank. I plan on putting Mangroves and Macro algae and having it be somewhat of a display refugium.
Frag tank:
Tank: 72”x24”x12”
The frag tank will have 2 metal halides exactly the same as the display tank.
I have a few old Tunze powerheads for the frag tank.
I also bought used custom made frag racks
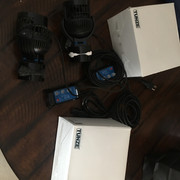
Powerheads:
To start, I will have two Tunze 6255 powerheads on each end of the tank. These have a extremely wide output compared to most powerheads, Im throwing around the idea,, of a Gyre xf 280 in the middle of the tank on the back wall, but this can come later if needed.
Tunze (2) 6255
• for tanks up to 1,050 gallons.
• Flow performance: approximately 1,300 to 4,800 gph
• Energy consumption: max. 58 W
• Power supply unit: 110-120V/50-60Hz
QT Tank
40 Breeder w/ hang on back filter, some old 3” PVC laying for hiding
Water Storage
450g for saltwater: buddy had this for free. free is good!! 3x3x4
55g for Freshwater:
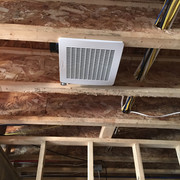
Humidity Control
I bought a 130cfm Exhaust fan. Being in Indiana it I ill probably need to get a dehumidifier also that runs into my sump pump.
Fish Breeding
I want to dabble into fish breeding, so im getting this setup used from a buddy. Pretty sweet setup i think.

My wife, 2 kids (2yr and 1 month) and I are in the process of building our dream home. During the framing of the house, I have been planning the build of a monster reef tank. I own my own construction company building custom homes and because of my construction background, I plan on doing a lot of the work myself. Now after 8 months of working on the house, I am finally able to start working on the tank. I also need to make a living while I build my own house, so my time to work on this house has been limited to lots of weekends and the occasional late night. So the slow build of the house might make this tank build take a while, but I hope you all enjoy the ride as much as I will.
Overview:
The Tank will be 120” long x 48” deep x 32” tall plywood tank (798 gallons). The total sytem volume should be somewhere around 1200 gallons. The tank will be in the wall facing the family room of our walkout basement. A 240 square foot fish room (10x24) will house the tank and all of its filtration. I’m planning on the tank to be a mixed reef with a rock wall on the back and two sides of the tank. The family room will have wainscoting paneling 3 ft. up the wall. My goal is to incorporate the wainscoting into the exterior wall of the tank and make it feel like a part of the room.
Front of house as of today:
Basement Floorplan
I am not one to get caught up spending money on unnecessary things in this hobby. I always try to get my best value in the equipment I buy. Because of this I will be building a plywood tank. As I stated above, my construction background helps me with being comfortable with this endeavor. I also won’t be spending tons of money on the newest latest and greatest things also. I try to buy things used if I cannot build them myself.
Google sketch image of Fish room
Plywood Tank Build
Tank is 120"x48"x32"
Step by step plans for building the tank.
1. My plan is to use 4'x10' 3/4" plywood to make an open box 32" tall. I will be making the tank in my future family room outside the hole because of the space I have in this room to move and install the glass
2. Cut out a hole on one end leaving 4" on each side and 2" on the top and bottom for the Glass
3. Once the box is made I’m going to Fiberglass the inside of the box. Special attention to the corners will be made. Will also add Black paint to the fiberglass.
4. After this I will coat the fiberglass with 3 (or more) coats of Epoxy to make it waterproof
5. Put Tank on its front edge leaving hole for glass down
6. Install a (rough measurements) 120"x30"x3/4 Low iron Glass over the hole facing down. Place 1/8 spacers in caulk to insure good bead. Have a powered caulk gun for this already.
7. At this point the tank is made and I will slide it into the hole from the outside. (Stand will already be made inside the hole)
8. I will then be building a 2x4 wall around the tank level with the height of the tank and securing the wall to the structural wall of the house.
9. I will be setting the tank back 2" into the 2x6 wall the hole is already in. I will use this 2" to put structural trim on the front side of the tank with the glass panel. This will be done all the way around the hole to help support the front edges.
10. I do want to use the 2x4 wall to hide plumbing for overflows and Electrical
11. After plumbing is done I’m going to foam a good portion of the 2x4 wall with a closed cell foam. This is done for 2 reasons.
1. Insulation of the tank since it’s in a cool basement.
2. Structural support between the plywood of the tank and the 2x4 walls. I know since the tank cannot be screwed to the wall, this will be a good way to tie them together.
12. At the end I am going to work on some sort of top bracing from the 2x4 wall, to the front of the tank/2x6 front wall. I will be running 4 250w metal halide lights, so my goal is to adjust the front bracing to that it doesn’t interfere with the lighting.
Stand
The stand will be made with 2 rows of 2x6s 16” OC on the front and back of the tank and 2x8s spanning for support in the middle of the tank. I will probably put a center “wall” in the stand also, but I hate losing the storage space under the tank.
Once the tank and stand are built, I will be making a raised 12” walkway around the tank. Im not sure of the height of this walkway yet, but I want to be able to work in the tank and be comfortable.
Sump
I will be using a 150 Gallon Rubbermaid stock tank.
4 Filter socks coming from the display tank to help with sediments.
Tunze 3155 ATO
6 Eheim Jagger 300w Heaters
Controller
NONE!!!! Sorta…..
My whole house will be a Samsung “smart things” house. This allows me to hook up timers, cameras, water leak sensors, and ive found I can even hook up a temperature probe to the tank. Im not 100% sold on reliability because its untested on fish tanks, so some of the major items will wait for a while before they are setup on this system. The room is wired so that every outlet is prewired with a switch. All the switches are in the same area for ease of use. I plan on putting the lights and maybe automatic feeder on this system to start. Then if my kids want to watch a movie in the family room, all they say is “google, turn off the fish tank light”. The lights turn off for up to 3 hours, but stay on a normal schedule other than that time. Same thing with the feeder (still working on this). Kids can feed the tank using voice control and I can make it so the tank will only feed so many times a day no matter how many times the kids try. I want the kids to interact with the tank, but stay out of my fish room when I’m not there…. Door will be locked!!!
Someday I’m sure I will add a controller when the technology is better for testing Calc, Mag, and Alk. Until they become more affordable, this will work.
Pump
Reeflo Hammerhead/Barracuda
6000 GPH
Lights
I plan to make a lighting rack to over the display rack. My goal is to hook up a winch to this to raise and lower the rack as needed when working in the tank.
Display tank will have 4 250w Metal halides.
Lumenmax Elite Reflectors
Luxcore/Icecap 250/400w Electronic Ballasts
Additional Blue supplemental lighting will be added later. Nothing fancy, just some blue LED strip lights.
Skimmer:
This thing is a beast. Ive looked at other Skimmers rated for a tank this size and most are not near this size. Im hoping it will exceed my expectations. I bought it used, so its worth a try!
MTC HAS-1000
• 6" Diameter reaction tube
• 5.25" Diameter neck
• 8" Diameter head
• Total height 48"
• Base footprint 10" x 10"
• Easy clean air injector
• Precision needle valve for air adjustment
• Ozone injection port included
• 1" Water input
• 1.5" Output with schedule 80 gate valve included
• 1/4" Cell cast acrylic tube
• 1/2" And 3/8" cell cast acrylic base
• Suitable for systems up to 750 gallons
• Baffle plate to help increase contact time
• Automatic waste collector included
Dual Carbon Reactor:
GFO Reactor:
Calcium Reactor:
Geo 618
Ive had this for my 220 gallon tank for 3 years and never set it up. Its too small for this tanks water volume, but I was told I will just be replacing the media more often. If this is a problem then ill upgrade later.
Refugium:
Size: 48”x24”x12”
This tank is my current frag tank. I plan on putting Mangroves and Macro algae and having it be somewhat of a display refugium.
Frag tank:
Tank: 72”x24”x12”
The frag tank will have 2 metal halides exactly the same as the display tank.
I have a few old Tunze powerheads for the frag tank.
I also bought used custom made frag racks
Powerheads:
To start, I will have two Tunze 6255 powerheads on each end of the tank. These have a extremely wide output compared to most powerheads, Im throwing around the idea,, of a Gyre xf 280 in the middle of the tank on the back wall, but this can come later if needed.
Tunze (2) 6255
• for tanks up to 1,050 gallons.
• Flow performance: approximately 1,300 to 4,800 gph
• Energy consumption: max. 58 W
• Power supply unit: 110-120V/50-60Hz
QT Tank
40 Breeder w/ hang on back filter, some old 3” PVC laying for hiding
Water Storage
450g for saltwater: buddy had this for free. free is good!! 3x3x4
55g for Freshwater:
Humidity Control
I bought a 130cfm Exhaust fan. Being in Indiana it I ill probably need to get a dehumidifier also that runs into my sump pump.
Fish Breeding
I want to dabble into fish breeding, so im getting this setup used from a buddy. Pretty sweet setup i think.
Last edited: