Elliott's Reef: 900g DT , 400g sumps

Elliott

New member
Well, it's about time I post my build thread. This system has been up and running for about 9 months. Build out took about 3 months. I had a 300g mixed reef that this system replaced.

I've been in this hobby since I was a kid and went through the typical fresh water systems, salt water systems and on to reefs. In fact I think I may be one of the first RC subscribers in the 90's but lost my ID/password and started a new one in 2001. RC has been a favorite past time for me. Without it I really don't think my interest would have been sustained nor culminated in this system. I want to thank all the reefers on this forum for all the valuable information I have received through the years. You deserve the true credit for this system.

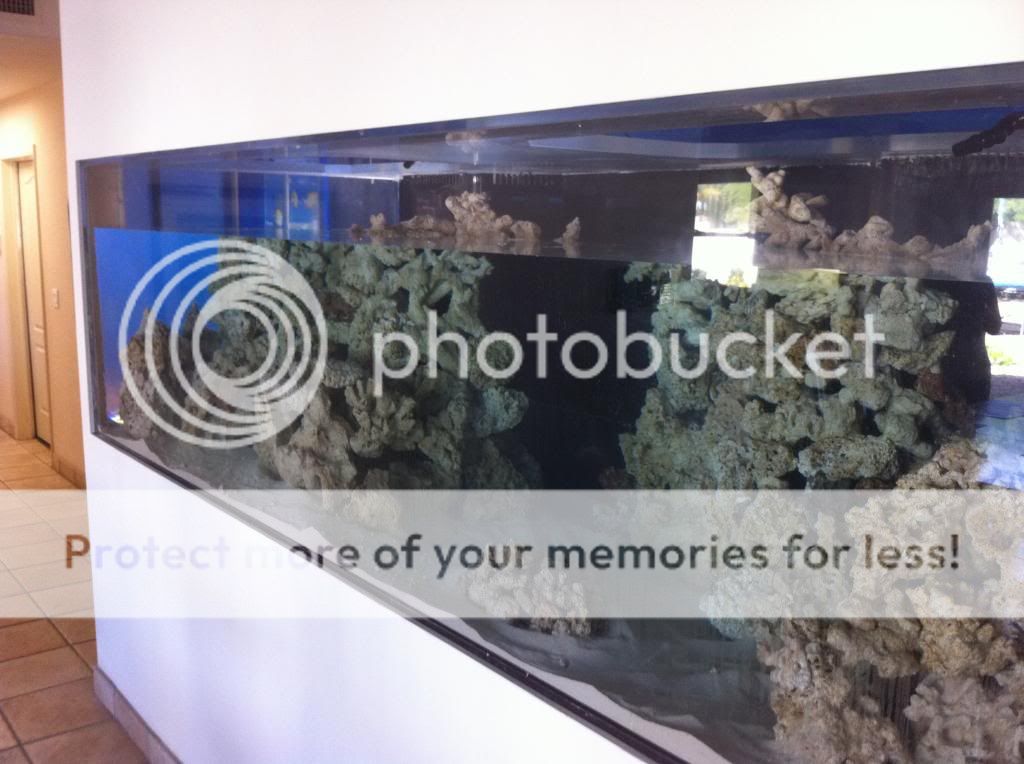
So lets get to it. First, here is a video tour that will give you a good feel for the system. I will then follow it with some build pictures and details for your review. It's 9.5 minutes in length. Hope you enjoy.

http://www.youtube.com/watch?v=9oIRZsjAkZI
 
so here is the room in the garage being built to house the display tank, that will be recessed in the wall...

IMG_0512.jpg


we had to jack hammer the cement floor to run the pluming for the sink...

IMG_0518.jpg


here is the overflow plumbing on the ground going to the remote filtration room 50' away, also in the garage, you'll notice the PVC runs inside a metal sleeve so the parked cars won't crush the pipes, we also kept the 300g reef up and running which is what's running through the pipes you see ...

IMG_0530.jpg
 
here is a look from the side inside this long but narrow room ...

IMG_0519.jpg


here is the tank sitting in it's final resting place ....

IMG_0538.jpg


Green drywall going up, storage tanks in place here ...

IMG_0548.jpg
 
Well done my hats off to you, enjoyed the music too:) Looking forward to your postings about you build.
 
here is the 300g reef which this system replaced, it was up and running during the build which took place right behind it ...

IMG_0545.jpg


Drywall going up ...

IMG_0563.jpg


polishing the QT tanks before installation ...

IMG_0567.jpg
 
still work to do on the facial, it took some experienced drywall to get it flush with the front panel of the tank, so the panel is just recessed the width of the drywall with a hard plastic insert, very clean look ...

IMG_0603.jpg


1500 lbs of LR was used for the aquascape, building large vertical walls with deep valleys and plateaus, I used peroxide on the rock and then let it dry out for weeks before cementing together, a big mistake I made was not using Lanthanum Chloride in the buckets to leach out the phosphate, which greatly delayed my start since I had to do it after installation and filling the tank!

IMG_0617.jpg


IMG_0618.jpg


IMG_0621.jpg
 
I decided to run 2 closed loops, each with 12 eductors, each loop powered by 3 HP 220v Iwaki pumps, controlled with VFD's. I had used a similar but smaller setup with the 300g reef and really liked the reliability of no moving parts inside the tank and not having to service the eductors, which are all buried deep in the rock work and out of sight. Having no visible plumbing was one big criteria of mine, even the waveboxes are not visible...

IMG_0630.jpg


IMG_0629.jpg


IMG_0633.jpg
 
Rock work now going in place over the eductor plumbing, I used epo putty, a strong expoxy putty that Sean used on Peter's tank, really good stuff ...

IMG_0636.jpg


IMG_0642.jpg


IMG_0644.jpg


IMG_0645.jpg
 
Very nice. One day I will have a huge system like this. I appreciate the details, it helps those that take on these projects later have a visual reference.
 
next I built the automatic feeder, I used a grey brute trash can to cut out my plastic, pvc pipe and a pool timer as follows...

here is the individual frozen food dispensers glued to the round tray...

photo-39.jpg


here is the base to hold the tray, which I glued down inside the freezer ...

photo-40.jpg


here is the pool timer used to rotate the feeding tray ...

photo-38.jpg


and this is how it looks installed, a hair dryer turns on for a minute to ensure the food falls through to the sump below, as you can see I drilled a hole from the freezer to the cooler, where the liquid foods are located. Everything is controlled by the Apex controller, I can feed 31 frozen portions anytime without a time limit and dispense liquid food at will. I currently feed liquid food at night three times a week, the skimmers, UV and Ozone turn off automatically for 8 hours after feeding, I now use 3 different foods: Reef Nutrtion's Phyto, Oyster and Roti on separate peristaltic pumps

photo-37.jpg
 
Last edited:
this is a great system, I am so glad you posted the pics and video. Ever since I saw your pics of the frozen food feeder on Peters thread it has been one Ive been looking forward to seeing more of.
Great video of an awesome tank!!
 
this is a great system, I am so glad you posted the pics and video. Ever since I saw your pics of the frozen food feeder on Peters thread it has been one Ive been looking forward to seeing more of.
Great video of an awesome tank!!

many thanks d3hree, I finally found the time to post it! life seems to always get in the way, I really had fun making the video though, was a bit of a challenge too, like the reef, all the best :thumbsup:
 
Back
Top