<a href=showthread.php?s=&postid=13132050#post13132050 target=_blank>Originally posted</a> by rustybucket145
You're getting close....
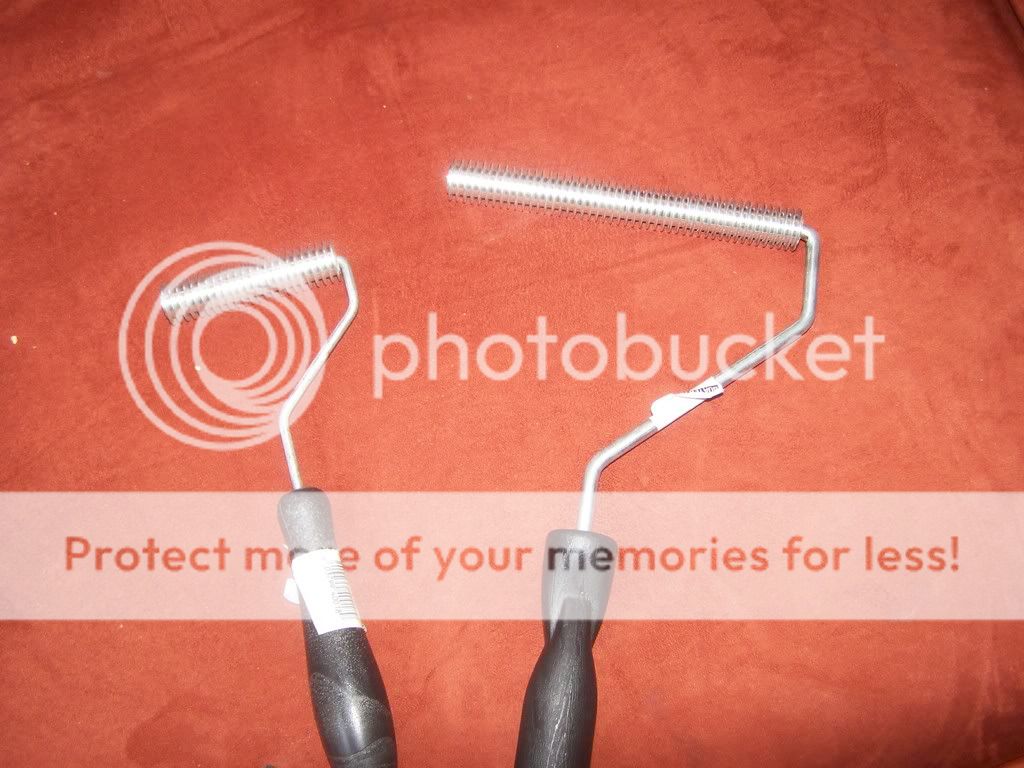
the rollers are definitely necessary. I don't know how many of these you will be making volume is definitely a friend of fiberglass mold systems.
Volume isn't the most important aspect for me right now, as most of the designs are just for tinkering with different structures in tanks, though it is useful to know how to keep the process running smooth.
I will definitely look into purchasing the rollers for future trials. Also, I noticed the resin had a tendancy to pool before it was fully cured. For larger molds, I'd say a more viscous resin is needed. I don't know if this can be done by adjusting the resin:hardener ratio, but I'm in no hurry to shorten my working time.
In terms of molding, could the plug be made out of basically the same design as the test patch (styro and duct tape)?
<a href=showthread.php?s=&postid=13132346#post13132346 target=_blank>Originally posted</a> by 8BALL_99
I still say 10 bucks worth of clay and another 20 to get it fired then your done..Cerimic cave. You wouldnt need a mold or anything. Your already at 50 bucks and looking at either a vacume pump or atleast some special rollers. How many of these do you plan on making?
I'm interested in the clay approach, but not necessarily for this project. Light, quick, and "easy" are the key here. I'm not convinced that ceramics are the key to feasible aquascaping forms for reef tanks. If they were, don't you think that ceramic DIYLR would be substantially more popular? Fiberglass is what the large-scale public and private aquariums use. Rock walls, shipwrecks, and other such designs are all made from fiberglass materials.
The point to all of this is to make shell that can overcome the inherent problem of DIYLR. To make a concrete that is both porous and strong using methods like adding salt crystals and such is a compromise. The idea is to have a fiberglass core that is the main structure, onto which concrete mixes can be applied.
As to the price, yes, $50 is high, however, as I stated, this was for enough supplies for multiple shell designs. The foam was 2'x8'x2", or enough to make
64 test patches like the one shown. There was also 18sq. ft of fiberglass cloth, and two packets of hardener, in addition to the large resin container. Given different sources and smaller amounts, the average DIYer could probably pay only half this amount. Things like vacuum pumps aren't always needed when you have the right tools such as the rollers jlaudiofreak mentioned. Yes, there is equipment to buy at the start, but it's not as if you have to repurchase the tools for each project.
Fiddling around with the test shape, I'm noticing some properties that can be learned from when doing the cave. One, the single layer is quite flexible. Two, and more importantly, the curves that hold up best to weight are the compound curves on the piece. I predict that for example, a cave made in the shape of a fancy cake dish would be stronger than a regular half-a-bucket shape. This may be common sense, but worth noting. Also, though the curves are relatively strong, the material is prone to sagging under heavier loads and pushing the sides outward. Given enough weight and a pattern like this, and I suspect the fiberglass would be crushed.
There are two ways that I have thought of that might combat this. One, the cave could be formed like the toe of a work boot, that is, connected to a bottom layer and reinforced to resist crimping. I suspect adding multiple layers in addition to fiberglass cloth strips where added support is needed may help accomplish the "steel toe".
The other is to have a shape like the test piece butressed by eggcrate on all sides, though I think the first idea may be better long term.
Any thoughts or suggestions?