Dave & Monica
New member
This is my current how-to-ship-coral guide. The first part contains quick overview of steps, followed by a lot more notes, commentary, rational, with specifics on shipping techniques & materials used. Also spattered throughout are pictures and lessons learned.
::: Disclaimer::: This post is meant to provide a foundation of knowledge as I found the whole process of shipping corals not well documented within our hobby. I'm not by any means an expert, but have shipped more than 20 boxes "“ totaling over 350 corals to date with no losses.
Phase 1: Be ready
1) Ensure you have an account with a shipping carrier (not absolutely required but will lower your costs a lot)
2) Have all packing materials on hand before you begin.
Phase 2: Sell and prepare shipment
1) Corals are sold and paid for, and buyer states preferred receiving day (ex Wed) so shipping is a day prior (Tues; obviously the day of the week changes depending on your specific coral order.)
2) Day before shipping (Mon), with 1 day before shipping a minimum; send pictures of the exact package to be shipped unless it was a WYSIWYG package. This removes any and all confusion on what the Buyer is getting. I also send my detailed acclimation, dip, and quarantine guide, but all that info can be found on ReefCentral.
3) Shipping day. (Tues) Print off (or write out) coral labels for each frag in the order and go online to draft the printing label. Shipping costs are determined by box size and weight, and since the actual weight is not known until the package is done, you shouldn't finalize the label until right before shipping.
Phase 3: Preparing the coral shipment.
a. Pull out the shipping box; if you don't know box size needed, have a few sizes available. (I'll expand on my experience in the notes)
b. If using a heat pack, take it out of the plastic wrapper at this time. I noticed the 20hr or more heat pack take 15+ minutes to heat up. Also, drill a small hole inside the top lid for air to get to the heat pack. Otherwise the heat pack uses all the O2 in the box, and doesn't stay warm.
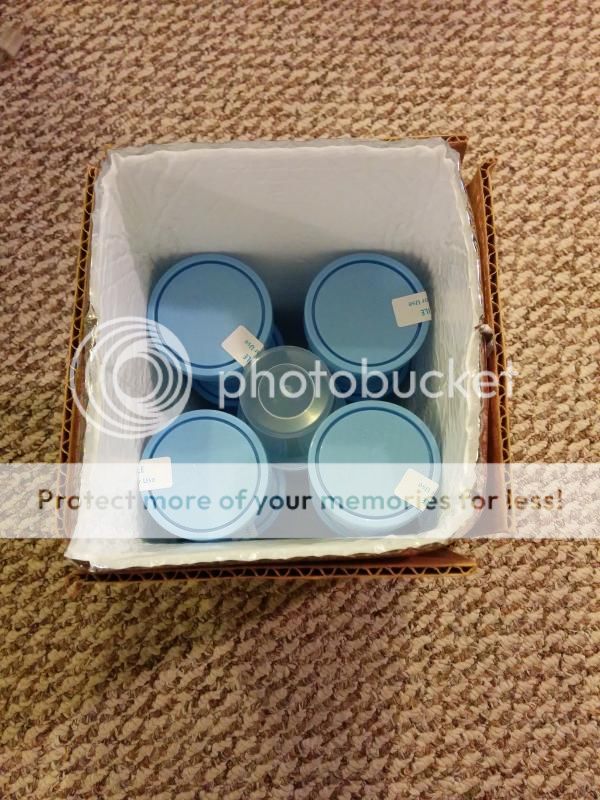
c. Remove styrofoam cooler from the carton box. Take the lid off styrofoam cooler (if not already done) and put it inside the cardboard box, setting both aside for later
Pic shows the lid in the box, and the lid has a hole in it for the heat pack.

d. Take the styrofoam cooler (just calling it "˜cooler' from this point forward) and line it with a plastic bag.

e. Put one layer of wadding at the bottom, I usually trace out and cut the size of the lid, 2-3 pieces, using one here.

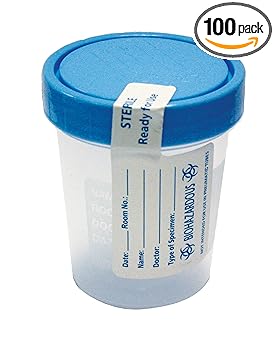
f. Put each coal in shipping cup, (I do this for all of the corals and leave them on the frag rack) *This assumes you already have the holes drilled and cut for each cup, see notes for more details
Coral goes in like this, a clean shot with no coral on the plug.

Here is what it looks like:

g. Take bag, fill with approximately ¼ full of water,

h. Put coral (already in cup) and place it inside the bag

I. Seal the bag, and seal again.

You can clearly see the first seal

...and here is what a double seal looks like. Notice there is still water at the top open end.

::: Disclaimer::: This post is meant to provide a foundation of knowledge as I found the whole process of shipping corals not well documented within our hobby. I'm not by any means an expert, but have shipped more than 20 boxes "“ totaling over 350 corals to date with no losses.
Phase 1: Be ready
1) Ensure you have an account with a shipping carrier (not absolutely required but will lower your costs a lot)
2) Have all packing materials on hand before you begin.
Phase 2: Sell and prepare shipment
1) Corals are sold and paid for, and buyer states preferred receiving day (ex Wed) so shipping is a day prior (Tues; obviously the day of the week changes depending on your specific coral order.)
2) Day before shipping (Mon), with 1 day before shipping a minimum; send pictures of the exact package to be shipped unless it was a WYSIWYG package. This removes any and all confusion on what the Buyer is getting. I also send my detailed acclimation, dip, and quarantine guide, but all that info can be found on ReefCentral.
3) Shipping day. (Tues) Print off (or write out) coral labels for each frag in the order and go online to draft the printing label. Shipping costs are determined by box size and weight, and since the actual weight is not known until the package is done, you shouldn't finalize the label until right before shipping.
Phase 3: Preparing the coral shipment.
a. Pull out the shipping box; if you don't know box size needed, have a few sizes available. (I'll expand on my experience in the notes)
b. If using a heat pack, take it out of the plastic wrapper at this time. I noticed the 20hr or more heat pack take 15+ minutes to heat up. Also, drill a small hole inside the top lid for air to get to the heat pack. Otherwise the heat pack uses all the O2 in the box, and doesn't stay warm.
c. Remove styrofoam cooler from the carton box. Take the lid off styrofoam cooler (if not already done) and put it inside the cardboard box, setting both aside for later
Pic shows the lid in the box, and the lid has a hole in it for the heat pack.
d. Take the styrofoam cooler (just calling it "˜cooler' from this point forward) and line it with a plastic bag.
e. Put one layer of wadding at the bottom, I usually trace out and cut the size of the lid, 2-3 pieces, using one here.
f. Put each coal in shipping cup, (I do this for all of the corals and leave them on the frag rack) *This assumes you already have the holes drilled and cut for each cup, see notes for more details
Coral goes in like this, a clean shot with no coral on the plug.
Here is what it looks like:
g. Take bag, fill with approximately ¼ full of water,
h. Put coral (already in cup) and place it inside the bag
I. Seal the bag, and seal again.
You can clearly see the first seal
...and here is what a double seal looks like. Notice there is still water at the top open end.

")