Meanwell LDD driver: for those who want to dim to 0 using Arduino

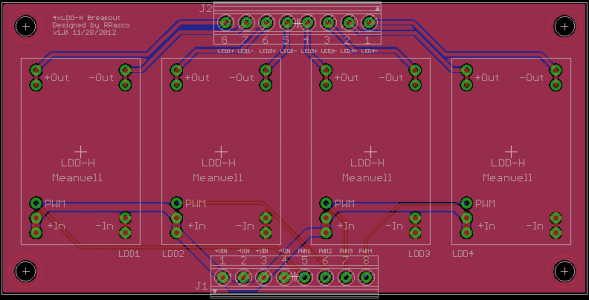
I thought about that, because I started using RJ-45 for signals on other boards, but I don't think a cat5 cable can handle much current. Trying to actually power LED strings up to 1A might not be a good idea. I tried looking, but couldn't find a solid answer for max current for cat5. I did see someone mention PoE uses 48VDC at 400mA max.
 
interesting you should say that, I have been using cat5 from the drivers to the strings for about three years now... just because I didnt see anyone post that not safe. I guess I will ask at work monday.. ;)
 
IteadStudio seems to be cranking out PCB's rather quickly nowadays. I just put in an order with them last week and my boards will be delivered tomorrow. Don't use SeeedStudio right now. They're having some problems with their PCB service. I put in an order with them 4 weeks ago and am still waiting for the PCB's to ship.

I've attached the Gerbers for production @ Itead. (from post #177)

What terminal blocks fit your layout?
Thanks!
 
I do beef them up, the supply traces are 24 mil. Wouldn't hurt to make them bigger I suppose, but I think this would be fine.

I like the dual board idea, except I would prefer not to cut anything if I'm having it manufactured. That's just me though.

I forgot to post these earlier. I had also updated the boards to use copper pours to clean up some of the traces too. I see you added copper pours to yours as well, O2.

rrasco, on the +VIN pins do both 1 and 3 need conneced or can you not use on of them?

also I noticed you files for the LDD-L and some of the board text says LDD-D

Thanks!
 
rrasco, on the +VIN pins do both 1 and 3 need conneced or can you not use on of them?

also I noticed you files for the LDD-L and some of the board text says LDD-D

Thanks!

You only need one of the +VIN. I did that so you can daisy chain boards easier.

I'll check my files. At some point I was operating under the impression they were LDD-D drivers. I have no logical reason why, I'll blame it on someone else and say they referred to them as that and I rolled with it. I have no clue though, because I've actually used these drivers before. Clueless. I'll update the text.
 
Just make sure you don't overload the terminals doing that. Good for smaller lower current setups. Bigger arrays with LDD-1000H, be cautious.
 
rrasco, I was just looking at your LDD-H x 4 board (version 1.0 dated 11/28/12) in the free version of eagle. I am a noob at this stuff but it looks like the Vin- on pins 2 & 4 is missing the trace to the LDDs. Am I missing something there? It looks like they were there on the previous version. Thanks
 
rrasco, I was just looking at your LDD-H x 4 board (version 1.0 dated 11/28/12) in the free version of eagle. I am a noob at this stuff but it looks like the Vin- on pins 2 & 4 is missing the trace to the LDDs. Am I missing something there? It looks like they were there on the previous version. Thanks

It's called a copper pour. Basically, everywhere there is not a trace, it's grounded. Look at this picture, the pink area is the copper pour, you'll notice the original traces are now 'outlined' instead of being solid. This is to isolate them from the copper pour.
 

Attachments

  • LDD-Hx4 Copper Pour.png
    LDD-Hx4 Copper Pour.png
    19.1 KB · Views: 4
I wanted to post this because I have gotten a few questions about it.

When I order boards from itead I choose a 1.6mm thickness, HASL for finish, and 100% etest. If you investigate itead's order process, you will notice I already have this information in the filename for download on the Google code site. You will simply need to put your order number at the beginning and add the color where appropriate.

This is from itead:

If you purchase different PCB prototyping service in one order, It's recommended to clarify order number and the corresponding dimension ,color, thickness, surface finish and quantity by naming gerber files . If there are more than one designs for the same service ,please mark them with a sequence by using A to Z.

PCB_gerbermail.jpg


And here is the link to Google Code for easier reference:

http://code.google.com/p/meanwell-ldd-led-driver/downloads/list
 
I love the PCB idea, if anyone ordered more than they need, and don't want to have them sitting around taking up space, PM me please.

These cheap dimmable drivers make a full spectrum build just that much easier to bring to fruition. Thank you all for your work paving the way, I honestly don't see how these won't be the best option in 9/10 DIY builds.
 
Thanks rrasco for all of your hard work on these boards!

I went ahead and ordered some last night. Anyone have any idea how long it takes for them to get manufactured?
 
Sure thing! Which boards did you go with?

They usually only take a few days to manufacture them. It will depend on your shipping method on how quick you get them though.
 
Rrasco

I thought you might be interested to know what I found in my latest batch of boards from Itead. I received the PCBs last night for the LM3409 based drivers that I posted earlier in the thread. You had commented that you didn't like designs where you'd have to make any cuts yourself. Well, something really cool happened. I had drawn a line in the silkscreen layer as a reference line in preparation for cutting the boards myself. The boards that I received, came with a shallow notch cut into them, following the line I had drawn. The notch was cut into both the top and the bottom sides. How this happened- I do not know? But- I was able to snap the boards into two very clean halves with very little effort. I feel like I got something for free, as most all PCB manufacturers want more $$ for additional cuts. Just something to think about.
 
That is interesting. They even say on their site you can panelize but only with silkscreen, meaning they don't cut the slots. Your experience suggests different. Maybe I'll email Wendy and ask her.

You can panelize but the design should meet our rules as followed:

(1) There should be no more than 5 sub-boards to fit the size

(2) The sub-boards should only be separated by silkscreen. Using holes or long slots to separate the sub-boards are not permitted.

PCB_sub.jpg
 
That is interesting. They even say on their site you can panelize but only with silkscreen, meaning they don't cut the slots. Your experience suggests different. Maybe I'll email Wendy and ask her.

Whoa! I went back and looked at the Board file and think that I found the reason for the "notch". I drew "my" line in the silkscreen layer. Problem is- I forgot to remove the dimension line directly underneath it. Maybe that mistake caused some confusion for the computer controlled cutting operation, resulting in the notch on both sides? Funny thing is- The design files passed the Itead DRC! Since I liked the results- I won't mention anything to Itead about it.:lmao:
 
Back
Top