My First Tank and Build Process

your doing it right man! no doubt. its a good thing. if ever u want to go bigger your already set. just a matter of moving livestock and switching tanks.

Definately bigger is better since your parameters wont swing as much. but if they do swing far its a little more challenging to get em back imo.
 
This is insane. Have you been saving up for 10 years? Lol Kudos on the handiness. The only part of the hobby that I haven't treaded on is electrical. I'm impressed, great job!
 
Great build thread! I am looking forward to having my own house again so I can do something like this in my basement!
 
it's starting to take shape

it's starting to take shape

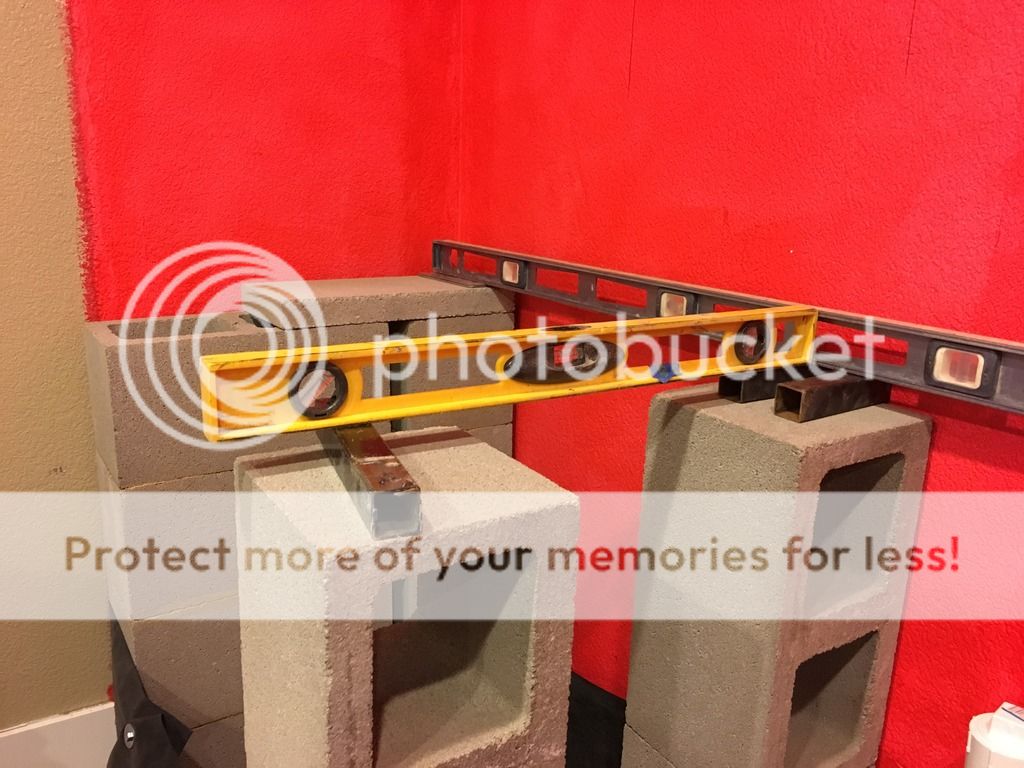
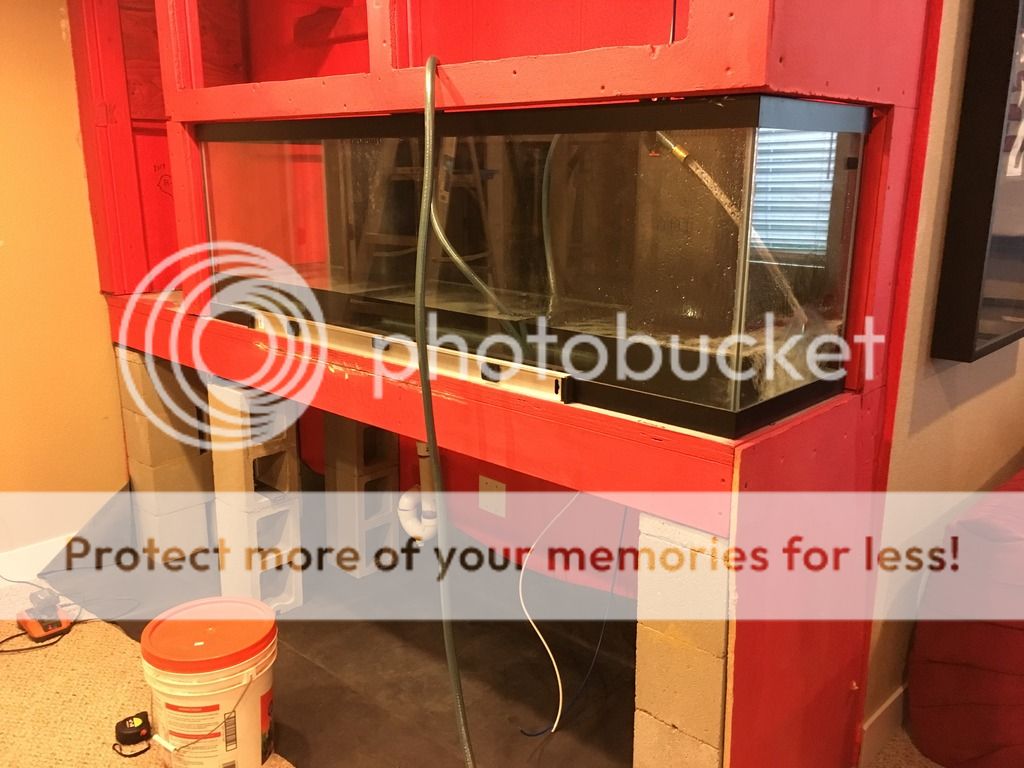
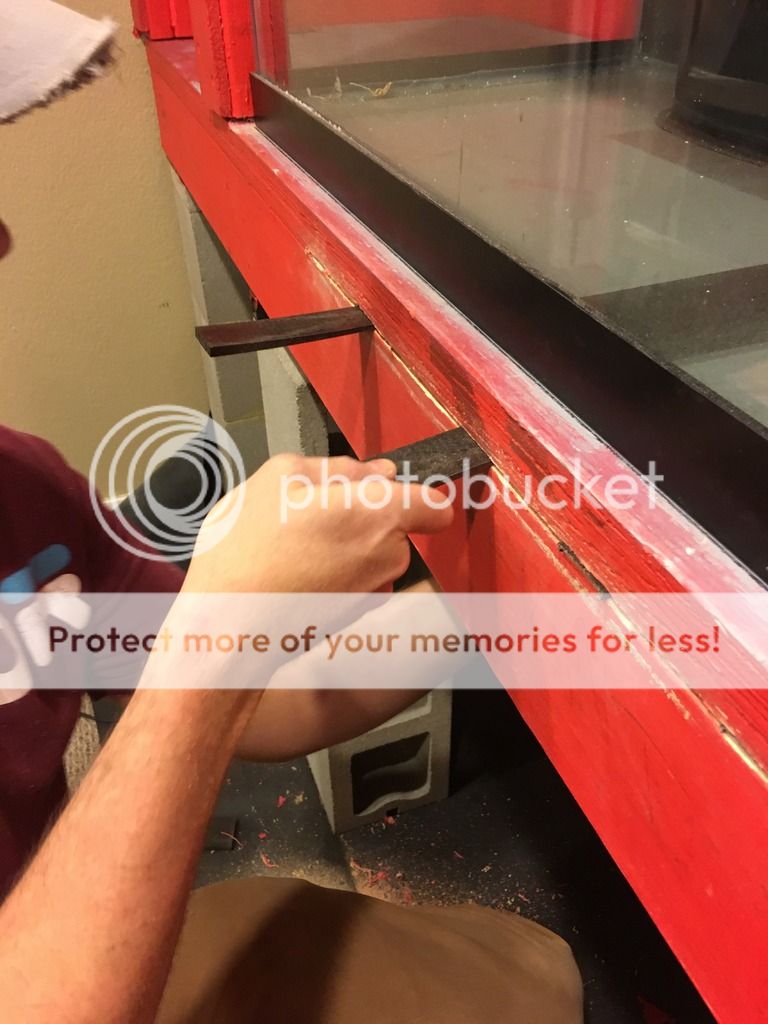
It was a busy day yesterday. I didn't finish all the work I wanted to get done but was happy about the progress thus far. Yesterday was all about leveling the tank stand. I ended up adding a 2" cement block piece to the top of each end of the stand. The second picture shows the 1.5x1.5 metal bar I used to ensure leveling of the middle section of cement blocks. After a few hours of shimming the top is level.


The only issue is the front left of the tank is just off by an 1/8" or so when I finished leveling. Water weight will help with what I have attributed to the wooden frame warping or not being completely level. Time to test the some water weight. I took the hose and attached it in the utility room to fill my RODI water/trash can. Below you can see the trash can full of water.


The water weight in the trashcan is nowhere near the tank weight but it did help a little bit. I am sure the weight of the tank and refugium will be more than enough to completely level it out. I then drained the water from the trashcan into the p-trap under the stand as an official test for draining the tank and it worked beautifully. Score one for the home team.

Next the RODI unit was mounted to the wall in the utility room. Below the RO unit is where the water/trashcan will live.


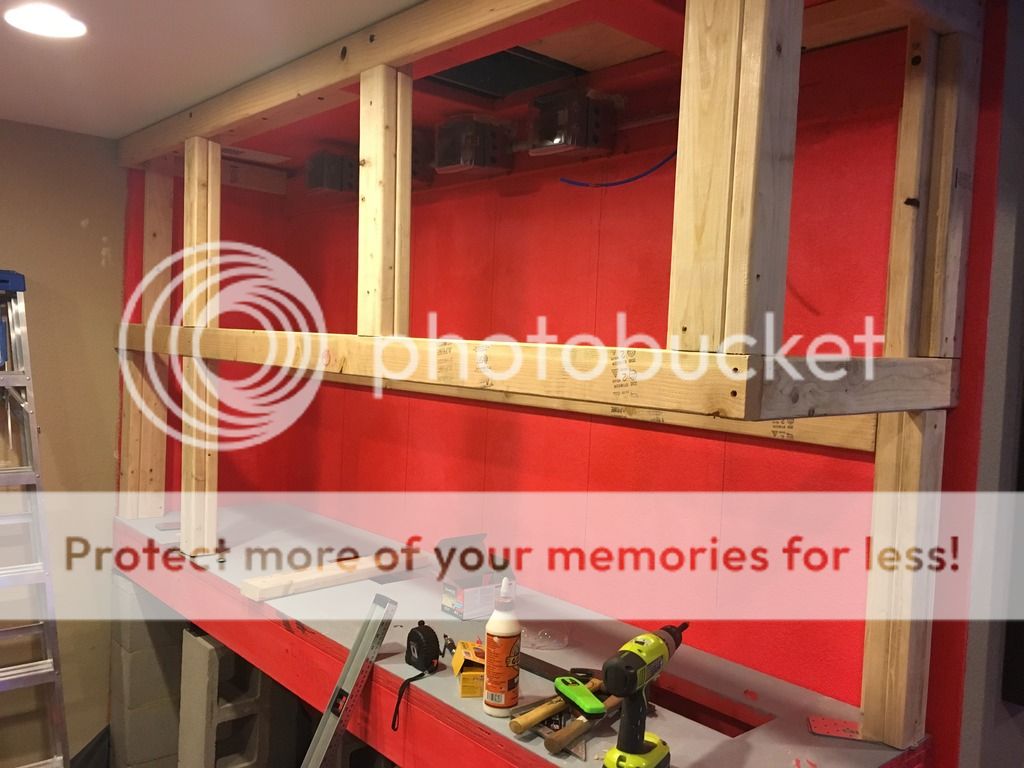
Framing was then started for the cabinets. The tank will sit on the far right of the stand and have a front and side viewing panel. The cabinets will be "œfloating" away from the tank and the stand to ensure as the house settles it will not tear away the cabinets. I added a 2x6 across the front ceiling that butted against the access panel into the ceiling. The 2x6 was drilled into the flooring I-bean above. From that I attached vertical 2x4s that will be the framing for the cabinets.


You can see the gap I left from the upper cabinet framing so it is not attached to the tank stand. The idea behind this is like the floating walls in basements to allow for settling of the tank with all the weight.


These pictures show more of the framing around the tank. I still need to attach the corner L-shaped brace to hold the floating edge about the corner of the tank. Each brace piece will have double 2x4s holding it in place and the upper frame is attached to the 2x6 which is attached to the i-beans of the ceiling above.


The sand and salt has arrived. After framing is done I will make the cabinets, stain, and install them before filling the tank. Don't want any of those VOCs entering the water while I'm starting to cycle the tank. Hopefully I can finish the framing this weekend and possibly start plumbing the tank. I will do a test fill of the tank to see how it holds and let it sit for a week to see how it shifts before adding sand and live rock. More to come. Thanks again for all the comments and following along.

How do you intend on accessing the tank for maintenance, etc? An extreme amount of planning for 180g, better safe than sorry I suppose ☺

Sent from my SM-G955U using Tapatalk
 
I love following builds like this, you can get great ideas. The hollow blocks worry me a little, I'd feel better if they were solid. Hope they hold up.
 
Framing is done

Framing is done

Today I finished the framing for the upper cabinets. Next step will be to put up the soundboards and then the cabinet façade. Cabinet doors will be made over the next week or two. I am going Saturday to pick up the stain to match my bar cabinets and hopefully Sunday the tank will be placed on the stand and all plumbed. All of my supplies have now arrived. If everything goes to plan, may get to do a water test Sunday night and try it out for a week. Cheers


As rare as it is for us to see peeps using masonry block for stands... I don't thing there's really any question of strength. I actually used block for a cheap quarantine tank stand with a 2x4 top. Worked great. We use hollow block for the foundation of our homes above the footer. I really don't think that his tank will be going anywhere.
 
the blocks have been used plenty of times. they are very strong. my only worry would be about them tipping over in a single stack.
 
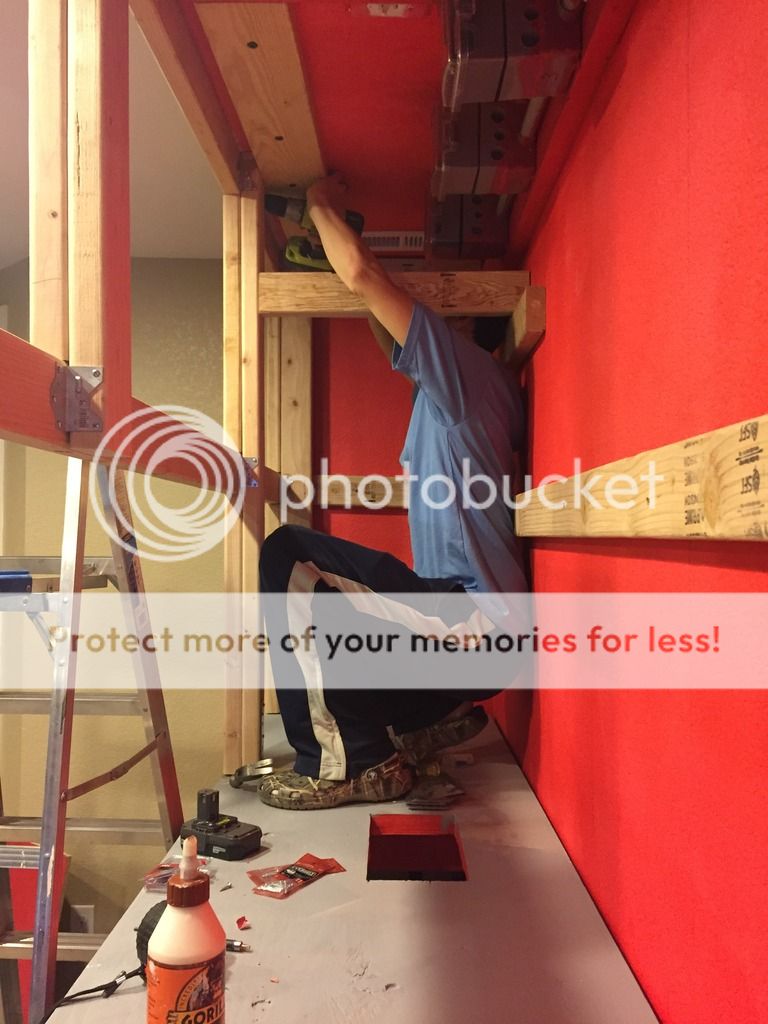
Alrighty. Today I finished all the framing for the tank. I had to sand 1/4 of an inch down on the open corner frame. It would have been a tight fit for the tank and I wanted more room for the tank to sit on the frame without any contact to it. That sanding only took forever and a day. After dusting myself off and attempting to vacuum the sawdust up from everywhere I moved on. I reinforced the frame with more 2x4s and installed the lighting frame. In the photos below you can see the 2x4 I put across the tank from the front to the back wall. I cut two u-shaped holes in the 2x4. I am going to use a pipe to sit in the holes and the pipe will hold my lighting. I will attach carabineers to the pipe and that will allow my lights to hang above the tank. If I need to move them to get into the tank, I can just slide them to one side or the other.


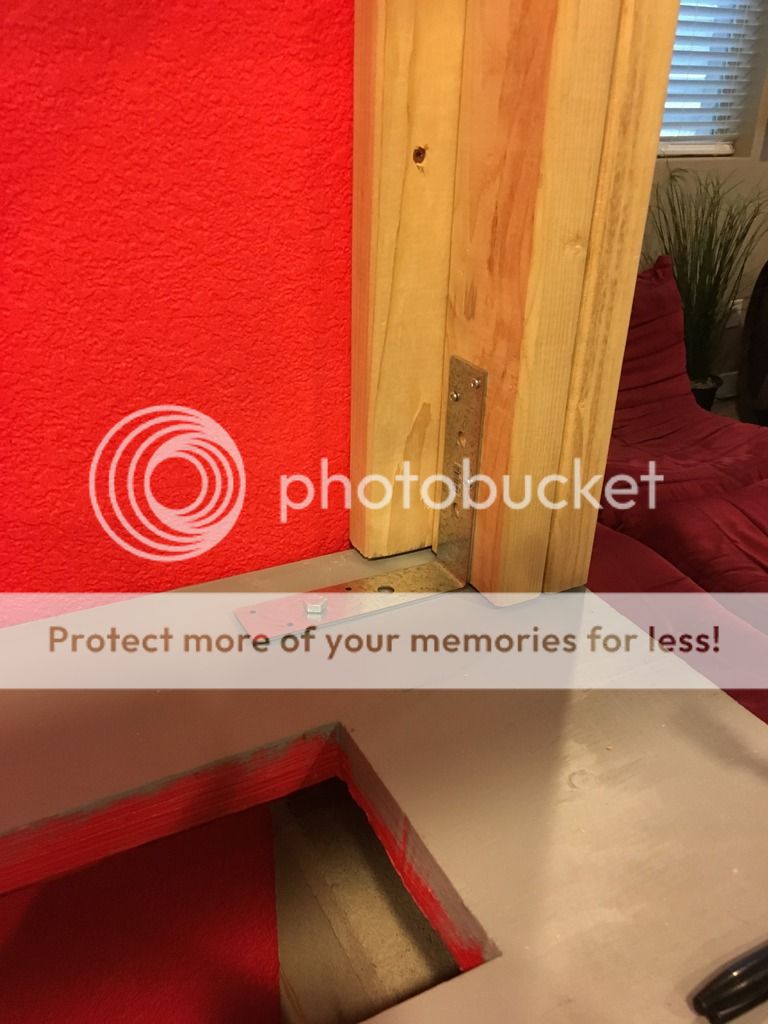
Next was to add metal L-brackets to the framing as one final measure of support. The next set of photos show the brackets being installed and in their final resting places. I tried to put one at the top and bottom of each upper cabinet framing.


This photo shows a large L-bracket. I used this to act as a stabilizer for the upper cabinet framing and the tank frame itself. Remember, I am building the upper framing to not come in contact with the tank stand. So as the house and the tank frame settle, it will not tear the cabinets away from the ceiling and/or wall. The bracket is screwed in to the upper cabinet framing and I used a lag screw to prevent the upper cabinets from shifting too far away from the edge of the tank frame. The lag screw is not completely screwed in tight to the tank frame, but just enough to allow for slight movement.


Last thing I did today was caulking all the seams with waterproof caulking. I will allow it to dry for a day or two and then apply another coat of RedGard to the entire framing. After the RedGard dries I will install the soundboard to the tank framing and apply more RedGard to the soundboard. Cabinet wood and stain has been purchased and cabinets will be taking shape soon.

 
Looking awesome. I am working on a much smaller tank build. Soon to post my own build thread. This is definitely motivation. I've been playing with drilling holes and making an overflow box with some 1/4" glass I have. Keep it up.

Sent from my Nexus 6 using Tapatalk
 
I'm starting to get sick of RedGard

I'm starting to get sick of RedGard

I've had a really busy week at work but was able to work on the stand a little bit. My wonderful wife started painting the remaining frame with RedGard. The second photo shows where I cut out a section of the 2x4 cross piece to allow for a large opening to where the refugium will be held. Installing the soundboard will happen this weekend and once installed will also be painted with the RedGard. I cut two pieces of the ¾" plywood for the sump tank to sit on under the tank. That is currently drying in the garage and will also be installed. More to come"¦


I was able to get some work done on the tank today. The picture below shows the installed soundboard on the tank frame. After installing the soundboard I painted it with RedGard to ensure waterproofing and to keep any fiber particles from flaking off.


The next two pictures show where I cut access points above the tank. The soundboard pieces I cut out I am keeping to place on the back of the cabinet doors to ensure it muffles as much sound and fan noise as possible. The soundboard has now been completely painted with RedGard.


The picture below shows the two pieces of plywood I cut and painted with RedGard. The smaller piece will be attached above the refugium area of the tank and will be the mounting piece to house all the electrical equipment. The larger piece of wood is going to be the base for the sump under the main display tank. I will put a few pieces of Trex wood underneath to get the plywood base off the floor and rubber liner.


Tomorrow is getting the tank on the stand day, plumbing, and test filling. Wish me luck"¦
 
holy hell I have a fish tank, kinda…

holy hell I have a fish tank, kinda"¦

First was to pull the RODI unit tubing down so it will enter and reach the sump under the display tank. With all the soundboard in place and everything RedGarded it was time to get the tank in place. Made sure the stand was still level and got the tank in it's resting place.


Next was to do a water test. I took the hose and connected it to my new water line in the utility room and started filling the tank. While the tank was filling I kept my level on the tank stand. After the tank was filled with tap water, an issue was noticed. There was a 1/8" bow in the center frame. The tank was level but the wood frame wasn't making contact with the front center of the tank. A cut between the double plywood top and the 2x6 frame was made. Composite shims then were used to level up the center bow. The shims were broken off and cut flush with the framing. A quick coat of RedGard to re-seal everything and we were back on track.


While the tank settled and I waited for the RedGard to dry I went to make a frame for the sump. Remember I used 2 pieces of plywood glued together and RedGarded to act as the base of the sump. I used a piece of Trex decking to create a frame for the plywood to sit on, just in case of any leaks.


Here is the tank filled and the sump in place below it. No plumbing ended up happening today but it was still a successful day. We are getting closer. Time to start thinking hard about what fish should we get"¦

 
unboxing stuff...

unboxing stuff...

Today I started working on plumbing and unboxing all my parts for the tank. No picture, but the Reef Octopus Regal Internal 250 is all plumbed and in the sump tank, the Spectrapure 5 stage RODI 180 unit is installed in the utility room and dumping into the Brute trashcan, and the Neptune Apex System Gold and energy bar 8 was unboxed and set aside for the moment. The first photo shows the Aqua medic DC pump that I am setting up for water changes. The adapter fitting will allow me to connect my hosing from the pump within the RODI collection unit (Brute trashcan) and have it empty into the tank for water changes. The second photo shows my two water inlets connected to two more Aqua medic DC Runner 5.1 pumps within the sump that will act as the return to the main display tank. My final Aqua medic DC Runner 5.1 pump will be supplying the UV sterilizer and refugio tank when I get both of those up and running. Still looking for a refugio tank to fit. I am going to end up having to have an acrylic tank made because it's a strange size for a tank.


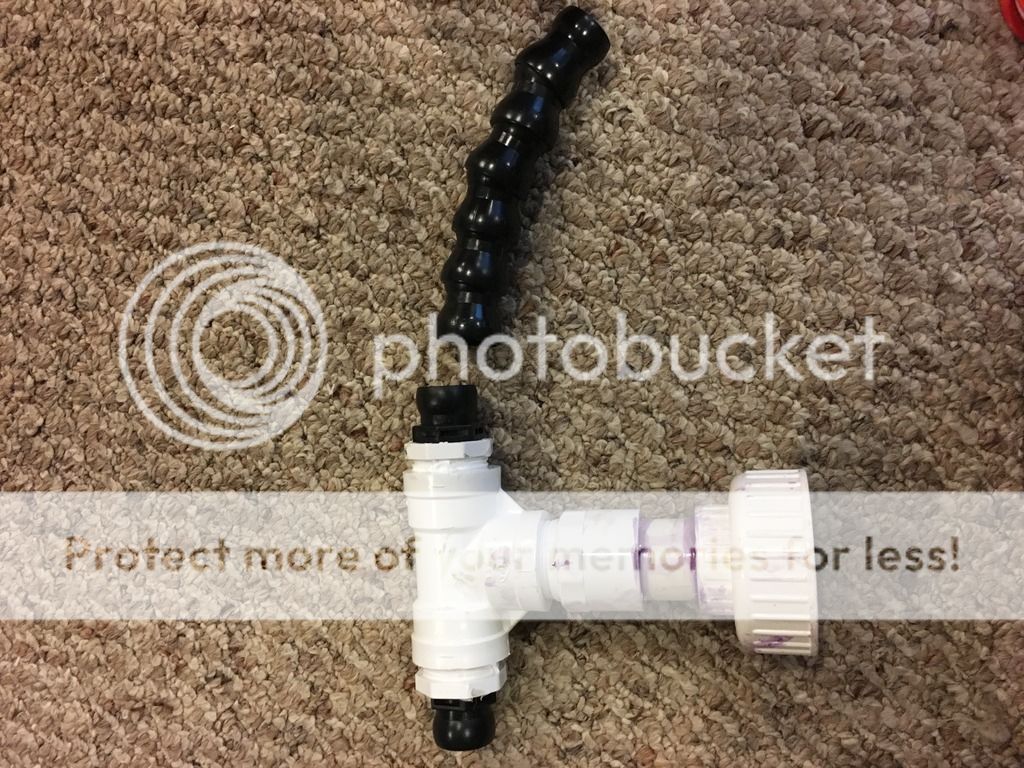
This shows the top of my new return line into the main display tank. I took a quick connect and adhered it to a PVC t-piece. This will allow me to change different sections the PVC piping if anything gets clogged or needs repair. All the tanks plumbing will be hard plumbed like this, which will allow me to fix or disconnected broken or malfunctioning sections of tubing. The hope is this will prevent me from having to re-plumb entire sections of plumbing. The last photo is an entire shot of the return water line that will feed the main display tank. Busy for the next week or two so hopefully the next update will show plumbing done and cabinets being installed. Cheers"¦


Back
Top