You are using an out of date browser. It may not display this or other websites correctly.
You should upgrade or use an alternative browser.
You should upgrade or use an alternative browser.
Project External Glass Overflow
- Thread starter Tunjee
- Start date

Tunjee
New member
Lunchbucket: Well, nobody's ever done this before. I had mine running for a few weeks during testing and it didnt crack. Will it crack after a year or two? I think I'm going to build a stand that will collect all the water incase it does break. Just had my hardwood floors redone and dont want to damage them.
P.S. People drill holes in the bottom of their tanks all the time and there's alot more pressure down there than there is up top.
P.S. People drill holes in the bottom of their tanks all the time and there's alot more pressure down there than there is up top.
 thanks again, TUNJEE.
 Lunchbucket
Premium Member
Tunjee - yeah i hear you about drilling holes in the bottom of thier tanks but some how i see the drill bit making smooth and unfractured holes while the dremel could "skip" or nick stuff...maybe not but i just am looking at the worst case situation.
Lunchbucket
Lunchbucket
Tunjee
New member
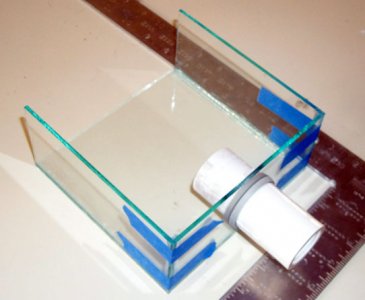
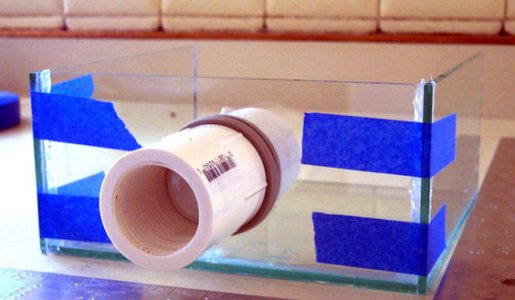
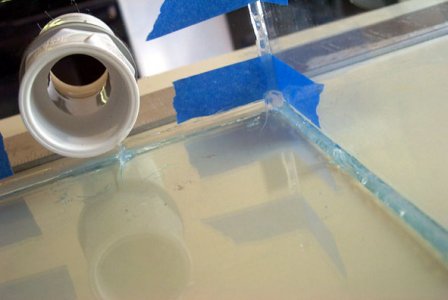
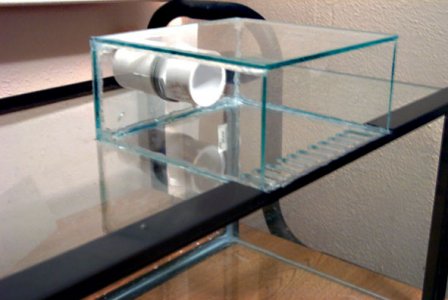
Mattydub: The back glass cant be as strong as it was by cutting the notches in it like I did. I cant prove that the reinforcement is mandatory but I think if something were to strike the top of the back glass where the notches are it would break. By adding the reinforcement I believe the glass can handle a much harder strike than before therefore decreasing the chances of breakage. It was however mandatory to remove the top trim in order to install the reinforcement with silicone. HTH
sdmike
New member
Tunjee said:gumbybc: it's a Velocity T1, it's so quiet you cant hear it running, so far I like it.
Imnaha: the drains in the sump are the only noise, this plumbing setup is just temporary, I ran outta pipe and 90's tonight, I might be able to get away without a stockman/durso. I plan on a baffle in the sump and two 90's at water heigth facing the opposite side of the pump.
My overflow was noisier'n h3ll till a friend told me to run a length of airline tubing down the drain till it quieted down.
No noise at all from it.
Less spendy than re-plumbing...
Mike
Tunjee
New member
sdmike said:My overflow was noisier'n h3ll till a friend told me to run a length of airline tubing down the drain till it quieted down.
No noise at all from it.
Less spendy than re-plumbing...
Mike
Sounds like a good idea, the air tubing acts like a vent I assume? One end of it should be slightly above the surface of the sump water and the other should stick out and above the drain hole.
Tunjee
New member
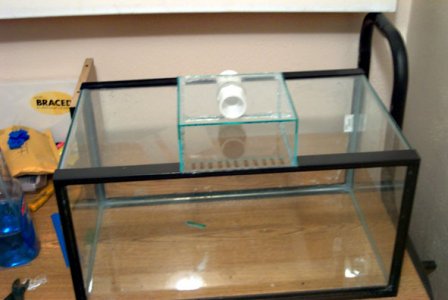
Updates.......making progress slowly sorry for the wait. Completed swing arm assembly for my light it also adjusts easily up and down. Sump is built and ready for additions. Stand is sealed added extra support and painted 5 coats inside waterproofing it. I have some pics here they are.
:bum:
:bum:

