Rembee's 90 gal. slow build....

Rembee

New member
And it begins.....
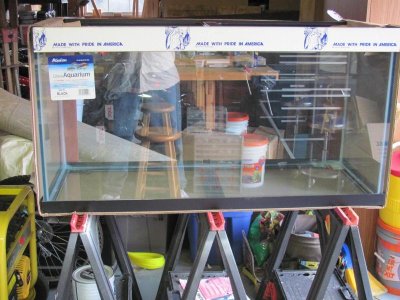
Well, about 5 years ago I started reading, and reading, and researching and more reading about anything and everything related to reef tanks. I have wanted a salt water aquarium for as long as I care to remember. After 40 something years, it is now becoming a dream come true. About 3 months ago I bought a 90 gal. Aqueon glass aquarium. I then started building a custom stand and canopy. This system will also have a 40 gal. breeder tank that will be used as the sump/refugium.

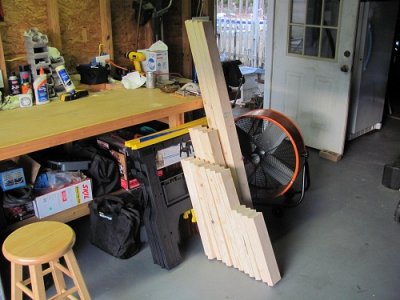
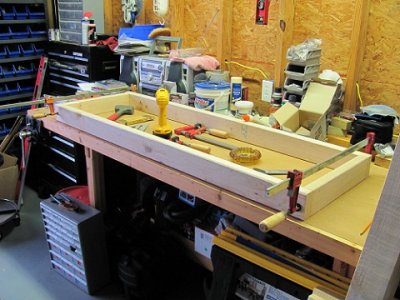
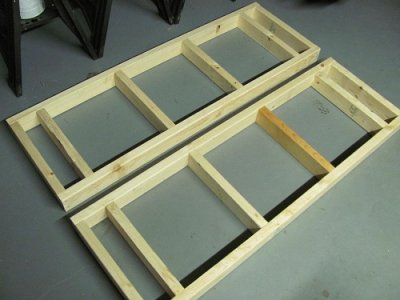
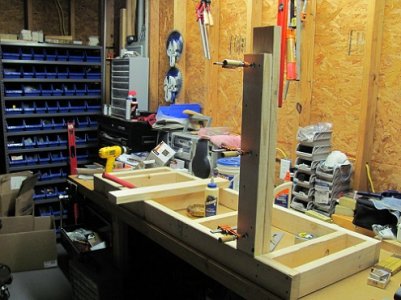
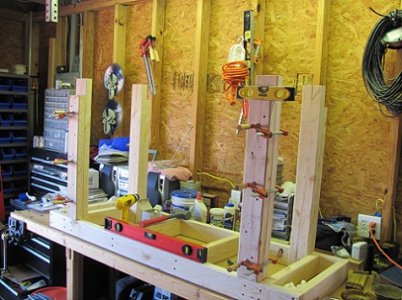
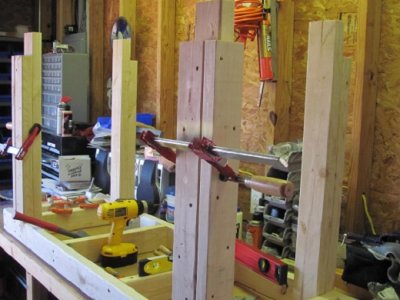
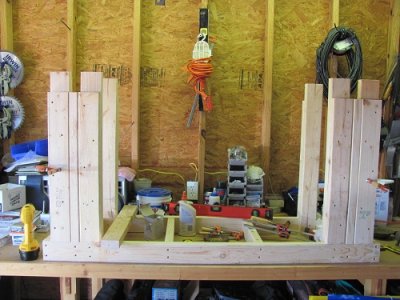
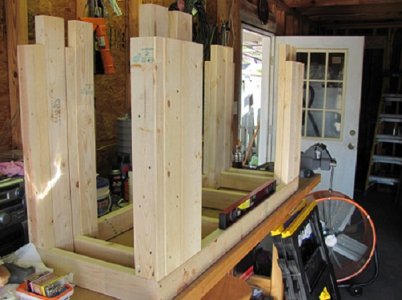
Here are some pics of the custom stand that I am building, start to finish.
 

Attachments

  • IMG_1228.JPG
    IMG_1228.JPG
    91.4 KB · Views: 26
  • IMG_1230.JPG
    IMG_1230.JPG
    98.4 KB · Views: 20
  • IMG_1232.JPG
    IMG_1232.JPG
    74.8 KB · Views: 19
  • IMG_1226.jpg
    IMG_1226.jpg
    79.8 KB · Views: 19
  • IMG_1233.JPG
    IMG_1233.JPG
    100.7 KB · Views: 30
Rembee's 90 gal. slow build....

The frame and legs are all glued and screwed together...
 

Attachments

  • IMG_1234.JPG
    IMG_1234.JPG
    100.8 KB · Views: 20
  • IMG_1236.JPG
    IMG_1236.JPG
    88.9 KB · Views: 18
  • IMG_1243.JPG
    IMG_1243.JPG
    100.1 KB · Views: 20
  • IMG_1245.JPG
    IMG_1245.JPG
    100.9 KB · Views: 15
  • IMG_1248.JPG
    IMG_1248.JPG
    101.1 KB · Views: 15
Congratulations on your new tank. It looks like you're taking your time and building a solid stand. Keep the pics coming and have fun. The folks here are always willing to help if you have any questions. Good luck.
 
Update

Update

I just learned how to use photo bucket, so the pics will be better now...lol.
Here is the frame.


<a href="http://s1177.photobucket.com/albums/x359/rarce32/My%20Reefing%20Journey/?action=view&current=IMG_1250.jpg" target="_blank"><img src="http://i1177.photobucket.com/albums/x359/rarce32/My%20Reefing%20Journey/IMG_1250.jpg" border="0" alt="Photobucket"></a>

<a href="http://s1177.photobucket.com/albums/x359/rarce32/My%20Reefing%20Journey/?action=view&current=IMG_1253.jpg" target="_blank"><img src="http://i1177.photobucket.com/albums/x359/rarce32/My%20Reefing%20Journey/IMG_1253.jpg" border="0" alt="Photobucket"></a>

And here it is painted

<a href="http://s1177.photobucket.com/albums/x359/rarce32/My%20Reefing%20Journey/?action=view&current=IMG_1269.jpg" target="_blank"><img src="http://i1177.photobucket.com/albums/x359/rarce32/My%20Reefing%20Journey/IMG_1269.jpg" border="0" alt="Photobucket"></a>
 
Congratulations on your new tank. It looks like you're taking your time and building a solid stand. Keep the pics coming and have fun. The folks here are always willing to help if you have any questions. Good luck.

Thanks Dave, and there will be plenty of pics to come.
 
I built a electrical closet in the end of the stand. Here is some of the wiring and outlet boxes.

<a href="http://s1177.photobucket.com/albums/x359/rarce32/My%20Reefing%20Journey/?action=view&current=IMG_1263.jpg" target="_blank"><img src="http://i1177.photobucket.com/albums/x359/rarce32/My%20Reefing%20Journey/IMG_1263.jpg" border="0" alt="Photobucket"></a>

<a href="http://s1177.photobucket.com/albums/x359/rarce32/My%20Reefing%20Journey/?action=view&current=IMG_1265.jpg" target="_blank"><img src="http://i1177.photobucket.com/albums/x359/rarce32/My%20Reefing%20Journey/IMG_1265.jpg" border="0" alt="Photobucket"></a>

<a href="http://s1177.photobucket.com/albums/x359/rarce32/My%20Reefing%20Journey/?action=view&current=IMG_1270.jpg" target="_blank"><img src="http://i1177.photobucket.com/albums/x359/rarce32/My%20Reefing%20Journey/IMG_1270.jpg" border="0" alt="Built in electrical closet."></a>
 
I'm skinning the stand out in poplar boards

<a href="http://s1177.photobucket.com/albums/x359/rarce32/My%20Reefing%20Journey/?action=view&current=IMG_1272.jpg" target="_blank"><img src="http://i1177.photobucket.com/albums/x359/rarce32/My%20Reefing%20Journey/IMG_1272.jpg" border="0" alt="Popular Wood Boards"></a>

<a href="http://s1177.photobucket.com/albums/x359/rarce32/My%20Reefing%20Journey/?action=view&current=IMG_1273.jpg" target="_blank"><img src="http://i1177.photobucket.com/albums/x359/rarce32/My%20Reefing%20Journey/IMG_1273.jpg" border="0" alt="Photobucket"></a>

<a href="http://s1177.photobucket.com/albums/x359/rarce32/My%20Reefing%20Journey/?action=view&current=IMG_1274.jpg" target="_blank"><img src="http://i1177.photobucket.com/albums/x359/rarce32/My%20Reefing%20Journey/IMG_1274.jpg" border="0" alt="Photobucket"></a>

<a href="http://s1177.photobucket.com/albums/x359/rarce32/My%20Reefing%20Journey/?action=view&current=IMG_1275.jpg" target="_blank"><img src="http://i1177.photobucket.com/albums/x359/rarce32/My%20Reefing%20Journey/IMG_1275.jpg" border="0" alt="Photobucket"></a>
 
I think you need to redo your stand, I don't think it's sturdy enough :wildone:.
Seriously though, nice build so far, one of the only things I wish I had done differently on my stand was to make an electrical section like yours.
 
I was inspired by the building idea of my stand and canopy by will16's stand and canopy build. Here I'm starting to build out the columns on the stand.

<a href="http://s1177.photobucket.com/albums/x359/rarce32/My%20Reefing%20Journey/?action=view&current=IMG_1276.jpg" target="_blank"><img src="http://i1177.photobucket.com/albums/x359/rarce32/My%20Reefing%20Journey/IMG_1276.jpg" border="0" alt="Photobucket"></a>

<a href="http://s1177.photobucket.com/albums/x359/rarce32/My%20Reefing%20Journey/?action=view&current=IMG_1300.jpg" target="_blank"><img src="http://i1177.photobucket.com/albums/x359/rarce32/My%20Reefing%20Journey/IMG_1300.jpg" border="0" alt="Photobucket"></a>

<a href="http://s1177.photobucket.com/albums/x359/rarce32/My%20Reefing%20Journey/?action=view&current=IMG_1305.jpg" target="_blank"><img src="http://i1177.photobucket.com/albums/x359/rarce32/My%20Reefing%20Journey/IMG_1305.jpg" border="0" alt="Photobucket"></a>

<a href="http://s1177.photobucket.com/albums/x359/rarce32/My%20Reefing%20Journey/?action=view&current=IMG_1307.jpg" target="_blank"><img src="http://i1177.photobucket.com/albums/x359/rarce32/My%20Reefing%20Journey/IMG_1307.jpg" border="0" alt="Photobucket"></a>
 
More pics....

<a href="http://s1177.photobucket.com/albums/x359/rarce32/My%20Reefing%20Journey/?action=view&current=IMG_1334.jpg" target="_blank"><img src="http://i1177.photobucket.com/albums/x359/rarce32/My%20Reefing%20Journey/IMG_1334.jpg" border="0" alt="Finally finished all the wood working, molding and trim."></a>

<a href="http://s1177.photobucket.com/albums/x359/rarce32/My%20Reefing%20Journey/?action=view&current=IMG_1321.jpg" target="_blank"><img src="http://i1177.photobucket.com/albums/x359/rarce32/My%20Reefing%20Journey/IMG_1321.jpg" border="0" alt="Photobucket"></a>

<a href="http://s1177.photobucket.com/albums/x359/rarce32/My%20Reefing%20Journey/?action=view&current=IMG_1319.jpg" target="_blank"><img src="http://i1177.photobucket.com/albums/x359/rarce32/My%20Reefing%20Journey/IMG_1319.jpg" border="0" alt="Photobucket"></a>

<a href="http://s1177.photobucket.com/albums/x359/rarce32/My%20Reefing%20Journey/?action=view&current=IMG_1341.jpg" target="_blank"><img src="http://i1177.photobucket.com/albums/x359/rarce32/My%20Reefing%20Journey/IMG_1341.jpg" border="0" alt="Photobucket"></a>

<a href="http://s1177.photobucket.com/albums/x359/rarce32/My%20Reefing%20Journey/?action=view&current=IMG_1351.jpg" target="_blank"><img src="http://i1177.photobucket.com/albums/x359/rarce32/My%20Reefing%20Journey/IMG_1351.jpg" border="0" alt="Photobucket"></a>
 
Rembee,
Your stand is very nice. It will hold more than 10xs the amount of weight you will be putting on it. When in dought (sp) make it stout.
I noticed you used some very wide poplar boards for the face of the cab. They will expand and contract. There is a very good chance you will have a gap were they meet your top and bottom rails. The gap will most likely get quite large.
 
This past weekend I finally got up enough nerve to drill 2 - 1.5" holes to install my 1500 gph glass-holes overflow kit. To my surprise and relief, both the holes came out great! This was a lot easier then I thought it was going to be.

<a href="http://s1177.photobucket.com/albums/x359/rarce32/My%20Reefing%20Journey/?action=view&current=IMG_1344.jpg" target="_blank"><img src="http://i1177.photobucket.com/albums/x359/rarce32/My%20Reefing%20Journey/IMG_1344.jpg" border="0" alt="Drilled holes 4/10/11"></a>

<a href="http://s1177.photobucket.com/albums/x359/rarce32/My%20Reefing%20Journey/?action=view&current=IMG_1346.jpg" target="_blank"><img src="http://i1177.photobucket.com/albums/x359/rarce32/My%20Reefing%20Journey/IMG_1346.jpg" border="0" alt="Photobucket"></a>

<a href="http://s1177.photobucket.com/albums/x359/rarce32/My%20Reefing%20Journey/?action=view&current=IMG_1347.jpg" target="_blank"><img src="http://i1177.photobucket.com/albums/x359/rarce32/My%20Reefing%20Journey/IMG_1347.jpg" border="0" alt="Photobucket"></a>
 
I also have been working on my canopy. Yesterday and today I have been staining and sealing it. Here are some pics before I stained it. I will post some more pics of it all stained and sealed as soon as I can.

<a href="http://s1177.photobucket.com/albums/x359/rarce32/My%20Reefing%20Journey/?action=view&current=IMG_1474.jpg" target="_blank"><img src="http://i1177.photobucket.com/albums/x359/rarce32/My%20Reefing%20Journey/IMG_1474.jpg" border="0" alt="Start of the Canopy Build 05/14/11"></a>

<a href="http://s1177.photobucket.com/albums/x359/rarce32/My%20Reefing%20Journey/?action=view&current=IMG_1476.jpg" target="_blank"><img src="http://i1177.photobucket.com/albums/x359/rarce32/My%20Reefing%20Journey/IMG_1476.jpg" border="0" alt="Photobucket"></a>

<a href="http://s1177.photobucket.com/albums/x359/rarce32/My%20Reefing%20Journey/?action=view&current=IMG_1477.jpg" target="_blank"><img src="http://i1177.photobucket.com/albums/x359/rarce32/My%20Reefing%20Journey/IMG_1477.jpg" border="0" alt="Photobucket"></a>

<a href="http://s1177.photobucket.com/albums/x359/rarce32/My%20Reefing%20Journey/?action=view&current=IMG_1493.jpg" target="_blank"><img src="http://i1177.photobucket.com/albums/x359/rarce32/My%20Reefing%20Journey/IMG_1493.jpg" border="0" alt="2nd Day of Canopy Build 05/15/11"></a>

<a href="http://s1177.photobucket.com/albums/x359/rarce32/My%20Reefing%20Journey/?action=view&current=IMG_1500.jpg" target="_blank"><img src="http://i1177.photobucket.com/albums/x359/rarce32/My%20Reefing%20Journey/IMG_1500.jpg" border="0" alt="Photobucket"></a>

<a href="http://s1177.photobucket.com/albums/x359/rarce32/My%20Reefing%20Journey/?action=view&current=IMG_1496.jpg" target="_blank"><img src="http://i1177.photobucket.com/albums/x359/rarce32/My%20Reefing%20Journey/IMG_1496.jpg" border="0" alt="Photobucket"></a>

<a href="http://s1177.photobucket.com/albums/x359/rarce32/My%20Reefing%20Journey/?action=view&current=IMG_1514.jpg" target="_blank"><img src="http://i1177.photobucket.com/albums/x359/rarce32/My%20Reefing%20Journey/IMG_1514.jpg" border="0" alt="Photobucket"></a>
 
Thanks for the kind words Sawdust. I think I measured more like 4 times and cut once.....:lmao:

But so far, everything is coming out nicely. I'm now working on putting the draw slides and a tray in the canopy that the lights will be installed on. The slides I bought have a double action slide. This way I will be able to push the light tray back to give me more room while working in the tank and at the same time being able to still have the tank lit up. I will also be able to pull the tray out to the front so changing bulbs will be easier.
 
I've always heard that poplar doesn't really take stain well because of it's natural pigments... apparently this is not the case. It looks really good.
 
Wow that stand is absolutely incredible. I envy the work of some of you handy folks. I can't wait to see what the canopy looks like.
 
Back
Top