Taqpol's 220 gallon custom Miracles tank!

Lighting Update

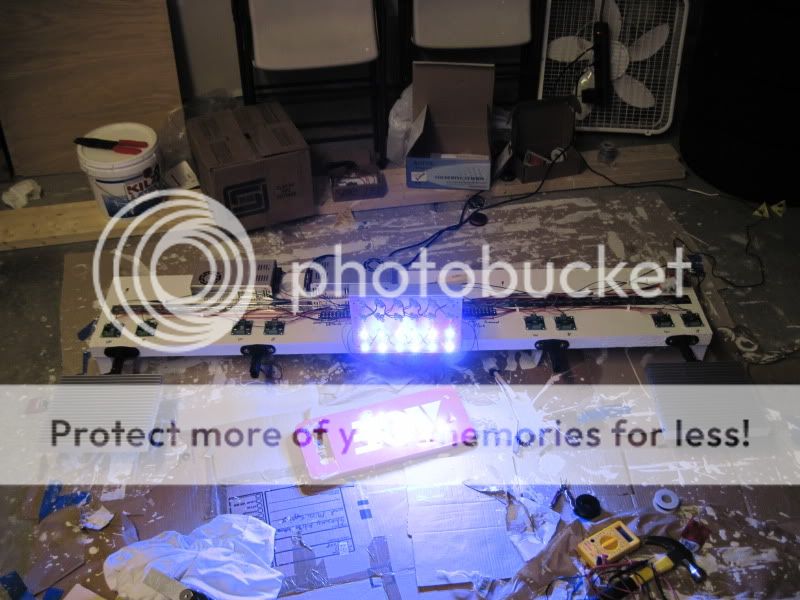
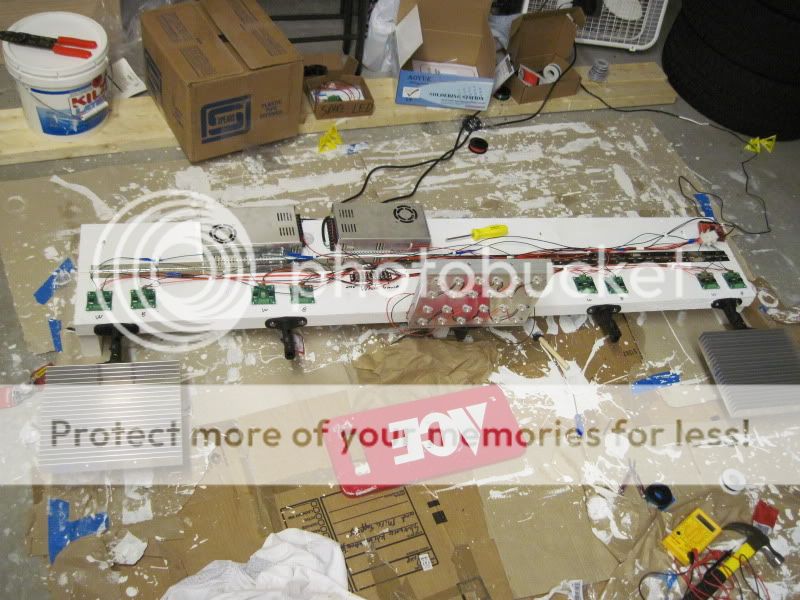
I still have a little more work to do and some testing, but I hope to get it hung over the tank tomorrow. (Sorry for the mess in these pictures...)
IMG_1320.jpg


IMG_1337.jpg


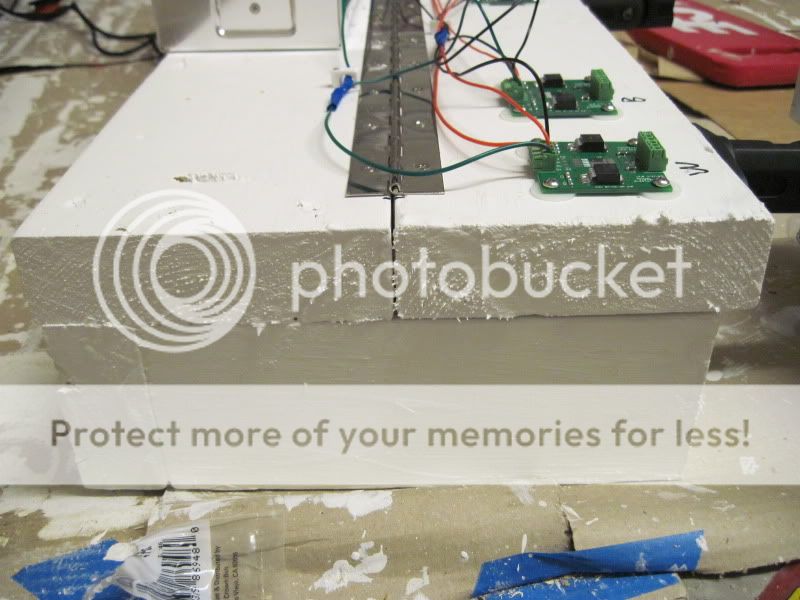
The frame is made entirely out of 2x4's and 2x6's joined together with glue and pocket hole screws. The part on the back is going to screw directly into the five wall studs behind and twelve inches above the tank. The piano hinges allow me to flip the front part up and against the wall in case I really need to get into the tank to do some maintenance. The great part about this design is when I finally get around to building a canopy for my tank (more like the shell of a canopy) it will slide onto the tank and over the light fixture, completely covering it from view.

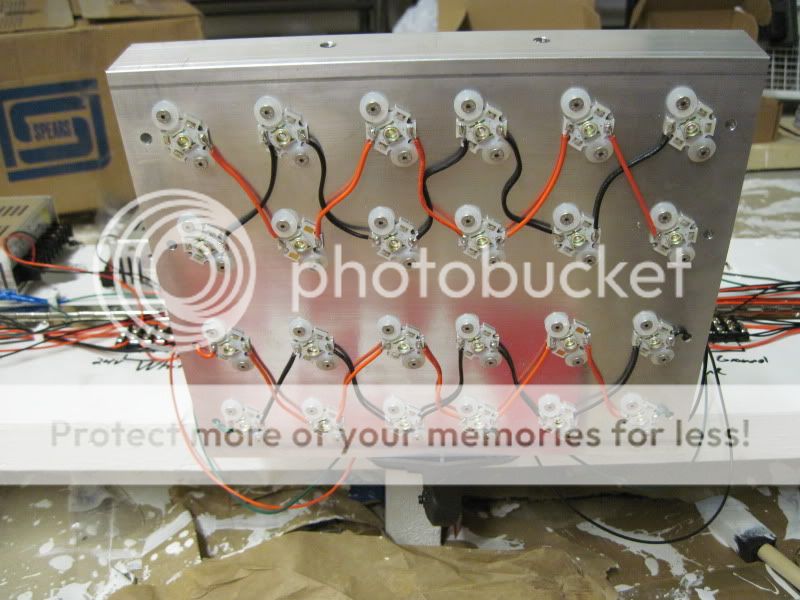
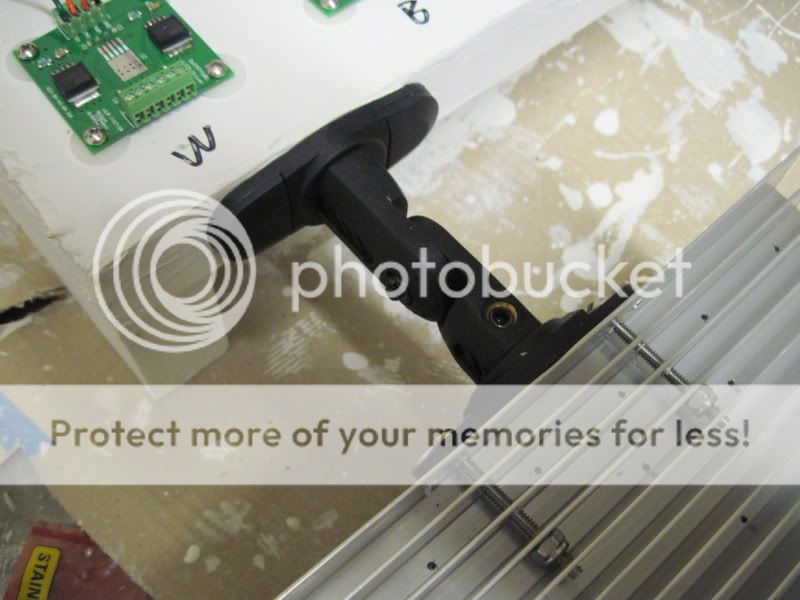
All five heatsinks are mounted to universal omni-directional speaker mounts I found at a local radio shack. This will allow me to rotate or angle the LED fixtures independently and at any angle I choose, so that I can really play with the directionality of light given to us by LEDs. I know for a fact I will be angling the two exterior fixtures towards the center of the tank to maximize their coverage.

Coincidentally, two 2x6's plus the length of the speaker mount was the exact distance from my wall that i needed to center the fixtures over the tank.
IMG_1336.jpg


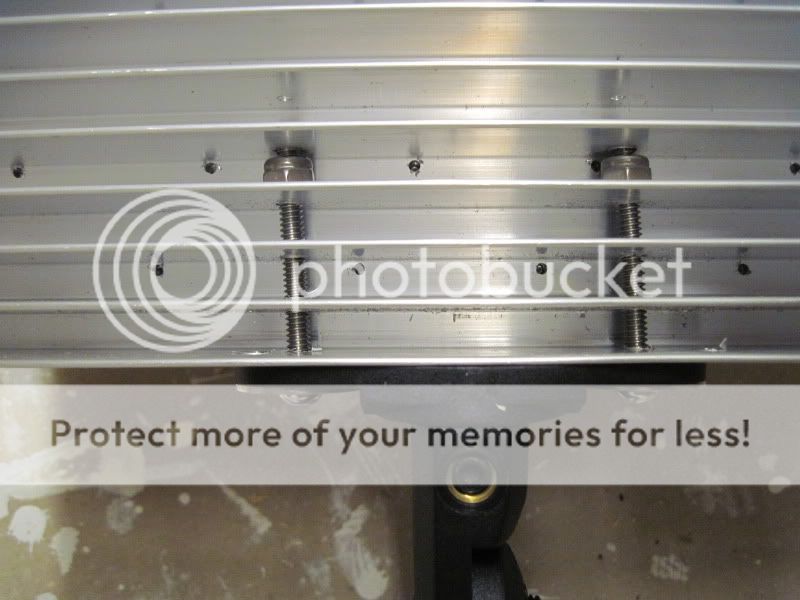
2" stainless steel machine screws coupled with nylon locking nuts inserted through holes drilled in the fins hold the fixtures to the speaker mounts. I did all these holes freehand (no drill press...) so please excuse the catty wompus screw in this picture. The other fixtures are much better.
IMG_1335.jpg


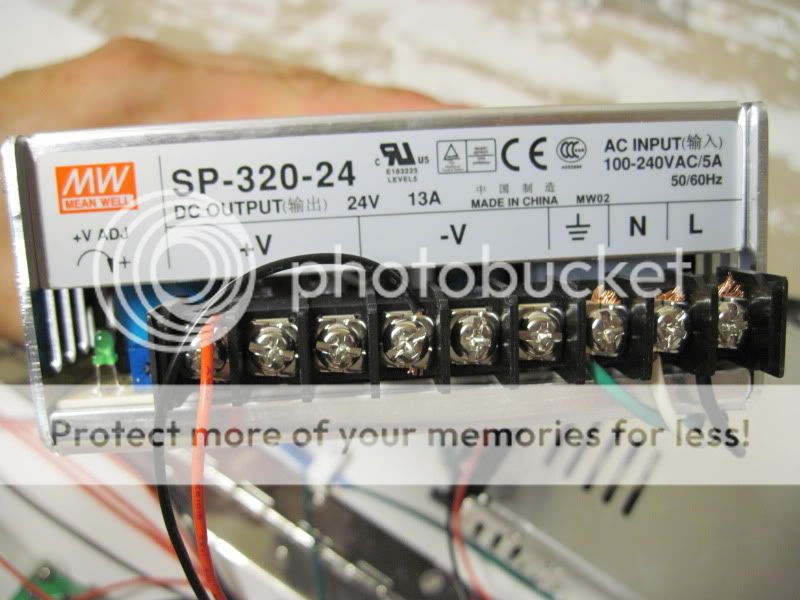
Meanwell SP-320-24 with built in PFC protection.
IMG_1327.jpg


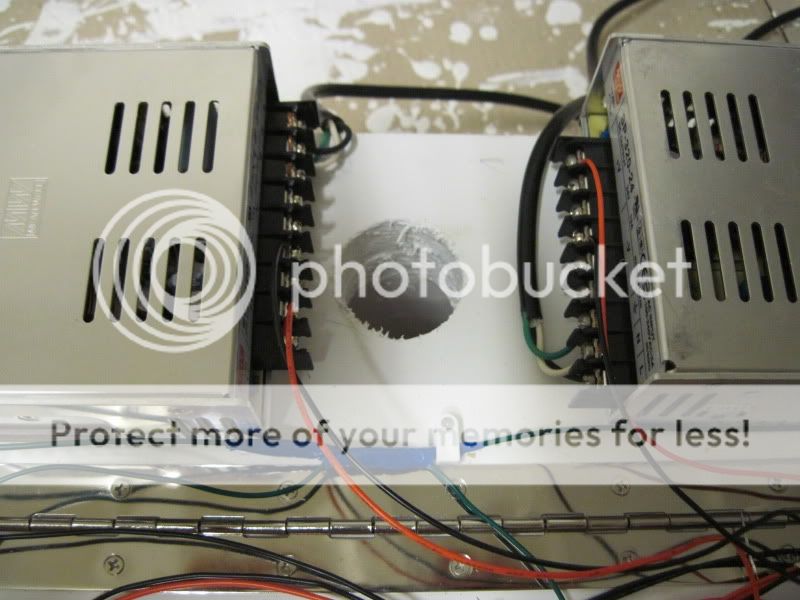
Hole drilled though the back 2x6 so that the power supply power cords can drop straight through to the dedicated 20A circuit underneath my main tank.
IMG_1325.jpg


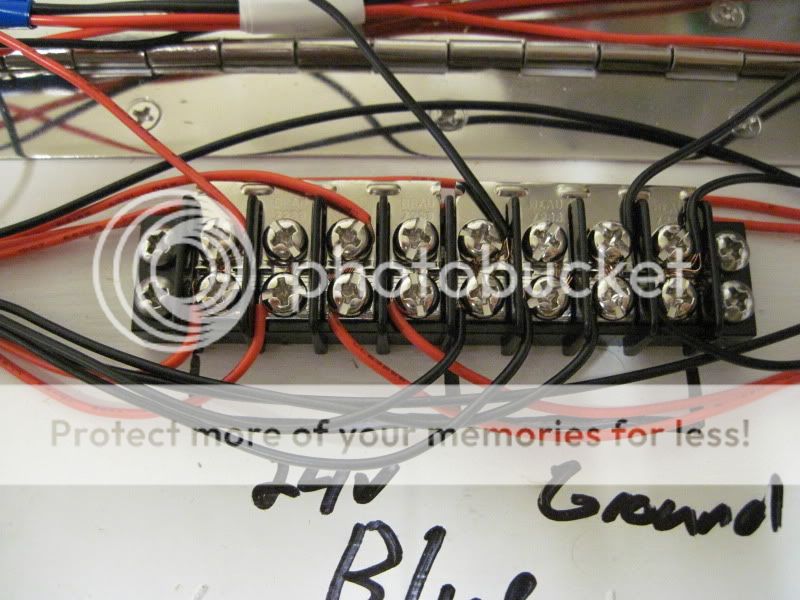
Barrier strips allow me to connect the multiple 24v supplies and Grounds from all ten drivers to a single wire going back to the power supply. I have two strips, one for the blues and one for the whites, divided evenly between 24v from the two different power supplies and the grounds for the individual power supplies.
IMG_1329.jpg


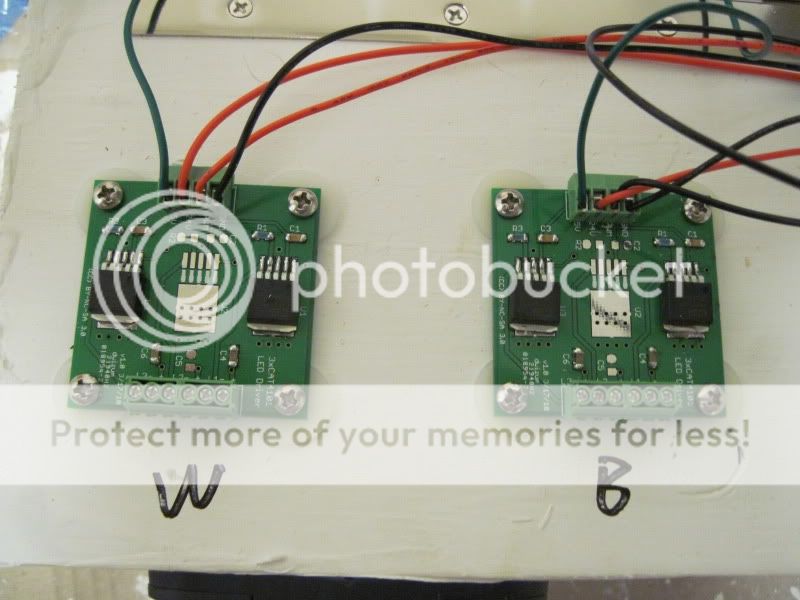
DIY drivers were located on the mobile 2x6 directly in front of their respective LED fixtures.
IMG_1324.jpg


Since I was lucky enough to have access to my father's CNC machine for pre drilling and tapping, I used Arctic Silver thermal paste and screws instead of thermal epoxy this time around. Those are #4-40 stainless steel 1/4" screws with a hex top and nylon washers holding the stars to the pre polished heatsinks.
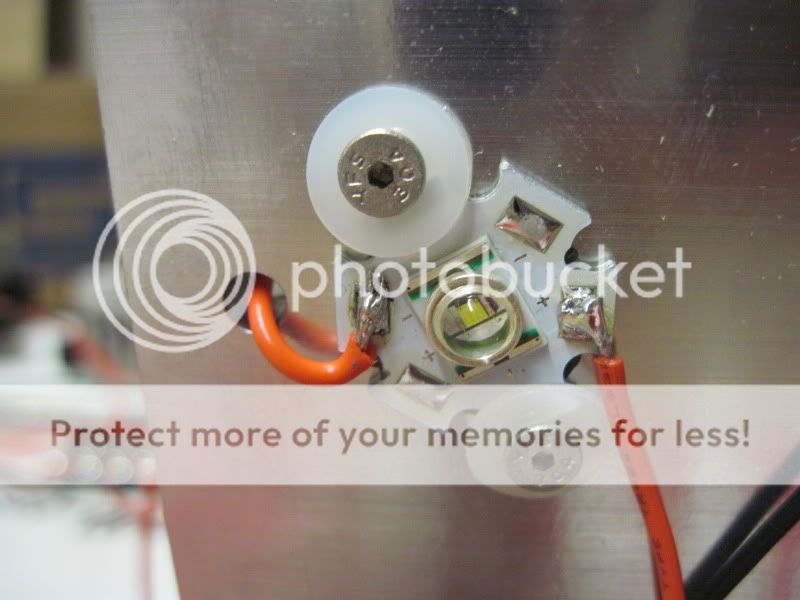
IMG_1323.jpg


A finished fixture.
IMG_1321.jpg
 
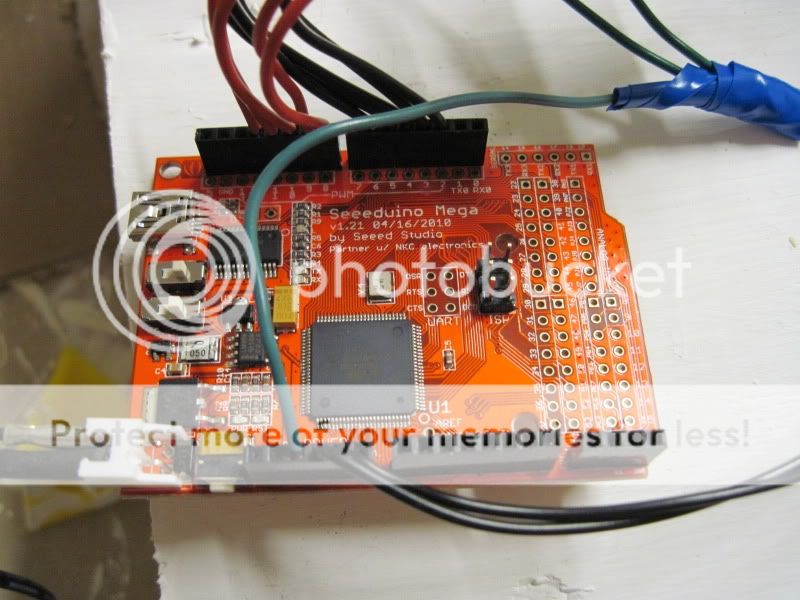
The 5v source for the CAT4101 driver as well as all ten 5v PWM signals are controlled by a Seeeduino Mega.
IMG_1331.jpg


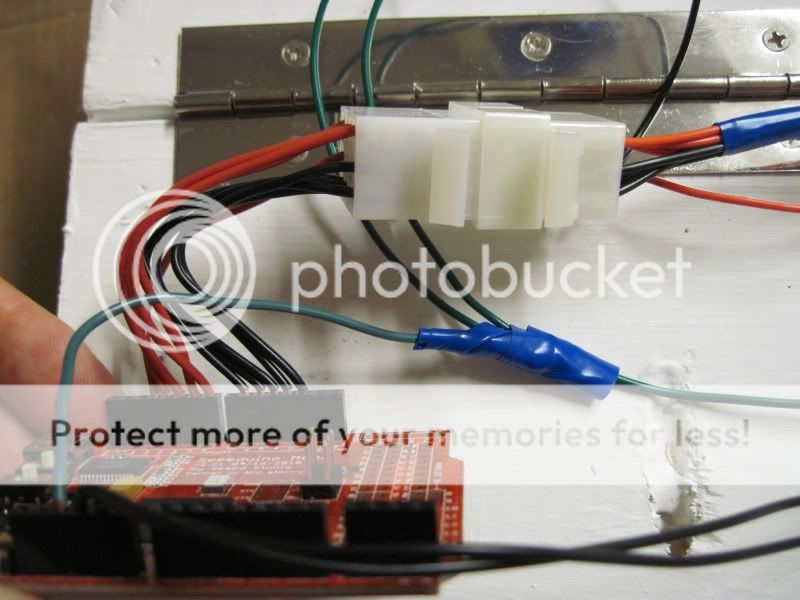
For simplicities sake I am only going to control the blues and the whites individually for awhile, but the overarching goal is to control all ten channels sperately and have a sunrise/sunset the proceedes east to west across my tank. Here is the wiring harness i constructed using a 12 pin molex connector to keep all the various PWM cables straight.
IMG_1333.jpg


Previously i just used the 5v out on the Arduino plugged into the 5v and PWM ports to do all my testing, but now i had to actually figure out how to program the Arduino and use the PWM signals. Good thing the programming of this beast is extremely well documented.

Here is the code I uploaded to the Arduino that is a simple "All lights on full blast":
Code:
int led1Pin = 2;
int led2Pin = 3;
int led3Pin = 4;
int led4Pin = 5;    
int led5Pin = 6;
int led6Pin = 8;
int led7Pin = 9;
int led8Pin = 10;
int led9Pin = 11;
int led10Pin = 12;

void setup(){}
void loop(){ 
  analogWrite(led1Pin, 255);  
  analogWrite(led2Pin, 255); 
  analogWrite(led3Pin, 255); 
  analogWrite(led4Pin, 255); 
  analogWrite(led5Pin, 255);
  analogWrite(led6Pin, 255);
  analogWrite(led7Pin, 255); 
  analogWrite(led8Pin, 255); 
  analogWrite(led9Pin, 255); 
  analogWrite(led10Pin, 255); 
}

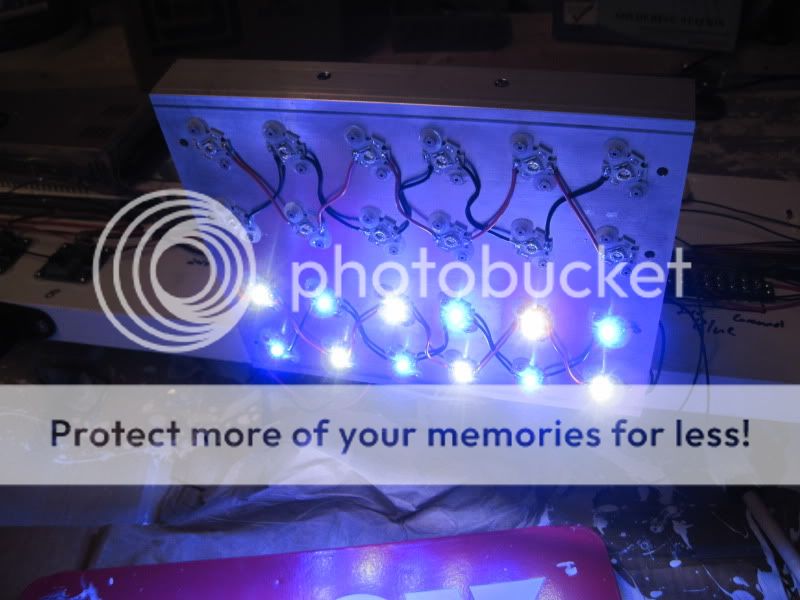
And voila!
IMG_1340.jpg


Can you see the single Neutral White in this set of twelve LEDs? Probably not with this point and shoot camera, but once I get my SLR back I'll try and take a few more true color picture comparisons for everyone.
IMG_1338.jpg


Now all I need to do is finish wiring the last four fixtures, mount this beast to my wall, and hope everything still works!

For more details on whats going on behind the scene, go ahead and check out my DIY LED thread.
 
Your Dad has a CNC machine? Now I'm freakin' jealous! :D Awesome job on the fixture Alex. Looks great. :)

Technically its his works CNC machine, but he did tell me he could offer its services, for a nominal fee of course. Now that the hard part is done for the heat sinks (programming where the holes need to be) I could pop out a bunch more of those very easily if i ever needed to expand.
 
Are you worried about any of those solder points getting exposed to saltwater? Have you thought about mounting a pane of glass underneath each panel? Just thinking out loud here... this is way beyond my skill set. :lol:
 
Looks great Alex. Do you have any insight into turning the PWM signals into 0-10V output? I've got the ELN-60-48D drivers, as at the time of purchase I was content to just upgrade my controller to something that provided the 0-10V output, but I may reconsider that if there's a solid DIY solution.
 
Are you worried about any of those solder points getting exposed to saltwater? Have you thought about mounting a pane of glass underneath each panel? Just thinking out loud here... this is way beyond my skill set. :lol:
I've seen your skill set, with a little reading you could make an LED fixture that looked professional! The fixtures are going to be 12" over the tank, about 14" from the water, but I still will need some type of splash shield. I plan on just getting a sheet of 1/4" acrylic, cutting panes that are slightly larger then the heatsink footprint, and screwing them on with some self tapping stainless screws. Not only will this protect the wires and solder joints, it will also hold the optics on tight. Thats actually all I'm waiting on now, once I decide the combination of optics that gives me the best coverage/PAR I will mount the splash shields.

Looks great Alex. Do you have any insight into turning the PWM signals into 0-10V output? I've got the ELN-60-48D drivers, as at the time of purchase I was content to just upgrade my controller to something that provided the 0-10V output, but I may reconsider that if there's a solid DIY solution.
Funny that you mention it, Der Wille Zur Macht made a "shield" (something that mounts to an Arduino) that is designed to convert the Arduino's 5v PWM to a 10v PWM just for dimming ELN Meanwells. Apparently it works pretty slick and would give you more options then straight analog dimming, but I would personally just go with the APEX in your situation. The "D" type meanwells actually have a lower cutoff then the "P" type, so you would get better dimming using an analog source.
 
I've seen your skill set, with a little reading you could make an LED fixture that looked professional! The fixtures are going to be 12" over the tank, about 14" from the water, but I still will need some type of splash shield. I plan on just getting a sheet of 1/4" acrylic, cutting panes that are slightly larger then the heatsink footprint, and screwing them on with some self tapping stainless screws. Not only will this protect the wires and solder joints, it will also hold the optics on tight. Thats actually all I'm waiting on now, once I decide the combination of optics that gives me the best coverage/PAR I will mount the splash shields.


I'm considering perhaps building some moonlights in the future but I need to ramp up my learning curve first. Good thoughts on the acrylic shields. I thought you probably had thought that one through already. ;)
 
For those of you wondering, my LEDs are done and hung over the tank! I like the color, but with both channels on full power it is EXTREMELY bright. I have borrowed a PAR meter and I plan on documenting this build just as I did my prototype, but I'm actually going to wait on taking pictures until a few more pieces fall into place. I need:

-Black background pieces

-Finish aquascape and mount corals (so I can show off a few coral colors)

-Finalize some of my Arduino programming so i can easily switch between channels

-And finish my plumbing manifold so that I can run a carbon reactor to polish the water for the "maximal" PAR readings

I actually plan on having all of the above done by Monday, which is good because I start my grad school classes on Monday the 30th and have orientations and meetings most of next week....
 
I think Dejavu will be pretty proud of me since he inspired me to do this, but I have also added a potential nipper to my system!

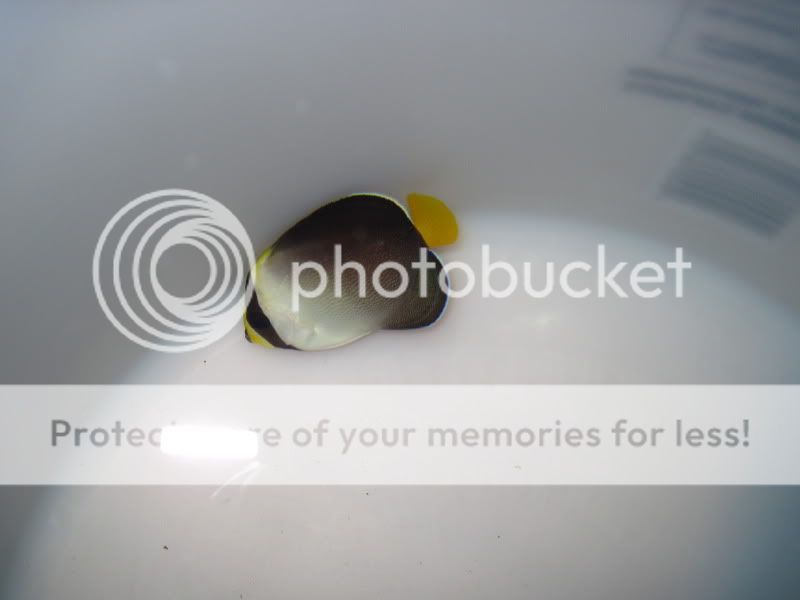
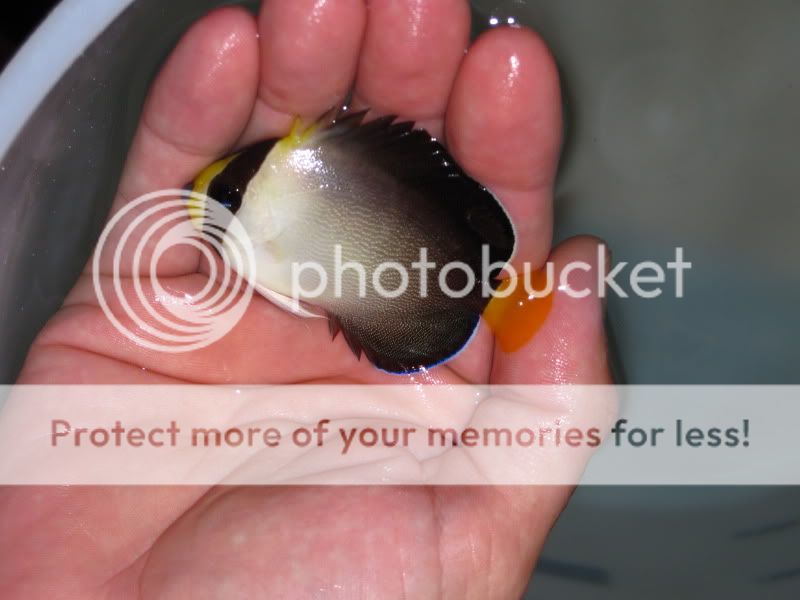
Chaetodontoplus mesoleucus AKA Vermiculated/Singapore Angelfish

IMG_1360.jpg


IMG_1364.jpg


I have been reading about this fish for awhile as I think it is one of the prettier Chaetodontoplus genera out there besides the $$$ blueline. They have a pretty poor track record in aquaria, but most of this is attributed to poor collection technique and the stress of shipping. For this alone I normally would have sworn them off, but the LFS I have only deals directly with local collectors (and they're prices show it...) and the little guy had been at their store for a little over four months. We'll see how he does!
 
Those are awesome little Angels. Just keep him well fed and it probably won't be a problem. :) Oh, and need pics of the lighting or I don't believe a word you are saying. :D
 
I've seen your skill set, with a little reading you could make an LED fixture that looked professional! The fixtures are going to be 12" over the tank, about 14" from the water, but I still will need some type of splash shield. I plan on just getting a sheet of 1/4" acrylic, cutting panes that are slightly larger then the heatsink footprint, and screwing them on with some self tapping stainless screws. Not only will this protect the wires and solder joints, it will also hold the optics on tight. Thats actually all I'm waiting on now, once I decide the combination of optics that gives me the best coverage/PAR I will mount the splash shields.


Funny that you mention it, Der Wille Zur Macht made a "shield" (something that mounts to an Arduino) that is designed to convert the Arduino's 5v PWM to a 10v PWM just for dimming ELN Meanwells. Apparently it works pretty slick and would give you more options then straight analog dimming, but I would personally just go with the APEX in your situation. The "D" type meanwells actually have a lower cutoff then the "P" type, so you would get better dimming using an analog source.

Alex,
Perhaps i can help you with this. I work with a lasercutting company all the time who i know could make a perfect splash shield or cover around everything and have individual holes for the lights. You would need to send me the drawings of the heat sink and where the holes are. But i think with a nice lasercut shield or cover, you would have one of the most professional looking LED fixtures out there. This company can also bend sheetmetal so we can have this cover wrap around the edges all the way around if you want

Let me know
Rob
 
Those are awesome little Angels. Just keep him well fed and it probably won't be a problem. :) Oh, and need pics of the lighting or I don't believe a word you are saying. :D

I like the way you think.
Soon enough! If I also get my SLR back on Monday you'll actually be able to see the color of the LEDs, not just a washed out blue mess.

Alex,
Perhaps i can help you with this. I work with a lasercutting company all the time who i know could make a perfect splash shield or cover around everything and have individual holes for the lights. You would need to send me the drawings of the heat sink and where the holes are. But i think with a nice lasercut shield or cover, you would have one of the most professional looking LED fixtures out there. This company can also bend sheetmetal so we can have this cover wrap around the edges all the way around if you want

Let me know
Rob
Thanks for the offer! That would look slick, very much like Sammy's LED fixture. Unfortunately I don't plan on gluing the optics down so I needed the splash guard to be able to press against them and hold them to the fixture. I don't want it to look horrible, but it doesn't have to look amazing since it will just be hidden behind a canopy anyways soon.
 
I think Dejavu will be pretty proud of me since he inspired me to do this, but I have also added a potential nipper to my system!

Chaetodontoplus mesoleucus AKA Vermiculated/Singapore Angelfish

IMG_1364.jpg

Beautiful! Will be watching to see how it does...

Oh and +1 on the pics of your LED fixture. :bounce3:
 
Soon enough! If I also get my SLR back on Monday you'll actually be able to see the color of the LEDs, not just a washed out blue mess.


Thanks for the offer! That would look slick, very much like Sammy's LED fixture. Unfortunately I don't plan on gluing the optics down so I needed the splash guard to be able to press against them and hold them to the fixture. I don't want it to look horrible, but it doesn't have to look amazing since it will just be hidden behind a canopy anyways soon.

i haven't seen sammys light. Do you have a pic or a link?
 
Beautiful! Will be watching to see how it does...

Oh and +1 on the pics of your LED fixture. :bounce3:
The LFS owner warned me he was a pretty reclusive fish, and in his little tank I only saw him three or four times before I decided to purchase him. All that being said, the little beggar has been out almost all day today just motoring around, even with my supposedly "peaceful" Chevron tang chasing him all over the tank!

i haven't seen sammys light. Do you have a pic or a link?
I'm sure Sammy won't mind, its an amazing DIY thread!
http://www.reefcentral.com/forums/showthread.php?t=1658978
 
I have LIGHT!
82310LightsAll.jpg


Quick Disclaimer!
All of these pictures were taken with my wife's P&S and my SLR is still in the shop. As such this does not represent the true color at all. That being said, I am very happy with adding two neutral whites per string of twelve cool whites and in the future I might have even gone more drastic with four or six neutral whites per twelve whites. The moment I get my SLR back I will try and take some true color photos.


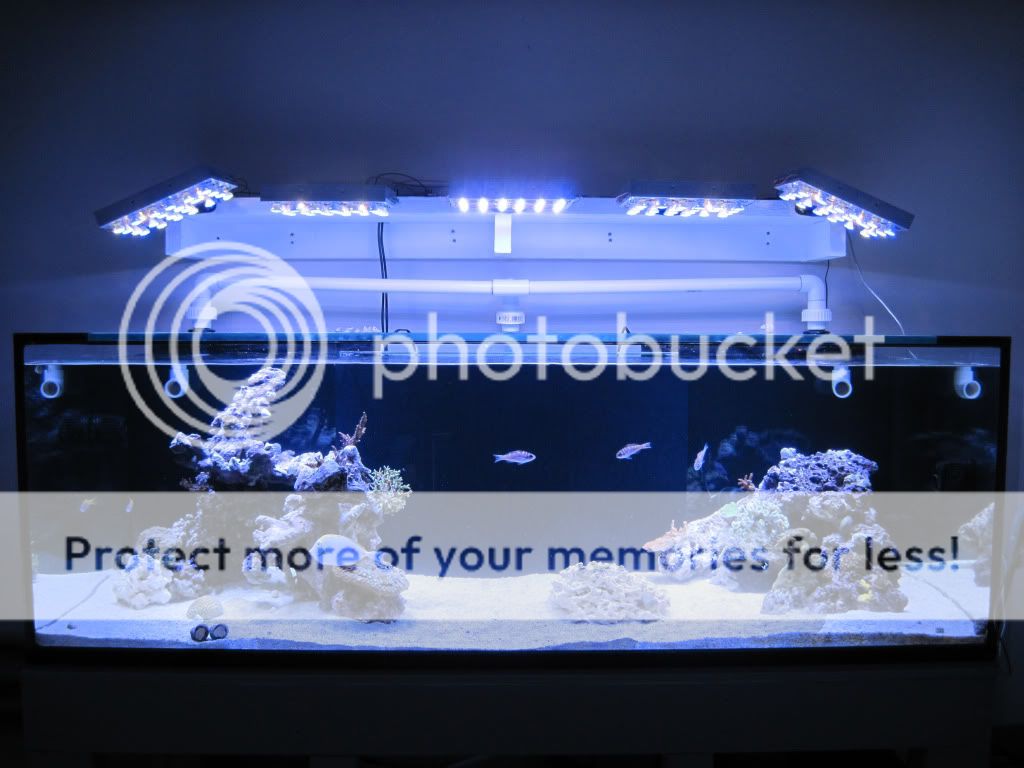
My fixture has five fixtures of 24 LEDs a piece, twelve blues and twelve whites, controlled independently for ten channels of LEDs. The entire thing will be controlled by an Arduino Mega to ramp up and ramp down the LEDs from the left of the tank to the right to simulate sunrise and sunset. All the fixtures are mounted 12.5" above the tank (14.5" above the water) and the four outside fixtures have 80 degree optics on the outside rows and 60 degree optics on the two inside rows of LEDs. The entire center fixture has no optics, this is because I did not plan to have many high light corals in the middle valley of the tank and also for better coverage. Coverage is definitely not an issue, but PAR down the middle is, so I'll probably pop on at least 80 degree optics in the near future.

Here are some pictures to show what the coverage looks like based on individual fixtures. The far left and far right are interesting because I have them angled into the tank.

Far Left
82310LightsMidLeft.jpg


Middle Left
82310LightsMidLeft.jpg


Center
82310LightsCenter.jpg


Middle Right
82310LightsMidRight.jpg


Far Right
82310LightsRight.jpg


Some people think you can use high power LEDS as moonlights. Maybe if you could just run a single one, but when I tried my smallest possible amount of the twelve center white LEDs with a PWM signal of 1 (out of 0-255) I thought it was still much too bright to be used as a moonlight.
82310LightsMoon.jpg


It is cool that the DIY drivers I used dim all the way down to 1 as it is a neat effect. Here are all the fixtures at 1 of 255.
82310LightsOne.jpg


And now what everyones been waiting for, the PAR numbers! Thanks go out to ReefEnabler for letting me borrow his meter!
82310LightsFTS.jpg


Numbers in red are the PAR numbers at the very top of the water. Numbers in yellow correspond to the reading taken directly in front of a coral or outcropping of rock. Numbers in black are on the sand bed. For reference, the tank is 220 gallons, 72"x30"x24" tall.

As you can see, the PAR is definitely lacking in the central area. I'll test again after I throw some optics on. Other than that PAR drops off significantly towards the front and back of the tank (it is 30" wide), but that shouldn't be too much of a problem since I don't have any rockwork there to grow corals on. Going by the rule of thumb of 200 PAR for SPS corals I should be able to grow them almost anywhere in the tank, including the sand bed in some areas.
 
Back
Top