crazzyreefer
New member
What started as a tragedy turned into a project to start my new 335 cube tank. Now I won't admit to starting the tragedy, but it sure made convincing my wife to get the new tank a lot easier. It is not quite my dream tank, but she would quite let me tear down the walls between the living room and bedroom. So I decided to settle while she was still saying yes.
Well some people wouldn't call it settling. We are replacing the tragic 140 gallon tank with the 335 which is 60 x 36 x 36.
So back to the tragedy that started it all . . . and for those of you who think I may have started it all to get the new tank, I wasn't even home when the major problems started. . .
So guys, believe it or not, I was very lucky. When I met my wife, she actually owned a 140 gallon reef tank on her own and was already addicted into the hobby. Now she loved fish, had too many for the size of tank, and corals were mostly softies. I figured it was a great start.
Now the TRAGEDY begins. . .
First the sump had a leak, so I had to tear down the filtration and we ran the tank sumpless with air stones for a month until it all came back together.
Next, we went on vacation and had a friend watch the tank. The day before we returned home, the temperature went way into the 100's and we had not put the air on before we left. When we arrived home the corals had started to melt. The cucumber died and combined with other things, toxins were being released. No amount of water changes were working, just about the time we were going to strip out the tank a seam released and in one day our decision was made, we needed a new tank. We lost $1,000's of dollars in corals and fish, but I told my wife that the only way to turn this mishap into a happy ending was to double the size of the next tank - and she bought it - I am a lucky man . . .
So hear is the plan that I put in motion while wearing a sad face as the tank was melting . . .
A large cube-like tank
20 foot wet neck auto flush protein skimmer for efficiency
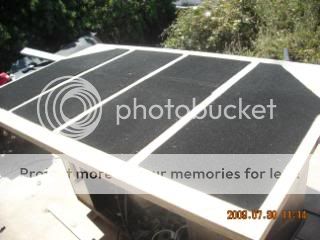
Surge installed in rafters of the roof to create a tidal wave effect
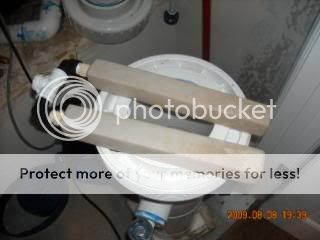
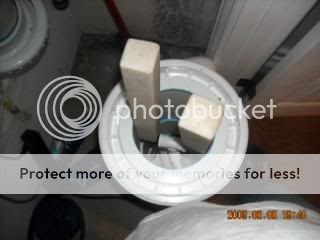
Cryptic zone for sponge filter
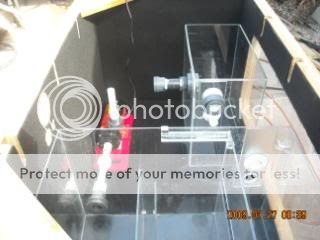
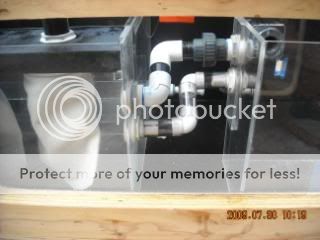
Large sump to handle over flow
Relay System running off a laptop
Reef Controller System for basic monitoring and logging
Commercial automated valves to control all aspects of the flow
200 gal fresh water storage tank, and 150 for salt with auto top off
Chiller to prevent melt downs - ooops
Calcium reactor
Kalk reactor
Phosphate reactor
Algae scrubber
Well that is what I came up with in my head - a little more sophisticated than what my wife had. But when you are going for it, and she says yes, you go for it.
And so it begins . . . .
Well some people wouldn't call it settling. We are replacing the tragic 140 gallon tank with the 335 which is 60 x 36 x 36.
So back to the tragedy that started it all . . . and for those of you who think I may have started it all to get the new tank, I wasn't even home when the major problems started. . .
So guys, believe it or not, I was very lucky. When I met my wife, she actually owned a 140 gallon reef tank on her own and was already addicted into the hobby. Now she loved fish, had too many for the size of tank, and corals were mostly softies. I figured it was a great start.
Now the TRAGEDY begins. . .
First the sump had a leak, so I had to tear down the filtration and we ran the tank sumpless with air stones for a month until it all came back together.
Next, we went on vacation and had a friend watch the tank. The day before we returned home, the temperature went way into the 100's and we had not put the air on before we left. When we arrived home the corals had started to melt. The cucumber died and combined with other things, toxins were being released. No amount of water changes were working, just about the time we were going to strip out the tank a seam released and in one day our decision was made, we needed a new tank. We lost $1,000's of dollars in corals and fish, but I told my wife that the only way to turn this mishap into a happy ending was to double the size of the next tank - and she bought it - I am a lucky man . . .
So hear is the plan that I put in motion while wearing a sad face as the tank was melting . . .
A large cube-like tank
20 foot wet neck auto flush protein skimmer for efficiency
Surge installed in rafters of the roof to create a tidal wave effect
Cryptic zone for sponge filter
Large sump to handle over flow
Relay System running off a laptop
Reef Controller System for basic monitoring and logging
Commercial automated valves to control all aspects of the flow
200 gal fresh water storage tank, and 150 for salt with auto top off
Chiller to prevent melt downs - ooops
Calcium reactor
Kalk reactor
Phosphate reactor
Algae scrubber
Well that is what I came up with in my head - a little more sophisticated than what my wife had. But when you are going for it, and she says yes, you go for it.
And so it begins . . . .


") i'll be following this
i'll be following this