240g Mixed Reef Tank Build

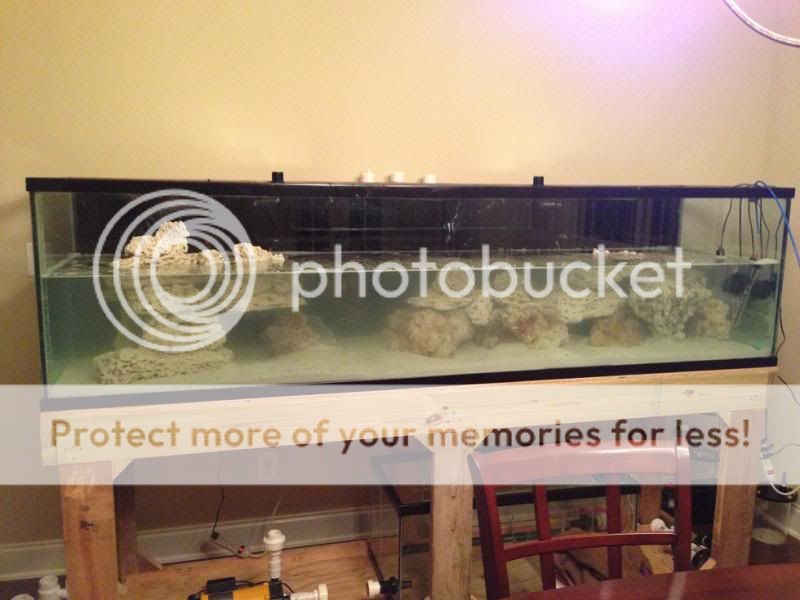
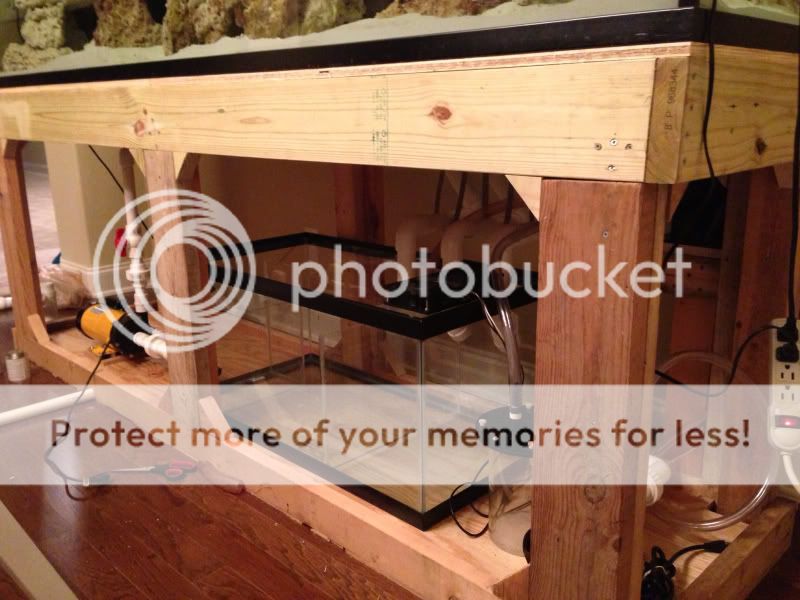
Here is the latest updates on the tank while I was home for the Easter holiday. I found a large mistake I made in building the stand and built the left side of the stand 1/4" taller than the right side, so the tank and water were not level. After alot of deliberation, I drained the 30 gallons used for a initial leak test and started to build up the right side of the stand to level it out. Since I am putting 3000lb on the stand, I was concerned with just using weak shims, so I went and bought a small sheet of 1/4" plywood.

I cut a 2" wide strip and 2 feet in length to place under the entire right end of the stand. Then I used a planar to plane off 1/32 of an inch while the board was still in tact in a 2" strip off the end. Then I could cut the board to get my 2" width and cut them into 6" strips to place under the stand all the way down until I get to the left side where I could get the thinnest pieces under the stand. I don't have any pictures of this process because I was working alone at 11pm at night not wanting to tae a break.

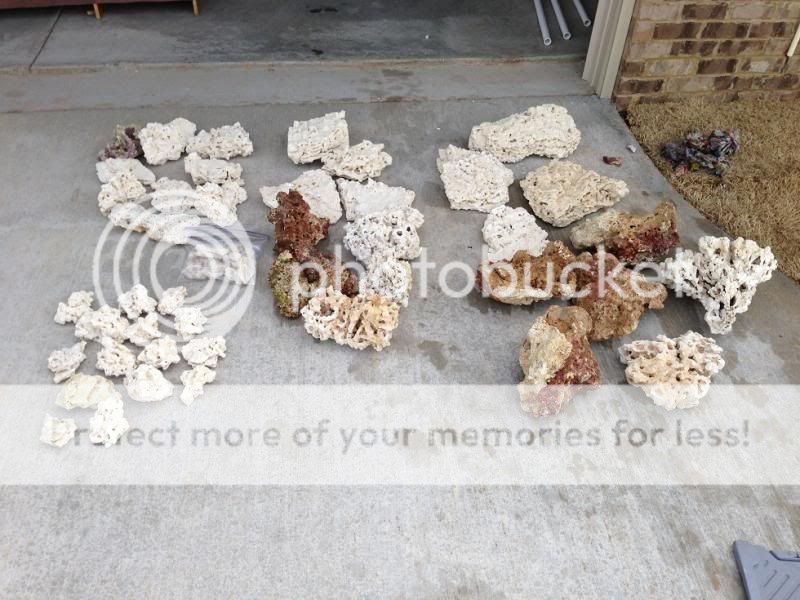
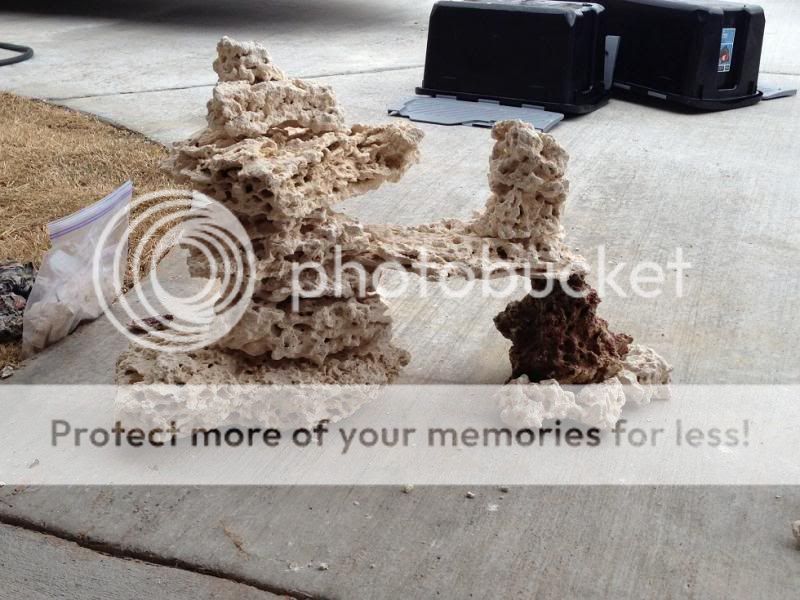
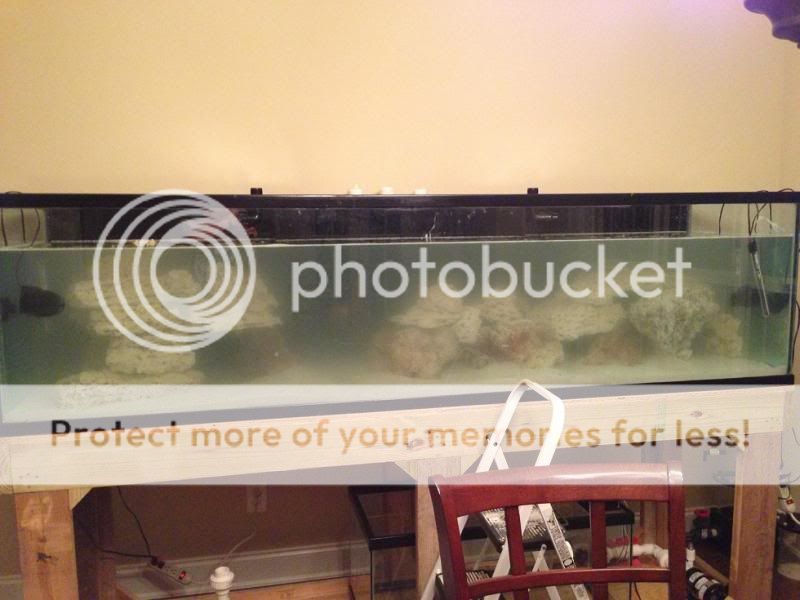
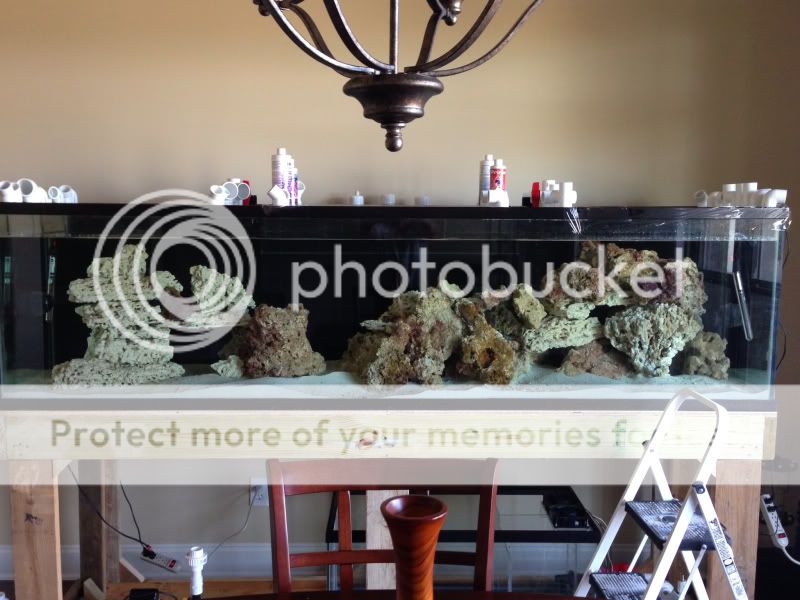
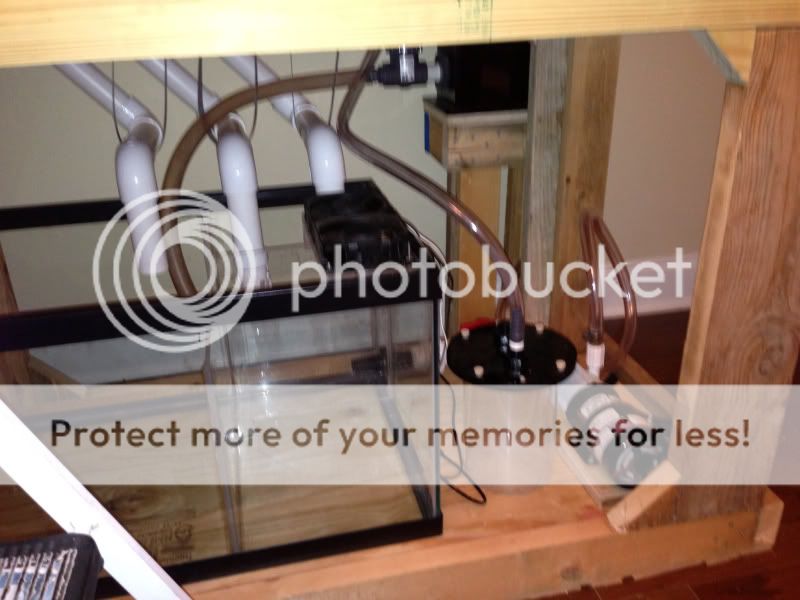
Well, I got the tank level and started the process of putting in the base rock, sand, RO water then mixed in some saltwater. I hope to get back in a week or so to straighten up the aquascaping to get it close to what I want. But it is cycling for now and I will finish my plumbing and aquascaping in a few weeks.
 
Here is a pic of the base rock. It includes 130 pounds of Reefrocks.net, 50 pounds of misc rock like texas holley and Pukani, and 75 pounds of other random rock. This is the dead base rock. I also brought in 20 pounds of live rock from my tank and 20 pounds of live rock from a tear-down tank from an individual in Birmingham , AL that was curing for 4 weeks in my garage. And I will be bringing in 100 pounds of live rock from my 55g and 20g system. So, alot of numbers there, but in the end I will have about 250 pounds in the DT, 75 pounds in the sump, and 50 pounds in my 40B refugium, giving me close to 400 pounds of rock. the bag in the middle holding rubble rock is a gallon size ziplock bag, so there are pretty good size pieces.

IMG_0569_zpsabb5e3a4.jpg


Here is a pic of the column I am setting up on one side of the DT.

IMG_0570_zps2ef1b692.jpg


Here is the water test with some RO water as I am mixing in saltwater to get up to 1.023 SG while it cycles.

IMG_0577_zps75942305.jpg


And here is the level I put the water until I can get all the plumbing donw to the sump.

IMG_0580_zpse1c6fc99.jpg
 
I have decided to change my setup for the sump, fuge, and frag tank. Originally I wanted to put a frag/growout section in the middle of my sump with a MH. Then plumb the fuge coming off of the return pump to a 20g refugium that will drain back into the sump. But with the $1 a gallon tank sale at Petco, I decided to redo my setup.

I am still using my 40B sump but I will load it with some extra live rock to keep my DT from having too much clutter.
Next, instead of just a 20g refugium, I am going to plumb a system in my laundry room with a 40B refugium that will drain down to a 40B frag tank, which will drain into the sump. This will also allow me to have a set-up out of view for my phytoplankton and different cultures. As well as dosing a few trace elements in the frag tank, which will then drain into the sump and up to the DT to dose the entire system. My normal dosing of calcium and alk (until I get a calcium reactor under the Stand), will still go into the sump and through the system.

I will have the Sump and Refugium on a reverse lighting cycle and have the frag tank on an overlap lighting cycle so I can have good viewing time in the afternoons and nights for fragging, showing, and selling. I am in the process of building the stand for this, so I will get some pictures of a dry setup on here later.

This is going to push my entire system to 360 gallons with about 300 true gallons of water. The solution to pollution is DILUTION!
 
Looks great. I love the left side squad ape. The right is nice but if it were my tank, I'd column one high point and atoll another. The way you have it seems a lil cluttered on that side. Plus with the left side having the archway the right looks a lil too similar. But that's just my opinion. Everything looks great though. Did you have rock left over?
I got 100lbs from reef rocks.net and had about a 100lbs of other rocks and it was too much for my 11' 325gal.
 
I love seein an old tank become new! It looks fantastic. Very well thought out.

To give it one extra bit of "new" you might wanna try, and this is just my opinion of course, a few pieces of black corners to cover the clear acrylic. I did it on mine a few days ago and it looks great. Take a look at my thread. Cannons 210g. Just a thought
 
Yes, very nice work on the black corner covers. I will keep this in mind if I don't do a matching stained wood cover. I was thinking of doing a quick removable corner cover so I can still run the magnet to clean it then place the corner back over it. But for the price I will probably do this anyways at least temporarily.
 
Yeah, we thought of doing the matching wood, but chose not to because of what you just mentioned, the glass cleaner. Velcro maybe. :idea:
 
Looks great. I love the left side squad ape. The right is nice but if it were my tank, I'd column one high point and atoll another. The way you have it seems a lil cluttered on that side. Plus with the left side having the archway the right looks a lil too similar. But that's just my opinion. Everything looks great though. Did you have rock left over?
I got 100lbs from reef rocks.net and had about a 100lbs of other rocks and it was too much for my 11' 325gal.

If you think this is cluttered, you should see it now with the 50 pounds of live rock in it on the right side. I definitely have some pieces in there that will be coming out and going into the sump when I get it cycled, then I can rockscape up the right side a little better.

I am still getting some ideas for that right side because I have about 5' of space in the tank and don't want to have 3 separate columns, so I need to see what I want to do on that right side. Can you explain what you are talking about with columning 1 high point and atoll another? I am sure that was a typo but I would like a good opinion or a quick sketch of what you are talking about.
 
Yeah, we thought of doing the matching wood, but chose not to because of what you just mentioned, the glass cleaner. Velcro maybe. :idea:

If I have enough space between the stand cover and tank, I will make the wood corner and put a large tab on top and a small tab on bottom on the back of the wood so it can slide up into the canopy, push it against the glass, then have it slide down into the stand. That way I can just lift it a little and pull it out of the bottom to slide it down and remove it.

Or I may can do magnets on the covers, then on the stand and canopy to have it stick to it when I place it up to the tank.
 
After 2 weeks away I finally got back up to Huntsville to get some more done on the tank. I walked in to some crystal clear water and the hope that I can keep it that way. The to-do list consisted of plumbing the overflows, plumb the skimmer, build a stand for the skimmer behind the tank, plumb the return lines, put in the first round of cleanup crew (thanks to Reefs2Go.com). Then I needed to build the saltwater mixing station and plumb the station through the house and under the stand. Then build my 40b refugium and 40b frag tank stack with phyto/brine/copepod culture station.

I was able to finish most of the plumbing with the exception of the return due to a conflict in how I want to plumb the return pump. And I didn't drill holes through the house walls to plumb the saltwater and refugium. I will update a few pictures in a little bit of the updated progress.
 
Here is the beautiful clean water.
f04d8a7231f434bc736fd218265dd6c5_zps96147f05.jpg


Pic of the 1.5" Bean Animal drains. I had to stagger the valves sideways so they didn't interfere with each other.
ba52648240b7775257f500b2f61087c9_zps15addae4.jpg


And a pic of the skimmer on the stand behind the tank. The outflow needed to be higher than the sump, so I had to build it up for free flowing drain. Good thing I took the width into account when I placed the tank 7" from the wall.
2700fbabb371ce154b957963762d48e3_zps944bf88c.jpg
 
And here is some additional random pictures of the plumbing. I will be filling all this area with the dosers, ATO, carbon reactor, GFO reactor, and UV Sterilizer. I have one dual reactor for carbon and GFO but I may have to split it since I will get about 300 gallons of water. And I plan on a Calcium Reactor one of these days.

016e014d266809e6b93d8a72665fc81c_zpsa68c97f4.jpg


da0f8c9739138ca0d8a224db4e753878_zps6643476e.jpg


87a7d867f771e916489a032ed0e586bf_zpsdbccf7ea.jpg


016e014d266809e6b93d8a72665fc81c_zpsa68c97f4.jpg


5ca6123a88a64089588ccdb46e7934df_zps013c2d0d.jpg
 
I plan to build a manifold for valves and quick connections of the UV Sterilizer, carbon reactor, GFO, refugium feed and future calcium reactor. I just can't decide if I want to feed all this off of my return pressure pump (1850 gph) which will take some away from my sump turnover or install one single 1000gph in sump pump which I already own to feed the manifold. This will also allow me to auto feed through my return pump if desired when away from home.
 
Nice... good progress... glad after your two weeks off it cleared out. See hands off approach works sometimes. LOL
 
I think this has really helped prevent working too fast, but now is almost crunch time. I have 2 weeks before I move so that is going to be a fun teardown and trip. I may make the 4 hour trip all by itself with the livestock and some live rock this week because I have a house sitter until we get home ot watch out for the fish. Then I actually have time to finish setting up my sump and the refugium room.
 
Here is an update on the saltwater mixing station. I didn't have a great setup to get my existing RODI water from the one barrel so I just decided to jack it up onto the stand with the water in it. I was able to rock it to one side and balance it on a pile of blocks, then use a motorcycle jack to raise up the other side, then rock it back and place a new block under it. SUCCESS! Oh, and the station is located directly by my Breaker Box, so I don't think that is quite up to code. :)

You can barely see the lines on the left side of the stand in the last picture that will eventually be routed into the back wall, through the laundry room, and through the wall under the stand. I have one line run for the freshwater top off and one line run for the saltwater changing. I hope to set it up in the future with a pump to remove water from the sump into a drain in the laundry room, then I can just open the valve and refill the saltwater with fresh water. I put the valves on the front in case I wanted to fill 5 gallon buckets or even sell a few gallons of rodi or saltwater.

I am going to have the RODI filter located in the laundry that is the room opposite of this wall and only route the RODI line through the wall to the float valve in the freshwater barrel on the right.

7d0df040f19cfc9cd935d9f026186e03_zps75690484.jpg


eff9085dc25ad57481e527cb32244579_zps41604eb7.jpg


2d2b90f2b7471af9ca9547ae567dfc03_zps2fc96204.jpg
 
And here is a picture of the Rack in the laundry room that will serve as my Refugium and Frag Tank. It will be plumbed from the sump (opposite of the wall on the left) so I will drill through this wall and up to the top tank on the left side. The top 40B is the refugium with 2 incandescent bulbs and will drain down into the bottom tank (drain on the right) where I will have a 40B as a frag tank with a 250w 20K Metal Halide HQI. Then it will drain out of the left side and return back to the sump.

The bottom rack will serve as a Phytoplankton Culture station as well as a location for a brind shrimp hatchery and copepod culture rack. I have an 8 way gang valve that will control 5 cultures of phyto (3 Nanochloropsus, 1 Tetraselmis, 1 Isocrysis), the single brine shrimp hatchery, and 5 gallon copepod culture tank.

60f0b575c96787b6fe21098a67afa5b5_zps15172606.jpg
 
Back
Top