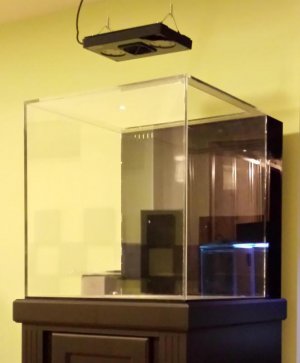
Acrylic fabrication questions? I can help!

Depends on how well you build it (edge prep, bonding technique, quality of vertical joints) and how many baffles you have & where. I personally don't build anything with walls less than 3/8" because the price difference is pretty negligible on a full sheet. 1/4" just doesn't give you much bonding area, why skimp, anything that holds water is a critical component.

You have to build it according to the worst case scenario. I always make sumps with enough excess capacity above operating level so that you can take the draw-down from the tank on a power outage + whatever your ATO reservoir holds. So this would take care of a situation where your ATO accidentally emptied out completely right after you filled it, and then you had a power outage. Then, the sump must hold that much water for a potentially extended period of time without blowing up.

IMO rimless can be done as long as your walls are 3/8" thick and you have baffles often enough such that there is no section that is longer than about 12-16". Bond the baffles in at the same time as the ends, not after. This allows you to use pins and get a strong (and structural) bond on both sides of the baffle. For baffles with a water height difference, I use 3/8" also, 1/4" for all others (like the 'up' baffles, etc).

If you do go with 1/4" all around, definitely need a euro. Again with the baffles adding strength, you can usually go with a perimeter only euro of say 2". Make sure you do 2" radius corners, this is the point where the stress gets focused. Also knock down **all** sharp edges with a razor blade (this also relieves stress focus points)
 
I am building a coast to coast overflow on the short end of my tank and want to make a lily pipe return out of acrylic. I picked up 1/2" IDx 3/4" OD tubing and bent the beginnings of the return but the radius of the bends is quite a bit larger than I would like.
My question is, "can I miter the tube for the 90 going over the edge of the aquarium?" That would allow me to keep the plumbing lower and closer to the aquarium. Being thick wall tube, there is quite a bit of surface area to solvent weld. My two concerns are the structural integrity of the joint. I'd hate to bump the pipe and break it off sending water everywhere. And two, will a bend that sharp drastically reduce the flow rate.
 
Anybody familiar with the use of clear pvc pipe? I got a few pieces of 6" clear pvc pipe and cut them to size to build some reactors out of it but I was wondering if it for one would bond to acrylic base plates and would I use weldon with it also.. It was free so I'm hoping it works lol..

I was thinking of getting the kits from avast for the base plates and fittings if it compatible.. Thanks
 
Better to bond PVC to PVC IMO, you can get gray flat sheets and then just use regular PVC solvent weld I think. I have tried welding PVC pipe to acrylic with WO16 or 3 or 4 and it bonds, but it's not a really strong bond.
 
OK thanks not sure if I want to go into that.. I have some acrylic tubes I will use instead. Maybe I'll experiment later with it.. I'm going to be making a calcium reactor and it will basically be under pressure so weak joints is not what I want =)..

Thanks for the info/contribution I've been going over the thread slowly and learning a lot from the various minds in this thread.
 
Anybody familiar with the use of clear pvc pipe? I got a few pieces of 6" clear pvc pipe and cut them to size to build some reactors out of it but I was wondering if it for one would bond to acrylic base plates and would I use weldon with it also.. It was free so I'm hoping it works lol..

I was thinking of getting the kits from avast for the base plates and fittings if it compatible.. Thanks
I have used weldon 40 two parts and it's nearly unbreakable. This is what I think GEO uses and a few other people that make reactors.

you should make a groove in the base so you can fill it with weldon 40.
 
My question is actually about polycarbonate, hopefully someone here will know. I got a poly sump with a tank and I need to raise one of the baffles that controls the skimmer height. I have a piece already cut that I need to bond to the old baffle. I was told by my local plastics dealer that I could only use a product made by 3M for about $100, a heat welding rod thingy or Weld-On #45. My question is if the weld-on 45 will be reef safe once cured? Hopefully someone who is familiar with Weld-On's products through acrylic work will know. Thanks.
 
Acrylic fabrication questions? I can help!

IMO go 1/2". Built several 3/8" ones for frag sale tanks but I do not recommend them for continuous use. Then I started making them 1//" and those are much sturdier.
 
Last edited:
I had my 24"x24"x24" tank built back in July, it's been in production since but also leaked twice now. It's made out of 3/8 thick acrylic and a top brace. I see a lot of bubbles in the seams and the overflow area is all black acrylic to hide all the piping, because of that the side is divided into 2 panels, clear acrylic about 19" deep then black acrylic for the rest of 5 inches.

It was leaking from the very back bottom corner almost within a week or so, it was a very slow leak but enough to get me scared so it was fixed by the builder to add more glue to the inside and outside of the corner. Fast forward few months and few nights ago I found a puddle of water on the floor, the same area but not the same spot was leaking - this time few inches higher and water was creeping out. When I stopped the pump and overflow water level dropped half, it stopped leaking.

I emptied the tank and the builder has it now, he told me he will reseal the tank. When he was removing the tank from the stand, he had to bang on the overflow area to get it separated from the base, the piece got separated from the seam! I always see some white stuff on the edge of all the seams from black acrylic but it's not salt as I can't wipe it. Believe it's probably just edges not sanded smoothly or bad joints?

Could the leakage because of how the overflow is designed at the back of the tank? The builder is very responsive but twice in few months got me worried.
 
Hard to imagine the design you are talking about, do you have any pictures? The way you describe it, I have red flags flying up left and right behind my head while reading this.

The facts though, at least as I see it

1) bubbles in the seam = poor edge prep and/or assembly technique (should be perfectly clear)
2) 2 types of acrylic jointed together may cause huge issues (could write several paragraphs, but need more info/pics before assuming)
3) If it leaked that soon, I'd get my money back and go elsewhere - honestly, whoever built it has no business building tanks, I don't care how responsive he is
4) I would have used 1/2" minimum for a 24" tall tank

But I'm a stickler...
 
Here's a pic of the tank, the back portion is black and that's where the overflow is. It's a lot of reflection off the back but you can see the vertical black edges running down with sort of white lines on it, those are the bubbles in the seam.
 

Attachments

  • tank.jpg
    tank.jpg
    35.1 KB · Views: 5
Last edited:
Ok, so this looks like a biocube type setup. Just so I know I'm seeing this right, it looks like the back panel is solid black. Then the filtration system is like a separate box that is bonded on to that?

If he was able to cause a seam separation just by banging on the tank, that is a seriously huge red flag. When properly bonded, the material should break before the seam should separate.

I the pic, I can see a whitish discoloration but hard to tell if that is flash or reflection, but it's long that seam on the back right, towards both the top and the bottom. Are those bubbles? I can see some along the left edge also.

These bubbles and easily broken joints are indicative of welding using only capillary action, and not using the pins method to allow for adequate soak time so that the panels fuse together properly for aquarium use.

Eurobrace is minimally adequate. Not wide enough around the entire perimeter, and the corner radius is too tight.

I would get my money back and walk away from this builder.
 
Yes, the look of it is similar to biocube, although the sump is in the cabinet so it's drilled at the bottom of the back black box so generally the black box is filled with water.

The whitish discoloration is the bubbles I'm referring to, yes they are on the left side too, as well as throughout all the seams.
 
Whoever made this doesn't know what they are doing. This tank is doomed. I now change my recommendation from walk away to run away, and then warn everyone you know not to buy from this guy.

...and don't feel like you are alone and the only one getting taken. I recently looked at a tank made by "the oldest tank manufacturer in the US", and a recognizable name-brand, which had bubbles in the seam that were downright embarrassing. When I contacted the company and sent them pictures they gave me answers that indicated they were lying, took shortcuts, and accepted flaws instead of demanding perfection.

I'm not saying that every tank should be perfect, but don't feed me a line of BS..
 
Can the leak be caused by not perfectly level stand? The stand has a flat surface for the tank to sit on, but the floor is not 100% level. I tried levelling it the best I could but it's not 100% level.
 
ideally, you want the tank 100% in contact with the stand and the surface to be 100% flat and supported. If the overall tank is not 100% level, this doesn't help an already bad situation. But if you got it close, a properly built tank should be fine. If we're talking 1/4" off over 24", that might cause some stress.
 
I'll double check the stand surface where the tank sits, pretty sure it's flat but then it has a moulding around the perimeter of the cabinet so I can't make sure by putting a piece of paper through. I know the floor is not levelled for sure but I have used plastic shim to level best I could. Should I be using a styrofoam or rigid foam (pink) to separate the tank and stand?
 
Back
Top