parrotchute
New member
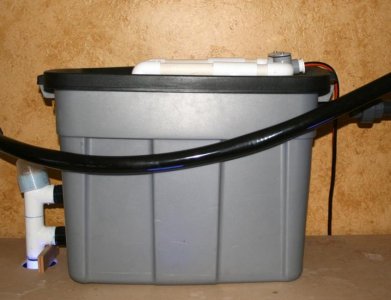
It's hard to tell from the picture, but it goes around because there's no space the other way - I don't want it protruding from the back of the tank.
Here's a question - what are your thoughts on supplemental filtration? What sort of filtration goes best to supplement or enhance turf scrubbing? I was thinking about experimenting with biopellets, but I think it may hinder the operation of the ATS.
") )
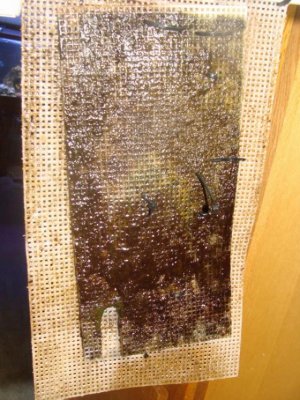
)Hey guys, thought I'd throw up a pic of my new scrubber. The screen is 10" x 14"; using some grow LEDs from eshine, we'll see how much growth I get. I'll keep you updated...


Alaska, how are you connecting yours? I put a union on mine, we'll see if that ends up being easy or not..
It's called a true union.
Thanks! Nope, I came up with the specs and a place I found online called TAP plastics made it for me. Not much noise from the drain hole, just a waterfall like sound. I could probably make it totally silent if I took some flex pvc and attached it to the bulkhead, and fed it to just underwater. The noise isn't bothering me, though, so I probably won't bother.
I am thinking about getting another screen and securing it to the current one, so that they're sandwiched together to get a more 3d growing surface. Any thoughts?
Alex
Any comments on the roughness question I asked?
I am intrigued by this idea, as I am struggling with phosphates and nitrates....I have a not great skimmer and this seems a great alternative.
Has anyone ever tried simply "floating" this canvas sheet in a sump? Or does it sink? I realize this would only be a 1 sided setup, but then I could use the existing flow through my sump and the existing lighting I have to grow cheato.
The reason I am asking is because I have limited clearance space in my sump and would love to not have to build a contraption. Lighting fixtures are friggin expensive in Canada($20+ for the reflector ones), I would prefer to not spend yet another hundred bucks on equipment.
Thanks.


Excellent! Is that using a roto-zip?
Same concept works with a router, except that PVC is supposedly hard on blades.
")