Algae Scrubber Basics

I did some testing this week. I allowed an extra 5-6 days of growth and my results are interesting.

Harvest amount was it's normal 2 Cups, however the algae was darker and denser. My screen does not grow hair algae but a very firm gelatin like algae.

During this time I also feed very heavily... Like 3 big meals a day. Simulating a vacation. Just top off water and food. I know every time you ask some to feed your tank it always gets more then what you tell them to feed...

Example of a days feeding:

Morning - 2 frozen spirulina brine shrimp just thawed in tank water
Two hunks of shrimp for each anemone.

Noon - tetra bits

Night - good squirt of plankton another chuck of shrimp for the BTA and a cube mysis.

FYI - after 6 days feeding like this I still saw no nitrates or phosphates... using Salifert tests.

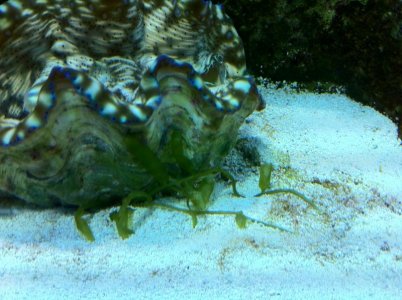
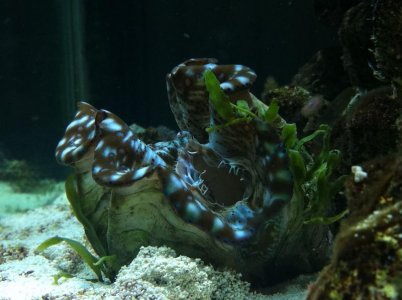
Ps. I got a clam!! Last week! :D
ImageUploadedByTapatalk1300490883.844310.jpg
 
Some additional thoughts...

I am home the entire week.
Tested frequently...
Monitored the tank even more frequently...

My anemones couldn't even keep up with this feeding schedule, and a lot of the time dropped their chunk of shrimp allowing it to become food for my fire shrimp, snails and sand sea star.
 
I did some testing this week. I allowed an extra 5-6 days of growth and my results are interesting.

Harvest amount was it's normal 2 Cups, however the algae was darker and denser. My screen does not grow hair algae but a very firm gelatin like algae.

During this time I also feed very heavily... Like 3 big meals a day. Simulating a vacation. Just top off water and food. I know every time you ask some to feed your tank it always gets more then what you tell them to feed...

Example of a days feeding:

Morning - 2 frozen spirulina brine shrimp just thawed in tank water
Two hunks of shrimp for each anemone.

Noon - tetra bits

Night - good squirt of plankton another chuck of shrimp for the BTA and a cube mysis.

FYI - after 6 days feeding like this I still saw no nitrates or phosphates... using Salifert tests.

Ps. I got a clam!! Last week! :D
View attachment 142568

Nice clam. I couldn't help but notice the clumped and maroon colored sand. Are you currently battling cyano?
 
Here is the journal for the tank I keep the scrubber on. I realized just today that I hadn't updated it in about 8 months. So I added about 5 posts to bring it up to speed. I have a more detailed thread on Aq. Advice that bridges the gap, and also my ATS build thread is on there. I should port it over to here too but I think I'll just leave it as one thread.

http://www.reefcentral.com/forums/showthread.php?t=1782070
 
couple of questions:

I'm thinking about implementing an ATS in my future build, going back to an earlier question I posted, have you all found for the trough design, what the optimal angle/flow rate is?

Also, I will be using the BeanAnimal overflow system, and I was wondering if it's best to plumb the ATS directly to the overflow, or to plum a line off of the return pump. I wasn't sure if plumbing off of the overflow pipes would affect the syphon/open channel and the noise level of the system. Seemed like it would be better to plumb a line off of the return pump with a valve to dial in the correct amount of flow.

Thoughts?
Thanks!
 
couple of questions:


Also, I will be using the BeanAnimal overflow system, and I was wondering if it's best to plumb the ATS directly to the overflow,
i use a beananimal overflow too, the nice thing about it is you can adjust the drain GPH that goes to your ATS w/o the use of a pump.
 
couple of questions:

I'm thinking about implementing an ATS in my future build, going back to an earlier question I posted, have you all found for the trough design, what the optimal angle/flow rate is?

Also, I will be using the BeanAnimal overflow system, and I was wondering if it's best to plumb the ATS directly to the overflow, or to plum a line off of the return pump. I wasn't sure if plumbing off of the overflow pipes would affect the syphon/open channel and the noise level of the system. Seemed like it would be better to plumb a line off of the return pump with a valve to dial in the correct amount of flow.

Thoughts?
Thanks!

I don't believe anyone has done/posted/tested enough information about building a trough design to give you hard facts, but here is my research has shown... We do know that it will need to be treated like a horizontal scrubber... so in square inches it needs to be 4x larger then that of a double sided vertical scrubber. As for angle I think anything under 45 degrees will work for you. With IMO 10 - 15 degrees being your sweet spot. Give it decent flow, it should fill the trough at least 1/4" to 1/2" with water, although I have seen designs that have almost 1" of water (deeper the water the stronger the light source will need to be) For design ideas I would have a close look at the couple trough designs that have been posted in this thread thus far... It may take a little time to find if someone has time to dig them up... Paul's 40 year old take uses a trough design... However it is not his only source of filtration... With a trough design you will mostly have trouble with getting a square inches needed for your tank size. (Thus needs another type of filtration) During the start of my research for my algae scrubber design, I too wanted to build a trough design, but after lots of research I resolved to the fact that building a double sided vertical screen would not only perform better water filtration then my trough design, but the vertical design was going to be easier to build!

As for overflow fed or other... I see no real reason not to use your overflow... I don't see why your BeanAnimal overflow should create any problems for the scrubber. I say send the save energy, you already have flowing water use it. One less pump to fail, to maintain, to power, to buy... You get it... :D
:beer:
 
I appreciate the quick response, my tank will only be 40 gallons, so the scrubber won't be TOO huge, I'll mull it over and i'm all for trial and error to figure out what will work, I will post my results when I begin the project!
 
Nice clam. I couldn't help but notice the clumped and maroon colored sand. Are you currently battling cyano?

Nope not cyano, it's actually the roots to the plant that camp with the clam. I was going to remove it but I think it looks cool!

ImageUploadedByTapatalk1300554075.066158.jpg

It's growing fast, and I hope it adds a nice look to the tank. Anyone know what it's called PM me.

Sorry I side tracked us again.
 
I think Mg removes Bryopsis the most, but yes in a word, it should starve it of it's nutrients the same as any other type of algae.
 
Well, Try Try Again.

I think with my cool little 10 gallon ATS, I made a couple of observations. 1. I think the flow was too slow to really do it's job as a filter of the whole system. I only had a little Mini jet 404 on it, and it had 18 inches of head, I just don't think the water flow was enough to turn over the whole tank volume fast enough. 2nd, I don't think the 1" square per gallon was enough in my case. It was probably a combination of both things, but I just haven't seen the results I've wanted. My DT algae is worse than ever.

So I have reworked my ATS to be super absorbent, and lemony fresh. I've added a third bulb. And a second screen and added more surface area to each screen. In all I have 96" of surface area. Each plastic canvas is 4"x6" and lit on both sides. Also I've beefed up the lights to three bulbs so there is light on both sides of each panel.

Just like Tim the Tool man Taylor, "what that thing needs is more power!"

So we'll run it this way for a while and see if the benefits start to kick in. I hope they do soon, I'm starting to lose corals that I don't want to lose.

Aaron

Let's see some pictures of the design changes.
 
So what you're saying is:
pointlesswithoutpics1.jpg


So I'll try to help that.
Here's what the mark 1 looked like. It was a pitcher that I modified with a listerine bottle and single 3X5 inch screen.
Mounted.jpg

14-Testing2.jpg

08-InternalsCollage.jpg


Well here's the Mark two. As I stated above, the first one didn't have the scrubbing power I wanted due to low flow. It was mainly a problem with display tank water turnover, I just don't feel like the 404 minijet was pushing enough through to cycle the water across the membranes. So I went this route.
The Mark 2 consists of a Marine Battery Box from Walmart Cost $8.65.
batterybox.jpg

batterybox2.jpg

I added a Bulkhead fitting to the bottom for the drain, and added a second screen. Plus the size of each screen is increased to 4x6 inches. This gives 48 inches of scrubbing power. Plus I have lit both sides by adding a third Bulb.
Fixtures.jpg

twoscreens.jpg

You can see that I used three outdoor weather resistant pig tail type light sockets. They have a rubber coating on them. Also since I needed them to reach further down in the scrubber, I added a spacer PVC fitting. Come to find out, the rubber weather resistant sockets fit perfectly in a 1 1/4" couple.
The Lamps are protected from spray by three bottles of Glacier brand bottled water. I cut the tops off the bottles, and cut flanges in the top to go through holes I dremilled in the top cover of the battery box. Then I secured them with zip ties.
Vents.jpg

You can also see the air vent holes that I put in the top to allow the lights to vent heat.
I ran this for several hours while I finished the rest of the box to see if they would melt down the bottles. While the plastic did get hot, it wasn't scorching, and didn't deform the plastic, so I figured I'd be safe using them for the light covers.

Hope this works, and hope this helps someone else.
Aaron
 
Now that's creative. All that for a 10 gallon? I would think your problem wasn't low flow - am I missing something?

Also, just a safety item that you need to address - the hose barb is not inserted far enough into the hose. It can slip off with vibration and pressure. Boil some water in a 1 cup pyrex measuring cup in the microwave, dip the hose in it and swirl it for a few seconds, then slide it on all the way. It will cool and constrict and you'll have to cut it off with a razor blade to remove it.
 
Thanks Floyd,

I've tried to take the hose off the barb, because I wanted to rotate it 180 degrees due to the curvature of the hose, and I could not get the darn thing off! I'd have to cut it off now. So I'm not too worried about it.

I do think the major problem was the flow, and the entire tank's volume not being able to be turned over quickly enough. I think a recurring theme on this thread has been that you almost can't have too much flow over the screens. Most people are running the entire overflow over the screens. Since my reactor is fed by a pump, then the pump needs to be powerful enough to simulate that type of flow.

Unfortunately, I'm back to the original problem, too much noise. I'll have to try all the tricks to silence this thing. We'll see. If I didn't have two very curious kids, I would just add a sump and forget about it, but I can't. Little fingers after all.

I hope this works.

Aaron
 
So you have 2 4" screens there, 8" total, x35 = 280 GPH total. You originally had 1 4" screen so you only needed 140 GPH. 14 turns per hour seems plenty to me.

The system I was running had a 20" wide screen pumping 433 GPH on a 125. I fixed the piping problem and now I have 760 GPH on a 125, or 6 turns/hour. I also have a Koralia 4 and 2 3's and 200+ # LR. I would hardly think that your problem is not a high enough turnover rate. So I'm still missing what your concern or problem is. Were you not getting enough screen growth? You lights are very close, and this could be the issue - too intense (heat is not the issue)

Refer to this thread/post for my flow fix

http://www.reefcentral.com/forums/showpost.php?p=18518184&postcount=37

EDIT I have not had a problem with that system at 433 GPH, except for high phosphates. I did the flow fix to see if that makes a difference. The screen is already showing better growth.
 
Mar-20-2011 Update

Mar-20-2011 Update

Its been 3 days and my screens are starting to get some algae growing on them. It appears to be diatoms. From what I have read it is part of the process. I have not added the tripod support for the other end of the screens yet. I am hoping to work on it some more tomorrow.

Here is another video of the screen and what it looks like. I also picked up some Velcro at the Dollar store to do some cable management last night. It isn't perfect, but it looks little better :).


Video of screens. You can see algae growing on all 4 sides on both screens. Not the best quality but you get the pic nonetheless.

DSCN6334.jpg

Cleaned up Sump closet

DSCN6336.jpg

Screens closeup. I think the video does a better job showing the growth

I am going to be building another scrubber for my 20g frag tank. It has a 10 gallon sump with plenty of room underneath. I also have a underutilized mag 5 pump that should definitely provide enough flow.

I'll post some before and after picks of it as well. The 10g sump under the tank is more of a traditional setup. I only had to spend about $4.00 dollars on some PVC and screen to set it up. :). The biggest issue was listening to my kids goofing around while I was shopping.
 
Back
Top