Algae Scrubber Basics

I wouldn't worry about keeping condensation off the plastic-the sun will punch plenty of light through.
How about using a fan for temp control and if it helps with condensation, that's a side benefit?

Won't it be a royal pain to climb on the roof to harvest?

I have an attic space in my garage that vents to the roof directly. I'd basically have attic access without getting on the roof.

Maybe I can runs line from my attic fan to create some suction.
 
Do you have hermits with the Cucumbers. I would be concerned hermits may go after them?

I have a massive army of hermits and coral banded shrimp... No one goes for my cucumbers. I feed enough that everyone has plenty. My hermits just had a massive spawning event last week. They lower their shells to expose their abdomens and spew material together... All together in the tank, they got into groups of ten or more each to do this.

I think most in tank aggression is due to starvation.
 
I'm really struggling with planning a build on one of these things. First, all my fish are juveniles, so I'm not sure how much I'll be feeding them as adults. Second, I can't figure out any way to mount these Amazon LEDs without doing a full blown build with acrylic. I don't really feel like spending the money, and I don't have any experience building with acrylic.

Does anyone have any pictures of dirt-simple mounting methods for these lights?

Easiest thing is to mount a screen in your sump on a loop, then put an LED grow floodlight facing it. It's some PVC, a pump, a screen, some zip ties and a lamp on a hook.
 
Easiest thing is to mount a screen in your sump on a loop, then put an LED grow floodlight facing it. It's some PVC, a pump, a screen, some zip ties and a lamp on a hook.

It's mostly the mounting of the light that's throwing me. Looking at pictures of the lights, I can't figure out a good way to do it.
 
It's mostly the mounting of the light that's throwing me. Looking at pictures of the lights, I can't figure out a good way to do it.

Have you considered making a really simple rectangle out of wood? Make it long enough that it can sit on the rim of your sump and not fall in. Make slot in the middle big enough for your screen to fit in and then screw the lights onto the wood rectangle so they face inwards to the screen (they have brackets so you can screw them down). It wouldn't keep the light in, but to do that you need an acrylic box. But it would be really cheap, if you paint the wood with a few coats of latex paint it shouldn't rot any time soon.

I can't draw a diagram as I am at work atm but if you don't understand I can daw one when I get home (in 8 hours :P)

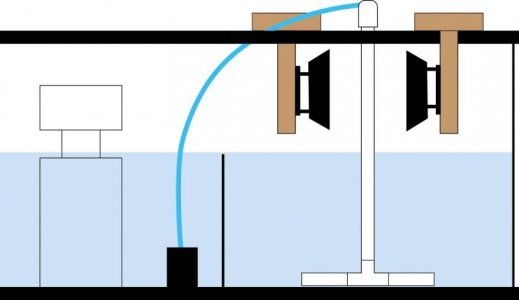
Not entirely sure I follow, but that did get me thinking of an option. Here's a quick and dirty illustration.
 

Attachments

  • ats design.jpg
    ats design.jpg
    24.6 KB · Views: 2
Not entirely sure I follow, but that did get me thinking of an option. Here's a quick and dirty illustration.

Very similar to what I was thinking. That is upside down to how I was thinking though as even if they say waterproof I am inclined not want to test that :p

Either would work though depending on how high the water level gets in your sump if your return shuts off. If you decide to flip it then just raise the screen.

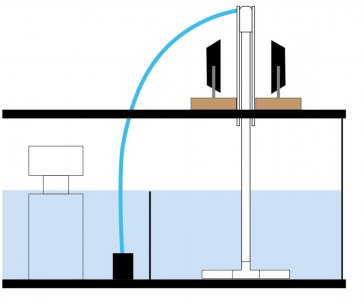
You shouldn't need the Vertical part of that "T" though. The way the brackets on the lights work is that to have the lights sitting vertically and facing the screen the bracket gets screwed onto a horizontal piece. Not sure if that makes sense but if you look at some pictures of the lights you might understand what I mean.

You're right, huge oversight on my part. They would be fully submerged if my return pump kicked off. Definitely not going to try that. I was wanting to keep it contained in the sump so that water spraying around wouldn't matter, but I suppose I'll have to think of something to combat that. I do have some thin acrylic sheets sitting around that I could fasten with some zip-ties or something. Really embrace that high-quality feel.

I think I follow. I wasn't looking at a photo of one of the lights when I sketched up the first design. I think I understand the bracket better now. Here's the revised design.
 

Attachments

  • ats design-01.jpg
    ats design-01.jpg
    29.9 KB · Views: 2
The theory is that some is loosely bound on the soft surface of the rock, this is somewhat easily "accessible". The kind you reference is bound on the matrix (with Agent Smith) and requires low pH to dissolve it. This can be done with an acid bath (obviously, killing the rock) or (the theory) via cleaving by Phosphate Solubulizing Bacteria (PSB).

My take on that it that bacteria and algae have a somewhat symbiotic relationship in this process - the bacteria create a localized low pH area which "cleaves" the phosphate, and the algae then uses it to grow. As I understand it, when this happens (the cleaving) the localized pH jumps due to the liberation of other materials, so either it is a very slow process on a cellular level (which is then dependent on the size and "tenacity" of the bacterial colony) or we just don't fully understand how it works. Likely, the latter. Especially if the agents have cut the hard line and the bacteria can't tell us anything about the matrix.

Completely off topic, but I now believe that Agent Smith is actually "The One"

Based on observed behavior of live coral in situations where phosphates are (as completely as possible) stripped I disagree with the theory, my wife and I are currently arguing about it, she's not on your side completely but can't think of a way to test said theory with equipment on hand. I contend merely dropping the PH to levels that don't affect the structure of the rock doesn't appear to make more phosphate available in my testing, and I saw no change in phosphate uptake (with LaCL) until I was using an acidic enough mix that I was altering the outer layer of rock. With that in mind having a bacteria colony that lowers ph enough locally to somehow un-bind additional phosphate seems to be a stretch to me. But then, I'm not a microbiologist or Chemist (that's why I have the wife). I leached my rock with LaCL to untraceable phosphates with no lowering of PH. Anyway, it's largely inconsequential to ATS in general, unless used to explain the growth patterns.

Side Note: Agent Smith is clearly the one.
 
You're right, huge oversight on my part. They would be fully submerged if my return pump kicked off. Definitely not going to try that. I was wanting to keep it contained in the sump so that water spraying around wouldn't matter, but I suppose I'll have to think of something to combat that. I do have some thin acrylic sheets sitting around that I could fasten with some zip-ties or something. Really embrace that high-quality feel.

I think I follow. I wasn't looking at a photo of one of the lights when I sketched up the first design. I think I understand the bracket better now. Here's the revised design.
8805874426e97db2804b203ee7e0bb43.jpg
The acrylic with the zip ties works. Exactly what I'm using. It does look cheap. I don't like it. But it works till I have the time to come up with something else. But after cleaning this screen for the first time. I was getting algae growing into the pipe. Got the dremel out and opened the slot quite a bit more. Never actually measured it. Was really just trying to get the surface clean. With the larger slot I haven't seen any spray yet. The acrylic sheet stays dry. And water flows down the screen nice.


Sent from my SAMSUNG-SM-G900A using Tapatalk
 
You're right, huge oversight on my part. They would be fully submerged if my return pump kicked off. Definitely not going to try that. I was wanting to keep it contained in the sump so that water spraying around wouldn't matter, but I suppose I'll have to think of something to combat that. I do have some thin acrylic sheets sitting around that I could fasten with some zip-ties or something. Really embrace that high-quality feel.

I think I follow. I wasn't looking at a photo of one of the lights when I sketched up the first design. I think I understand the bracket better now. Here's the revised design.

Yeah a splash here and there on the lights I am cool with but wouldn't want to submerge them.

That drawing is pretty much exactly what I meant, I was just thinking go all they way and connect the two bits of wood and made a rectangle, but that isn't actually needed. Just make sure the wood cant get knocked into the sump. Zip ties and thin acrylic will certainly work well for that just like jerseypete has done.

I'll probably add a bit of wood overlapping the tank trim to secure it in place, making the wood bits look kind of like a giant [. Should be enough to hold them in place securely while still allowing for easy disassembly and adjustability.
 
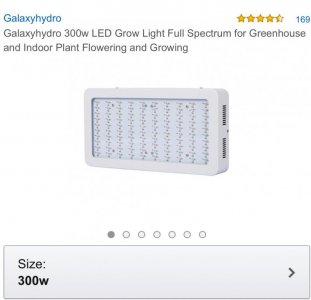
Ok so I take it this is the type of LED that would work for an ATS


Feel like wasting money?


The whole idea is to use 50-60w to handle export of nutrients at a minimal cost.


There are much better options then flushing wattage down the drain
 
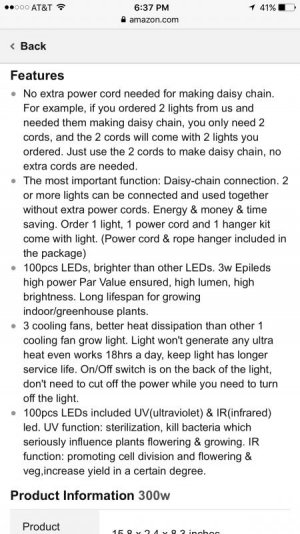
I can't find anything like that other then the flood lights. Everything I see in that range has 225LEDs and they are less then 1W each. I wouldn't buy these light by the way. I'm just trying to figure out the types of lights that work. Now that I think about it you probably don't want the IR or UV
 
Last edited:
You guys are fancy... I just use a couple of hooks and zip ties. Seriously- it's just a light.

Use the simplest cheapest single multichip LED ...
 
Back
Top