ChadTheSpike
Reef Engineer
A buddy on my local forum told me that I ought to put my fixture up on reef central with the title "œBEST DIY LED fixture ever"¦" I think he was joking"¦ but I thought to myself: "œI haven't been that active on RC lately, why not, it might be fun" and so here we are!
I started work on this project really for two reasons. First, I need to have a project going all the time, it keeps me busy and out of trouble, also, I like my projects to be beyond my current ability "“ I like the challenge. Second, with all the hype the around LEDs the last couple of years, I really wanted to see what could be done with them.
Almost a year ago now, I had a conversation with a local reefer about different ways to use lighting to enhance the aquascaping and visual appeal of a tank. During this conversation, I had the tickle of an idea that perhaps LEDs could be used to cast shadows one direction in the morning. Since I was in between projects, I decided that I should design an LED fixture that would do just that.
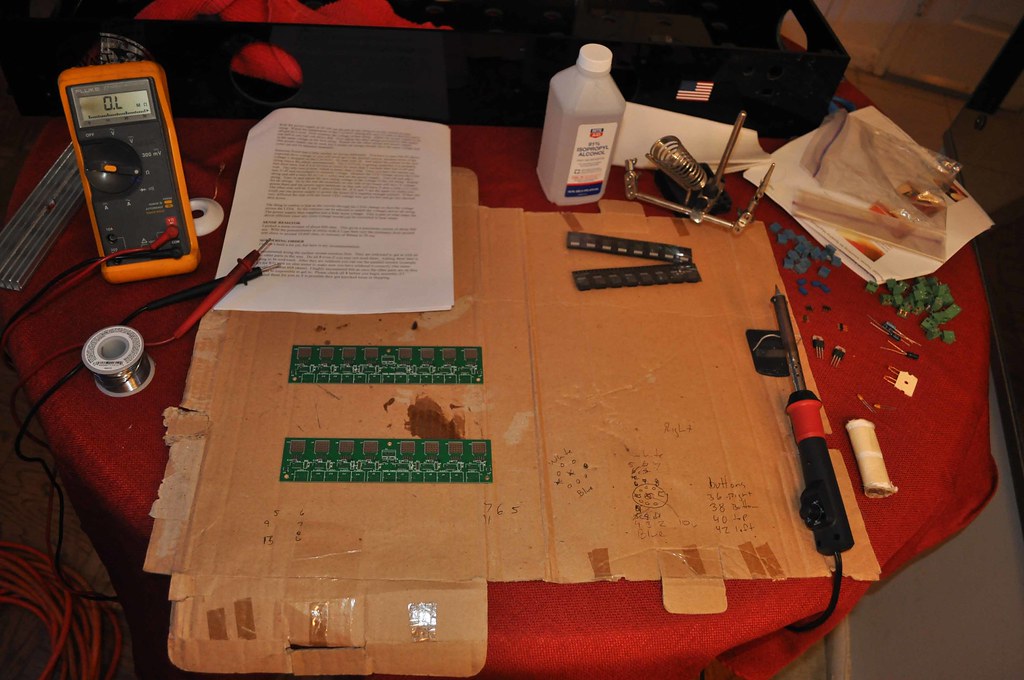
And so I began down an almost year-long path to get to where I am now. This is probably a good time to give a little of my background. I was an electronics technician in the Navy for nine years, during that time I went to school to learn how to solder on nuclear safety instrumentation "“ so I know how to solder fairly well. Also, I learned some basics of electronic components, although honestly this really didn't help me much during my project. After my time in the enlisted Navy, I went to college to get an engineering degree, which I now use every day and attribute to giving me some basics in programming and the use of modeling programs. Reef-wise, I have been active in the hobby since '88.
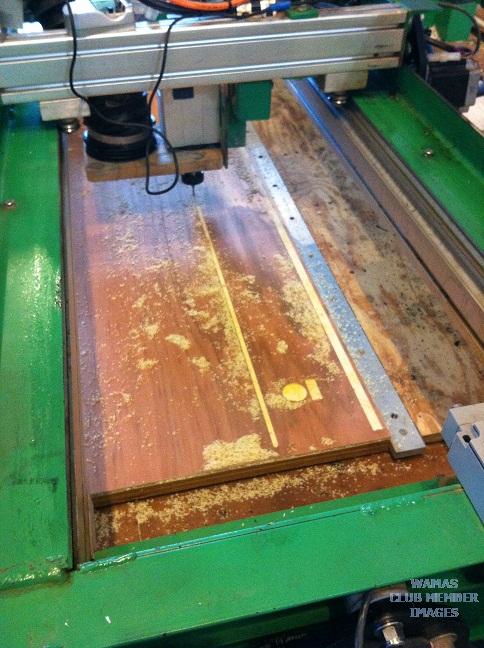
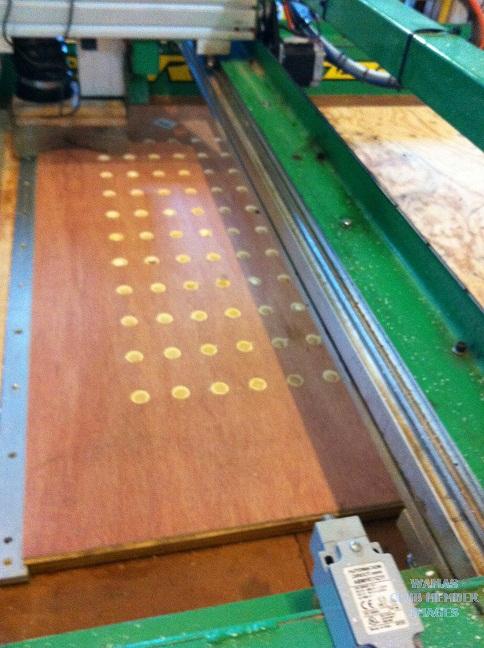
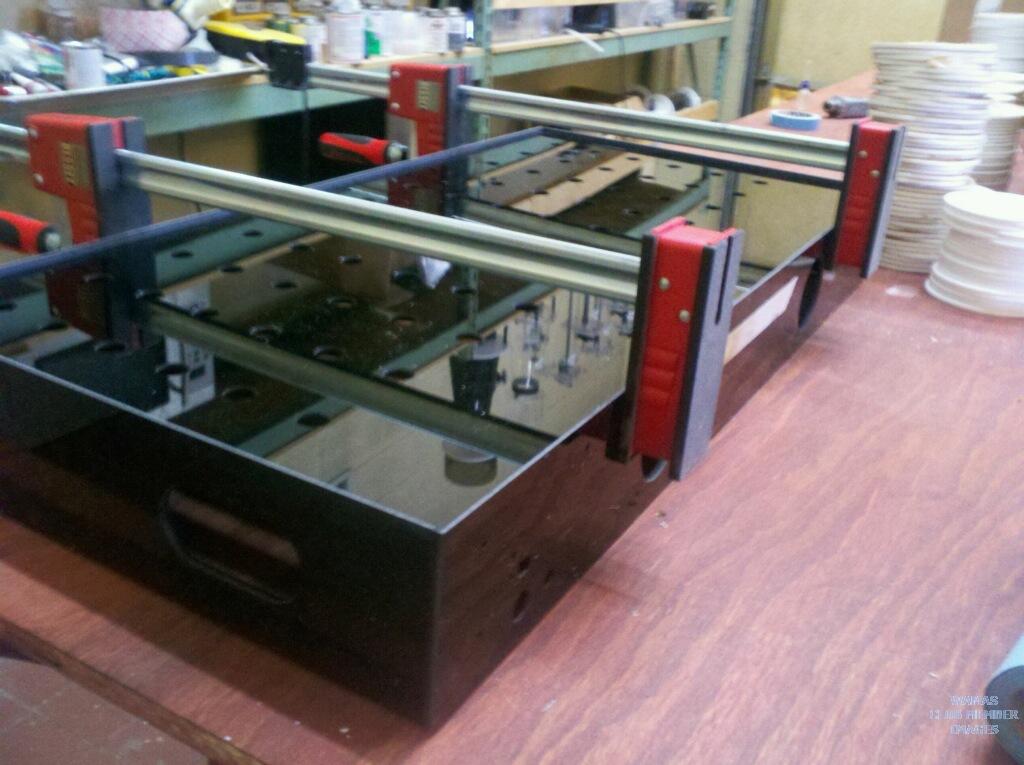
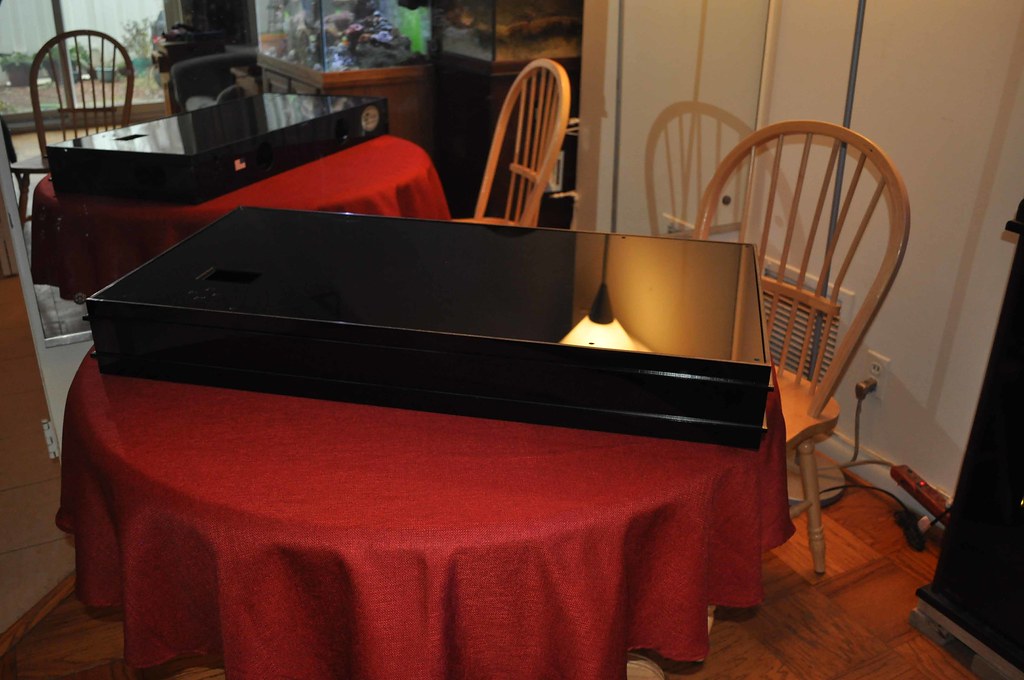
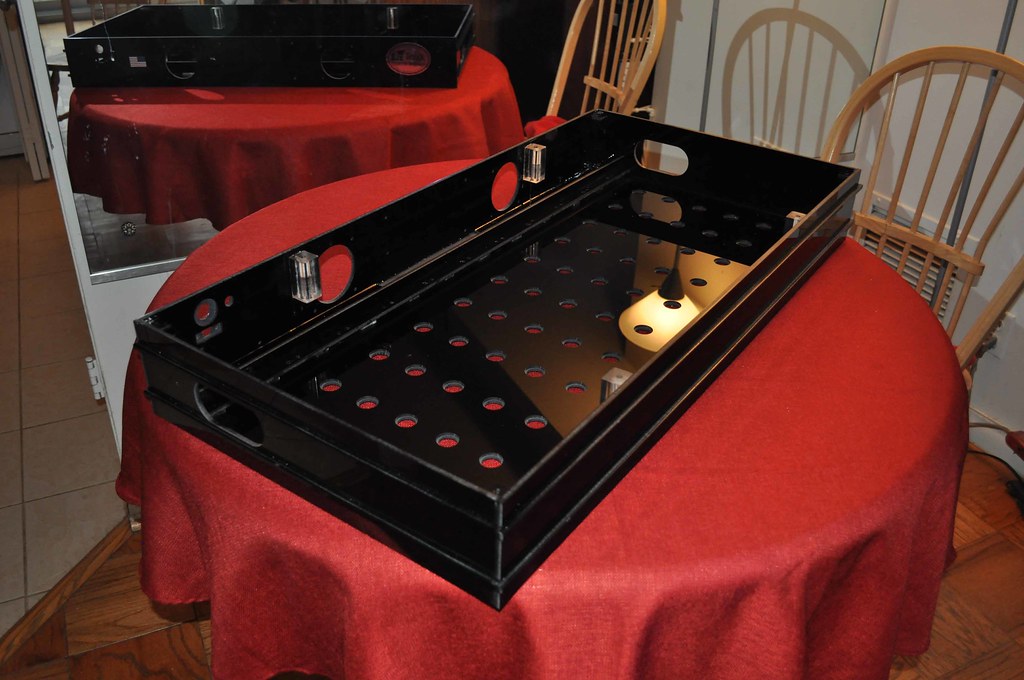
But that's enough of that; let's start talking about LEDs and reefs. Something that I think is a very common shortfall in many DIY LED projects is the long-term effect of warm, humid, and salty air on electronics "“ it wrecks havoc on them in fairly short order! Also, looks. I am a perfectionist. and hanging an unfinished piece of equipment with wires going every which way is not something that I was about to do.
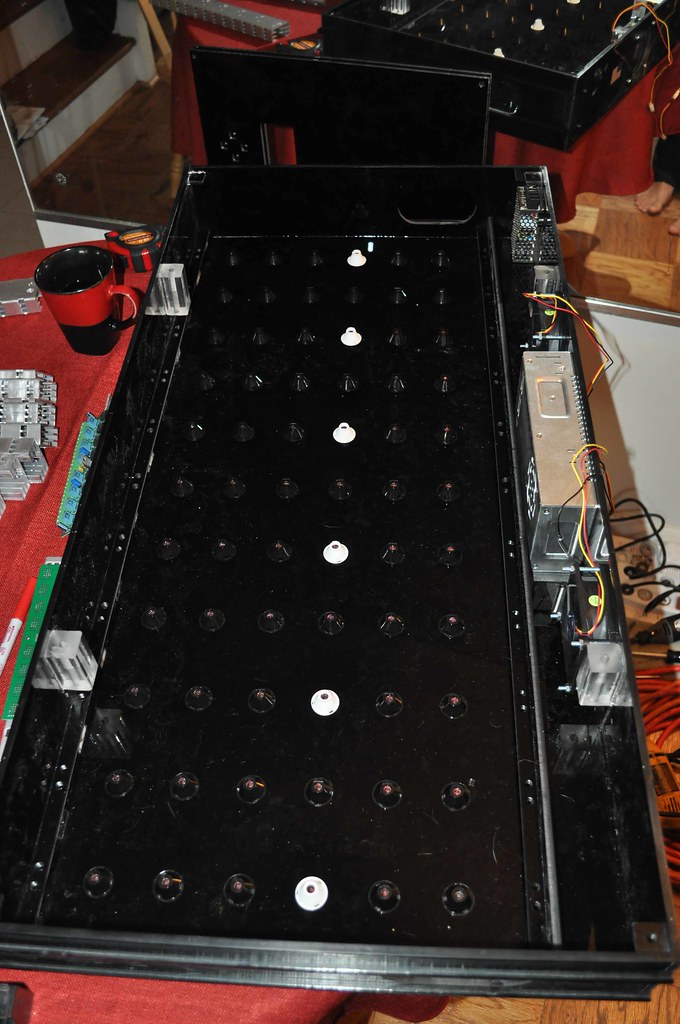
And finally, here are a couple of CAD renderings I did for my fixture design.
Top view-

Bottom view-

And view without the top-

Some technical details:
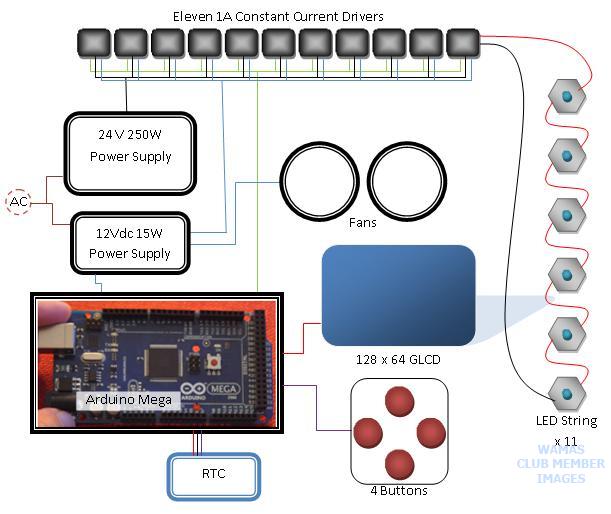
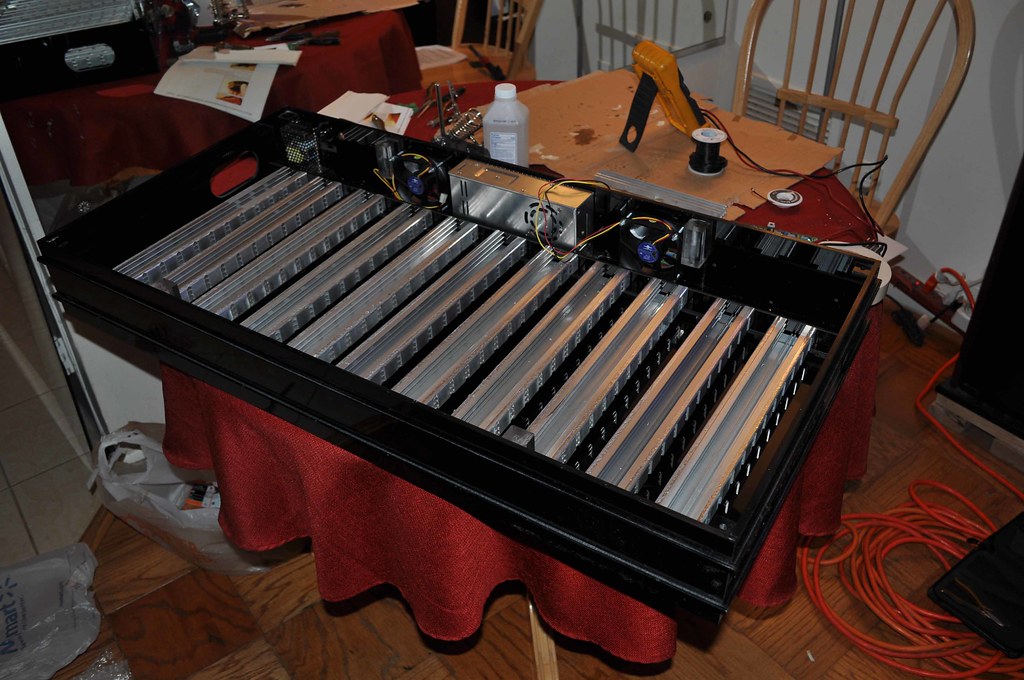
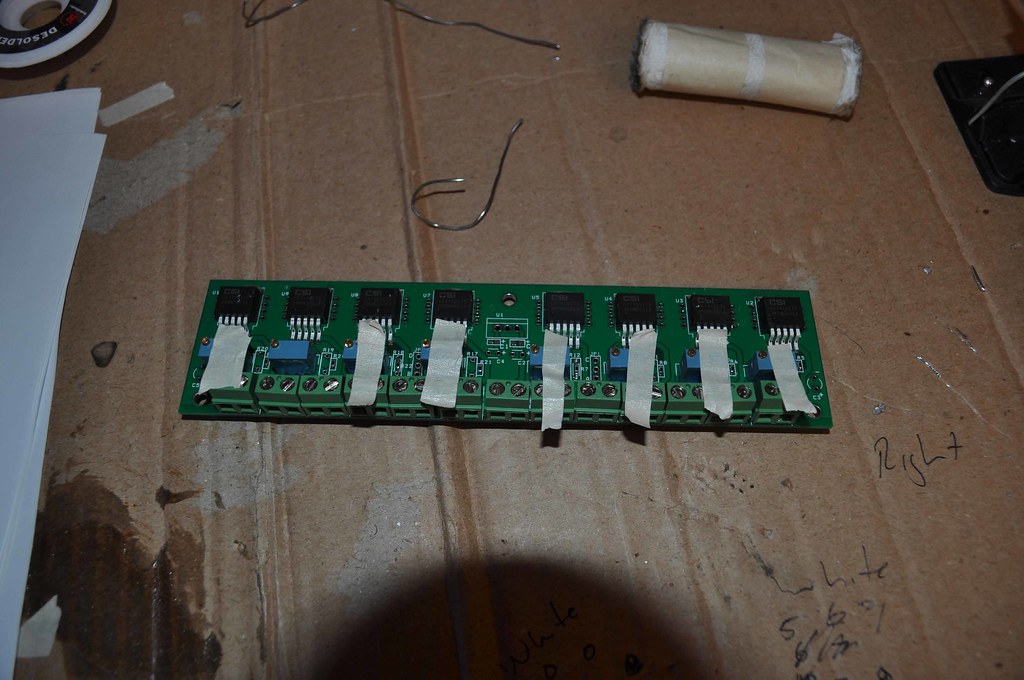
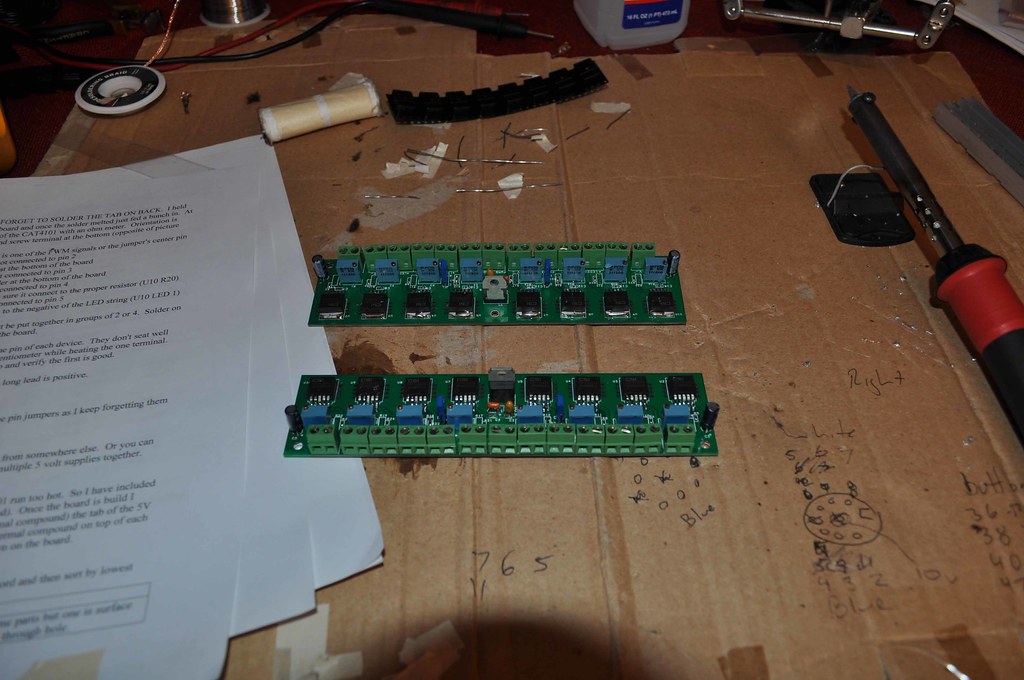
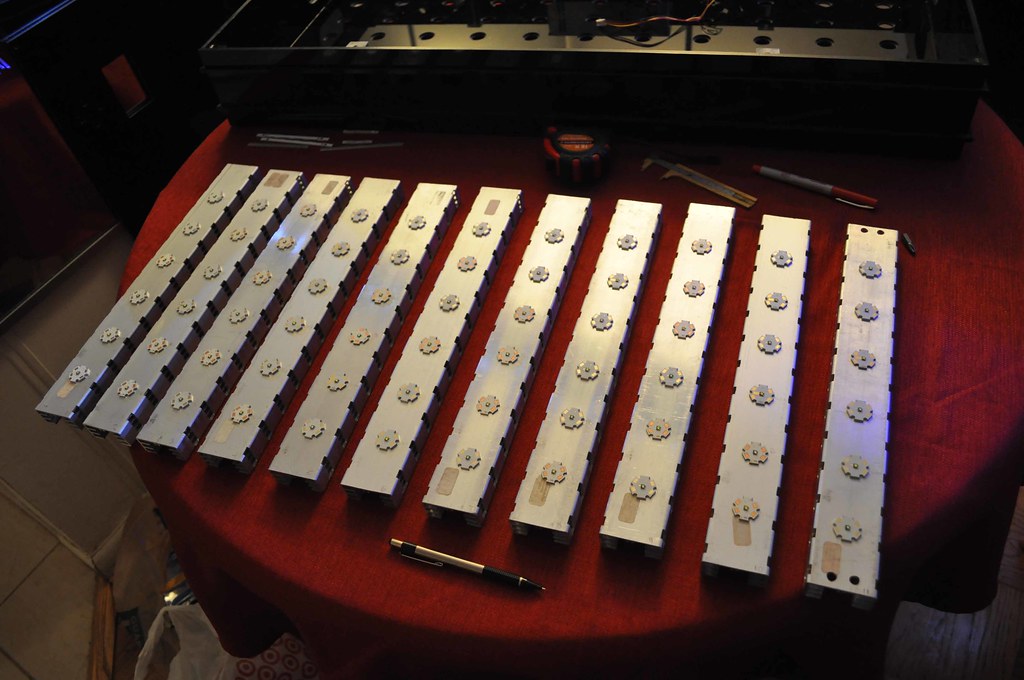
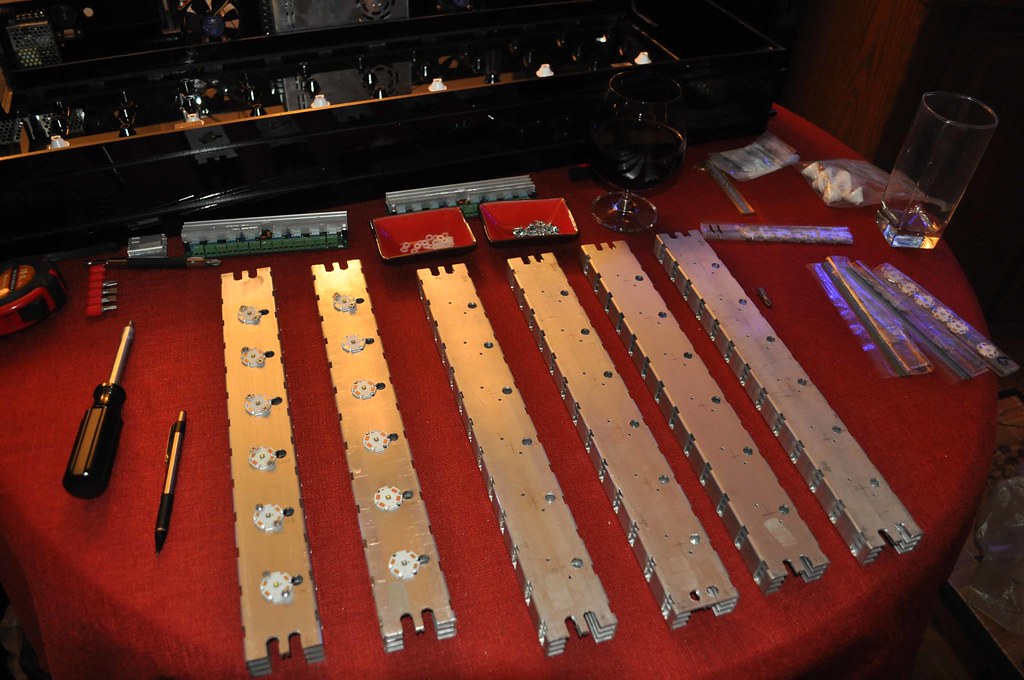
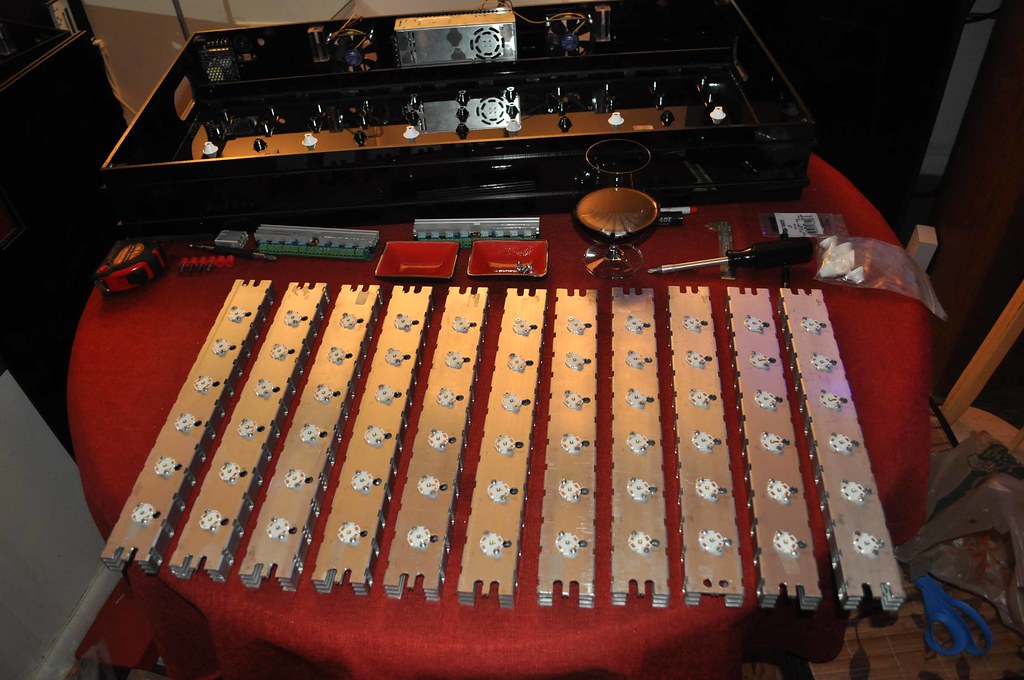
LEDs - 66 LEDs driven by 11 individually PWM controlled DIY drivers based on a CAT4101 constant current chip (courtesy of thefishman). The LEDs are approximately centered on a 2.1" x 2.4" grid and have 80* optics more for fixture cleanliness and the final look than anything else. I expect I will hang the fixture 8-12" off the water.
The PWMs are driven by an arduino mega microcontroller.
System status is outputted to a 128x64 blue GLCD display.
Various behavior characteristics are inputted via a button and menu system.
I also have programs for cloud and storm simulation. Basically, the controller chooses semi-randomly how cloudy a given day will be and then plans how long clouds will be and how much intensity will be reduced by the cloud. If the cloud reduction intensity is greater than a certain amount, there is a probability that a storm will occur within that cloud.
Here is the layout of the color breakdown:
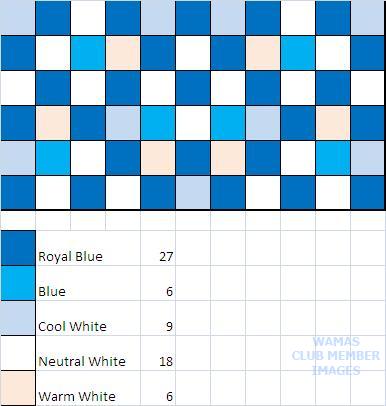
The channel arrangement is loosely based on columns putting like colors on a single channel (with the exception of the center channel, which is mixed) and a separate channel for both blue and warm white... I will be able to separately control those so they will not overpower anything.
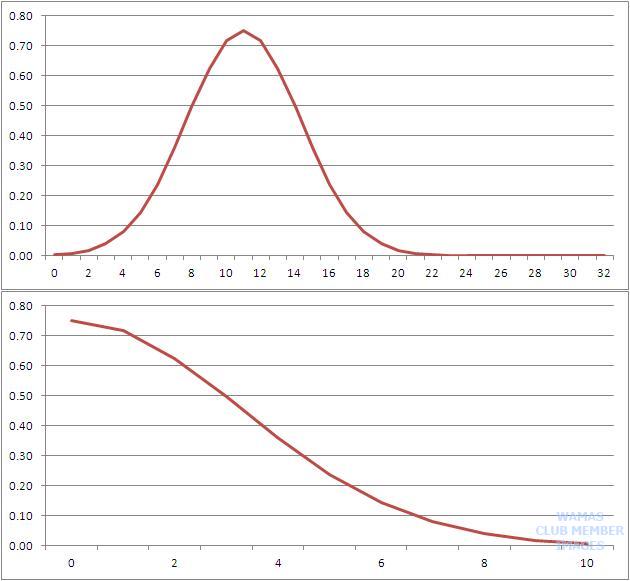
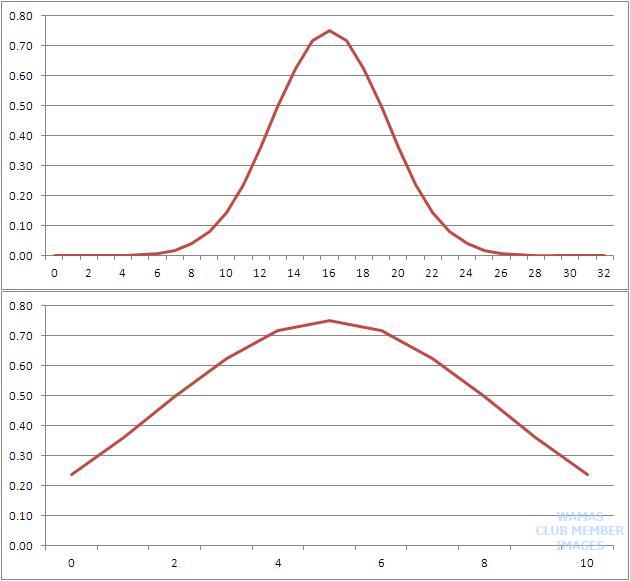
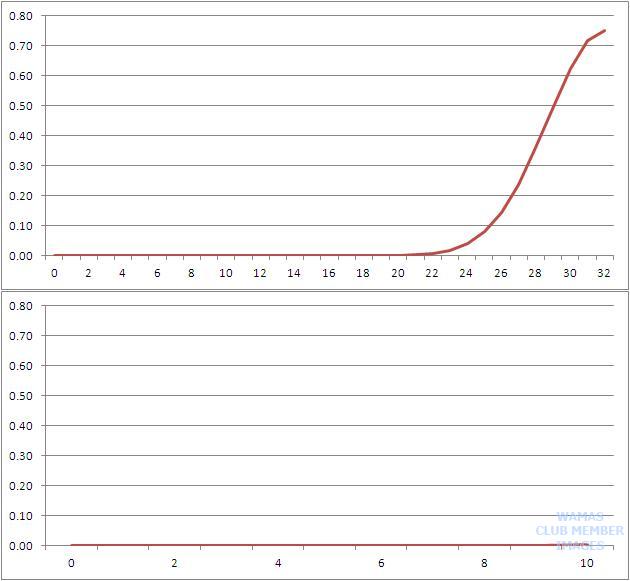
You may be wondering (if you are still reading and not just looking at pictures) about how I planned to accomplish my shadows cast one way in the morning and the other in the evening. My answer? (bear with me for just a second, since things are going to get a little technical) By programming the lighting distribution into a Gaussian curve and then "moving" it over the course of the day - basically the fixture would simulate where the brightest point is coming from and vary that over the course of the day. So, what does that mean and how would you do that?
I started work on this project really for two reasons. First, I need to have a project going all the time, it keeps me busy and out of trouble, also, I like my projects to be beyond my current ability "“ I like the challenge. Second, with all the hype the around LEDs the last couple of years, I really wanted to see what could be done with them.
Almost a year ago now, I had a conversation with a local reefer about different ways to use lighting to enhance the aquascaping and visual appeal of a tank. During this conversation, I had the tickle of an idea that perhaps LEDs could be used to cast shadows one direction in the morning. Since I was in between projects, I decided that I should design an LED fixture that would do just that.
And so I began down an almost year-long path to get to where I am now. This is probably a good time to give a little of my background. I was an electronics technician in the Navy for nine years, during that time I went to school to learn how to solder on nuclear safety instrumentation "“ so I know how to solder fairly well. Also, I learned some basics of electronic components, although honestly this really didn't help me much during my project. After my time in the enlisted Navy, I went to college to get an engineering degree, which I now use every day and attribute to giving me some basics in programming and the use of modeling programs. Reef-wise, I have been active in the hobby since '88.
But that's enough of that; let's start talking about LEDs and reefs. Something that I think is a very common shortfall in many DIY LED projects is the long-term effect of warm, humid, and salty air on electronics "“ it wrecks havoc on them in fairly short order! Also, looks. I am a perfectionist. and hanging an unfinished piece of equipment with wires going every which way is not something that I was about to do.
And finally, here are a couple of CAD renderings I did for my fixture design.
Top view-
Bottom view-
And view without the top-
Some technical details:
LEDs - 66 LEDs driven by 11 individually PWM controlled DIY drivers based on a CAT4101 constant current chip (courtesy of thefishman). The LEDs are approximately centered on a 2.1" x 2.4" grid and have 80* optics more for fixture cleanliness and the final look than anything else. I expect I will hang the fixture 8-12" off the water.
The PWMs are driven by an arduino mega microcontroller.
System status is outputted to a 128x64 blue GLCD display.
Various behavior characteristics are inputted via a button and menu system.
I also have programs for cloud and storm simulation. Basically, the controller chooses semi-randomly how cloudy a given day will be and then plans how long clouds will be and how much intensity will be reduced by the cloud. If the cloud reduction intensity is greater than a certain amount, there is a probability that a storm will occur within that cloud.
Here is the layout of the color breakdown:
The channel arrangement is loosely based on columns putting like colors on a single channel (with the exception of the center channel, which is mixed) and a separate channel for both blue and warm white... I will be able to separately control those so they will not overpower anything.
You may be wondering (if you are still reading and not just looking at pictures) about how I planned to accomplish my shadows cast one way in the morning and the other in the evening. My answer? (bear with me for just a second, since things are going to get a little technical) By programming the lighting distribution into a Gaussian curve and then "moving" it over the course of the day - basically the fixture would simulate where the brightest point is coming from and vary that over the course of the day. So, what does that mean and how would you do that?